Steren GAM-020 User manual


ENGLISH
ENGLISH-02
IMPORTANT
Before using your new USB Roll-up piano, please read the
following recommendations.
Do not expose your USB Roll-up piano to extreme temperatures.
Always use a soft and dry cloth in order to clean
Do not attempt to open this device as this could cause malfunctions
or the voiding of the warranty.
FEATURES
Piano with 49 keys for the PC.
Made of plastic ultra exible and soft to the touch.
It has 100 tones and 100 rhythms.
USB 1.1 and 2.0 compatible.
Batteries are not required.
Compatible with Windows 2000, XP, Vista.
•
•
•
•
•
•
•
•
•

ENGLISH
ENGLISH-03
MINIMUM SYSTEM REQUIREMENTS
Intel Pentium II o AMD Athlon processor running 2.4 GHz
128MB RAM
100MB of hard disk space
CD-ROM.
CONTROLS
1.- Keys
2.- USB cable
•
•
•
•
1
2

ENGLISH
ENGLISH-04
INSTALLATION PROGRAM.
1.- Insert the CD-ROM into your CD-ROM drive.
2.- The following screen appears, click NEXT to continue the
installation.
3.- If you want to create a program icon in the desktop, enable the
respective box, then click NEXT to continue the installation.

ENGLISH
ENGLISH-05
4.- Then click INSTALL to begin with the installation.
5.- Finally click FINISH to complete the installation

OPERATION
Once installed the software:
1 .- Connect the USB cable from the piano to an available USB port
on the computer. The PC will automatically detect the equipment and
update the system.
2 .- Open the application called “Piano USB” Set tones, rhythms, etc.
3 .- Started playing the piano.
ENGLISH
ENGLISH-06

ENGLISH
ENGLISH-07
PROGRAM CONTROLS
1.- Help, open your user´s manual.
2.- Percussions.
Press the Percussion button, the Drum Kit will appear in the middle of
the Piano Interface.
You can use your curser to select various Instruments.
Press the choice Instrument once to create a sound.
All Percussion sound is activated within this static box, not your
keyboard.
1234567
8910 11 12

ENGLISH
ENGLISH-08
3.- Rhythm
There are a total of 100 Rhythm types.
Click on the arrow to bring down the different rhythm types, their name
will appear in the box below the Rhythm screen.
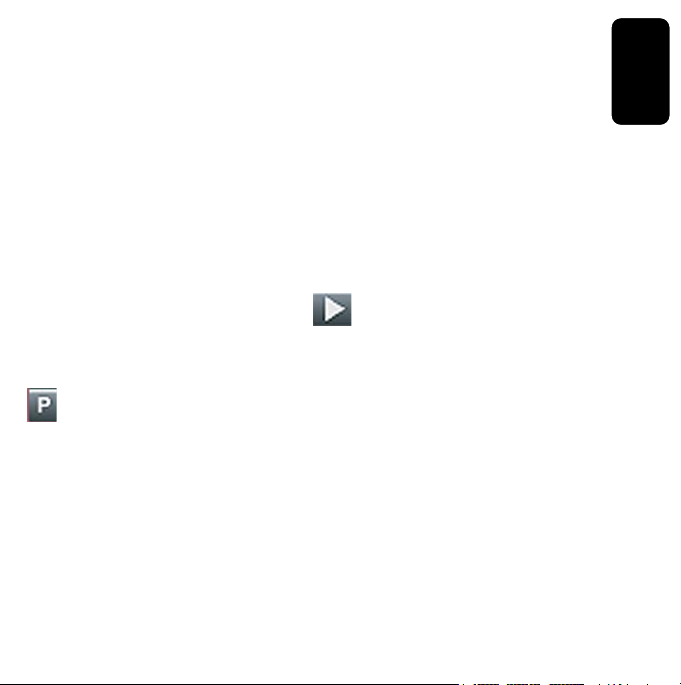
Use your curser to select your desired Rhythm Style then press play
4.- Mode Select
There are two Modes to choose from in this program, Free Play Mode
and Learning Mode.
Press the Mode button once to select or deselect which mode you
prefer. The currently Selected Mode will have a red lit indicator light to
the left of it.
5.- Tone Adjust.
There are 7 levels of Tones and a Default (-3- +3, default being 0)
Pressing the + or – Tone buttons will adjust the musical sound
with respect to timbre and manner of expression.
The current Tone value will appear on the Status Display.
6.- Minimize the program.
7.- Close the program.
8.- Tempo
Press one of the Tempo buttons, the current tempo value will appear on
the Status Display.
You can use the tempo Up and Down buttons to increase or decrease
the tempo of Orchestrated Accompaniment Patterns and other
Recorded features. The Tempo value range is from 40 to 208 bpm
(beats per minute) a high value will be higher speed playback.

ENGLISH
ENGLISH-09
9.- Effects
The Effects Buttons will add vibration (Vibrato) or anger (Portamento)
effects to the selected Instrument Voice. Press either Effect button once
to select or deselect the function.
10.- Timbres
128 Timbres. Click on the arrow to bring down the different Timbre
types, their name will appear in the box below the Instrument screen.
Use your curser to select your desired Timbre Style.
11.- Music library.
There are examples of 6 types of music.
Select a type, click the PLAY button on the screen will be seen
playing the notes.
12.- Record / Playback
PROGRAM
This will allow the user to program their own Rhythm. It can record
all events exactly as they are performed.
When the Program button is pressed it puts the selected Rhythm into
the Program standby mode. It will only store one at a time so if you
hit the Program button again you will loose your previously recorded
Rhythm unless you have saved it.
Recording begins as soon as you start to play on any section of the
piano.

ENGLISH
ENGLISH-10
RECORD
This will allow the user to record their music performances.
It can record all Upper Voice (not Layer Voice or Lower Voice) note
events exactly as they are performed.
When the Record button is pressed it puts the selected Music Record
track into the Record standby mode. It will only store one at a time so if
you hit the Record button again you will loose your previously recorded
track unless you have saved it.
Recording begins as soon as you start to play on any section of the
piano.
STOP: Press the stop button to stop the recording or playback.
PLAY : Press the Play button to hear previously recorded tracks
or tracks from the music library.
OPEN
Press the Open button to open previously recorded tracks.
SAVE
Press the Save button to save your newly recorded track as a le.
SPECIFICATIONS
Input: 5V - - - (x USB)
Product design and specications are subject to change, without
notice.

WARRANTY
This Steren product is warranted under normal usage against defects in workmanship and
materials to the original purchaser for one year from the date of purchase.
CONDITIONS
1.- This warranty card with all the required information, invoice or purchase ticket, product
box or package, and product, must be presented when warranty service is required.
2.- If the product stills on the warranty time, the company will repair it free of charge.
3.- The repairing time will not exceed 30 natural days, from the day the claim was received.
4.- Steren sell parts, components, consumables and accessories to customer, as well as
warranty service, at any of the addresses mentioned later.
THIS WARRANTY IS VOID IN THE NEXT CASES:
If the product has been damaged by an accident, acts of God, mishandling, leaky batteries,
failure to follow enclosed instructions, improper repair by unauthorized personnel, improper
safe keeping, among others.
a) The consumer can also claim the warranty service in the purchase establishment.
b) If you lose the warranty card, we can reissue it, if you show the invoice or purchase ticket.
Product: USB Roll-up piano
Part number: GAM-020
Brand: Steren

RETAILER INFORMATION
Name of the retailer
Address
Product
Brand
Part number
Serial number
Date of delivery
In case your product fails or have questions, please contact your nearest dealer. If
you are in Mexico, please give a call to our Call Center.
Call Center
01 800 500 9000


IMPORTANTE
Antes de utilizar su nuevo Tapete de piano, por favor lea las
siguientes recomendaciones.
No exponga el tapete de piano a temperaturas extremas.
Siempre utilice un paño suave, limpio y seco para limpiar el equipo.
La garantía es inválida si trata de abrir el equipo.
No use ni almacene este equipo en lugares donde existan goteras
o salpicaduras de agua.
CARACTERISTICAS
Tapete de piano con 49 teclas para PC.
No requiere baterías.
Fabricado de plástico ultra exible y suave al tacto.
Cuenta con 100 tonos y 100 ritmos.
Compatible con puerto USB 1.1 y 2.0
Compatible con Windows 2000, XP, Vista.
•
•
•
•
•
•
•
•
•
•
ESPAÑOL-02
ESPAÑOL
Antes de utilizar su nuevo Kit C

REQUISITOS MINIMOS DEL SISTEMA
Procesador Intel Pentium II o AMD Athlon 2.4 GHz
128MB en memoria RAM
100MB de espacio de disco duro
Lector de CD.
CONTROLES DEL PIANO
1.- Teclas del piano.
2.- Cable USB.
•
•
•
•
ESPAÑOL-03
ESPAÑOL
1
2

INSTALACION DEL SOFTWARE.
1.- Coloque el CD de instalación (incluido) en el lector de CD de la
computadora.
2.- Aparecerá la siguiente pantalla, haga clic en NEXT para continuar
con la instalación.
3.- Si desea crear un acceso directo del programa en el escritorio,
habilite la casilla respectiva, posteriormente haga clic en NEXT para
continuar con la instalación.
ESPAÑOL-04
ESPAÑOL

4.- Seleccione INSTALL para comenzar con la instalación.
5.- Para terminar haga clic en FINISH.
ESPAÑOL-05
ESPAÑOL

OPERACION
Una vez instalado el software siga los siguientes pasos:
1.- Conecte el cable USB del piano a un puerto USB disponible de la
computadora. La PC detectará automáticamente el equipo y actualizará
el sistema.
2.- Abra la aplicación llamada “USB PIANO” Congure los tonos, ritmos,
etc.
3.- Comience a tocar el piano.
ESPAÑOL-06
ESPAÑOL

CONTROLES Y FUNICONES DEL PROGRAMA
1.- Permite abrir el modo ayuda del programa
2.- Percusiones.
Oprima este botón y desplegará la siguiente pantalla.
Usando el cursor seleccione los distintos instrumentos.
Pulse la elección de instrumentos una vez para crear un sonido.
Todas las percusiones de sonido se activan dentro de este cuadro
no en el teclado.
ESPAÑOL-07
ESPAÑOL
1234567
8910 11 12
Antes de utilizar su nuevo Kit C

3.- Ritmos.
Hay un total de 100 tipos de ritmos.
Haga Clic en la echa para desplegar los diferentes tipos de ritmo.
Posteriormente oprima el botón PLAY para reproducir el ritmo
seleccionado.
4.- Seleccion de Modo.
Hay dos modos para elegir: Modo de reproducción libre (Permite tocar
las teclas manualmente) y Modo de aprendizaje (Permite tocar las
teclas con ayuda de melodías programadas en la Biblioteca de música).
Pulse el botón de modalidad una vez para seleccionar o deseleccionar
el modo que usted preera.
El modo seleccionado tendrá un color rojo y una luz indicadora de
encendido a la izquierda del mismo.
5.- Ajuste de Tono.
El tono es la propiedad de los sonidos que los caracteriza como más
agudos o más graves, en función de su frecuencia.
Este ajuste permite tocar diferentes sonidos en las melodías
Hay 7 niveles de tonos del -3 al + 3 y por defecto el 0.
Presione los botones + o - para ajustar el sonido musical.
6.- Minimiza el programa.
7.- Cierra el programa.
8.- Tempo
El tempo musical, es el término que designa la velocidad con la que se
desarrolla una pieza de musical.
ESPAÑOL-08
ESPAÑOL
Table of contents
Languages: