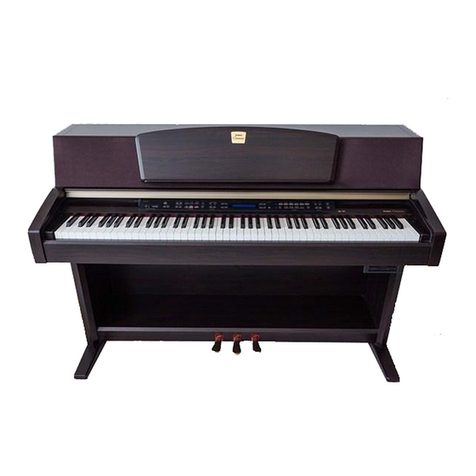
Sound Sation Primus User manual

DIGITAL PIANO
88 keys whit HAMMER ACTION AND IVORY FEEL
Please read this manual carefully and properly take care of it
USER MANUAL
Leggete questo manuale e conservatelo per future consultazioni
MANUALE UTENTE

Dear customer,
First of all thanks far purchasing a SOUNDSATION® product. Our mission is to satisfy
all possible needs of musical instrument and professional audio users oering a wide
range of products using the latest technologies.
We hope you will be satised with this item and, if you want to collaborate, we are
looking for a feedback from you about the operation of the product and possible
improvements to introduce in the next future. Go to our website www.soundsation-
music.com and send an e-mail with your opinion, this will help us to build instruments
ever closer to customer’s real requirements.
One last thing: read this manual before using the instrument, an incorrect operation
can cause damages to you and to the unit. Take care!
The SOUNDSATION Team
Gentile Cliente,
Grazie per aver scelto un prodotto SOUNDSATION®. La nostra missione è quella di
orire ai nostri utenti una vasta gamma di strumenti musicali ed apparecchiature audio
e lighting con tecnologie di ultima generazione.
Speriamo di aver soddisfatto le vostre aspettative e, se voleste collaborare, sarem-
mo lieti di ricevere un vostro feedback sulla qualità del prodotto al ne di migliorare
costantemente la nostra produzione. Visitate il nostro sito www.soundsationmusic.
com ed inviateci una mail con la vostra opinione, questo ci aiuterà a sviluppare nuovi
prodotti quanto più vicini alle vostre esigenze.
Un’ultima cosa, leggete il presente manuale al ne di evitare danni alla persona ed al
prodotto, derivanti da un utilizzo non corretto.
Il Team SOUNDSATION

3
ENGLISH
PRIMUS DIGITAL PIANO User manual
TABLE OF CONTENTS
1. INTRODUCTION..........................................................................................................................6
1.1. Unpacking.................................................................................................................................................................6
1.2. Accessories...............................................................................................................................................................6
2. OVERVIEW ...................................................................................................................................7
3. MAIN FEATURES .........................................................................................................................7
4. REAR PANEL ................................................................................................................................8
5. HEADPHONES CONNECTION....................................................................................................9
6. MUSIC STAND .............................................................................................................................9
7. CONTROL PANEL ..................................................................................................................... 10
8. START PLAYING ....................................................................................................................... 11
8.1. Master Volume......................................................................................................................................................11
8.2. Demo........................................................................................................................................................................11
9. VOICE & RELEVANT FUNCTIONS........................................................................................... 12
9.1. Voices selection ...................................................................................................................................................12
9.2. Layer..........................................................................................................................................................................12
9.3. Split............................................................................................................................................................................12
10. STYLE & RELEVANT FUNCTIONS ........................................................................................... 13
10.1. Rhythm.....................................................................................................................................................................13
10.2. Accompaniment (Style)......................................................................................................................................14
11. CHORD LIST.............................................................................................................................. 15
12. PANEL CONTROLS ................................................................................................................... 16
12.1. Metronone..............................................................................................................................................................16
12.2. Tempo.......................................................................................................................................................................16
13. FUNCTIONS .............................................................................................................................. 17
13.1. Twin Piano...............................................................................................................................................................17
13.2. Transpose................................................................................................................................................................17
13.3. Tune ..........................................................................................................................................................................18
13.4. Tempo.......................................................................................................................................................................18
13.5. Beat of Metronome.............................................................................................................................................18
13.6. Reverb ON/OFF.....................................................................................................................................................19
13.7. Chorus ON/OFF....................................................................................................................................................19
13.8. Reverb Level...........................................................................................................................................................19
13.9. Chorus Level...........................................................................................................................................................20
13.10. Touch ........................................................................................................................................................................20
13.11. Speakers ..................................................................................................................................................................21
13.12. Reset..........................................................................................................................................................................21
14. RECORD FUNCTION................................................................................................................. 21
14.1. Recording preparation.......................................................................................................................................21
14.2. Start Recording.....................................................................................................................................................21
14.3. Stop and save Recording..................................................................................................................................22
14.4. User song Playback.............................................................................................................................................22
15. “BT AUDIO STREAMING” FUNCTION.................................................................................... 23
16. MIDI ......................................................................................................................................... 23
16.1. What’s MIDI? .........................................................................................................................................................23
16.2. USB/MIDI Function Socket...............................................................................................................................23
17. PEDALS...................................................................................................................................... 24
18. VOICE LIST ................................................................................................................................ 25
19. ACCOMPANIMENT STYLE LIST............................................................................................... 26
20. RHYTHM LIST........................................................................................................................... 26
21. DEMO SONG LIST .................................................................................................................... 27
22. SPLIT LOWER VOICE LIST........................................................................................................ 28
23. MIDI IMPLEMENTATION CHART............................................................................................ 28
24. SPECIFICATIONS ...................................................................................................................... 29
25. WARRANTY AND SERVICE ..................................................................................................... 30
26. WARNING................................................................................................................................. 30

4
ENGLISH
PRIMUS DIGITAL PIANO User manual
IMPORTANT SAFETY SYMBOLS
The symbol is used to indicate that some hazardous live terminals are
involved within this apparatus, even under the normal operating con-
ditions, which may be sucient to constitute the risk of electric shock
or death.
The symbol is used in the service documentation to indicate that spe-
cic component shall be replaced only by the component specied in
that documentation for safety reasons.
Protective grounding terminal
Alternating current/voltage
Hazardous live terminal
Denotes the apparatus is turned on
Denotes the apparatus is turned o
WARNING: Describes precautions that should be observed to prevent the danger
of injury or death to the operator.
CAUTION: Describes precautions that should be observed to prevent danger of
the apparatus.
To protect the environment, please try to recycle the packing material
as much as possible
Don’t throw this product away just as general trash, please deal with
the product follow the abandon electronic product regulation in your
country.
TAKING CARE OF YOUR PRODUCT
fRead these instructions
fKeep these instructions
fHeed all warning
fFollow all instructions

5
ENGLISH
PRIMUS DIGITAL PIANO User manual
1) Water / Moisture
The keyboard should be protected from moisture and rain and can not be used near
water; for example near a bathtub, a kitchen sink, a swimming pool, etc.
2) Heat
The keyboard should be located away from heat sources such as radiators, stoves or
other appliances that produce heat. Don not use it when maximum ambient tempera-
ture is higher than 40°C.
3) Object and Liquid Entry
Objects do not fall into and liquids are not spilled into the inside of the keyboard for
safety.
4) Power ADAPTER
Please use specied Adapter, otherwise fault adaptermay cause damage of your elec-
tronic keyboard. Do not place adapter or power cord near heating source such as cen-
tral heating or heat radiator. Regularly check power plug and clean surface dirt. Do not
pull out power plug with wet hands. Do not overbend wire and place heavy matters on
wire with other matters to avoid damaging wire. Unplug the keyboard from the mains
during lightning storms or when unused for long periods of time.
5) CleaninG and MAINTENANCE
To clean the body of the electronic keyboard, please use dry soft cloth. Do not use
paint, organic solvent, alcohol or chemically impregnated cloth.
6) radio frequencies
This instrument has been tested and found to comply with the limits for a Class B dig-
ital device, pursuant to Part 15 of the FCC Rules. These limits are designed to provide
reasonable protection against harmful interference in a residential installation. This
equipment generates, uses, and can radiate radio frequency energy and, if not installed
and used in accordance with the instructions, may cause harmful interference to radio
communications. However, there is no guarantee that interference will not occur in a
particular installation.
7) Servicing
Do not open the case of electronic keyboard and try to disassemble any part of it or
make any change to it. Should any abnormal function occur in use, please stop operat-
ing it immediately and send the keyboard for repair by qualied service personnel only.
Only use accessories/attachments or parts recommended by the manufacturer
NOTICE:
fSpecications are subject to change without notice
fShould any description of product function be not specied in detail or some typing
error occurs, please forgive us.

6
ENGLISH
PRIMUS DIGITAL PIANO User manual
1. INTRODUCTION
Thank you for purchasing our PRIMUS Digital Piano. Enjoy your new digital piano and
make sure to read this manual carefully before operation.
This user manual is made to provide both an overview of controls, as well as informa-
tion on how to use them.
1.1. Unpacking
Your PRIMUS Digital Piano was carefully packed to ensure safe transport. Despite this,
we recommend you to carefully examine the package and its contents for any signs of
physical damage, which can occur during transport. Each unit has the following parts:
f1 x PRIMUS Digital Piano
f1 x Power Adapter 16V 2,6A DC
f1 x Sustain Pedal
f1 x Music Stand.
f1 x User Manual
ATTENTION: Packaging cartons are not a toys! Keep out of reach of chil-
dren!!! Keep in a safe place the original packaging material for future use.
If anything damaged during transport, notify the shipper immediately and keep the
packing material for inspection. Again, please save the carton and all packing materials.
If the piano must be returned to the manufacturer, it is important that it is returned in
the original manufacturer box and packing. Please do not take any action without rst
contacting us.
1.2. Accessories
SOUNDSATION can supply a wide range of quality accessories that you can use with
your PRIMUS Digital Piano, like Audio cables, Headphones, Piano stand, external speak-
ers and a wide range of other dedicated items.
All products in our catalogue has been long tested with this device, so we recommend
you to use Genuine SOUNDSATION Accessories and Parts.
Ask your SOUNDSATION dealer or check out our website www.soundsationmusic.com
for any accessories you could need to ensure best performance of the product.

7
ENGLISH
PRIMUS DIGITAL PIANO User manual
2. OVERVIEW
PRIMUS is a brand new digital piano suitable for various occasions and applications.
This professional piano has a keyboard with “Hammer Action” which in combination
with a realistic piano sound and an “Ivory feel” tactile sensation, gives the impression of
playing a real classical piano. All the functions present in the PRIMUS digital piano are
easy to use. The size of the tool is small so it doesn’t take up much space. Its sound sys-
tem was designed by expert “sound designer” and therefore its sound is both rich and
delicate, showing the unique charm of the digital piano. PRIMUS is a digital piano that,
thanks to its fantastic sound, is worth having..
3. MAIN FEATURES
f88 Keys Keyboard with “Hammer Action” and “Ivory feel”
fMax Polyphony: 81
fPower Supply DC 16V 2,6A (Bundled Adaptor)
f90 high quality voices
f30 styles and 30 rhythms to play various musical genres
f60 Demo songs and 10 User Songs
fLAYER Function to Play Two Voices simultaneously
fLOWER SPLIT function to play a dierent voice for left and right hands
fRecord and Playback functions available
fUSB/MIDI Function available
fBT Audio Streaming function available
f2 speakers of 25 Watt each
fRobust and elegant cabinet with black nish
fSustain Pedal included
fMusic Stand included
fOptional exclusive stand with three pedals and black nish

8
ENGLISH
PRIMUS DIGITAL PIANO User manual
4. REAR PANEL
1) USB PORT
This USB port is for communicating with a computer via a USB cable. “MIDI IN” and
“MIDI OUT” can work simultaneously via USB using dedicated software installed on the
computer.
2) PEDAL SOCKET
Plug the pedal cable jack of the optional exclusive stand for the piano with this socket.
(The stand for the piano needs to purchase separately).
3) SUSTAIN PEDAL CONNECTOr
This connector is dedicated sustain pedal. Connect the included sustain pedal here.
4) AUX STEREO OUT CONNECTORS
The AUX OUT connectors on the rear panel provide the instrument’s output for con-
nection to an amplier, stereo sound system, mixing console or recorder. Use jack type
audio cables to connect the AUX OUT connectors located on the rear panel to the
audio inputs of the external audio device.
Note:
To avoid damaging the speakers, make sure that the volume of the digital piano and
external audio device has been set to the minimum level.
5) POWER SUPPLY CONNECTOR
a) Before connecting the supplied power supply, make sure that the piano
is turned o. Before you switch on your piano on or o, turn down the
volume of piano rst.
b) Plug the AC adaptor into an AC outlet.
c) Press the POWER switch to turn on the digital piano.
Note:
When the piano is not in use or during thunderstorm, please
disconnect the power for safety purpose.

9
ENGLISH
PRIMUS DIGITAL PIANO User manual
5. HEADPHONES CONNECTION
Standard stereo headphones can be connected as shown in the previous gure.
After connecting headphones, the internal stereo speaker system automatically turns
o. Sound can only be heard through headphones.
Note:
To avoid the risk of hearing loss when using headphones,please do not play the piano
with a high volume level for a long time.
6. MUSIC STAND
Insert the included Music Stand as shown in the gure above.

10
ENGLISH
PRIMUS DIGITAL PIANO User manual
7. CONTROL PANEL
1) Power ON/OFF
Switch on/o the piano
2) MASTER VOLUME
Turning this knob to the right will increase the main volume; turning it to the left will
reduce the main volume.
Note:
This knob will have no eect on audio les from “BT Audio Streaming”. In this case the
volume will have to be regulated by the paired remote device.
3) DEMO BUTTON
Using this button you can access the “DEMO” section. This piano has 60 demonstration
songs for listening
4) VOICE BUTTONS
This piano has 90 voices which can be selected using one of these 8 shortcut buttons or
with the [+] / [-] buttons.
5) [+] / [-] Buttons
These buttons can be used when selecting voices or, to set the Tempo value.
6) METRONOME button
Pressing this button will activate the metronome. This function is very useful especially
in learning to play at the right time.
7) SPLIT BUTTON
Pressing this button activates the SPLIT mode. With this mode, you can play two instru-
ment sounds in separate parts of the keyboard. In the right section of the keyboard,
play the main voice and in the left section of the keyboard, play the lower voice or
chord.
Note:
Pressing the [METRONOME] and [SPLIT] buttons simultaneously activates the FUNC-
TION mode. In this mode, parameters and eects can be set from the specied keys.
Please refer to the “FUNCTIONS” paragraph.

11
ENGLISH
PRIMUS DIGITAL PIANO User manual
8) ACCOMP BUTTON
There are 2 automatic chord accompaniment modes: SPLIT and PIANO. By pressing the
[ACCOMP] button, the style will begin as soon as the chord is played.
9) RHYTHM BUTTON
As soon as this button is pressed, the rhythmic part of the style will start
10) RECORD BUTTON
This button activates recording of a user song. User can record and save 10 Songs. For
further explanations about recording a song, please refer to the “RECORD FUNCTION”
paragraph.
11) USER SONG BUTTON
Pressing this button starts or stops playback of a user song.
8. START PLAYING
8.1. Master Volume
The main volume can be adjusted according to your needs. Turning the knob to the
right increases the main volume; turning the knob to the left reduces the main volume.
MASTER VOLUME
8.2. Demo
This piano features 60 high-quality demo songs, which can be listened to by perform-
ing simple operations.
1) PLAY/STOP DEMO SONGS
Pressing the [DEMO] button will automatically play 60 demo songs in a loop. When the
songs are playing, if you press the [DEMO] button again, the song will be stopped and
the “Demo” function will be closed immediately.
2) SELECTION OF A DEMO SONG
Hold down the Demo button, then press the specied key (Refer to the numerical tips
in the gure below or the “DEMO SONG LIST” to select a song. 60 keys correspond to
60 demo songs.

12
ENGLISH
PRIMUS DIGITAL PIANO User manual
9. VOICE & RELEVANT FUNCTIONS
9.1. Voices selection
This piano has a total of 90 voices that can be selected from 8 shortcut buttons and
the [+] / [-] buttons. By pressing a shortcut button for the voices, the desired voiced
is selected and the LED corresponding to the button lights up. If the [+] / [-] buttons
are used at this point, other voices within the current group can be cyclically selected.
Please refer to the “VOICE LIST.
9.2. Layer
1) LAYER SELECTION
The 90 voices of the piano can be combined with each other so that two voices sound
simultaneously (LAYER function) according to your needs. Holding down one of the
quick selection buttons for the voices, pressing another one, activates the LAYER
function. The LEDs for the two selected voices will be lit. The rst selected voice will be
the main one while the second will be the LAYER voice. The volume of the main voice is
louder than the second selected voice.
2) EXIT FROM LAYER FUNCTIOn
Press any shortcut button for the voices. The LED for the button pressed lights up and
the LEDs for the previously selected items go o. The piano will be set in main voice
mode.
9.3.Split
By pressing the [SPLIT] button, the LED corresponding to the button lights up and
“Split” mode is activated. The keyboard is divided into two parts: left / right. The Split
Point is the G3 note. The right part will play the main voice and the left part with the
“Lower” voice. Chords can also be played on the left side of the keyboard. Please refer
to the “ACCOMP” paragraph in the “STYLE & RELEVANT FUNCIONS” section.

13
ENGLISH
PRIMUS DIGITAL PIANO User manual
1) SPLIT LOWER VOICE SELECTION
There are 11 Split lower voices into the piano. When [ACCOMP] is turned o, press the
[SPLIT] button. The [SPLIT] button LED will ash. At this point you can select the split
lower voice with the [+] / [-] buttons. Please refer to the SPLIT LOWER VOICE LIST
2) EXIT SPLIT LOWER FUNCTION
To exit the “Split Lower” function, press the [SPLIT] button. The LED for the [SPLIT] but-
ton will turn o.
10. STYLE & RELEVANT FUNCTIONS
10.1. Rhythm
1) START/STOP A RHYTHM STYLE
Pressing the [RHYTHM] button will start the rhythmic part of a style and the LED relat-
ing to the [RHYTHM] button will light up. Pressing the [RHYTHM] button again, the LED
will turn o, the rhythm part of the style will be stopped and the “Rhythm” mode will
be exited
2) RHYTHM SELECTION
Press and hold the [RHYTHM] button and then, to select the rhythmic part of the
desired style, press the corresponding key (refer to the numerical suggestions in the
following gure). In this digital piano there are 30 rhythmic parts of style selectable
through the 30 enabled keys. Please refer to the RHYTHM LIST

14
ENGLISH
PRIMUS DIGITAL PIANO User manual
10.2. Accompaniment (Style)
1) ACCOMPANIMENT STYLE START/STOP
By pressing the [ACCOMP] button, the LED for the button lights up and the accompani-
ment style will start as soon as you play a chord on the keyboard. Press the [ACCOMP]
button again to stop the accompaniment style and exit the “Accomp” mode. The [AC-
COMP] button LED will turn o.
2) ACCOMPANIMENT STYLE SELECTION
Press and hold the [ACCOMP] button and then, to select the desired accompaniment-
style, press the corresponding key (refer to the numerical suggestions in the following
gure). In this digital piano there are 30 accompaniment style selectable through the 30
enabled keys. Please refer to the ACCOMPANIMENT STYLE LIST.
3) Accompaniment chords mode
a) SPLIT
When SPLIT mode is active, the keyboard is separated into the left (Chord) /
right (Voice) parts. The accompaniment style will start by playing a chord on
the left side of the keyboard.
b) PIANO
When SPLIT mode is turned o, the accompaniment style will start as soon as
a chord is played anywhere on the keyboard.
Note:
With the “PIANO” mode (SPLIT O), only the “FINGERED” mode of chord can be
worked.

15
ENGLISH
PRIMUS DIGITAL PIANO User manual
11. CHORD LIST
The note with bracket can be omitted
CHORD TYPE CHORD NAME CHORD NOTE
CMajor [M] 1-(3)-(5)
C6 Major sixth [6] 1-(3)-5-6
CM7 Major seventh [M7] 1-(3)-(5)-7
CM7#11 Major seventh sharp Eleventh [M7#11] 1-(2)-3-#4-(5)-7
Cmadd9 Major add ninth [Madd9] 1-2-3-5
CM9 Major ninth [M9] 1-2-3-(5)-7
C6 9 Major sixth add ninth [6 9] 1-2-3-(5)-6
Caug Augmented [aug] 1-3-#5
Cm Minor [m] 1-b3-(5)
Cm6 Minor sixth [m6] 1-b3-5-6
Cm7 Minor seventh [m7] 1-b3-(5)-b7
Cm7b5 Minor seventh atted fth [m7b5] 1-b3-b5-b7
Cmadd9 Minor add ninth [madd9] 1-2-b3-5
Cm9 Minor ninth [m9] 1-2-b3-(5)-b7
Cm11 Minor eleventh [m11] 1-(2)-b3-4-5-(b7)
CmM7 Minor major ninth [mM7] 1-b3-(5)-7
CmM9 Minor major ninth [mM9] 1-2-b3-(5)-7
Cdim Diminished [dim] 1-b3-b5
Cdim7 Diminished seventh [dim7] 1-b3-b5-6
C7 Seventh [7] 1-(3)-(5)-b7
C7sus4 Seventh suspended fourth [7sus4] 1-4-5-b7
C7b5 Seventh atted fth [7b5] 1-3-b5-b7
C7 9 Seventh ninth [7 9] 1-2-3-(5)-b7
C7#11 Seventh sharp eleventh [7#11] 1-2-3-#4-(5)-b7 or 1-(2)-3-#4-5-b7
C7 13 Seventh thirteenth [7 13] 2-3-5-6-b7
C7b9 Seventh atted Ninth [7b9] 1-b2-3-(5)-b7
C7b13 Seventh atted thirteenth [7b13] 1-3-5-b6-b7
C7#9 Seventh sharp ninth [7#9] (1)-#2-3-(5)-b7
CM7aug Major seventh augmented [M7aug] 1-3-#5-7
C7aug Seventh augmented [7aug] (1)-3-#5-b7
Csus4 Suspended Fourth [sus4] 1-4-5

16
ENGLISH
PRIMUS DIGITAL PIANO User manual
Note:
In the previous table, the listed chord ngerings are all in root note position, other
inversions can be used with the exception of:
1) The M6 chords are only recognized in root note position.
All other inversions are interpreted as m7.
2) The 6 9 chords are only recognized in root note position.
All other inversions are interpreted as m711.
3) The m6 chords are only recognized in root note position.
All other inversions are interpreted as m7b5.
4) With aug and dim7 chords the lowest note played is assumed to be the
root.
12. PANEL CONTROLS
12.1. Metronone
1) METRONOME ON/OFF
Press the [METRONOME] button to activate the metronome. The LED for the [METRO-
NOME] button ashes and the metronome sound is heard. Pressing the [METRONOME]
button again turns the metronome o. The LED for the [METRONOME] button will turn
o.
2) BEATS SELECTION
This piano oer the following kinds of beat: 2/4, 3/4, 4/4, 5/4, 6/4. Please refer to the
“FUNCTIONS” paragraph.
12.2. Tempo
1) TEMPO hints
When styles or songs are playing or, when the metronome is activated, the LED relative
to the [METRONOME] button will give the visual indication of the tempo.
2) Tempo adjustment
The range of TEMPO parameter is 40—240 beats per minute and there are two ways to
adjust it:
a) Press and hold the [METRONOME] button and then press the [+] or [-]
buttons to adjust the tempo value. If the [+] and [-] buttons are pressed
simultaneously, the tempo parameter will be reset to the default value
(style, song or metronome).
b) Tn the “FUNCTIONS” mode, press the specied key to adjust tempo. Please
refer to the “FUNCTION” paragraph.

17
ENGLISH
PRIMUS DIGITAL PIANO User manual
13.FUNCTIONS
Press the [METRONOME] and [SPLIT] buttons simultaneously to activate the FUNC-
TION mode. When this mode is activated, the LEDs for the [METRONOME] and [SPLIT]
buttons ash. Parameters and eects can be set by pressing the keys specied in this
mode. Press any button to exit FUNCTIONS mode.
13.1. Twin Piano
The piano can be separated into the left / right parts and both parts are set to the same
octave so that two people can play it simultaneously. The Split Point is the C4 note.
In FUNCTIONS mode, press the specied key to turn the twin piano on / o as shown
below.
Note:
1) If the piano stand was purchased, when the TWIN function is activated,
the SOFT PEDAL is transformed into SUSTAIN PEDAL for the left part of
the keyboard and the original SUSTAIN PEDAL is only for the right part of
the keyboard.
2) When the TWIN function is active, the SPLIT LOWER mode can’t be selected
and therefore, the voice for the Lower part cannot be selected.
13.2. Transpose
The Transpose parameter allows you to transpose the overall pitch of the instrument
with a range of -5 to +6. In FUNCTIONS mode, press the specied key to set the Trans-
pose value as shown in the following gure. When the “0” key is pressed, the Transpose
parameter value will be reset to the default value (0).

18
ENGLISH
PRIMUS DIGITAL PIANO User manual
13.3. Tune
The general ne pitch of the instrument can be raised or lowered in cent steps by
adjusting the Tune parameter.. In FUNCTIONS mode, press the specied key to set the
Tune value as shown in the following gure. The range of the Tune parameter is: -100 ~
0 ~ + 100 Cents. Each step of increase or decrease is 1 Cent. By holding down the spec-
ied keys (+ or -) the value of the tune parameter will increase / decrease continuously.
When the “0” key is pressed, the Tune parameter value will be reset to the default value
(0).
13.4. Tempo
In the FUNCTIONS mode, press the specied keys to adjust the Tempo value as shown
below. When you press the“Default ”key, the piano will recover to the default Tempo
value (Style, Song).
13.5. Beat of Metronome
In the FUNCTIONS mode, press the specied key to set the beat of metronome as
shown below.
Note:
It is not possible to change the type of beat while playing an rhythm, accompaniment
or demo.

19
ENGLISH
PRIMUS DIGITAL PIANO User manual
13.6. Reverb ON/OFF
The reverb eect is on as default. In the FUNCTIONS mode, press the specied key to
on/o the reverb eect as shown below:
13.7. Chorus ON/OFF
The chorus eect is o by default. In the FUNCTIONS mode, press the specied key to
on/o the chorus eect as shown below:
13.8. Reverb Level
There are 3 levels of reverb eect. In the FUNCTIONS mode, press the specied keys to
set the level of reverb eect as shown below. When you press the“0”key, the piano will
recover to the reverb default level.

20
ENGLISH
PRIMUS DIGITAL PIANO User manual
13.9. Chorus Level
There are 3 levels of chorus eect. In the FUNCTIONS mode, press the specied keys to
set the level of chorus eect as shown below. When you press the“0”key, the piano will
recover to the chorus default level.
13.10. Touch
There are 4 types for touch curve. In the FUNCTIONS mode, press the specied key to
change the type of touch curve as shown below.
1) Normal
This is the default. The keyboard gives an intermediate touch response suitable for
most musical styles.
2) HARD
This is a less sensitive keyboard response which requires a heavier touch to obtain
maximum sound levels
3) SOFT
This is the most sensitive keyboard response which permits maximum sound levels with
a light touch
4) .FIXED
This does not oer any touch sensitivity. Each key plays at the highest level of dynam-
ics, regardless of how hard the piano key is pressed.
Table of contents
Languages:
Other Sound Sation Musical Instrument manuals
