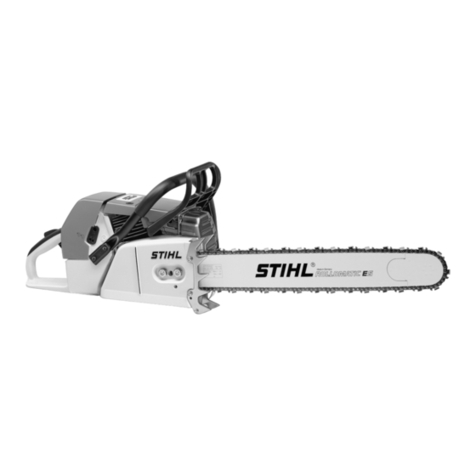
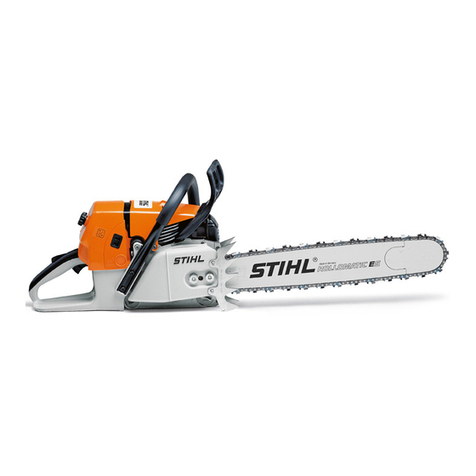
Stihl MS 460 R User manual

{
STIHL MS 460 R Instruction Manual


Original Instruction ManualPrinted on chlorine-free paper
Printing inks contain vegetable oils, paper can be recycled.
© ANDREAS STIHL AG & Co. KG, 2012
0458-147-0121-B. VA1.A12.
0000000080_002_GB
MS 460 R
English
1
{
Contents
Dear Customer,
Thank you for choosing a quality
engineered STIHL product.
This machine has been built using
modern production techniques and
comprehensive quality assurance.
Every effort has been made to ensure
your satisfaction and troublefree use of
the machine.
Please contact your dealer or our sales
company if you have any queries
concerning your machine.
Your
Hans Peter Stihl
Guide to Using this Manual 2
Important safety information 2
Mounting the depth limiter 3
Adjusting Cutting Depth 3
Chain lubrication 4
Converting a chain saw 4
Tensioning the saw chain (depth
limiter installed) 7
Checking the chain tension (depth
limiter installed) 8
Maintaining and Sharpening the
Saw Chain 8
Replacing the Starter Rope and
Rewind Spring 9

MS 460 R
English
2
Pictograms
All the pictograms attached to the
machine are shown and explained in this
manual.
Symbols in text
Warning where there is a risk of an
accident or personal injury or serious
damage to property.
Caution where there is a risk of
damaging the machine or its individual
components.
Engineering improvements
STIHL's philosophy is to continually
improve all of its products. For this
reason we may modify the design,
engineering and appearance of our
products periodically.
Therefore, some changes, modifications
and improvements may not be covered
in this manual.
The STIHL Rescue Saw is designed
especially for use by emergency
services (e. g., fire departments,
technical emergency services, disaster
prevention services, etc.).
The STIHL Rescue Saw may only be
used by specially trained personnel in
rescue missions, because in addition to
handling the chain saw, it is also
necessary to assess the other
circumstances and risks.
Using the STIHL Rescue Saw requires
special working techniques. If these are
not observed, there is an increased risk
of injury for the user or the rescuee.
This Instruction Manual supplements
the standard Instruction Manual for the
basic MS 440 and MS 460 chain saws. It
describes the deviations from the
standard Instruction Manual and the
conversion of the STIHL MS 440 and
MS 460 chain saws into rescue saws.
It is important that you read both
Instruction Manuals carefully before
using the machine for the first time.
Non-observance of the following safety
precautions may cause serious or even
fatal injury.
There is a risk of fire during refueling.
The special cutting attachment (carbide-
tipped saw chain) cuts through thin
sheet metal, tar paper, light masonry,
insulating materials, roof linings, glass
(e. g., ICE windows), nails, etc.
If dust is generated and when cutting
glass, use a dust mask or respiratory
protection.
Before starting work, always put on
personal protective gear as described in
the Instruction Manual for the basic
chain saw. In addition, put on a face
shield and safety glasses.
There is an increased risk of injury by
flying debris from cutting. This debris
may contain sharp-edged pieces of
material which, due to their greater
density, have a higher kinetic energy
than wood chips do.
When fighting fires, the depth limiter
permits precise cutting of vent holes in
roofs and paneling to enable positive
pressure ventilation.
Use of the bar nose in the manner
dictated by this special application may
result in an increased risk of kickback.
During each cutting operation, the static
equilibrium of the separated structure
must be observed, especially when
working on the roof, to keep persons
from falling and roof structures from
collapsing.
Another application is searching for
sources of fire especially with
smoldering fires in the roofs of industrial
and commercial buildings.
The HD filter (MS 460) or fleece filter
(MS 440) ensures outstanding filter
performance even under the extreme
conditions encountered in rescue
missions.
The wrap-around handlebar may only be
used in conjunction with the chain
sprocket cover included.
Guide to Using this Manual Important safety information

MS 460 R
English
3
NMount the bar and chain – see
Instruction Manual for the basic
chain saw
NSlide the guide (1) over the bar and
screw in the screws (2)
NPush the slide (3) into place
NFit the adjusting screw (4) with
washer (5)
NTighten screws (2)
NPull the slide (3) forward as far as
possible
NTighten adjusting screw (4)
The cutting depth is infinitely adjustable
from just a few millimeters to
approx. 20 cm.
Before each adjustment of the cutting
depth:
NSwitch off the engine
NEngage the chain brake by pushing
the hand guard (1) toward the nose
of the guide bar – the saw chain is
blocked
NPlace the chain saw on the ground
and position the front of the right
foot in the rear handle
Mounting the depth limiter Adjusting Cutting Depth

MS 460 R
English
4
NWith the right hand, grip the slide
from above and loosen the
adjusting screw (2) with the left
hand
NAdjust cutting depth (arrow) and
tighten adjusting screw (2)
NRelease the chain brake
Adjusting the delivery rate
NTurn adjusting screw (on the bottom
of the machine) to the right as far as
it will go = maximum delivery rate
Chain lubricant
Because of the anticipated long periods
of disuse, a partly synthetic chain
lubricant, e. g., STIHL Chain and Bar
Lubricant.
Air filter
MS 440
NInstall fleece filter – see "Removing
the air filter" in the Instruction
Manual for the basic chain saw
MS 460
NInstall HD filter insert – see
"Removing the air filter" in the
Instruction Manual for the basic
chain saw
Chain lubrication

147BA012 KN
E
Converting a chain saw

MS 460 R
English
5
Removing the front handle
NUndo the screws (1)
NRemove top handle (2) toward the
rear
Pushing on the holder
NCoat the wall of hole (a) with STIHL
Press Fluid OH 723 or with
detergent
NSlide the holder (2) with the
opening (b) as shown in the picture
onto the wrap-around handlebar
NPosition the holder (2) with the
opening (b) as shown in the picture
Assembling the wrap-around handlebar
NPush the elbow connector (3) onto
the middle section (4) and screw
down the end (5) of the handlebar
with screw (6) M5x20 and
washer (7)
11
147BA005 KN
2
11
179BA039 KN
a
2b
4
5
3
147BA006 KN
67

MS 460 R
English
6
Mounting the wrap-around handlebar
NSlide the handlebar (1) onto the saw
from behind and position it
NScrew in screws (2) P6x32.5
NScrew in and tighten the screws (3)
P6x19 – already present
NPush the combination wrench into
the holder
Cutting attachment
NUnscrew nuts (1) and remove chain
sprocket cover (2)
NRemove the guide bar and saw
chain – see "Mounting the bar and
chain" in the Instruction Manual for
the basic chain saw
Mounting the guard plate
NRemove screw (1) and nut (2)
NRemove screw (3)
NRemove spiked bumper (4) and
chain catcher (5)
NRemove screw (6)
NCoat screw (7) from the conversion
kit with Loctite 243 or equivalent
adhesive and screw it in
NPosition guard plate (8) with
screw (1) and nut (2)
NCoat screw (9) M5x12 from the
conversion kit and screw (3) with
Loctite 243 or equivalent adhesive
NScrew in screw (9) with washer (10)
– washer is included only with the
guard plate with an oblong hole and
is required only for it
11
147BA008 KN
2
10
3
1
9
2
5
8
147BA017 KN

MS 460 R
English
7
NMount chain catcher (5) with
screw (3)
NTighten down the screws and nuts
crosswise
Chain sprocket cover
NFor mounting the saw chain and
guide bar, use the chain sprocket
cover (1) in the conversion kit –
spacers (2), cover (3) and spiked
bumper (4) must be mounted
NMount the bar and chain – see
Instruction Manual for the basic
chain saw
NMount the depth limiter – see
"Mounting the depth limiter"
NSwitch off the engine
NPut on protective gloves
NLoosen adjusting screw (1)
NPush the slide (2) toward the engine
as far as it will go
NUndo the nuts (3)
NRaise the guide bar at the nose
NUse the screwdriver to turn the
screw (4) to the right until the saw
chain rests against the underside of
the guide bar
NRaise the guide bar further and
tighten the nuts securely
NContinue with "Check chain
tension"
A new saw chain must be retensioned
more frequently than one that has been
in use already for an extended period.
NCheck chain tension frequently –
see "Operating Instructions" in the
Instruction Manual of the basic
chain saw
Tensioning the saw chain
(depth limiter installed)

MS 460 R
English
8
NSwitch off the engine
NPut on protective gloves
NLoosen adjusting screw (1)
NPush the slide (2) toward the engine
as far as it will go
NThe saw chain must lie against the
bottom of the bar – and it must be
possible to pull it across the guide
bar by hand when the chain brake is
released
Nif necessary, retension saw chain
A new saw chain must be retensioned
more frequently than one that has been
in use already for an extended period.
NCheck chain tension frequently –
see "Operating Instructions" in the
Instruction Manual of the basic
chain saw
NAdjust the depth of cut
Never use a dull or damaged saw chain
– this leads to increased physical strain,
increased vibration load, unsatisfactory
cutting results and increased wear.
NClean the saw chain
NCheck the saw chain for cracks and
damaged rivets
NReplace damaged or worn chain
components and adapt these parts
to the remaining parts in terms of
shape and level of wear – rework
accordingly
Compliance with the angles and
dimensions listed below is absolutely
necessary. An improperly sharpened
saw chain – especially depth gauges
that are too low – can lead to increased
kickback tendency of the chain saw –
risk of injury!
Saw chain 36 RDR
ASharpening angle 15°
BSide plate angle 85°
Checking the chain tension
(depth limiter installed)
Maintaining and Sharpening
the Saw Chain

MS 460 R
English
9
To sharpen the carbide-tipped saw
chain, use only the USG universal
sharpener with a diamond wheel. When
doing so, proceed according to the USG
Instruction Manual.
The angles must be identical for all
cutters in the saw chain. Varying angles:
Rough, uneven running of the saw
chain, increased wear – even to the
point of saw chain breakage.
All cutters must be equally long.
With varying cutter lengths, the cutter
heights also vary and cause rough
running of the saw chain and chain
breakage.
NAll cutters must be ground down
equal to the length of the shortest
cutter
Depth gauge setting
The depth gauge determines the chip
thickness.
aRequired distance between depth
gauge and cutting edge (0.65 mm)
Lowering the depth gauges
The depth gauge setting is lowered
when the cutter is sharpened.
NCheck the depth gauge setting after
each sharpening and grind with the
USG
Settings on the USG sharpener
Saw chain 36 RDR
After sharpening
NClean the saw chain thoroughly,
removing any chips or dust –
lubricate the saw chain thoroughly
NIn the event of extended periods of
disuse, store saw chains in cleaned
and oiled condition
Repair
The saw chain can be repaired with
NG 3, NG 4, NG 5 and NG 7.
With the saw chain 36 RDR, cutters, tie
straps, 3-humped drive links, and drive
links can be unriveted and riveted.
Chain saws with ElastoStart starter grip
– see Instruction Manual for the basic
chain saw.
Removing the fan housing
NRemove screws (1)
NPush hand guard upward
NPull the bottom of the fan housing
away from the crankcase and
remove downwards
Replacing a torn starter rope
NCarefully press the spring clip (2) off
of the post with a screwdriver or
suitable pliers
NCarefully remove the rope rotor with
washer (3) and pawls (4)
Cutter Depth gauge
right left
A+10 +10 +40
B0 0 0
C+15 -15 0
-
+
--
A
B
C
523BA077 KN
+
+
Replacing the Starter Rope
and Rewind Spring
1
11
1
133BA014 KN
44
3
2
001BA096 KN

MS 460 R
English
10
The rewind spring can jump out – risk of
injury!
NLever the rope out of the starter
handle with a screwdriver
NRemove the remainder of the rope
from the rotor and starter handle
NThread a new starter rope from top
to bottom through the handle and
rope guide bush (5) – secure the
starter rope by making a special
knot
NThread the other end of the rope
through the rotor (6) and secure it in
the rotor with a simple overhand
knot
NCoat the bearing bore in the rope
rotor with non-resinous oil
NSlip the rope rotor onto the starter
post – turn it back and forth a little
until the anchor loop of the rewind
spring engages
NRefit the pawls (4) in the rotor and
slip the washer (3) over the starter
post
NPress the spring clip (2) on to the
starter post and over the pegs of the
pawl with a screwdriver or suitable
pliers – the spring clip must point in
the clockwise direction – as in the
picture
Tensioning the rewind spring
NMake a loop in the unwound starter
rope and use it to turn the rope rotor
six full revolutions in the direction of
the arrow
NHold the rope rotor tight – pull out
the twisted rope and untangle it
NRelease the rope rotor
NSlowly let go of starter rope so that
it winds onto the rotor
The starter grip must be drawn firmly
into the rope guide bush. If it tips
sideways: increase the spring tension by
another turn.
It must be possible to turn the rope rotor
another half-turn when the rope has
been drawn out completely. If not, the
spring has been tensioned too tightly
and may break!
NRemove one turn of the rope from
the rotor
NMount the fan housing on the
crankcase
6
5
179BA011 KN
44
3
2
001BA096 KN
144BA016 LÄ

MS 460 R
English
11
Replacing broken rewind spring
NRemove the rope rotor
The broken pieces of spring may still be
under tension and can spring apart
unexpectedly on removal from the fan
housing – risk of injury! Wear a face
shield and protective gloves.
NCarefully pry out the broken pieces
of spring with a screwdriver
NApply a few drops of non-resinous
oil to the new replacement spring
NPosition the replacement spring
with frame in the fan housing – the
anchor loop must be located over
the retaining lug in the fan housing
NApply suitable tools (screwdriver,
punch, etc.) to the recesses
(arrows) and push the spring into its
seat in the fan housing – the spring
slides out of the frame.
NReinstall the rope rotor, tension the
rewind spring, replace the fan
housing and screw it into place
001BA024 KN
001BA103 KN

MS 460 R
English
12


www.stihl.com *04581470121B*
0458-147-0121-B
0458-147-0121-B
englisch
G
Table of contents
Other Stihl Chainsaw manuals

Stihl
Stihl MSE 141 C User manual

Stihl
Stihl TS 400 Cutquick User manual

Stihl
Stihl MS 231 User manual

Stihl
Stihl MS440 User manual

Stihl
Stihl 17 User manual

Stihl
Stihl MS 461 R User manual

Stihl
Stihl MSA 120 C User manual

Stihl
Stihl MS 661 C-M User manual

Stihl
Stihl MS 251 C-Q User manual

Stihl
Stihl MS 250 User manual

Stihl
Stihl MSA 160.0 C User manual

Stihl
Stihl MS440 User manual

Stihl
Stihl E 140 User manual

Stihl
Stihl MS 280 C User manual

Stihl
Stihl MSA 120 C User manual

Stihl
Stihl MS 271 User manual

Stihl
Stihl MS 720 User manual

Stihl
Stihl MSA 120 C User manual

Stihl
Stihl MS 271 User manual

Stihl
Stihl MSE 250 C User manual