Storage Options baby cam User manual

2
CAUTION
RISK OF ELECTRIC SHOCK
DO NOT OPEN
TO REDUCE THE RISK OF ELECTRIC SHOCK,
DO NOT REMOVE THE COVER.
NO USER SERVICABLE PARTS INSIDE.
REFER SERVICING TO QUALIFIED PERSONNEL.
The lightning flash with arrowhead symbol, within an equilateral
triangle, is intended to alert the user to the presence of non-
insulated “dangerous voltage” within the product’s enclosure that
may be of sufficient magnitude to constitute a risk of electric shock.
The exclamation point within an equilateral triangle is intended to
alert the user to the presence of important operating and
maintenance (servicing) instructions in the literature accompanying
the appliance.
WARNING:
TO PREVENT FIRE OR SHOCK HAZARD, DO NOT
EXPOSE THIS UNIT TO RAIN OR MOISTURE
CAUTION:
TO PREVENT ELECTRIC SHOCK, ENSURE THE PLUG
IS FULLY INSERTED INTO A MAINS SOCKET

3
WARRANTY AND TECHNICAL SUPPORT
To help you make the most of this product you’ll find a host of information including full product manuals, FAQ,
troubleshooting guides and a support service if you have specific questions, available at our support website:
www.storageoptions.com/support.
This product is also backed by a 12 month warranty in the unlikely event of something going wrong. More
information and warranty registration is available at www.storageoptions.com/warranty.
Support:
www.storageoptions.com/support/
Warranty:
www.storageoptions.com/warranty/
TABLE OF CONTENTS
OVERVIEW
4
PACKAGE CONTENTS
4
FEATURES
5
3.1 –Camera
3.2 –Monitor
5
6
DEVICE ASSEMBLY
7
4.1 –Camera
4.2 –Monitor
7
7
POWERING ON
8
5.1 –Camera
5.2 –Monitor
8
8
PAIRING THE UNITS
8
CHARGING BATTERIES
9
ON-SCREEN INDICATORS
9
8.1 –Signal Condition
8.2 –Battery Meter
9
9
ATTACHING BRACKETS TO A CAR WINDOW
10
APPENDIX –PRODUCT SPECIFICATION
10
4
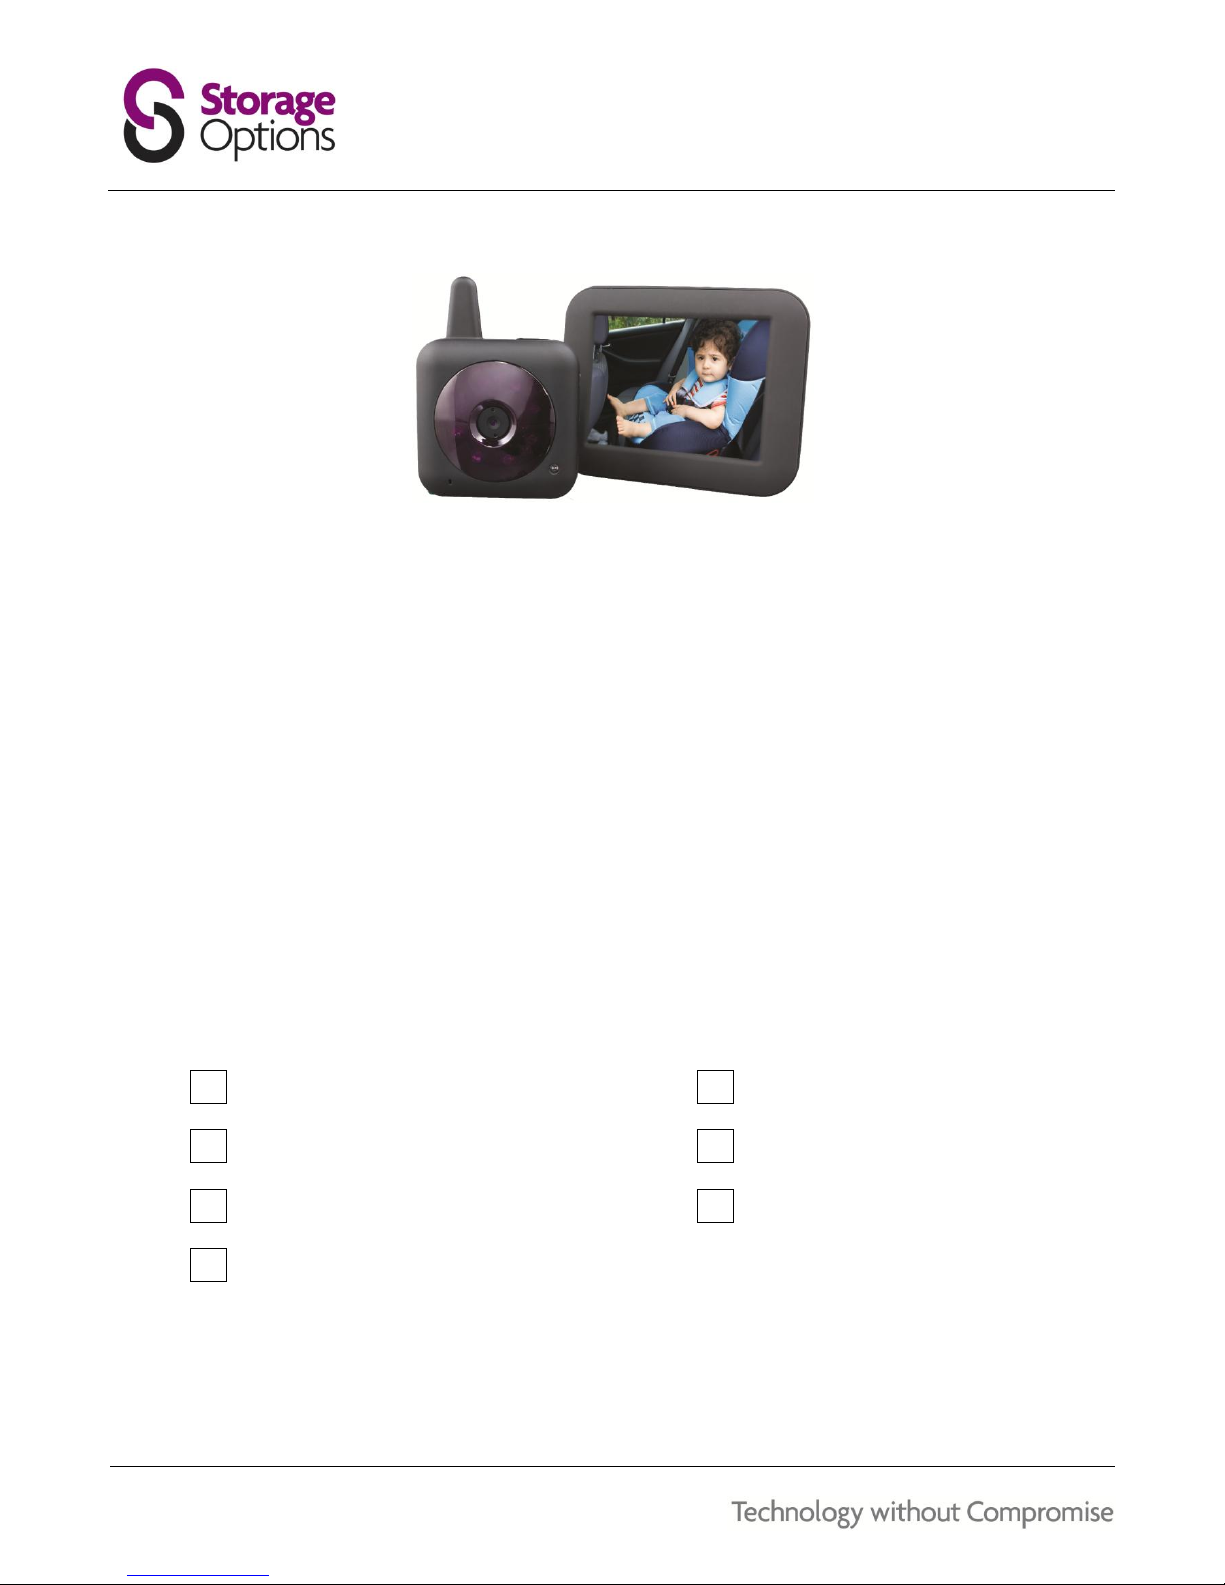
OVERVIEW
Turning around to look in the back seat whilst driving might mean that you cannot maintain control of your vehicle.
But if you’re on your own with your baby and are concerned something is wrong you may feel you have no choice...
Baby Cam Car offers a simple, easy to use solution to this problem. A compact wireless camera affixes to the side
window to get a clear view of your baby and to transmit the video picture. This is received by a wireless display,
fixed to the windscreen much like a sat nav, to view whilst driving. No more turning round or looking over your
shoulder, get the reassurance that you need and stay in control of your vehicle.
100% digital car baby monitor kit
Interference-free wireless transmission
3.5” colour LCD screen
Infra-red night vision
High sensitivity microphone
PACKAGE CONTENTS
Check the contents of your Baby Cam package against this checklist. If anything is missing or damaged, please do not
use the system, and inform your supplier as soon as possible.
3.5” wireless LCD baby monitor
Wireless camera
Suction cup mounting bracket for monitor
Suction cup mounting bracket for camera
Dual car cigarette lighter adapter unit
2x car chargers
Instruction manual
5
FEATURES
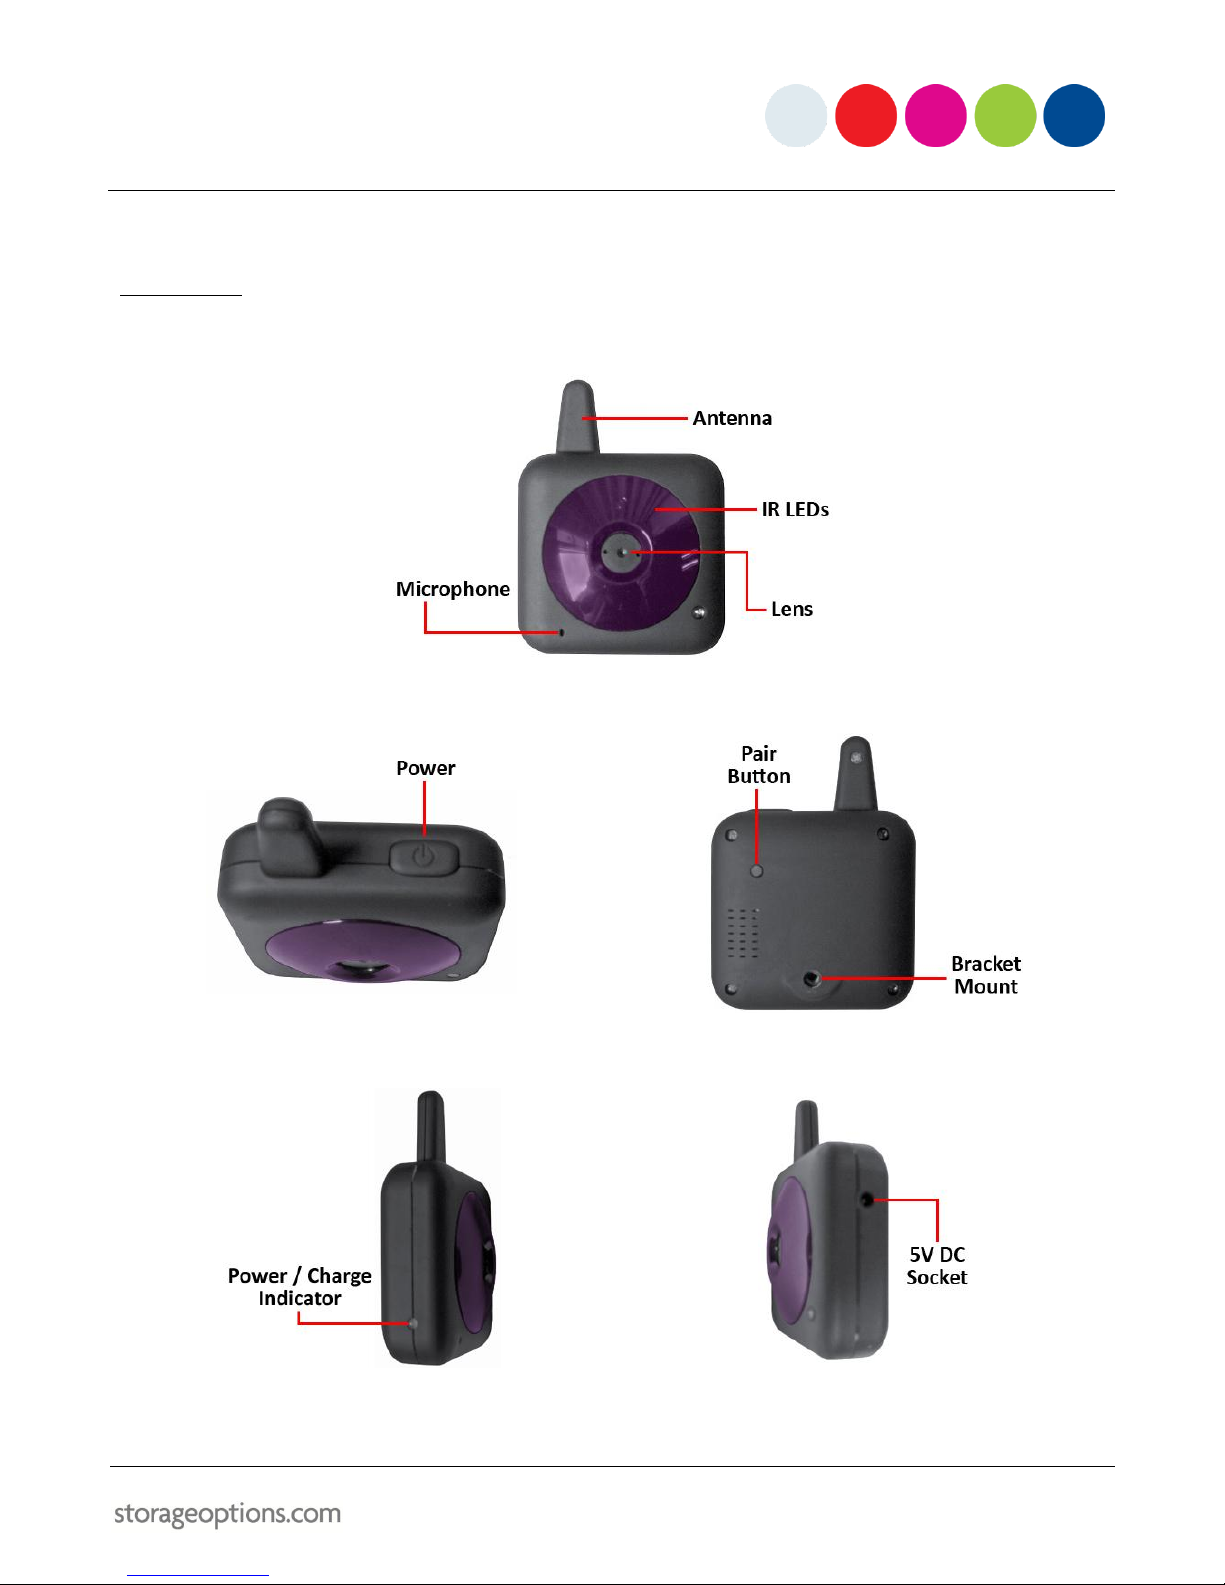
3.1 –CAMERA
The camera has various features you should be familiar with for correct operation.
The POWER button is located on top of the camera, next to the aerial, and the PAIR button is located on the back:
The power socket and charge indicator are on opposite sides of the camera:
6
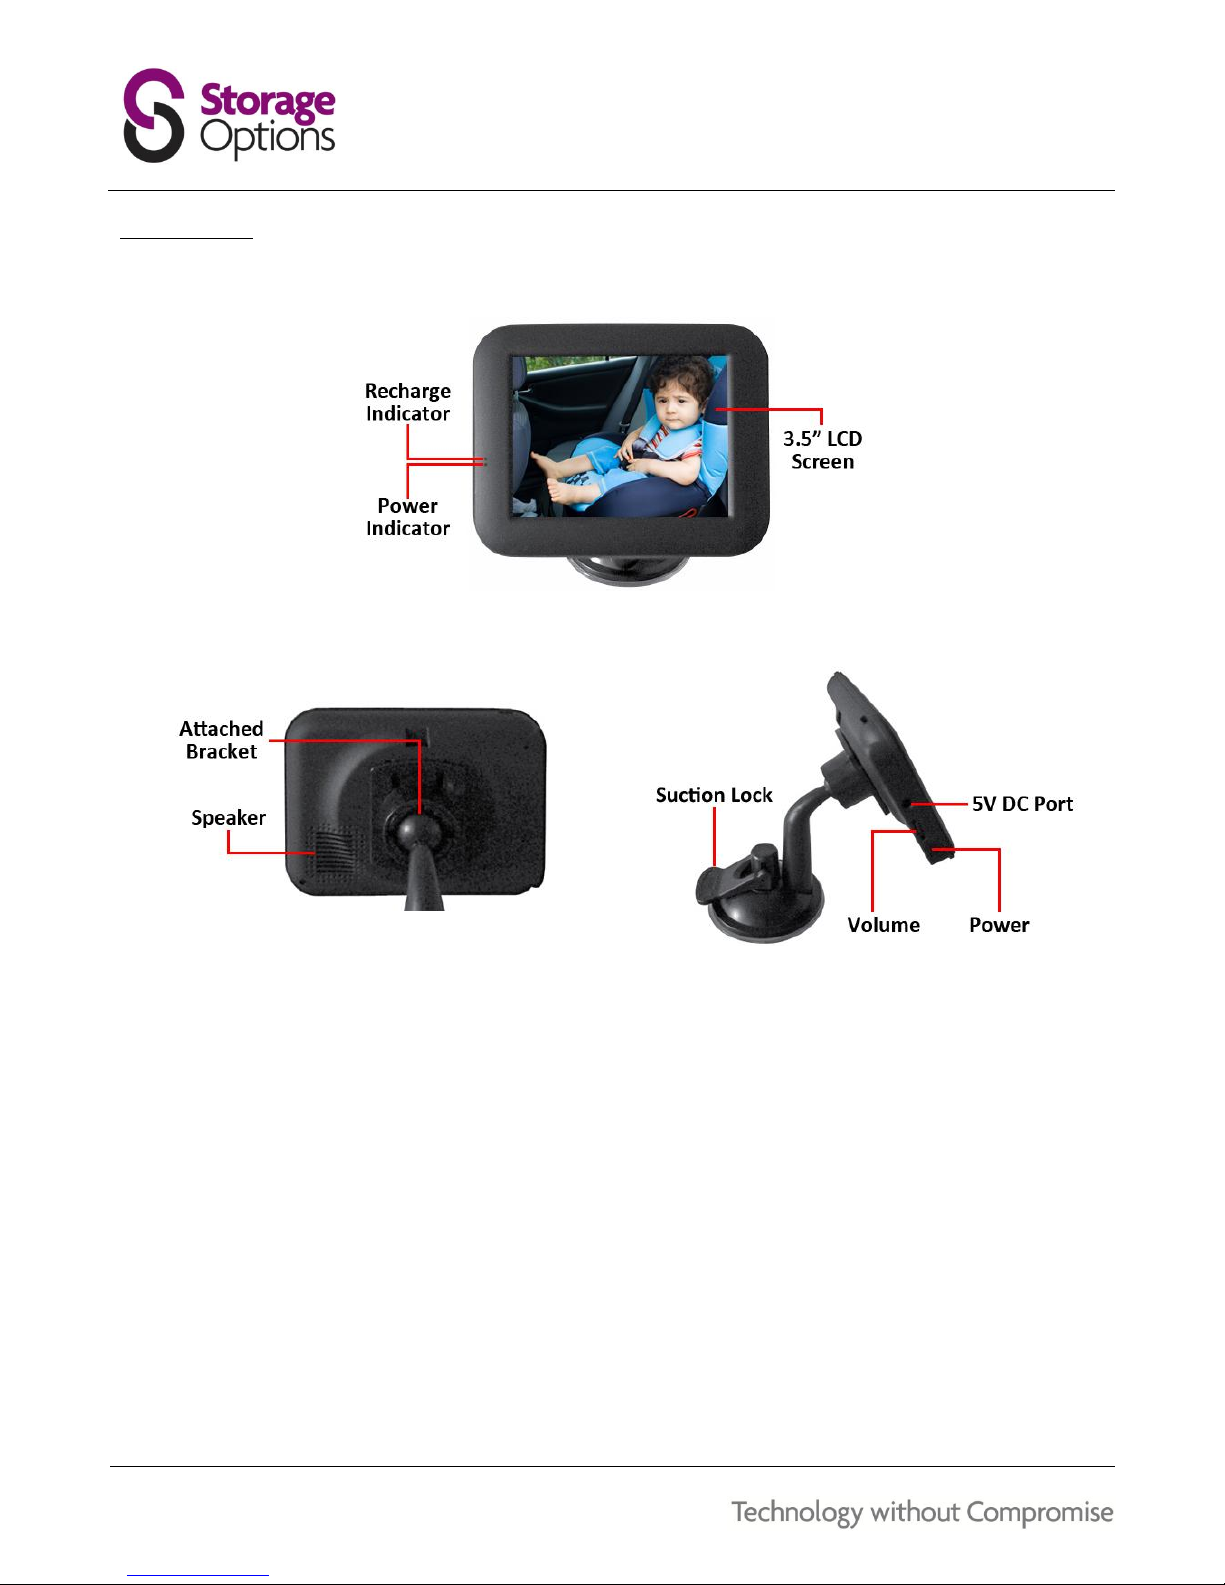
3.2 –MONITOR
The monitor has various features you should be familiar with for correct operation.
It has sockets and controls on the left hand side, as well as a speaker located on the back:
The speaker allows the user to hear audio detected by the camera’s built-in microphone. You can adjust the speaker
volume by turning the dial on the left-hand side of the monitor:
Rotate upwards to increase volume.
Rotate downwards to decrease volume.

7
DEVICE ASSEMBLY
4.1 –CAMERA
To assemble the camera and mount:
1. Locate the fixing hole on the back of the camera. The smaller mounting bracket (black and silver design) is
designed for the camera.
2. Screw the camera onto the bracket, then tighten the rubber seal to it (middle image below).
3. To alter the camera angle, loosen the bolt and position the camera as required, then re-tighten the bolt.
4.2 - MONITOR
To assemble the monitor and mount:
1. Locate the four mount holes on the back of the monitor and align with the four pegs on the bracket.
2. Slide the monitor downwards to lock the pegs in place.
3. To alter the monitor angle, simply move it to the required position.

8
POWERING ON
5.1 –CAMERA
To turn the camera on:
Press and hold the power key for 5 seconds.
The indicator LED will turn green.
To turn the camera off:
Press and hold the power key for 5 seconds.
The indicator LED will switch off.
5.2 –MONITOR
To turn the monitor on:
Press and hold the power key for 3 seconds.
The indicator LED will turn green.
To turn the monitor off:
Press and hold the power key for 3 seconds.
The indicator LED will switch off.
PAIRING THE UNITS
The camera and monitor are paired in the factory, but if for some reason they become unpaired (e.g. prolonged
period of no signal), you may need to re-pair the units.
To pair the camera and monitor:
1. Turn off the monitor.
2. Press and hold the power key on the monitor until the power indicator LED flashes.
3. Press the PAIR button on the camera. The power indicator LED on the monitor will stop flashing.
9
CHARGING BATTERIES
1. Connect one cable from the charger unit to the camera via the DC 5V port.
2. Connect the other cable from the charger unit to the monitor via the DC 5V port.
3. Connect the dual car charger unit to your car’s power socket.
NOTE
A separate kit is available for charging the camera and monitor from a household mains socket. Ask your
retailer, or visit the Storage Options website at www.storageoptions.com for more information.
While recharging, the LED indicator will be red.
When fully recharged, the LED will turn green.
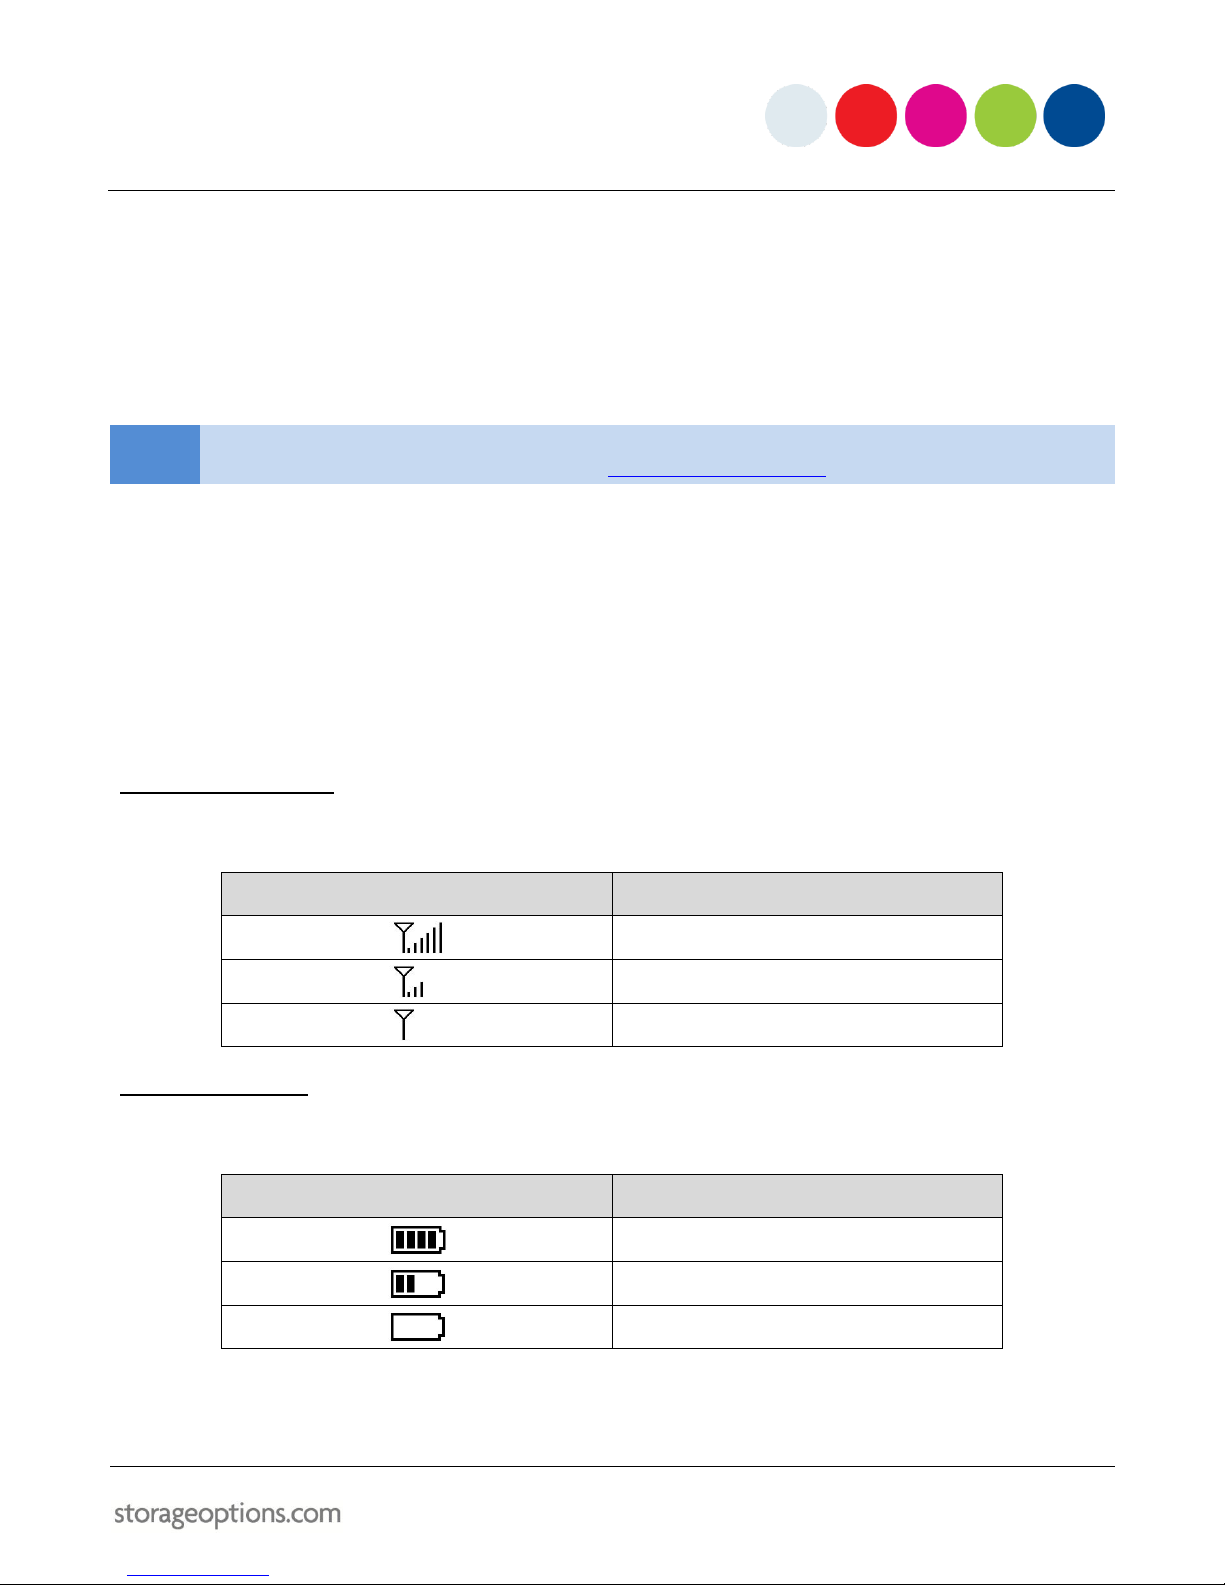
ON-SCREEN INDICATORS
The monitor unit features on-screen indicators for both signal condition and battery life. Refer to the following
descriptions for more information.
8.1 –SIGNAL CONDITION
The signal quality indicator is located at the top left of the display.
INDICATOR
DESCRIPTION
Good signal
Weak signal
No signal
8.2 –BATTERY METER
The battery level indicator is located at the top right of the display.
INDICATOR
DESCRIPTION
Battery is full
Battery is half-full
Battery is empty

10
ATTACHING BRACKETS TO A CAR WINDOW
To secure to a car window:
Place the suction cup on the window, and push the locking lever down
to secure it in place.
To remove from a car window:
Flip the locking lever into the unlocked position to release the grip.
There may still be a vacuum between the bracket and window. If this
event occurs, gently pull the rubber tab until the seal is broken.
APPENDIX –PRODUCT SPECIFICATION
Baby Cam Kit
Transmission Frequency:
2400MHz –2480MHz
Operating Humidity:
20% –80% RH
Transmission Power:
17dBM
Receiving Sensitivity:
-85dBM
Operating Frequency:
2450MHz
Battery Life:
4 hours (approx.)
Unobstructed Effective Range:
100m (approx.)
Power Consumption:
150mA + 15mA
Modulation Mode:
FHSS
Power Supply:
DC 5V
Operating Temperature:
0oC –60oC
Display Type:
3.5” TFT LCD

11
NOTES

12
Other manuals for baby cam
1
Table of contents
Other Storage Options Security Camera manuals


