manuals.online logo
Brands
  1. Home
  2. •
  3. Brands
  4. •
  5. Storkcraft
  6. •
  7. Baby & Toddler Furniture
  8. •
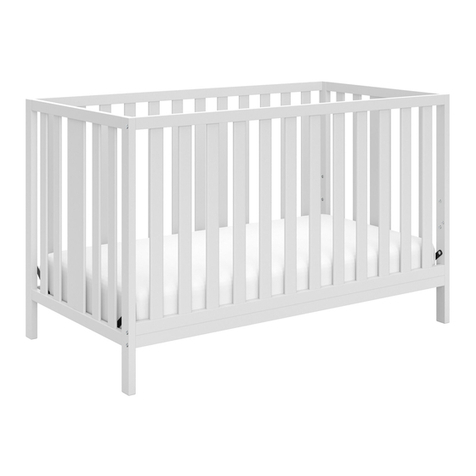
  9. Storkcraft Tuscany 04588-49 Series User manual

Storkcraft Tuscany 04588-49 Series User manual

Ledéfaut desuivrecettemiseengardeet lesinstructionsdemontagepourrait entrainer uneblessuregraveoulamort.
!
Liseztouteslesinstructionsavant demonterlelitdebébé.GARDEZLESINSTRUCTIONSPOURUSAGEULTERIEUR.
!
1Lesbébéspeuvents’étouffeaveclaliterie.Veuilleznejamaisajouterunoreiller,édredon,borduredeprotectionourembourrageen
dessousdubébé.
!
Lematelasposédanscelitdevraitavoiruneépaisseurmaximalede6pouces(15centimetres)etdevraitêtred’unelongueuretd’une
largeurtellesqu’ilyaiauplus3centimetresd’espaceentrelematelasetlescôtésdulitlorsquelematelasestpoussédansuncoindulit.
!
Unenfantpeutsuffoquerdanslesespacesentrelescotesdulitdebébéetlematelassilematelasesttroppetit.
!
Avantd’utiliseroudemonterlelitdebébé,inspectez-lepourvousassurerqu’iln’yapasdepiècesendommagées,d’articulations
deserrées,depiécesmanquantesoudebordstranchants.Serrezfermementlesboulonsetautresattaches.N’UTILISEZPASlelitde
bébésicertainespiècessontmanquantesoubrisées.ContactezStorkCraftpourlespiècesderechangeetdesunstructionssinécessaire
.
!
PourréduirelerisqueduSIDS/MSN,lespédiatresrecommandequelesenfantsenbonnesantedormesurleurdos,àmoinsqu’il soit
recommandedemanièredifférenteparundocteur.
!
N’utilisezpasunmatelasàeauaveccelitdebébé.
!
N’utilisezjamaisdesacsd’expéditionenplastiqueouautrestypesdesacsplastiquespourrecouvrirlematelaspuisqu’ilspeuventétouffer
l’enfant.
!
Sivousretapezlelit, utilisezunfininontoxiqueindiquépourlesproduitspourenfants.
!
N’utilisezpascelitd’enfantamoinsd’êtreenmesurederespecterrigoureusementlesinstructionsapposéesaulitouci-jointes.
!
Suiveztouteslesinstructionspourlitdebébé.
!
RISQUED’ÉTRANGLEMENT:
!
Lescordespeuventétrangler.N’utilisezpasd’objetsaveccordeautourducoud’unenfant.Tellequepourunesucetteoùunvêtementà
capuchonaveccorded’attache.N’attacherriensurlelitavecunecordeoùficellepourdesjouetsoùdécoration.
!
Pouéviterl’étranglementassurez-vousdebienserrertouteslespiècesdulitdebébé.Unenfantpeutcoincerunmembreducorpsou
sesvêtementsavecdespiècesdesserrés.
!
Neplacezpaslelitprèsdefenêtresoùlescordesdepersiennesoudetenturespouvantétranglerl’enfant.
!
RISQUEDECHUTE
!Lorsquevotreenfant estcapabledesetenirdebout,placezlematelasàlapositioninférieureet enlevezlescoussinetsdeprotection,
grosjouetsettoutautreobjetsurlesquelsl’enfantpourraitgrimperpoursortirdulit.
!
N’utilisezpaslelitdebébésil’enfantestcapabled’ensortirsansaideoùs’ilmesureplusde35pouces(89cm).
!
MISEENGARDE
AVERTISSEMENT: TOUTMATELASUTILISÉDANSCELIT
DOITAVOIRAUMOINS27-1/4POUCESPAR51-5/8POUCES
DEGRANDEUR(69X131CM)ETUNMAXIMUMDE6
POUCESD’EPAISSEUR(15CM).
CEPRODUITSECONFORMEAUREGLEMENTS
APPLICABLESDELACOMMISSIONALASECURITE
DESPRODUITSAUCONSOMMATEURS.
3
4
Identifying The Parts/ Identificación las piezas/Identification des pièces
5
1/4” x 3-3/8”
8 PCS
1/4” x 2-1/2”
8 PCS
1/4” x 2”
4 PCS
1/4” x 3/4”
12 PCS
1
2
3
4
Allen Key /Llave
Allen/Clef Allen 1 PC
Barrel nut /
Tureca de barril
/Manchon fileté
16 PCS
T
1/4” x 1-3/4”
3 PCS
5
8
PC
X
Wooden dowel/
Clavija de madera/Manchon en bois
BOLTS /PERNOS/ Boulon
C
Back panel/
Panel trasero
Panneau arrière
carril superior
O
Top rail
Couronne/
Top rail/
carril superior
B
Right panel/
Panel derecho
Panneau droit
Right panel back post/
B2
Poste trasero derecho
Poteau arrière droit
B1
Right panel front post/
Poste delantero derecho
Poteau avant droit
Front panel/
D
Panel delantero
Panneau avant
O
E
Mattress support/
Base del colchón
Base de matelas
A
Left panel/
Panel izquierdo
Panneau Gauche
A1
Left panel front post/
Poste delantero izquierdo
Poteau avant gauche
A2
Left panel back post/
Poste trasero izquierdo
Poteau arrière gauche
Z
P
Stabilizer Bar/
Barre Stabilisatrice
Bar stabilisatrice
Barre de retenu
1
2
Thank you for purchasing Stork Craft product. Be sure to check all packing material carefully for small parts, which may
have come loose inside the carton during shipment. Identify and count all parts and compare with parts list.
Gracias por la compra de productos Stork Craft. Asegúrese de revisar todo el material de embalaje con cuidado para
piezas pequeñas, que pueden haber soltado dentro de la caja durante el transporte. Identificar y contar con todas las
partes y comparar con la lista de piezas.
A
B
A1
5
3
3
A2 B1
B2
5
5
T
5
X
T
T
T
X
X
X
A
B
O
4
4
X
X
T
T
PAGE 6
Insert one Wooden Dowel (X) into
each end of the top rail of Left Panel
(A). Align the Wooden Dowel (X)
with the corresponding holes in Back
Post (A2) secure with Bolts (5) and
Barrel Nuts (T). Tighten by Allen Key
provided. repeat steps for Front post
(A1).
Repeat these steps for Right Panel
(B) and using Post (B2 & B1).
Merci pour votre achat Stork Craft.
Assurez vous de vérifier tous
matériel d'emballage pour les pièces
qui se serait détachée durant
l'envoie. Identifier et conter toute les
pièces et comparer avec la liste des
pièces incluse.
Insérer un manchon en bois (X)
dans chaque extrémité du panneau
gauche (A). Aligner le manchon en
bois (X) avec les trous
correspondant du poteau arrière
(A2) et attachez à l’aide des boulons
(5) et manchon fileté (T). Serrer le
tous avec la clef Allen incluse.
Répéter les mêmes étapes pour le
poteau du devant (A1).
Répéter les mêmes étapes pour le
panneau droit (B) et les poteaux (B2
& B1)
Insert one Wooden Dowel (X) into
each end of the top rail of Back
Panel (C). Align the Wooden Dowel
(X) with the corresponding holes in
Back Post (A2) secure with Bolts (4)
and Barrel Nuts (T). Tighten by Allen
Key provided.
Repeat these steps for Attaching
Right Panel (B) but do not fully
tighten Bolts (4). Install Top Rail (O)
between the Back Post and secure
using Bolts (3). Now tighten all Bolts
using the provided Allen Key.
Insérer un manchon en bois (X)
dans chaque extrémité du panneau
arrière (C). Aligner le manchon en
bois (X) avec les trous
correspondant du poteau arrière
(A2) et attachez à l’aide des boulons
(4) et manchon fileté (T). Serrer le
tous avec la clef Allen incluse.
Répéter les mêmes étapes pour le
panneau avant (B) sans
complètement serrer les boulons.
Installer la couronne (O) entre les
poteaux arrière à l’aide des boulons
(3). Resserrer tous les boulons a
l’aide de la clef Allen incluse.
C
Merci pour votre achat Stork Craft. Assurez vous de vérifier tous matériel d'emballage pour les pièces qui se serait
détachée durant l'envoie. Identifier et conter toute les pièces et comparer avec la liste des pièces incluse.
3
4
B
D
CO3
4
4
A
3
T
T
7
Assemble mattress base in the highest
position for a newborn. When the baby grows,
the mattress support should be lowered to
prevent baby from climbing out. Attach
mattress support (E) to the left panel and right
panel (A&B) with four 1/4” x 3/4” bolts (1)
using the Allen key. Be sure the mattress
support is leveled and centered before
tightening all bolts. Do not fully tighten Bolts
(1) at this time.
Assemblée le sommier du matelas en
position élevé pour le nouveau né. Quand le
bébé grandit le sommier doit être abaissé en
position inférieure pour empêcher le bébé de
grimper hors du lit. Attacher le support de
matelas (E) au panneau droit et gauche (A/B)
avec 4 boulons ¼''x ¾’'(1) à l'aide de la clef
Allen. Assurez-vous que le support du
matelas soit centré et a niveau avant de
serrer les boulons. Ne serrer pas les boulons
(1) complètement a ce moment.
Insert one Wooden Dowel (X) into each end of the
top rail of Back Panel (C). Align the Wooden Dowel
(X) with the corresponding holes in Front Post (A1)
and (B1) by slightly pulling the post apart until the
Wooden Dowels can be inserted into the
corresponding holes of both post. secure with Bolts
(4) and Barrel Nuts (T), but do not fully
tighten Bolts (4). Install Top Rail (O) between the
Front Post and secure using Bolts (3). Now tighten
all Bolts using the provided Allen Key. Note to fully
tighten Bolts (1) in the Mattress Support (E).
Insérer un manchon en bois (X) dans chaque
extrémité du panneau avant (D). Aligner le
manchon en bois (X) avec les trous correspondant
du poteau avant (A1 et B1) en séparent légèrement
les poteaux de manière à insérer les manchons de
bois et attachez à l’aide des boulons (4) et
manchon fileté (T). Ne serrer pas les boulons (4)
complètement a ce moment.
Installer la couronne (O) entre les poteaux avant à
l’aide des boulons (3). Resserrer tous les boulons
inclus les boulons de la base du matelas (E) a
l’aide de la clef Allen incluse.
C
E
A
B
B1 X4
ADVERTENCIA
Step1,Detachthefrontpanel(D)fromtheposts(D1&D2)using
Allenkey. Install Stabilizer rail (P) using Bolts (4) and
Barrel Nuts (T). Tighten by Allen Key provided.
Step2,Movemattresssupport(E) tothelMiddleposition
byadjustingboltswithAllenkey.
Détacherlepanneauavant(D)despoteaux(D1&D2)
aveclaclefAllenincluse. Installer labarrestabilisatrice(P)
aveclesboulons(4)aveclesmanchonsfiletés(T)et serrer
touslesboulonsaveclaclefAllen.Positionnerlabasedu
matelasdanslapositionlaplusbasseal’aidedelaclef
Allen












.
!
WARNING
!
8
Ledéfautdesuivrecettemiseengardeetlesinstructionsdemontagepourraitentraineruneblessuregraveoulamort par
étranglementoucoinçage.
Neplacezpaslelitprésdefenètresoulescordesdetenturesoudepersiennespeuventétranglerl’enfant.
Labarrederetenuedoitêtreenplacelorsquelelitestutiliséenlitd’enfantoulitdejour.
L’enfantdoitavoir15moisaumoinsetpasplusde50lbspourètredanscelitd’enfant.
Lematelasdoitavoirlagrandeurspécifiéepourcelit.
Lematelasutilisédanscelitdoitavoirunedimensionminimumde515/8"x271/4"x4"etunmaximumde6"épais.
N’utilisez pas d’objets avec corde autour du cou d’un enfant. Telle que pour une sucette où un vêtement à capuchon
aveccordeattache.N’attacherriensurlelitavecunecordeoùficellepourdesjouetsoùdécoration.
5
B
A
P
4
4
T
STEP1.Unscrewleftandrightpanels(A&B).Removethemattresssupport(E).Make
surethebackpostsarestillattachedtothebackpanel (C)usingthe1/ 4" x3/4"Bolts(1)
withAllenKeyasshownindiagrambelow.
7
Full Size Bed with Headboard Assembly
CAMA DOBLE CON CABEZA Y PIE DE CAMA
Lit double avec tête de lit
FULL SIZE CONVERSION RAILS ARE NOT INCLUDED. THEY HAVE TO BE PURCHASED SEPARATELY. BED
RAILS MAY DIFFER FROM ILLUSTRATION.
MARCO DE METAL NO ESTÁ INCLUIDO. SE DEBE COMPRAR SEPARADAMENTE.. EL MARCO DE METALPODRÍA
SER DIFERENTE AL QUE MUESTRA ELDIBUJO.
Le cadre de lit n’est pas inclus et doit être acheté séparément. Le cadre peut différer de l’illustration
Al l en.
6
Attacher la barre de retenu (Z) au poteau avant et
barre stabilisatrice avec 3 boulons ¼’’x1-¾‘’ (2) et la
clef Allen incluse comme indiquer sur le diagramme
1
9
SAFETY RAILIS INCLUDED.
SAFETY RAILCOULDALSOBEASSEMBLEDTOTHEOTHERSIDEIFDESIRED.
Barre de retenu incluse, la barre de retenu peut être installé sur le côté droit ou
gauche, comme désiré
1
Détacher le panneau gauche et droit (A & B) et
retirer la base du matelas (E). Laisser les
poteaux attacher au panneau arrière (C) en
utilisant les boulons ¼’’x¾’’ (1) et la clef Allen
incluse comme indiquer sur le diagramme
STORAGEANDCARE/DÉMONTAGEDULITDEBEBE/ALMACENAMIENTOYCUIDADO
DO NOT remove any part that is attached with wood screws,The stationary side rail, mattress base can all be
disassembled for storage. Simply review the assembly instructions for each and reverse the order to disassemble.
Wipe all parts with a dampened clean cloth. DO NOT use abrasives. To convert to a double bed please follow the
instructions in the double bed kit. (MUST BE PURCHASED SEPARATELY)
Les panneaux avant, arrière, droit, gauche et le support de matelas peuvent être détaché et entreposer. Simplement
suivre les instructions de montage au revers. Nettoyer le lit a l'aide d'un chiffon humide, ne jamais utiliser un
détergeant ou produit abrasif.
Los paneles delantero, trasero (C/D), los paneles izquierdo y derecho (A/B) y la base del colchón pueden ser
removidos para su almacenaje.. Para desmantelar, seguir las instrucciones de ensamblaje al revés. Para limpiar, use
un paño húmedo. Nunca utilizar un producto abrasivo.
LIMITEDONEYEARWARRANTY/
YourproductiswarrantedagainstdefectsinworkmanshipormaterialforONEYEARfromthedateoftheoriginalpurchase.Thiswarrantyshall
be limited to repairing or replacing any part of the product which, in the opinion of the company, shall be proved defective in materials or
workmanshipundernormal useandserviceduringtheoneyearwarrantyperiod.Duringtheoneyearwarrantyperiod,repairorreplacement of
parts shall be made at no charge. Dateof purchase of the product must be established by production of your sales slip or other satisfactory
evidence.
HOWTOGETPROMPT,EFFICIENTSERVICE/
Contact our customer servicedepartment. The telephone number andhoursof operationarelistedbelow. Pleasedonot returntheproduct to
thestorewhereit wasoriginallypurchasedastheydonot stockreplacement parts. Whencallingour customer servicedepartment, makesure
tomentionthemodel number anddateof manufacture. Bothcanbefoundontheendpanel.It iscompanypolicytorespondtoeachrequest
asquicklyaspossible.
GARANTIELIMITEED'UNAN/
Votre produit a une garantiecontre tout vice de matériau ou de fabrication pendant UNANa compter de la date d’achat. Cette garantie est
limitée a la réparation ou du remplacement de toute pièce qui, a l’avis de la société, s’avère défectueuse dans les conditions normales
d’utilisation, en raison d’un vice de matériau ou de fabrication pendant la période de garantie d’un an. La société réparera ou remplacera
gratuitement les pièces défectueuses. La date d’achat du produit doit être établie en présentant votre re uç de caisse oú autre preuve
satisfaisante.
POURUNSERVICERAPIDEETEFFICACE/
UNAÑODEGARANTÍALIMITADA
Este producto está garantizado contra defecto en la mano de obra o material usado por UNAÑO desde la fecha original de compra. Esta
garantíaselimitaalareparaciónoel reemplazodecualquier partedel productoloscuales, al juiciodelacompañía, resultendefectuosos en
los materiales o mano de obra bajo uso normal durante el periodo del año de garantía. Durante el año de garantía, las reparaciones y las
piezas de reemplazo no tendráncosto alguno. La fecha de compra del producto será establecida por su recibo de compra ocualquier otra
pruebaoevidenciasatisfactoria.
PARAUNSERVICIOEFICIENTE
Veuillezvous communiquer avecnotreserviceauxclients. Lenumérodetéléphoneet les heures d'ouvertureson indique ci-dessous. Ne pas
retourner ce produit au marchant puissequ'il n'entrepose aucune pièces de rechange. Veuillezmentionnez lenuméro de modèle, la date de
fabricationetlepaysd'originequisetrouvesurlatêtedelit.Lefabricantapourpolitiquederépondreleplusrapidementàchaquedemande.
Comuníqueseconnuestroservicioal cliente. El númerode teléfonoyhorariodeatención estáindicadoacontinuación. Porfavor nodevolver
el artículo alatiendadondefuecomparadooriginalmente, ellosnotienen piezasdereemplazoenstock. Cuandollameanuestro servicioal
clientepor favor proporcionar el número de modelo, lafechayel paísde fabricación. Lainformación seencuentra en un adhesivoenlaparte
interiordelacuna. Lamismainformaciónlaencontraraenlacajaenlaquerecibióelproducto.
Mode# /Modeøle No/Numéro de modèlo
(
)
COLOR
Pack Date/Date d’emballage/Fecha de embalaje:_____________________
Date of Purchase/Date d’achat/Fecha de compra: _____________
(you should also keep your receipt)
(Por favor guardar sus recibos)
CustomerServiceDirectTelephoneline:1-877-274-0277 Fax(604)274-9727
Hoursofoperation:7:00AMto3:00PM,PacificStandardTime
e-mail:parts@storkcraft.com
Servicealaclientèle-Téléphone:1-877-274-0277 Telecopieur(604)274-9727
Heuresd'ouverture:7ha15h00(HeurenormaleduPacifique)
e-Mail:parts@storkcraft.com
Serviciodelíneatelefónicadirectaalcliente:1-877-274-0277FAX(604)274-9727
Horariodeatención:7:00ama3:00pm,horadelpacifico
e-Mail:parts@storkcraft.com
(Veuillez garder votre reçu)
PAGE 10
DISTRIBUTED BY/ DISTRIBUE PAR:
Stork Craft Manufacturing Inc.
6W 1K6
Twitter@Storkcraft

Other Storkcraft Baby & Toddler Furniture manuals

Storkcraft Monterey 04542-00 GH Series User manual

Storkcraft

Storkcraft Monterey 04542-00 GH Series User manual

Storkcraft 04510-10 FT Series User manual

Storkcraft

Storkcraft 04510-10 FT Series User manual

Storkcraft 04588- 49 FT Series User manual

Storkcraft

Storkcraft 04588- 49 FT Series User manual

Storkcraft Hampton Classic 04520-31 Series User manual

Storkcraft

Storkcraft Hampton Classic 04520-31 Series User manual

Storkcraft 01740-021-IW User manual

Storkcraft

Storkcraft 01740-021-IW User manual

Storkcraft 04522-211-MB User manual

Storkcraft

Storkcraft 04522-211-MB User manual

Storkcraft 04586- 47-TS Series User manual

Storkcraft

Storkcraft 04586- 47-TS Series User manual

Storkcraft Hillcrest 04520-03-FT Series User manual

Storkcraft

Storkcraft Hillcrest 04520-03-FT Series User manual

Storkcraft 00524-22-FT User manual

Storkcraft

Storkcraft 00524-22-FT User manual

Storkcraft Steveston 04585-30 -FT Series User manual

Storkcraft

Storkcraft Steveston 04585-30 -FT Series User manual

Storkcraft 04622-1 Series User manual

Storkcraft

Storkcraft 04622-1 Series User manual

Storkcraft 04610-70-WW Series User manual

Storkcraft

Storkcraft 04610-70-WW Series User manual

Storkcraft Alpine User manual

Storkcraft

Storkcraft Alpine User manual

Storkcraft 04521-35-MB Series User manual

Storkcraft

Storkcraft 04521-35-MB Series User manual

Storkcraft 03662-10 AC User manual

Storkcraft

Storkcraft 03662-10 AC User manual

Storkcraft Hillcrest 04520-03-FT Series User manual

Storkcraft

Storkcraft Hillcrest 04520-03-FT Series User manual

Storkcraft Carousel 04526-35 -MB Series User manual

Storkcraft

Storkcraft Carousel 04526-35 -MB Series User manual

Storkcraft 04510-131-HY User manual

Storkcraft

Storkcraft 04510-131-HY User manual

Storkcraft Pacific 04522-20 GH Series User manual

Storkcraft

Storkcraft Pacific 04522-20 GH Series User manual

Storkcraft Portofino 04586-47-KM Series User manual

Storkcraft

Storkcraft Portofino 04586-47-KM Series User manual

Storkcraft Davenport 04520-71 -MB Series User manual

Storkcraft

Storkcraft Davenport 04520-71 -MB Series User manual

Storkcraft SLUMBER 05361-0-KM Series User manual

Storkcraft

Storkcraft SLUMBER 05361-0-KM Series User manual

Storkcraft 04510-10 FT Series User manual

Storkcraft

Storkcraft 04510-10 FT Series User manual

Storkcraft 20405-012 User manual

Storkcraft

Storkcraft 20405-012 User manual

Popular Baby & Toddler Furniture manuals by other brands

timkid CLEXO Assembly instructions

timkid

timkid CLEXO Assembly instructions

RH Baby&child POPPY Assembly instructions

RH Baby&child

RH Baby&child POPPY Assembly instructions

Perma 754 instruction manual

Perma

Perma 754 instruction manual

ingenuity Cradling Bouncer user manual

ingenuity

ingenuity Cradling Bouncer user manual

KIDSMILL UP Newborn Rocker user manual

KIDSMILL

KIDSMILL UP Newborn Rocker user manual

SAUTHON easy SERENA UT101A Technical manual to keep

SAUTHON easy

SAUTHON easy SERENA UT101A Technical manual to keep

Fisher-Price V4557 instructions

Fisher-Price

Fisher-Price V4557 instructions

Charlie Crane KUKO quick start guide

Charlie Crane

Charlie Crane KUKO quick start guide

Babymore Sleigh Changer instructions

Babymore

Babymore Sleigh Changer instructions

Kolcraft Cuddle 'N Care instructions

Kolcraft

Kolcraft Cuddle 'N Care instructions

Britax ADVOCATE Canadian User Guide

Britax

Britax ADVOCATE Canadian User Guide

Delta Children KID SIZE 55100 instruction manual

Delta Children

Delta Children KID SIZE 55100 instruction manual

Evenflo infant/breathable carrier instructions

Evenflo

Evenflo infant/breathable carrier instructions

SAUTHON passion ASTRAL AN101A Technical manual to keep

SAUTHON passion

SAUTHON passion ASTRAL AN101A Technical manual to keep

Brevi Gaia Instructions for use

Brevi

Brevi Gaia Instructions for use

KITE Nebula Instruction leaflet

KITE

KITE Nebula Instruction leaflet

KidKraft Avalon 16650 Assembly instructions

KidKraft

KidKraft Avalon 16650 Assembly instructions

DOM FAMILY Lotus 388 Manual instructions

DOM FAMILY

DOM FAMILY Lotus 388 Manual instructions

manuals.online logo
manuals.online logoBrands
  • About & Mission
  • Contact us
  • Privacy Policy
  • Terms and Conditions

Copyright 2025 Manuals.Online. All Rights Reserved.