Suaoki ICS7+ User manual

ICS7 Car Battery Charger
User Manual
+


CONTENTS
English·························1-12
Deutsch······················13-25
Français······················26-38
Español······················52-64
Italiano························39-51
日本語························65-77

Thank you For choosing Suaoki
About ICS7
The ICS7represents the most advanced technology and charging
efficiency in the market, making each charge a simple press. The ICS7is
designed for charging all types of 12V lead-acid and 12V lithium-ion
batteries, including Wet, Gel, MF, AGM, and Lithium-ion batteries. It is
suitable for charging battery capacities from 14 to 140 Ah and maintaining all
battery sizes. Before using the charger please carefully read the battery
manufacturer’s specific precautions and recommended rates of charge for
the battery. Make sure to determine the voltage and type of your vehicle’s
battery by referring to your owner’s manual prior to charging
Charging Modes
The ICS7has multiple modes: all 7 together. Some charging modes must
be selected manually. It is important to understand the differences and
purpose of each charging mode before use. Do not operate the charger until
you have confirmed the appropriate charging mode for your battery. Check
the description below to find out:
EN-1
Battery Type & Mode Explanation
In Standby mode, the charger is not
charging or providing any power to the
battery. Energy save is activated during
this mode,drawing microscopic power
from the electrical outlet.
No Power
Pon

For charging 12-volt batteries in cold tempera-
tures (winter mode) below 50°F (10°C) and AGM
& EFB batteries. Press BATTERY TYPE SELEC-
TION button “ ” after plug in and toggle until
AGM icons displays on LCD, Press Mode button
“ ” to toggle until “ ” appears on LCD.
EN-2
12V
SLA 12V
FAST
AGM
12V FAST
SLA 12V
SLOW
For charging 12-volt Wet Cell, Gel Cell, and
Maintenance-Free batteries. Press BATTERY
TYPE SELECTION button “ ” after plug in and
toggle until SLA icon displays on LCD, Press
Mode button “ ” to toggle until “ ” appears
on LCD.
BATTERY
TYPE
SELECTION
MODE
14.4V | 7.0A | 28-140Ah
For charging 12-volt Wet Cell, Gel Cell, and
Maintenance-Free batteries. Press BATTERY
TYPE SELECTION button “ ” after plug in and
toggle until SLA icon displays on LCD, Press
Mode button “ ” to toggle until “ ”appears
on LCD.
BATTERY
TYPE
SELECTION
MODE
14.4V | 3.5A | 14-70Ah Batteries
BATTERY
TYPE
SELECTION
MODE
14.7V | 7.0A | 28-140Ah

For charging 12-volt batteries in cold tempera-
tures (winter mode) below 50°F (10°C) and AGM
& EFB batteries. Press BATTERY TYPE SELEC-
TION button “ ” after plug in and toggle until
AGM icons displays on LCD, Press Mode button
“ ” to toggle until “ ”appears
EN-3
12V LITHIUM
12V FAST
AGM
12V SLOW
BATTERY
TYPE
SELECTION
MODE
14.7V | 3.5A | 14-70Ah
For charging 12-volt lithium ion phosphate
batteries. (LiFePO4)
14.4V | 7.0A | 28-140Ah
An advanced battery conditioning mode for
repairing and storing, old, idle, damaged,strati-
fied or sulfated batteries. Automatically starts and
initialize once it is determined necessary.
20V | 0.3A Any Capacity
Con 12V

Operation Guidance
Step 1
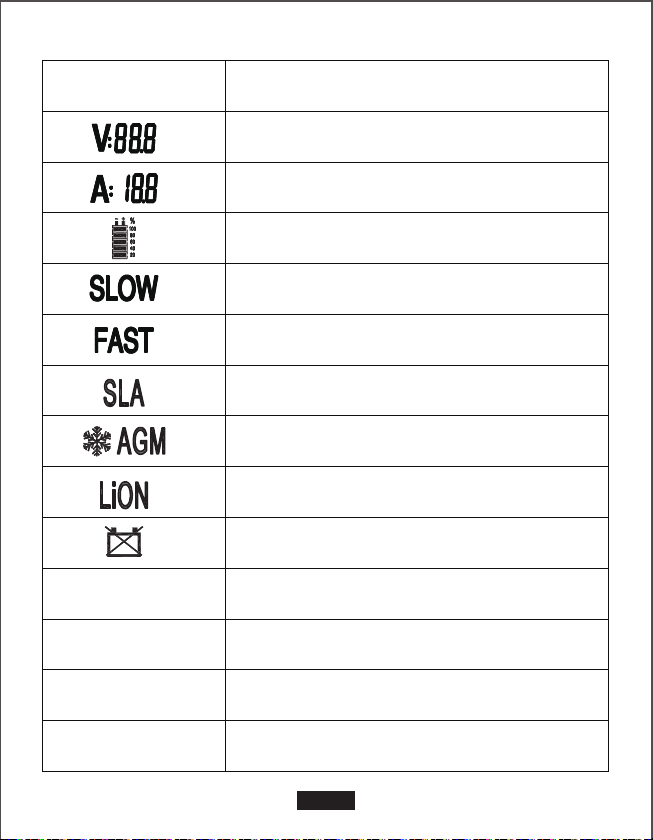
First, plug in and LCD will light up and display "Pon".
Step 2
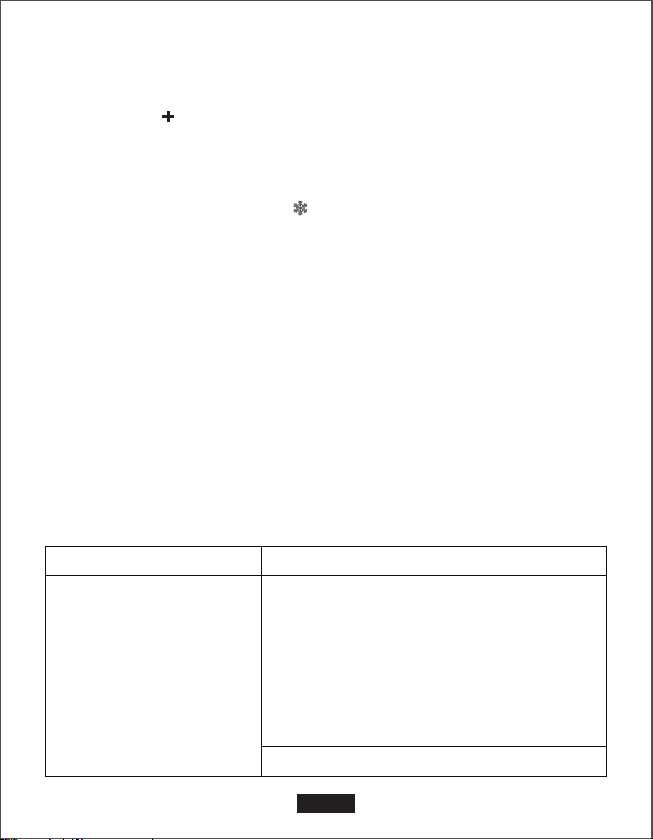
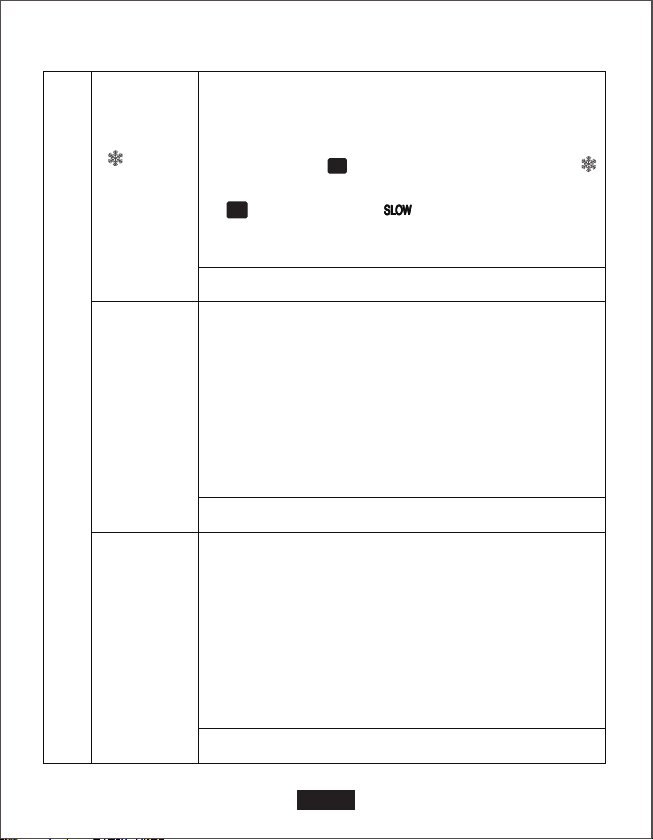
Press button “ ” until the correct battery type appears on LCD, and this
could be shown as SLA, AGM or LiON icon. Winter program and icon “ ”
will appear when AGM is selected.
Step 3
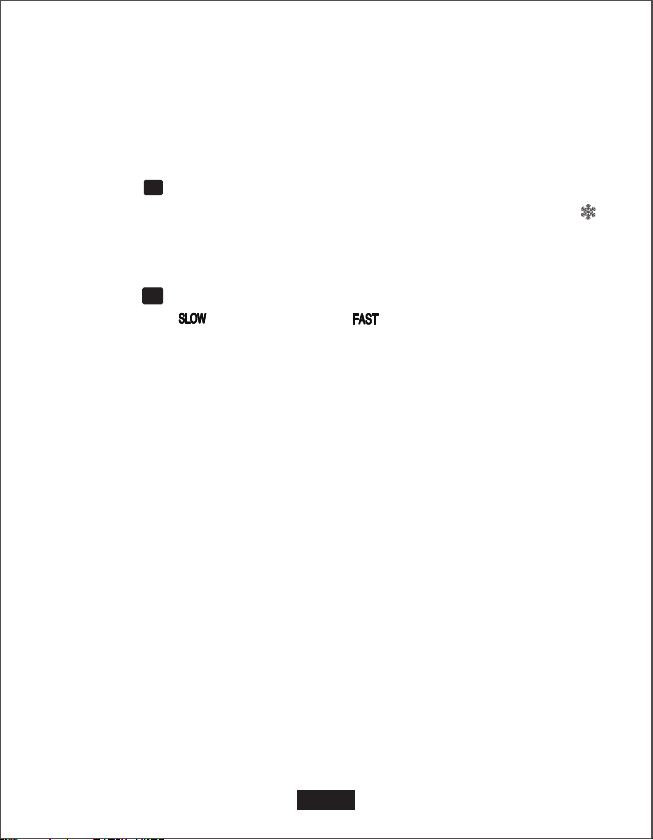
Press button “ ”,choose the correct charging rate to charge your battery
and this could be “ ” 3.5A Slow and “ ” 7A Fast respectively. Please
note this device has a special memory function after you unplug from AC
source, it will retain the battery type choice and selected charging speed.
Step 4
Attach the RED (+) and BLACK (-) clamps to the correct polarity of your
vehicle battery.
(a)If the clamps are attached to the wrong terminals of the battery, the LCD
will display " Err " and stop operation.
(b)If the clamps are attached to the battery correctly, the voltage of car
battery would be displayed on screen temporary and then ' Con ' would be
displayed on screen. this will indicate the charger is now entering self
conditioning mode to repair sulfated target battery automatically.
Step 5
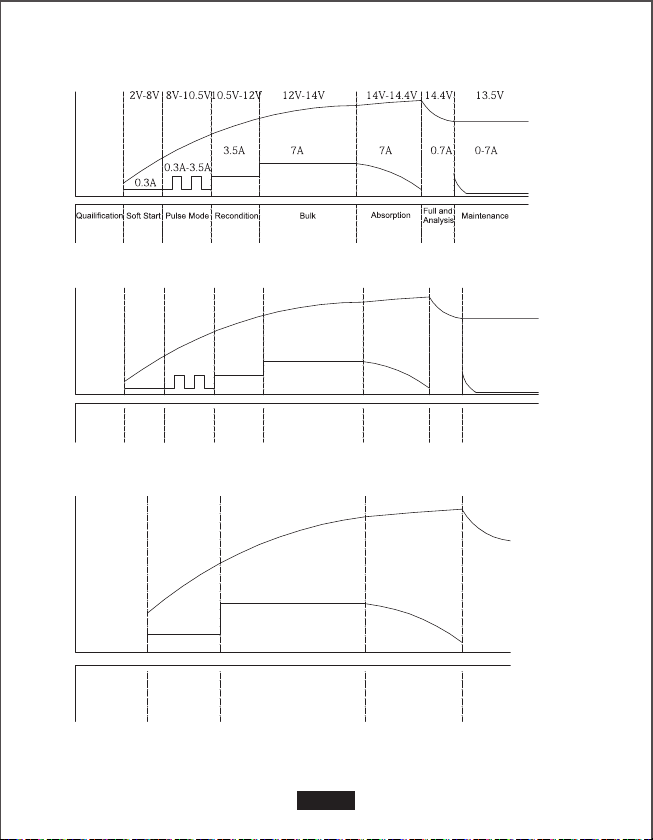
This charger will now go through the 9 pre-programmed charging steps. The
time it takes to fully charge your car battery depends on the battery size.
I) If battery is 100~110Ah, average charging time = 20 hours.
II) If battery is 210Ah, it might takes up to 40 hours. Once the charging cycle
is completed and your car battery is confirmed as a well-functioning one,
'FUL ' icon will show on the LCD screen and the charger will continue to
EN-4
BATTERY
TYPE
SELECTION
MODE

trickle charge your car battery continuously as needed.
Please Note: This device can now be left connected to the battery at all
times to provide maintenance charging.
ATTENTION
A)If outside temperature is below 10℃, the ICS7has a winter mode feature
to allow special charging program. Press button “ ” until you see “ ”
icon appears. Please note, “ ” share the same program as AGM. Even if
your battery is SLA, this program applies. This program DOES NOT apply to
LiON.
B)At any time during charging, if your car battery has been detected with
abnormal feedback, the charger will determine the car battery as defective
and LCD displays “ ”icon.
C)This charger is designed to release power if and when a correct polarity is
detected. At any time, there will be no sparks or power at the clamps, unless
a battery is present.
D)This charger is designed to charge all Sealed Lead Acid (SLA) (Wet, MF,
Flooded, Gel), Absorption Glass Mat (AGM), and LiFePO4, Lithium
(LiON)batteries.
LCD Display
EN-5
BATTERY
TYPE
SELECTION

EN-6
Display Item Description
FUL
Err
Con
Pon
Charging voltage
Charging current
Battery and charging status
3.5A Slow charging rate
7A Fast charging rate
all Sealed Lead Acid (SLA) (Wet, MF,
Flooded, Gel)
Snow mode, and AGM
LiFePO4
Defective battery
Fully charged
Wrong polarity +/-
Automatic self repair/desulfation
Power on/Standby

EN-7
Charging Programs
< <
9 STEPS (12V/7A SLA)
2V-8V 8V-10.5V 12V-14V 14.4V
1.8A
0.3A
10.5V-12V 14V-14.4V 13.5V
0.3A-1.8A
3.5A <3.5A
<0.35A
0-3.5A
Quailification Soft Start Pulse Mode Recondition Bulk Absorption Full and
Analysis Maintenance
Voltage
Current
9 STEPS (12V/3.5A SLA)
Voltage
2V-8V
0.5A
7A <7A <0.7A
8V-14V 14V-14.4V 14.4V
Quailification Recondition Bulk Absorption Full
Current
5 STEPS (12V/7A LiON)
Current
Voltage

EN-8
2V-8V
0.3A
3.5A <3.5A <0.35A
8V-14V 14V-14.4V 14.4V
Quailification Recondition Bulk Absorption Full
5 STEPS (12V/3.5A LiON)
2V-8V 8V-10.5V 12V-14V 14.7V
3.5A
0.3A
10.5V-12V 14V-14.7V 13.5V
0.3A-3.5A
7A <7A <0.7A 0-7A
Quailification Soft Start Pulse Mode Recondition Bulk Absorption Full and
Analysis Maintenance
9 STEPS (12V/7A AGM)
2V-8V 8V-10.5V 12V-14V 14.7V
1.8A
0.3A
10.5V-12V 14V-14.7V 13.5V
0.3A-1.8A
3.5A<3.5A 0.35A 0-3.5A
Quailification Soft Start Pulse Mode Recondition Bulk Absorption Full and
Analysis Maintenance
9 STEPS (12V/3.5A AGM)
Voltage
Current
Voltage
Current
Voltage
Current

EN-9
Step 1. Qualification
Ensure that the battery is in good condition prior to charge. Charger will not
be started if battery is less than 7.5V(12V system). If charger detect the
battery is slightly fatigue with minor sulphated condition, it will rejuvenate and
recover the battery back to its peak performance.
Step 2. Soft Start
Soft Start is used when the charger has detected a battery at a very low
initial state of charge. Voltage and current are delivered at specified rate to
help the battery to recover prior to entering Pulse mode.
Step 3. Pulse Mode
Detects sulphated batteries. Pulsing current and voltage removes sulphate
from the lead plates of the battery restoring the battery capacity.
Step 4. Recondition
Recondition follows when the pulse mode is completed, it aims to re-active
the element of battery for battery charging condition.
Step 5. Bulk
The normal charge is commenced to deliver the constant current for
charging up the battery until 80% full.
Step 6. Absorption
The charge program has switched over to constant voltage; the charge
current has to be reduced according to the raised of battery level, until the
battery is full.
Step 7. Full
The charge will stop until the battery is 100% charged.
Step 8. Analysis
It checks the battery voltage after charged, to make sure the voltage can be

EN-10
retained. Otherwise, the battery is classified as dead battery.
Step 9. Maintenance
(Fully Charged) - Maintaining the battery voltage at maximum level by
providing a constant voltage charge. The battery can be permanently
maintained at a proper work level and to be kept ready to go.
CHARGING TIMES
Battery Size (Ah)
40
60
80
100
120
140
15
22
30
37
45
52
7
11
15
19
22
26
Approx. Charging Time
12V/3.5A 12V/7A
The estimated time to charge a battery is shown above.
The size of the battery (Ah) and its depth of discharge (DOD) greatly affect
its time to a fully charged battery and is for reference purposes only. Actual
data may differ due to battery conditions. The time to charge a normal
discharged battery is based on a 50% DOD.

EN-11
Caution
-Please attach the RED (+) and BLACK (-) clamps to the correct polarity of
your vehicle battery.
-The LCD will display “Err” and stop operation if the clamps are connected in
reverse.
-Please note this device has a special memory function. After you unplug
from AC source, it will retain your pervious battery type choice and selected
charging speed.
-Please note, SNOW MODE shares the same program as AGM. Even if you
battery is SLA, this program applies. However, this DOES NOT apply to
LION battery.
Using 12V Lithium
12V Lithium charge mode is designed for 12V LifePO4 battery only .Please
consult the manufacturer of your car battery before charging and ask for
recommended charging rates and voltages. Lithium-ion batteries maybe
unstable and unsuitable for charging.
Con Self Conditioning Mode
This Mode is for 12V lead-acid batteries only. This mode uses a high
charging voltage and may cause some water loss in wet (flooded) cell
batteries. Some batteries and electronics may be sensitive to high charging
voltages. To minimize risks, please disconnect the battery before using this
mode.
Technical Specification
1.Input Voltage:100-240V,50-60Hz
2.Working Voltage:85-264V, 50-60Hz
3.Output Voltage: 12V
4.Output Current: 3.5A/7A(103W Max)

EN-12
5.Suitable Battery Type: All SLA batteries(Wet,MF,GEL Flooded and
VRLA),AGM(EFB),LiON(12V LiFePO4)
6.Material:ABS+PC housing
7.Working temperature:-10°C to 45°C (14°F~113°F)
8.Housing Protection:IP65
Package Content
●ICS7Car Battery Charger
●1*Battery Clamp
●1*Eyelet Terminal Connector
●1*Carrying Bag
●1*User Manual
Warranty
Our company provides customers with warranty of 12 months from the date
of purchase.
Contact us
For any inquiries or comments concerning our products, please send an
possible.

Vielen Dank, dass Sie sich für Suaoki entschieden haben.
Über ICS7
Der ICS7stellt die fortschrittlichste Technologie und Ladeeffizienz auf dem
Markt dar und stellt jede Ladung mit einem einfachen Druck fertig. Der
ICS7ist für das Laden aller Arten von 12V-Blei-Säure- und 12V-Lithi-
um-Ionen-Akkus ausgelegt, einschließlich Nass-, Gel-, MF-, AGM- und
Lithium-Ionen-Akkus. Es ist zum Laden von Akkukapazitäten von 14 bis 140
Ah und zum Erhalt aller Akkugrößen geeignet.
Bevor Sie das Ladegerät verwenden, lesen Sie bitte sorgfältig die spezifisch-
en Vorsichtsmaßnahmen des Akkuherstellers und die Empfehlungen für die
Akkus. Stellen Sie sicher, dass Sie vor dem Laden die Spannung und den
Typ Ihres Fahrzeugsakkus anhand der Bedienungsanleitung ermitteln
Lademodi
Der ICS7hat mehrere Modi: alle 7 zusammen. Einige Lademodi müssen
manuell ausgewählt werden. Es ist wichtig, die Unterschiede und den Zweck
jedes Lademodus vor der Verwendung zu verstehen. Betreiben Sie das
Ladegerät erst, wenn Sie den für Ihre Akkus geeigneten Ladezustand
bestätigt haben. Überprüfen Sie die Beschreibung unten, um herauszufind-
en:
DE-13
Akkutyp und Modus Erläuterung
Im Standby-Modus lädt das Ladegerät
die Akkus nicht auf. In diesem Modus
wird die Energiesparfunktion aktiviert,
wodurch nur wenige Energie aus der
Steckdose entnommen wird.
Kein Strom
Pon

Zum Aufladen von 12-Volt-Akkun bei kalten
Temperaturen (Winterbetrieb) unter 50 °F (10 °C)
bei AGM- und EFB-Akkus. Drücken Sie die
AUSWAHLTASTE FÜR DIE AKKUTYPEN " "
nach dem Einstecken und schalten Sie das Gerät
ein, bis das AGM-Symbol auf dem LCD
erscheint. Drücken Sie die Modustaste " ", um
zu wechseln, bis " " auf dem LCD erscheint.
DE-14
12V
SLA
12V
SCHNELL
AGM
12V
SCHNELL
SLA 12V
LANGSAM
Zum Aufladen von 12-Volt-Nasszellen, Gelzel-
len und wartungsfreien Akkus. Drücken Sie die
AUSWAHLTASTE FÜR DIE AKKUTYPEN " "
nach dem Einstecken und schalten Sie das
Gerät ein, bis das SLA-Symbol auf dem LCD
erscheint. Drücken Sie die Modustaste " ",
um zu wechseln, bis " " auf dem LCD
erscheint.
BATTERY
TYPE
SELECTION
MODE
14,4V | 7,0A | 28-140Ah
For charging 12-volt Wet Cell, Gel Cell, and
Maintenance-Free batteries. Drücken Sie die
AUSWAHLTASTE FÜR DIE AKKUTYPEN " "
nach dem Einstecken und schalten Sie das
Gerät ein, bis das SLA-Symbol auf dem LCD
erscheint. Drücken Sie die Modustaste " ", um
zu wechseln, bis " " auf dem LCD erscheint.
BATTERY
TYPE
SELECTION
MODE
14,4V |3,5A |14-70Ah Akkus
BATTERY
TYPE
SELECTION
MODE
14,7V | 7,0A | 28-140Ah

Zum Aufladen von 12-Volt-Akkun bei kalten
Temperaturen (Winterbetrieb) unter 50 ° F (10 °
C) bei AGM- und EFB-Akkus. Drücken Sie die
AUSWAHLTASTE FÜR DIE AKKUTYPEN " "
nach dem Einstecken und schalten Sie das
Gerät ein, bis das AGM-Symbol auf dem LCD
erscheint. Drücken Sie die Modustaste " ", um
zu wechseln, bis " " auf dem LCD erscheint.
DE-15
12V LITHIUM
12V
SCHNELL
AGM
12V
LANGSAM
BATTERY
TYPE
SELECTION
MODE
14,7V | 3,5A | 14-70Ah
Zum Aufladen von 12-Volt-Lithium-Ionen-Phos-
phat-Akkus. (LiFeP04)
14,4V | 7,0A | 28-140Ah
Ein fortschrittlicher Akku-Konditionierungsmodus
für die Reparatur und Lagerung von alten, leeren,
beschädigten, geschichteten oder sulfatierten
Akkus. Es wird automatisch gestartet und
initialisiert, sobald es notwendig ist.
20V | 0,3A Beliebige Kapazität
Con 12V

Bedienungshinweise
Schritt 1
Zuerst stecken Sie es ein und das LCD wird aufleuchten und "Pon" anzeigen.
Schritt 2
Drücken Sie die Taste " ", bis der richtige Akkutyp auf dem LCD angezeigt
wird. Dies könnte als SLA-, AGM- oder LiON-Symbol angezeigt werden. Das
Winterbetriebprogramm und das Symbol " " erscheinen erst, wenn AGM
ausgewählt ist.
Schritt 3
Drücken Sie die Taste " " und wählen Sie die richtige Ladegeschwind-
igkeit, um Ihre Akkus zu laden, und dies könnte " " bzw. 3,5 A und " "
bzw. 7A schnell sein.
Bitte beachten Sie, dass dieses Gerät über eine spezielle Speicherfunktion
verfügt, nachdem Sie das Gerät von der Wechselstromquelle getrennt
haben. Es behält die Wahl des Akkutyps und die gewählte Ladegeschwind-
igkeit bei.
Schritt 4
Befestigen Sie die ROTEN (+) und SCHWARZEN (-) Klemmen mit der
richtigen Polarität Ihrer Fahrzeugsakkus.
(a) Wenn die Klemmen falsch angebracht sind, zeigt das LCD "Err" an und
der Betrieb wird gestoppt.
(b) Wenn die Klemmen korrekt an die Akkus angebracht sind, wird die
Spannung der Fahrzeugsakkus vorübergehend auf dem Bildschirm
angezeigt und dann wird "Con" auf dem Bildschirm angezeigt. Dies zeigt an,
dass das Ladegerät jetzt in den Selbstkonditionierungsmodus eintritt, um
sulfatierte Zielakkus automatisch zu reparieren.
Schritt 5
Dieses Ladegerät wird nun durch die 9 vorprogrammierten Ladeschritte
DE-16
BATTERY
TYPE
SELECTION
MODE

gehen. Die Zeit, die zum vollständigen Aufladen der Ihrer Fahrzeugsakkus
benötigt wird, hängt von der Akkukapazität ab.
I) Wenn die Akku 100-110Ah ist, beträgt die durchschnittliche Ladezeit 20
Stunden.
II) Wenn die Akku 210Ah ist, kann es bis zu 40 Stunden dauern.
Sobald der Ladezyklus abgeschlossen ist und Ihre Fahrzeugsakkus als gut
funktionierend bestätigt sind, erscheint das "FUL" -Symbol auf dem
LCD-Bildschirm und das Ladegerät lädt fortlaufend die Fahrzeugsakkus
fortlaufend wie benötigt.
Bitte beachten Sie: Dieses Gerät kann jetzt immer an die Akkus
angeschlossen bleiben, um eine Wartungsladung zu ermöglichen.
BEACHTUNG
A) Wenn die Außentemperatur unter 10 °C liegt, verfügt der ICS7über eine
Wintermodusfunktion, die ein spezielles Ladeprogramm ermöglicht. Drücken
Sie die Taste " ", bis das Symbol " " erscheint. Bitte beachten Sie, dass
" " das gleiche Programm wie AGM teilt. Auch wenn Ihre Akkus SLA sind,
gilt dieses Programm. Dieses Programm gilt NICHT für LiON.
B)Wenn die Fahrzeugsakkus mit einer abnormalen Rückmeldung während
des Ladevorgangs erkannt wurde, erkennt das Ladegerät die Fahrzeugsak-
kus als defekt und zeigt das Symbol " " an.
C) Dieses Ladegerät wurde entwickelt, um Energie freizugeben, wenn eine
korrekte Polarität festgestellt wird. Zu jeder Zeit werden keine Funken oder
Spannungen an den Klemmen auftreten, es sei denn, dass ein Akku
vorhanden ist.
D) Dieses Ladegerät wurde entwickelt, um alle Akkus, darunter versiegelte
Bleisäure (SLA) (Nass, MF, überflutet, Gel), Absorptionsglasmatte (AGM)
und LiFePO4, Lithium (LiON) aufzuladen.
DE-17
BATTERY
TYPE
SELECTION
Table of contents
Languages:
Other Suaoki Batteries Charger manuals
Popular Batteries Charger manuals by other brands

Votronic
Votronic Pb 1240 Mounting instruction and operating manual

Ericsson GE
Ericsson GE INTERNAL BATTERY STANDBY CHARGER Maintenance manual

WEMPE
WEMPE WeTech WTC620 user manual

Teasi
Teasi Smar.T power quick start guide

Velleman
Velleman SOL20 user manual

Goji
Goji Qi Wireless Charging Pad instruction manual