Subaru H0010VC785 User manual
1 2
3 4
CD PLAYER INSTALLATION INSTRUCTION
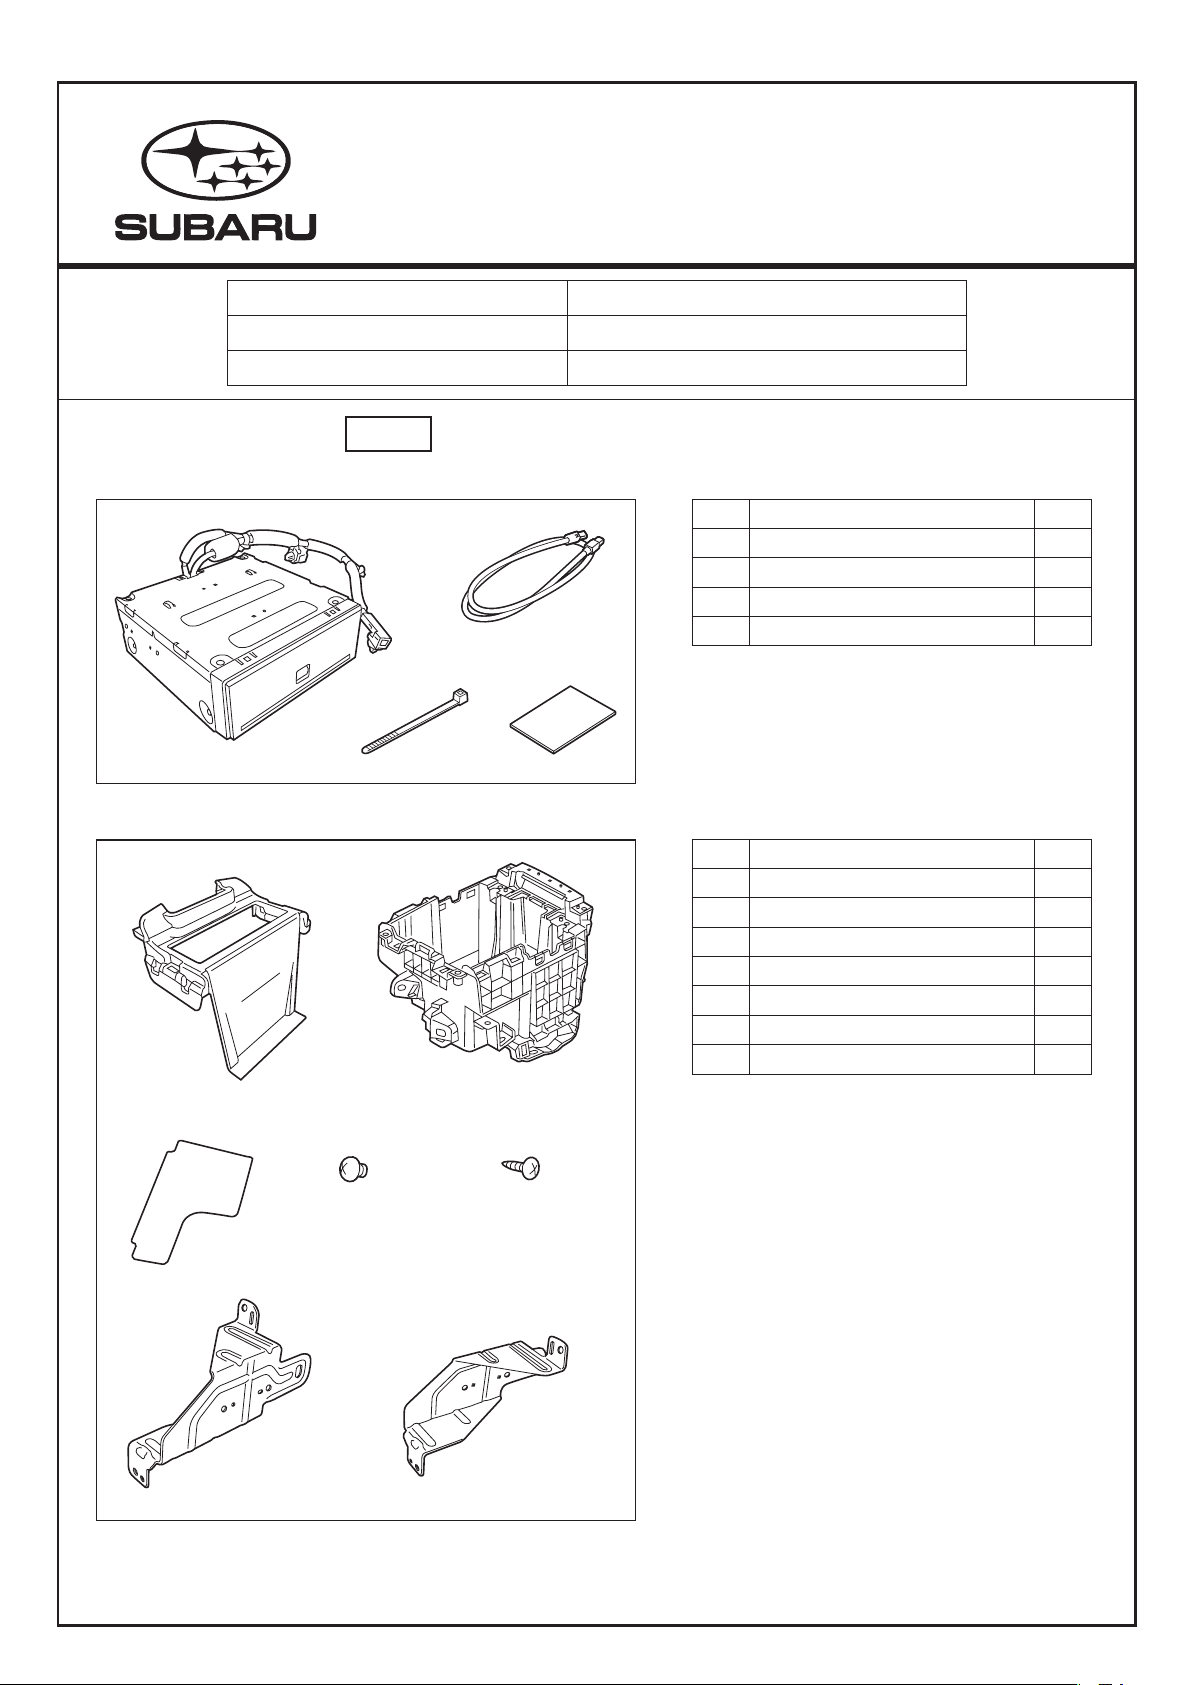
COMPONENTS 6MT
●CD PLAYER 6MT H0010VC765
●FITTING KIT 6MT H0010VC710
No. QtyName
1CD PLAYER 1
2Relay harness 1
3Cable tie 10
4Urethane sheet 2
Applicable model Genuine component number
H0010VC785
204-0444-01
WRX(6MT) 2022MY~
H0010VC775WRX(CVT) 2022MY~
1
△
5 6
7 8 9
0 !
No. QtyName
5Panel deck 1
6Pocket (for deck) 1
7Mat 1
8Truss screws (M5x6) 4
9Screws (M5x16) 6
0Bracket RH 1
!Bracket LH 1
PF3982AD, PF3982AE, PF3982BD, PF3982BE
-
1
-
-
2
-
1 2
3
TOOLS USED
Philips screwdriver, Flathead screwdriver, Clip remover, Trim removal tool, Nose pliers, Nipper, Cutter knife,
Plastic tape, Curing tape
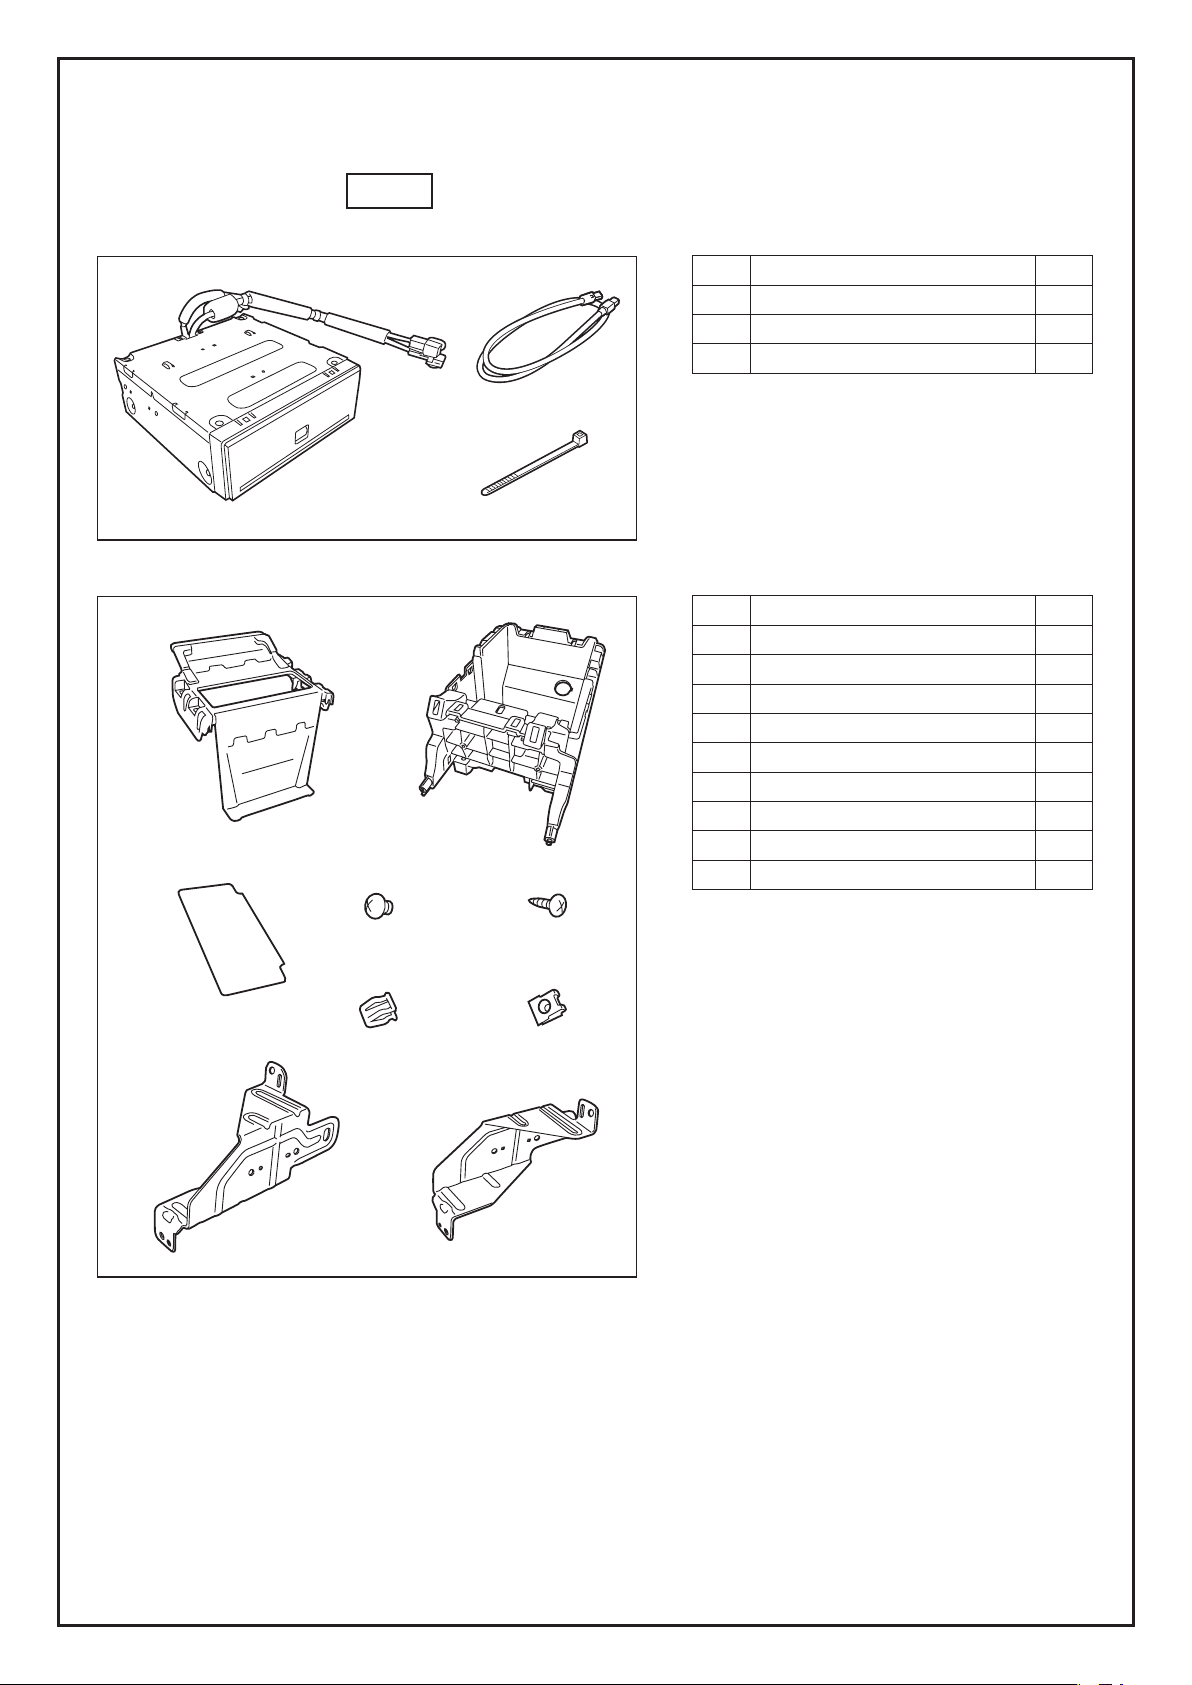
COMPONENTS CVT
●CD PLAYER CVT H0010VC755
●FITTING KIT CVT H0010VC700
No. QtyName
1CD PLAYER 1
2Relay harness 1
3Cable tie 10
No. QtyName
4Panel deck 1
5Pocket (for deck) 1
6Mat 1
7Truss screws (M5x6) 4
8Screws (M5x16) 4
9Plastic clips 6
0Spring nuts 4
!Bracket RH 1
@Bracket LH 1
4 5
6 7 8
9 0
! @
-
3
-
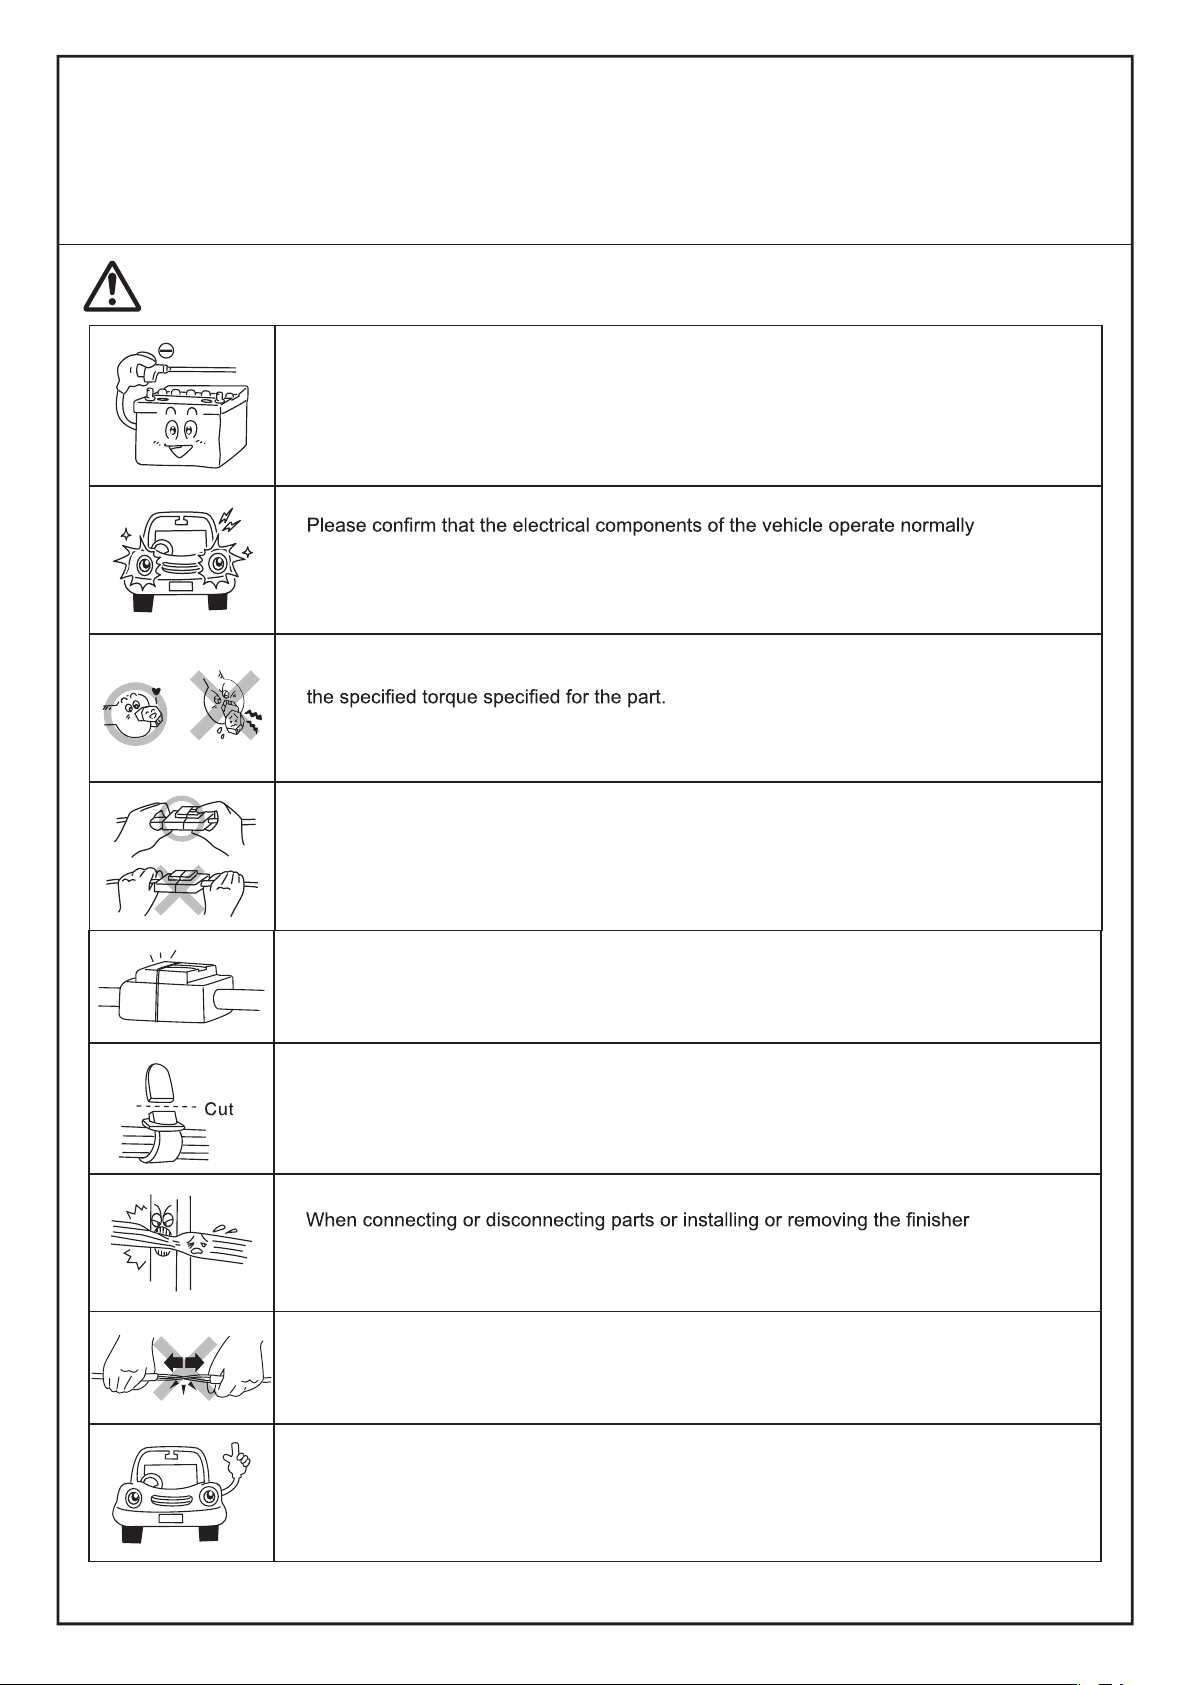
PRECAUTIONS
• Please refer to the precautions below before you begin work, in order to install the product safely and accurately
Please also refer to the vehicle Service manual.
• This manual shows typical installation procedures on LHD vehicle. Installation will be mirror image for RHD vehicles.
ATTENTION
• Please disconnect the battery cable while conducting wiring operations. Failure to do so
may result in electrical shock or injury.
• . Also,
please make an note of data in the memory of the electrical components such as the
radio. This will help avoid problems that may arise when performing the repair check after
the installation.
• When tightening bolts or screws, use the proper tools and the proper size, and comply for
Failure to securely tighten the bolt and nut may cause them to loosen and fall off, causing
damage.
• When removing the connector from the vehicle, remember to remove the lock that holds
the main body of the connector, instead of pulling the lead line.
This protects against a lead wire cuts, etc.
• Please be sure to properly connect the connector and terminal. This helps to avoid a poor
connection.
• When wiring the harness(wiring), clamp the wires together along with the wiring harness
of the vehicle. This protects the harness from becoming entangled or causing strange
sounds.
• , etc, be
careful not to let the harness be hooked or pulled from the back. This protects against a
cut wire or shorts.
• Be careful not to forcefully pull the wiring harness of the vehicle. This helps prevent the
connector from being disconnected, and the wires from being cut or damaged.
• After installing the wiring, perform an operations check on the newly installed parts before
reassembling. This helps prevent mis-wiring.
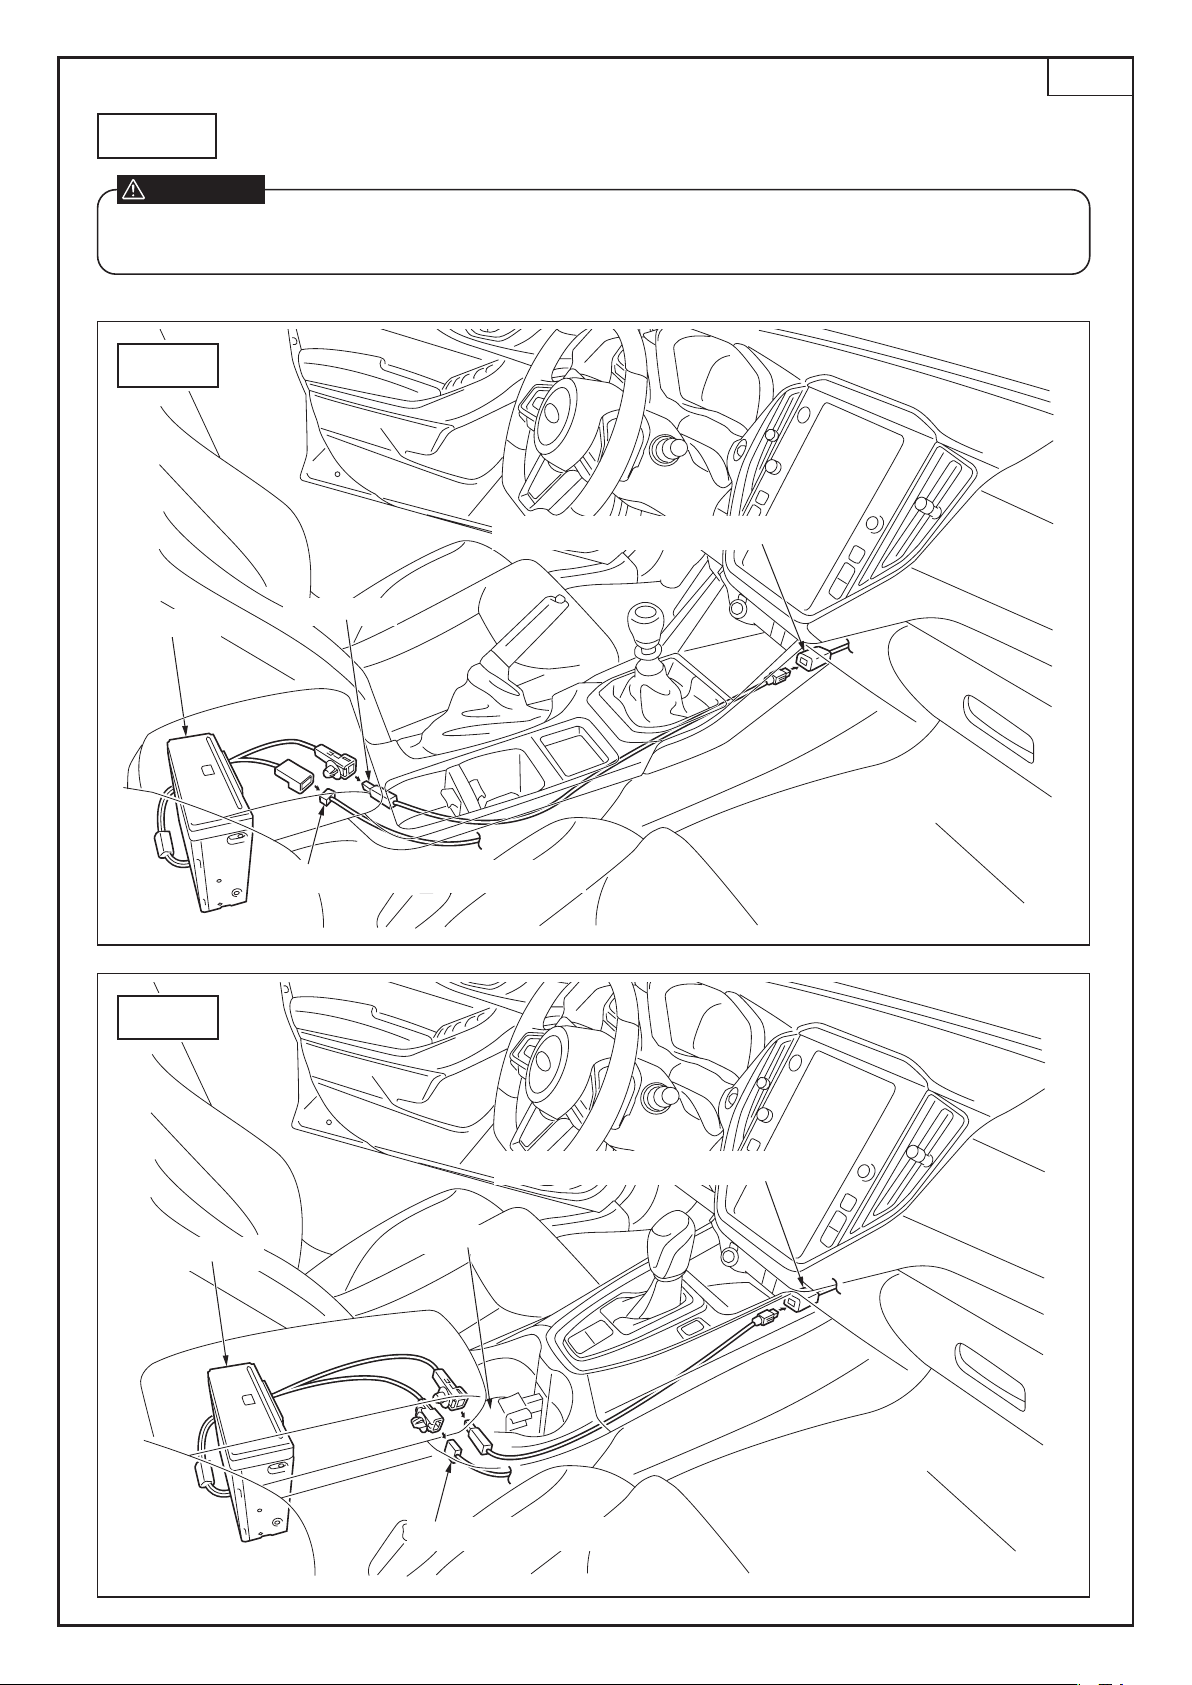
Vehicle-side pre-wire(Power system)
Vehicle-side pre-wire(Video system)
Relay harness
CD PLAYER
CD PLAYER
Vehicle-side pre-wire(Power system)
Relay harness
Vehicle-side pre-wire(Video system)
INSTALLATION OVERVIEW
To prevent any accident during work, make sure to disconnect the negative (
-
) terminal of the battery
according to the latest service manual.
WARNING
WRX
WRX
6MT
CVT
-
4
-

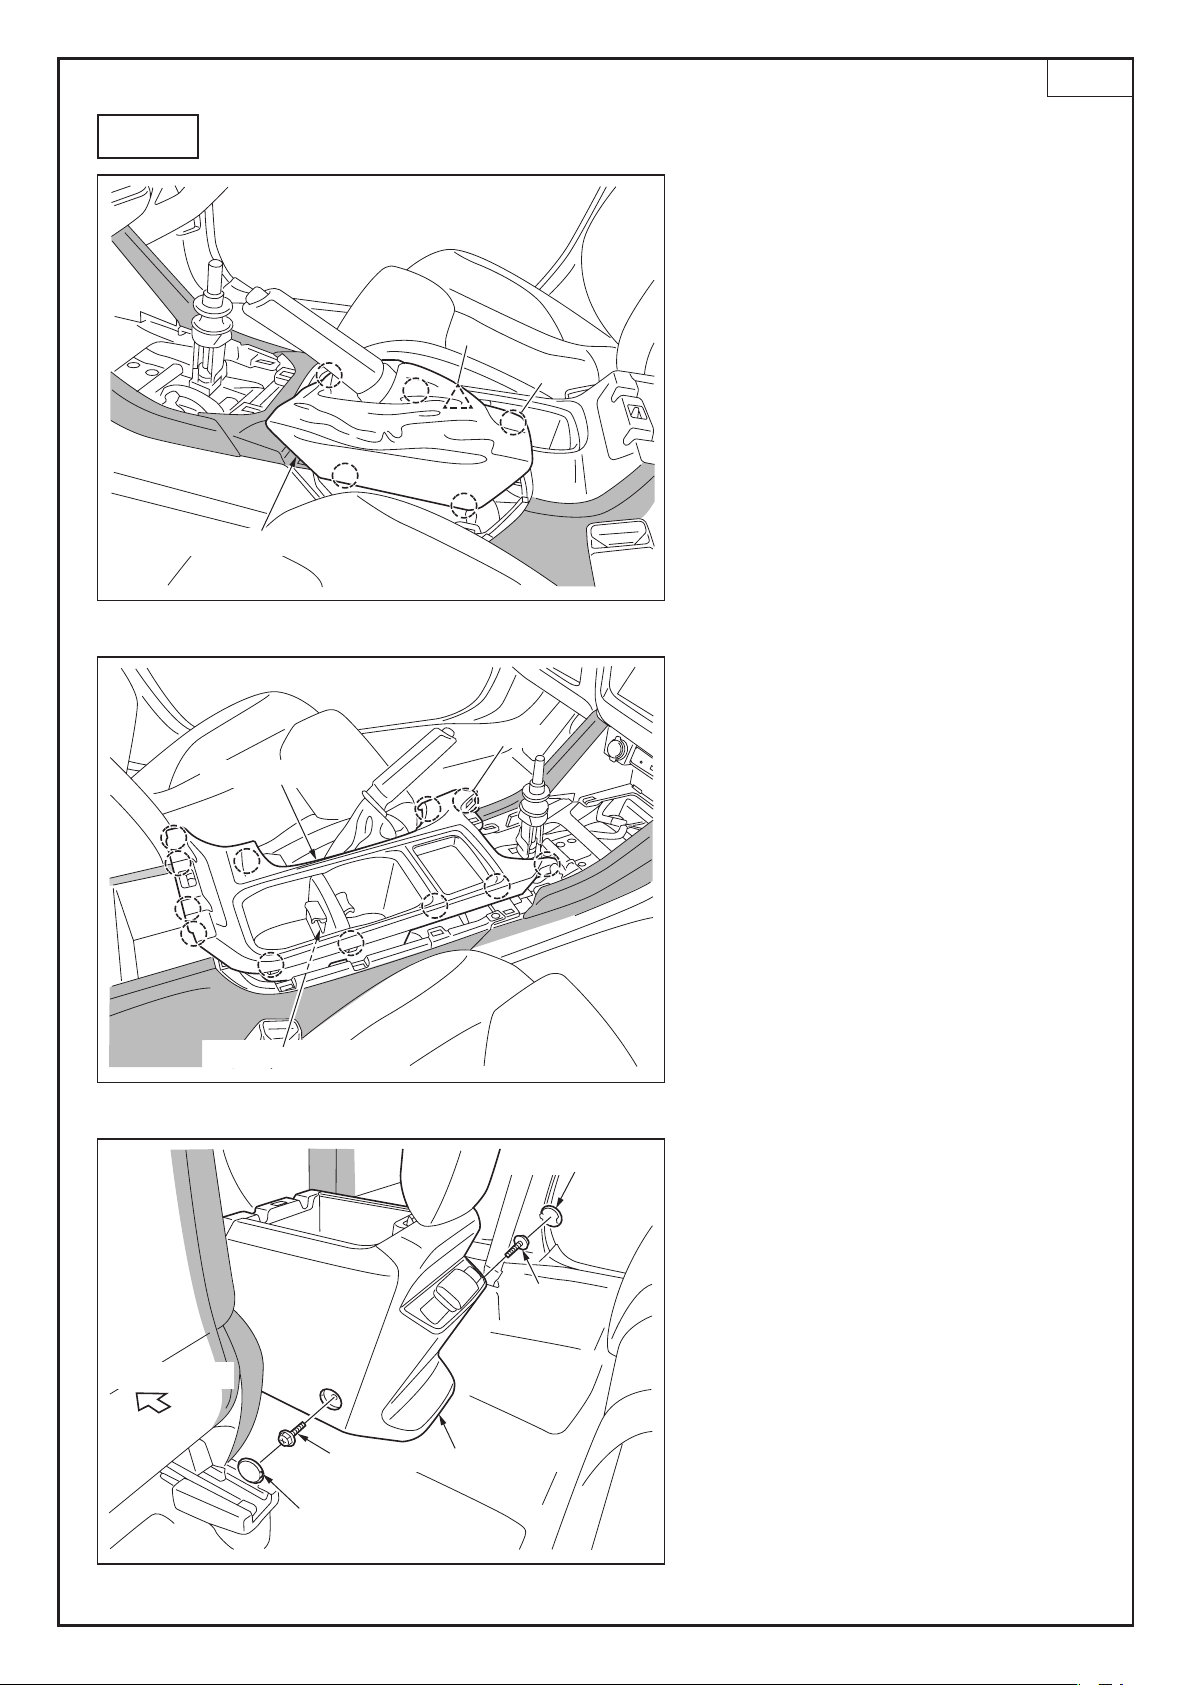
Shift lever boot ASSY
Clips
Shift knob
6MT
REMOVING THE VEHICLE COMPONENTS
(1) Rotate the shift knob in the direction of the
arrow to remove it.
(2) Remove the shift lever boot ASSY.
(Clips: 8 points)
Affix curing tape to the shaded parts ( ) in the figure to protect the vehicle.
NOTE
-
5
-
WRX
Shift lever boot ASSY
Clips
Shift knob
6MT
REMOVING THE VEHICLE COMPONENTS
(1) Rotate the shift knob in the direction of the
arrow to remove it.
(2) Remove the shift lever boot ASSY.
(Clips: 8 points)
Affix curing tape to the shaded parts ( ) in the figure to protect the vehicle.
NOTE
-
5
-
WRX
Console box ASSY
Bolt
Bolt
Cap console
Cap console
Moving forward
Cover front ASSY
Connector position
Clips
Parking brake boot
Clips
Tab
6MT
(3) Remove the parking brake boot.
(Clips: 5 points, Tab: 1 point)
(4) Remove the cover front ASSY.
(Clips: 12 points)
(5) Remove the two cap consoles.
(6) Remove the two bolts.
-
6
-
WRX
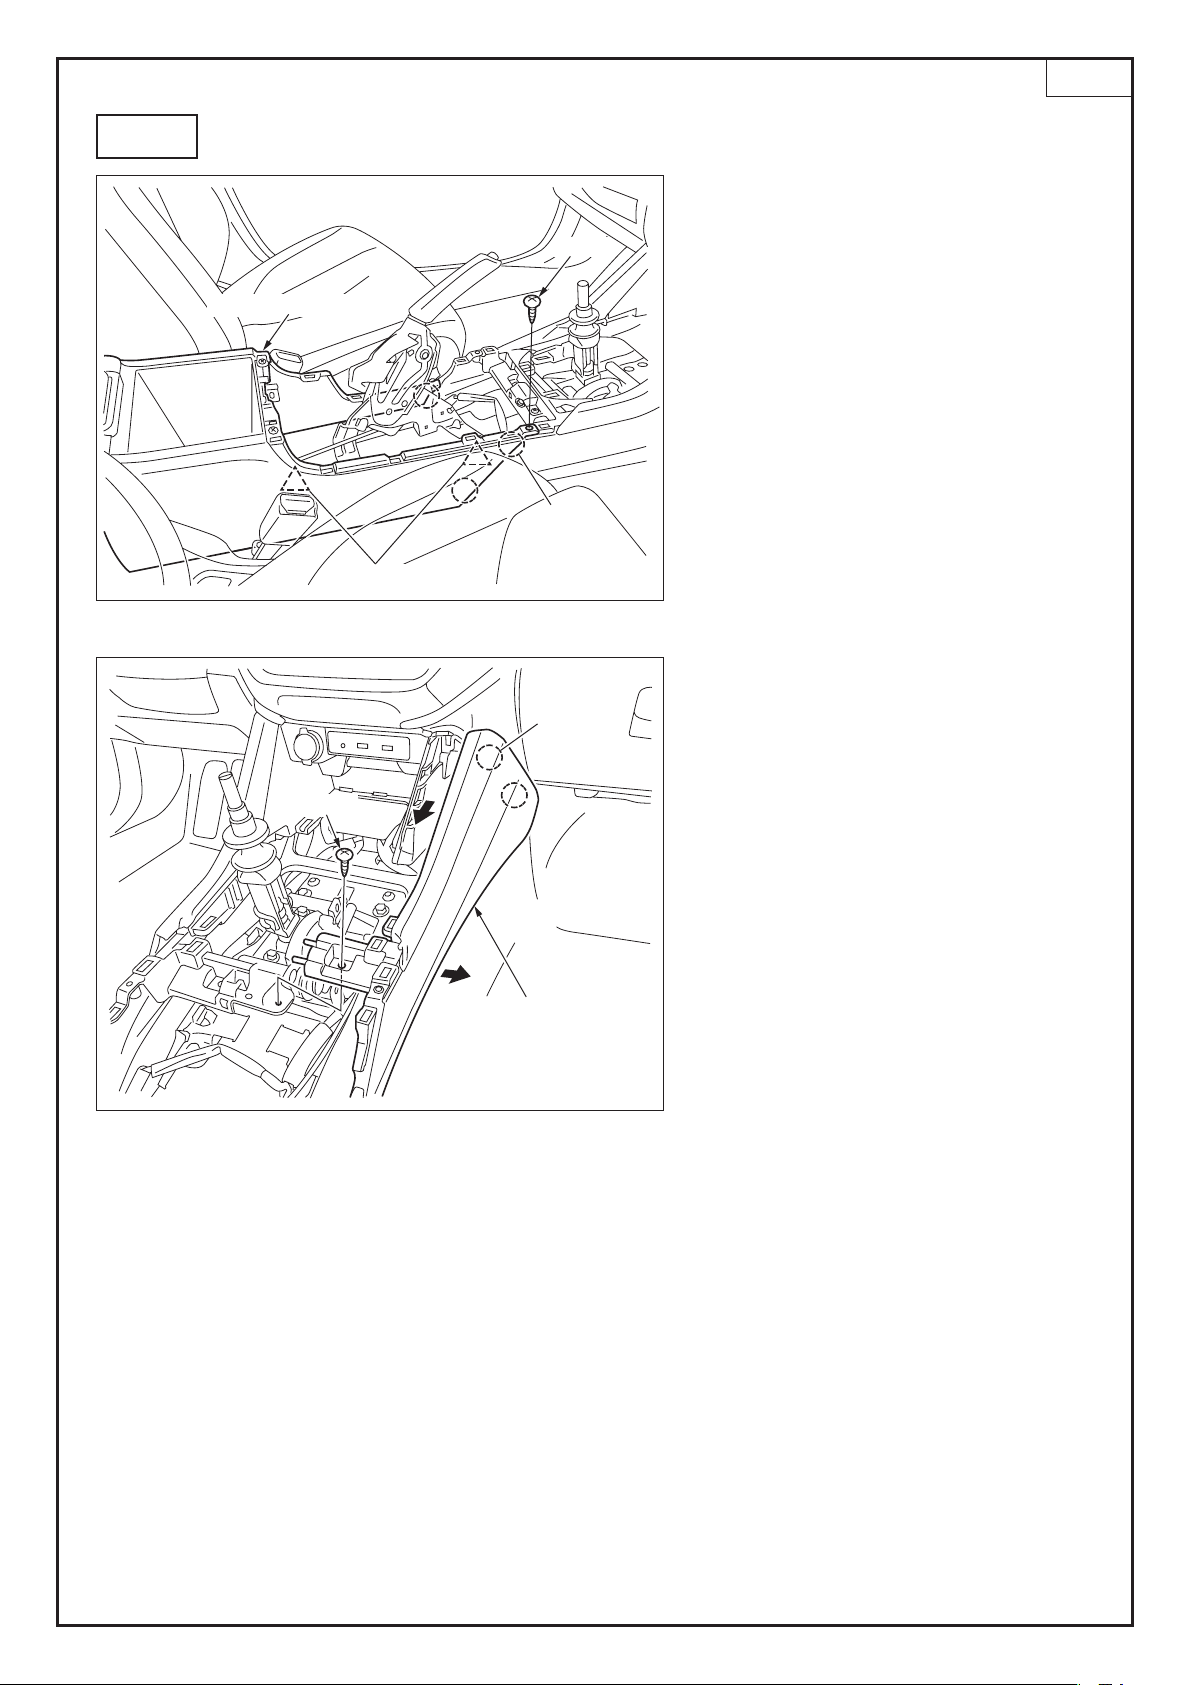
Clips
Screw
Cover center side RH
Screw
Console box ASSY
Connector position
Clips
6MT
(7) Remove the screw, disconnect each
connector, and remove the console box
ASSY.
(Clips: 3 points)
(8) Remove the screw, and then remove the
cover center side RH.
(Clips: 2 points)
-
7
-
WRX

Rubber of the center tray
Screwdriver
Shift lever
-
8
-
CVT
(1) Turn over the rubber of the center tray, insert
the screwdriver into the position in the figure,
and while inserting it to the depth, lower the
shift lever.
(2) Lower the shift lever boot, and pull out the
pin to remove the shift knob.
(3) Remove the center tray.
Affix curing tape to the shaded parts ( ) in the figure to protect the vehicle.
NOTE
Center tray
Pin
Shift knob
Shift lever boot
WRX
-
9
-
CVT
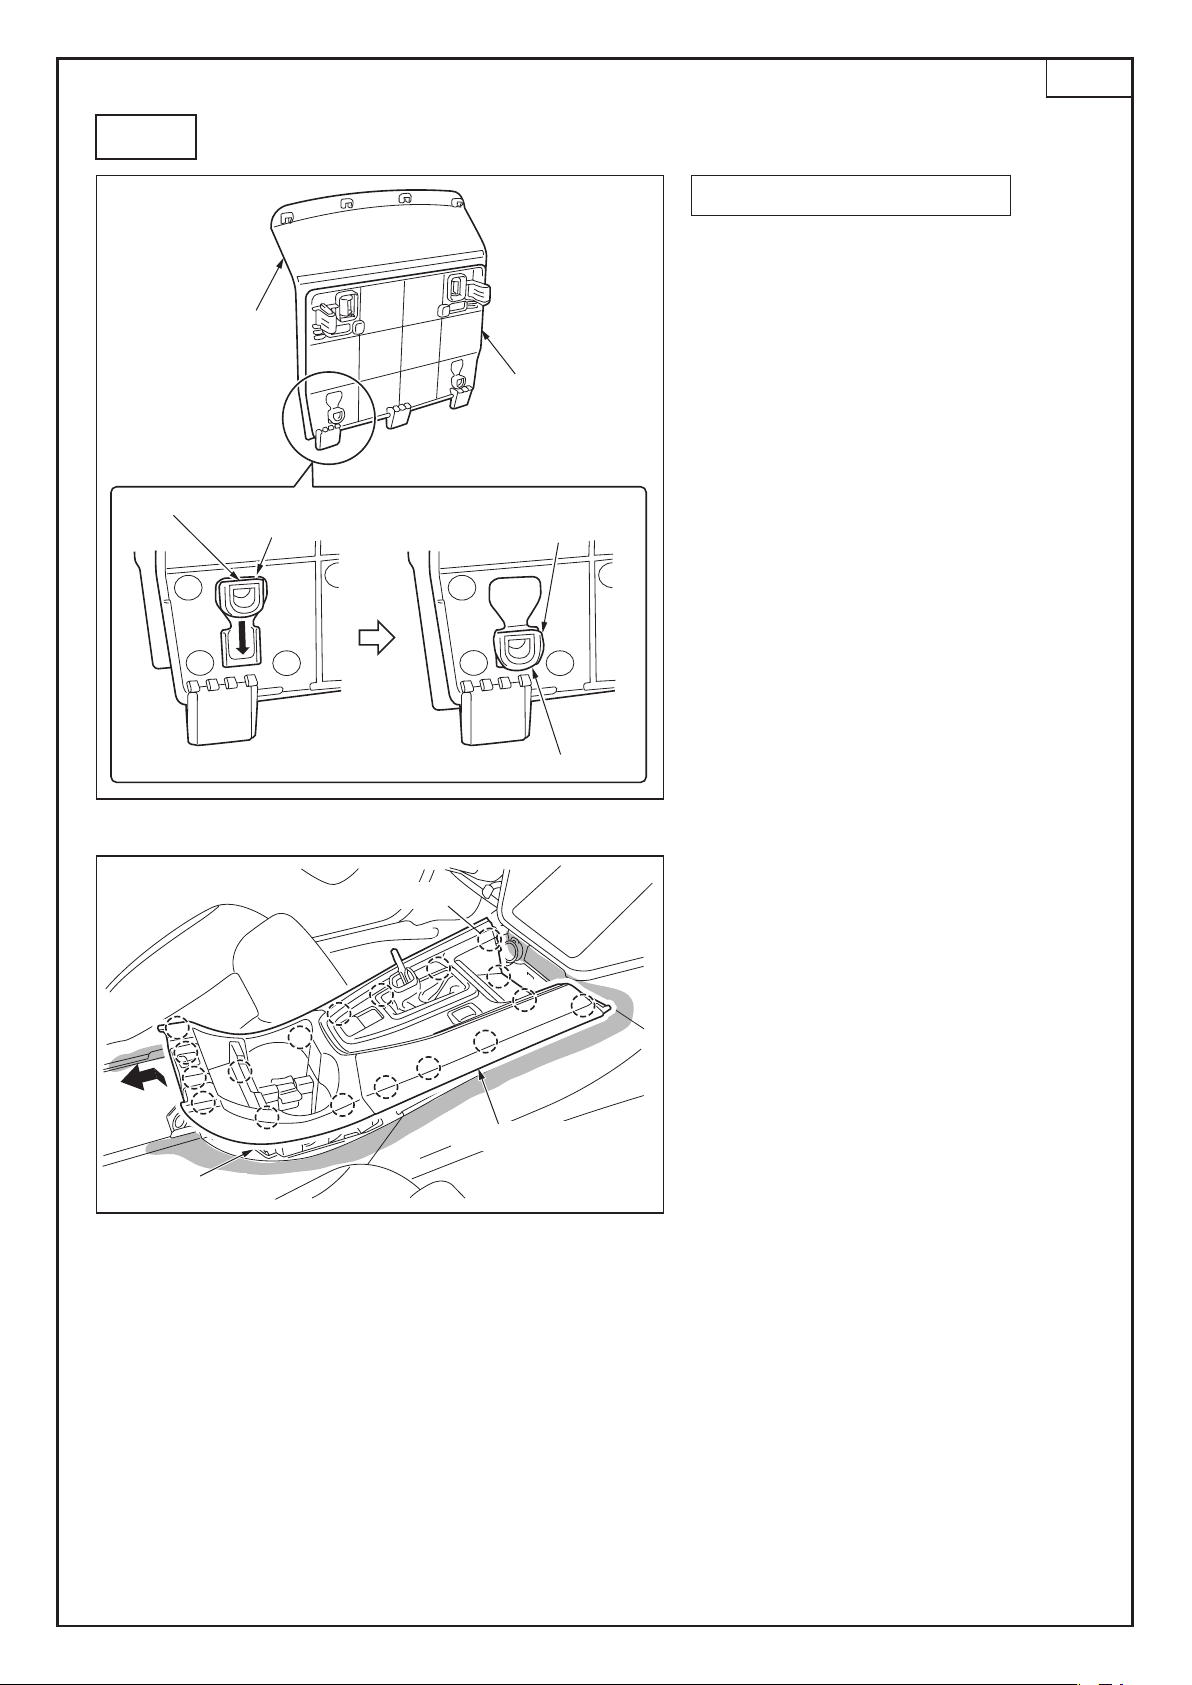
Plastic panel
Rubber of the
Center tray
Hooks of the rubber
Insert into this position. Hooks of the rubber
Shift down the hook
Caution during reinstallation
●If the plastic panel is detached from the rubber
during removal of the center tray, firmly fit the
hooks of the rubber into the recess sections of
the plastic panel, and perform reinstallation.
Clips
Cover front ASSY
Connector position
(4) Disconnect the one connector, and then
remove the cover front ASSY.
(Clips: 18 points)
WRX

-
9
-
CVT
Plastic panel
Rubber of the
Center tray
Hooks of the rubber
Insert into this position. Hooks of the rubber
Shift down the hook
Caution during reinstallation
●If the plastic panel is detached from the rubber
during removal of the center tray, firmly fit the
hooks of the rubber into the recess sections of
the plastic panel, and perform reinstallation.
Clips
Cover front ASSY
Connector position
(4) Disconnect the one connector, and then
remove the cover front ASSY.
(Clips: 18 points)
WRX
Cover center side RH
Screw
Clips
-
10
-
CVT
Cap console
Tabs
Screws
Console box ASSY
Bolt
Cap console
Bolt
Connectors
(5) Remove the two points of the cap console.
(6) Remove the two bolts and two screws, and
while disconnecting the three connectors,
remove the console box ASSY.
(Tabs: 2 points)
(7) Remove the screw, and then remove the
cover center side RH.
(Clips: 2 points)
WRX
This manual suits for next models
1
Table of contents
Other Subaru CD Player manuals


