16 | 17
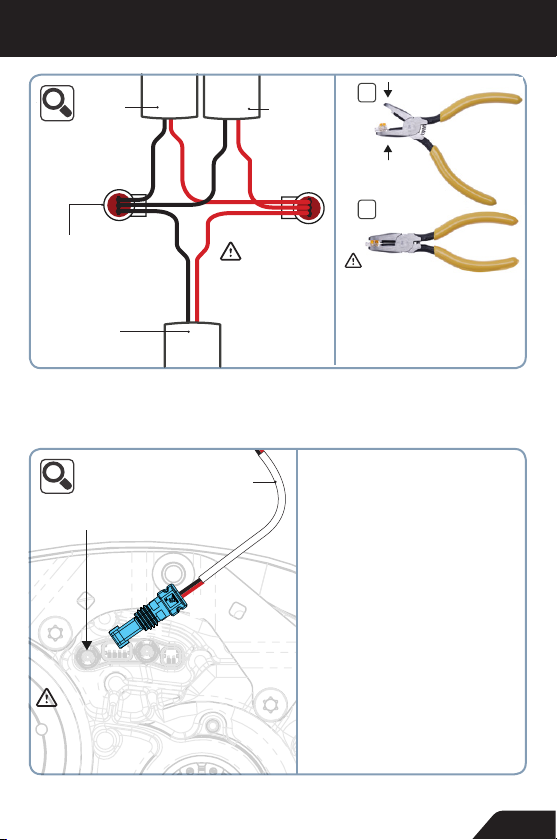
ACHTUNG! Kabelenden
nicht abisolieren. |
ATTENTION! Do not
remove insulation.
Hupen Stromkabel & M99 MINI PURE-45 mit Bosch Frontlicht Anschlusskabel |
Horn power cable & M99 MINI PURE-45 with Bosch front light connection cable
M99 HUPE | HORN – INSTALLATION
C1
2
WICHTIG! Kappe bündig zum
Gehäuse einpressen. Nicht tiefer!
Empfohlenes Werkzeug: Scotchlok™
Schneidklemmzange (E-9Y) |
IMPORTANT! Do not press the tap
deeper than the edge of the housing!
Requested tool:Scotchlok™ IDC
crimping pliers (E-9Y)
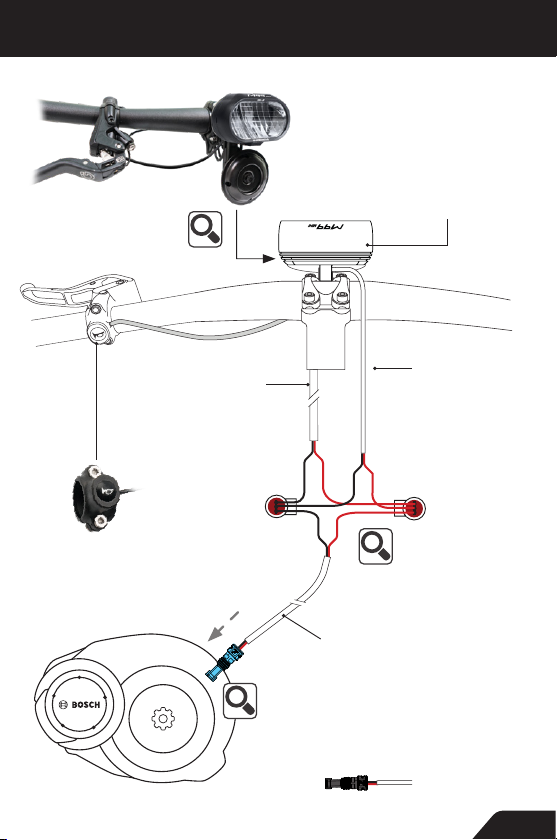
3-fach Verbinder |
Triple Connector
M99 MINI
PURE-45 |
M99 MINI
PURE-45
Hupen
Stromkabel |
Horn power
cable
Bosch Frontlicht
Anschlusskabel |
Bosch front light
connection cable
BOSCH
D
C
D
E
B
F
A
23 14
C
F
E
A
B
D
2 14 3
DU_gen2_Active_Performance_CX_assembled_20150618
GEWICHT:
A4
BLATT 1 VON 1
MASSSTAB:1:5
ZEICHNUNGSNR.
BENENNUNG:
ÄNDERUNG
ZEICHNUNG NICHT SKALIEREN
WERKSTOFF:
DATUM
SIGNATUR
NAME
ENTGRATEN
UND SCHARFE
KANTEN
BRECHEN
OBERFLÄCHENGÜTE:
WENN NICHT ANDERS DEFINIERT:
BEMASSUNGEN SIND IN MILLIMETER
OBERFLÄCHENBESCHAFFENHEIT:
TOLERANZEN:
LINEAR:
WINKEL:
QUALITÄT
PRODUKTION
GENEHMIGT
GEPRÜFT
GEZEICHNET
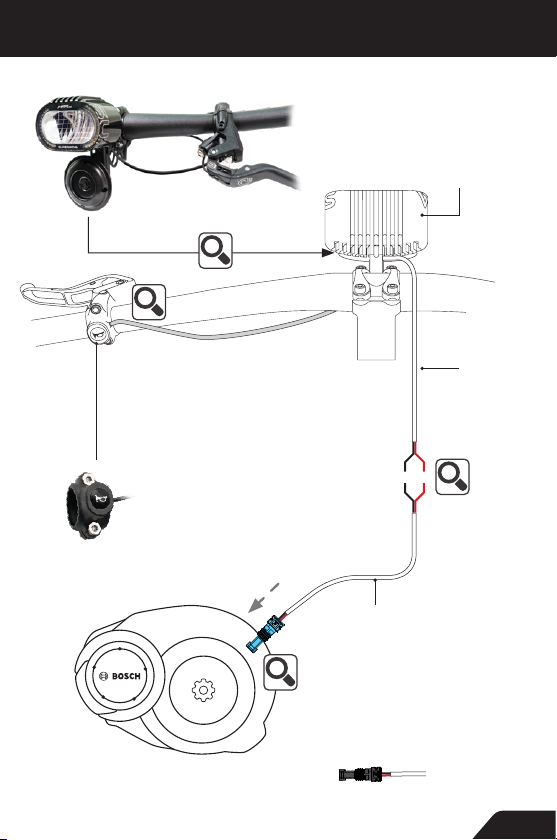
Frontlicht Port | Front light port
Bosch Frontlicht-oder Rücklicht-
Anschlusskabel | Bosch front or
tail light connection cable
Anschluss des Front- / Rücklichtkabels an den Front- / Rücklicht Port |
Connect the front/tail light cable to the front/tail light port
WICHTIG!
Bitte prüfen Sie ob der Lichtanschluss auf 12 V
geschaltet ist oder ob er überhaupt aktiviert ist.
Das können Sie bei einem Bosch-zertifizierten
Händler tun. Falls vorher ein Licht montiert war,
können Sie sich an dessen Spannung orien-
tieren. Die Stromversorgung mit dem Stecker
kann man jeweils am Front- oder Rücklichtport
gewährleisten. Bitte stellen Sie sicher, dass
alle Verbraucher an beiden Ports in Summe
nicht mehr als 19 Watt verbrauchen. Die Hupe
verbraucht 9 Watt. Weitere Verbrauchswerte
der Supernova Produkte finden Sie in unserem
Katalog oder auf der Website.
IMPORTANT!
Please check if the light port is set to 12 V or if
it is activated at all. A Bosch-certified service
dealer can check this for you. If another light
was installed before, you can use that as
voltage reference. The front- and rear light can
be supplied from the second port, but please
ensure that the horn and lights do not use more
than 19 W.