1
3
2
7
8
5
6
7
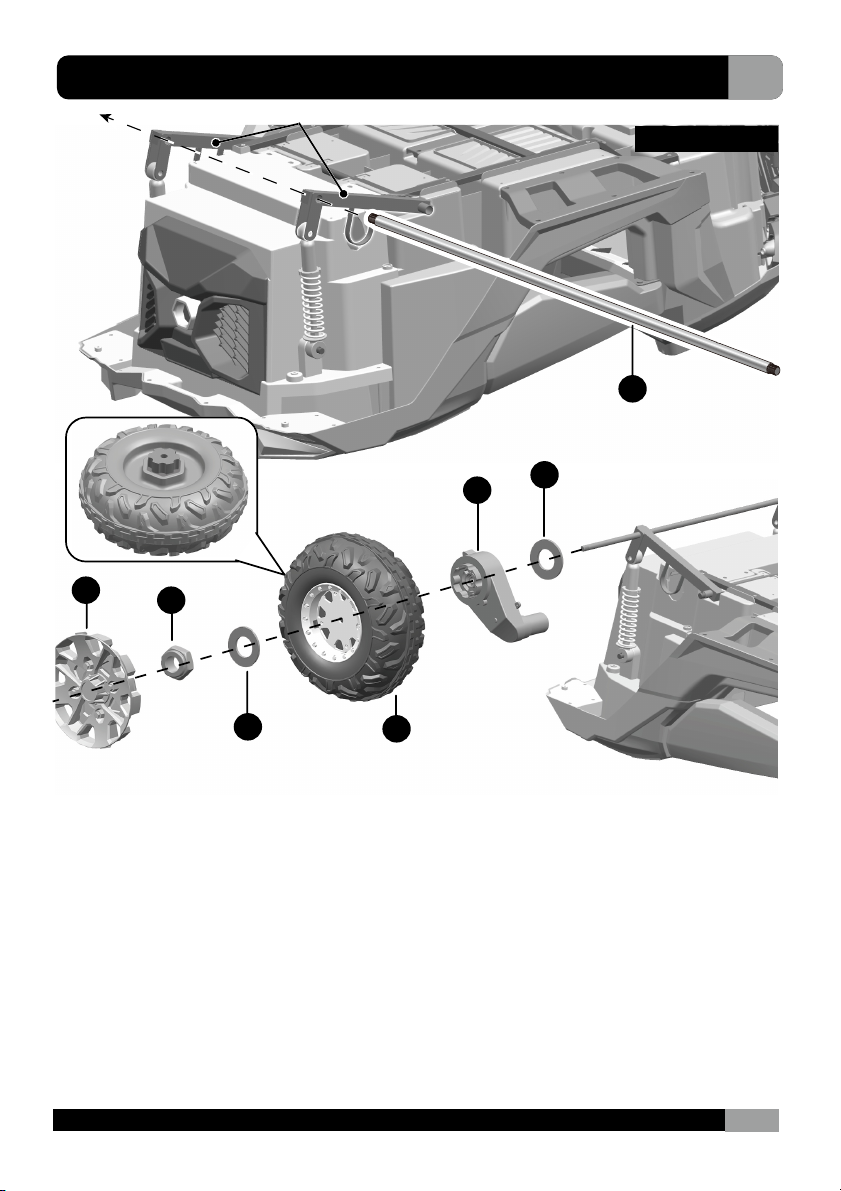
EAttach the Front Axle
Front bottom view
Front bottom view
Front shock absorber
4
1. Remove the Φ12 plastic washer from the front
alxe. Fit the front axle to the vehicle.
2-4. Remove the screws, Φ8 plastic washer *2
and the nuts from the rear shock absorbers with
two hex wrenches. Line up the holes on the front
axle frame with the holes on the front shock
absorber, and reinsert the screw, Φ8 plastic
washer *2 and fasten the nut on the opposite
side. Repeat for the other side.
5-6. Insert the bent end of the steering column into
the hole on the front axle linkage. Fit a Φ10
plastic washer to the bent end of the steering
column and insert a split pin into the hole on the
steering column, bend the ends of split pin back
using a long nose pliers (not included).
HINT: You may tighten the nuts on the shock
absorber to adjust the tightness of the shock
absorbers.
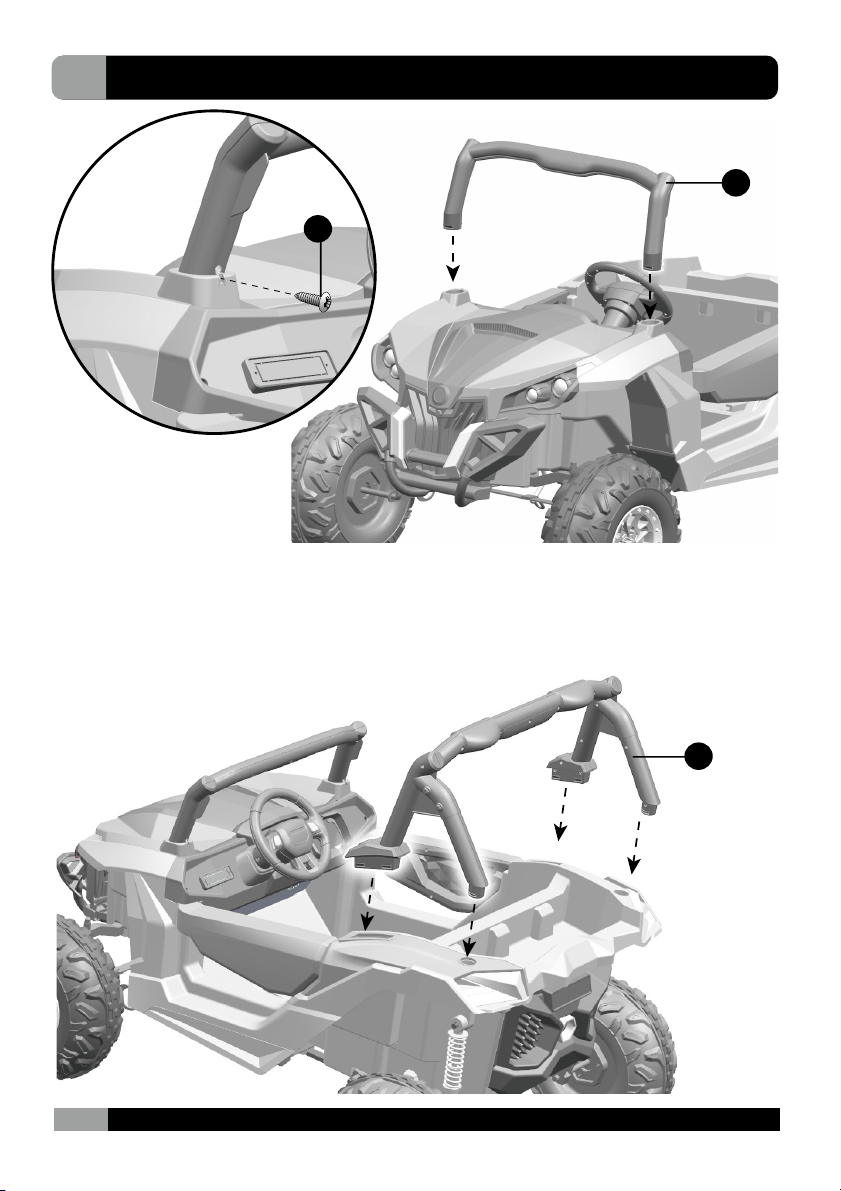
7-8. Press the button located at the front of hood
and lift up the hood. Slide a Φ12 washer and
tighten a locknut with a spanner.
Front inside view
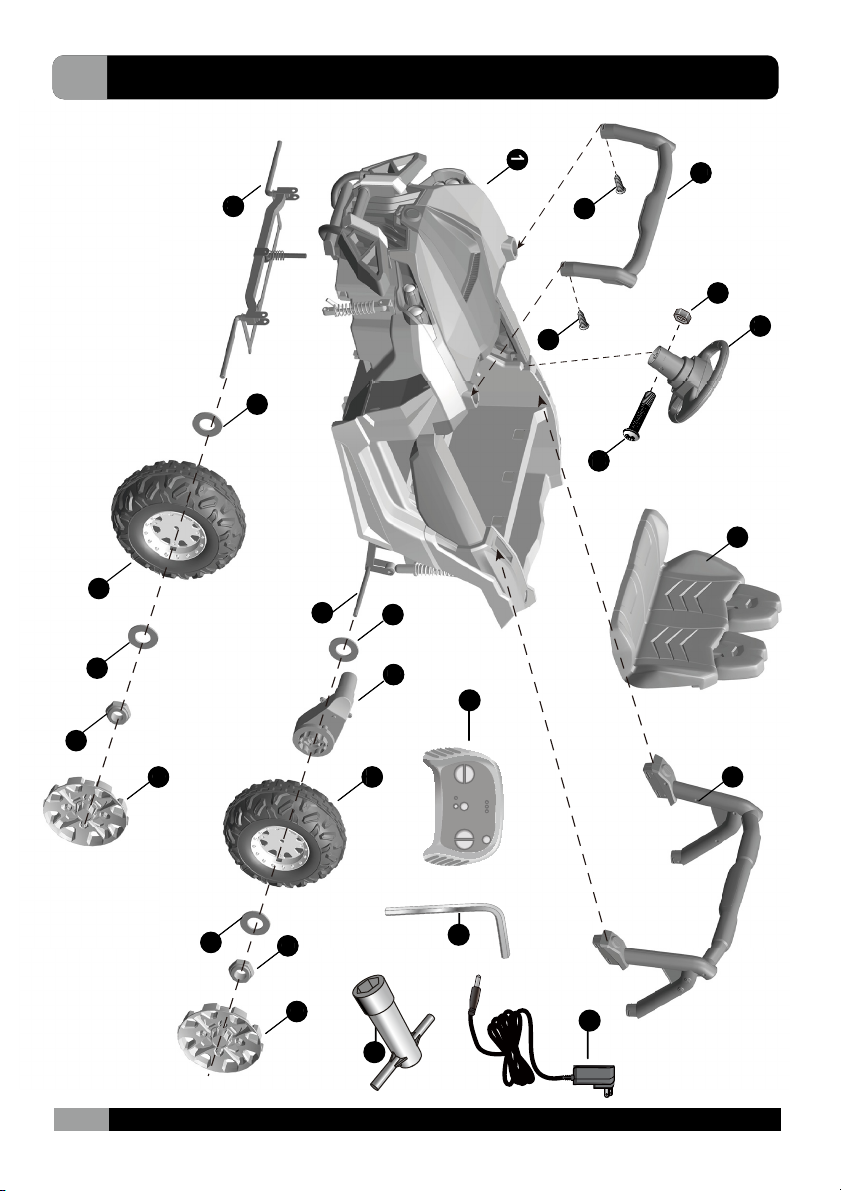
Nut
M6X30 machine screw
Φ10 plastic
washer
Φ12 plastic washer
Φ8 plastic
washer