10
English
Install the machine on the tailpipe fumes (H). The conduit must be
positioned laterally (Fig. 5) in order not to hinder the maneuverability
of the handwheel manual eject the coffee (J).
Fig. 5
Connecting ue
The machine must be installed with a special ue gas system.
You can use the pipe already in place to install the machine or you can
request a scavenging system (Optional).
The connection with an existing pipeline must include a ange for con-
necting the exhaust pipe of the machine with a diameter of 100 mm.
Use a hose resistant to high temperatures and non-ammable diam-
eter of 100 mm. Use a metal clamp to stop the tube on the exhaust
pipe of the machine.Connect the other end of the tube to the ange on
the scavenging system of the installation room. Use a metal clamp to
stop the pipe ange.
The smoke evacuation system (optional) includes an intake system
consisting of a hood and an engine intake.
Mount the engine intake to a minimum distance of 3 m from the
exhaust fumes.The suction motor must ensure an aspiration of
350 m3 / h.
The preparation and installation of smoke evacuation systems shall
be borne by the customer and must be in compliance with applicable
environmental laws on emissions in the country to use the machine.
The installation must be performed by a qualied professional.
COMMISSIONING
It is installed by the user on the supply line of the machine
a protective device (circuit breaker) that is automatically ac-
tivated in case of failure or overcurrent. Follow the instruc-
tions laws in the country of installation.
Warning!
Danger of electric shock. Connect the machine to an outlet
with grounding.
Before connecting the machine to check that the mains volt-
age indicated on the label on the back of the machine cor-
responds to the local system.
Try to open and close the slider located under the cargo tank of raw
coffee (Fig. 6).
Fig. 6
Check the ue pipe connection with the evacuation line in the local
installazione.Controllare the connection of the electrical power pole
with the machine.
Check that the voltage of the industrial network is equal to the one
shown on technical data.
Insert the plug into the electrical outlet, which must be equipped with
grounding.
Security systems
The machine is provided with a switch (B) that can be used as emer-
gency switch: turn the power switch to “OFF” to turn off the machine.
On the panel there is an emergency button (C). Press the emergency
button to stop the electric resistance and start the cooling cycle. Af-
ter the cooling cycle reset the emergency button: rotate and pull the
emergency button.
Alternatively you can grab the plug and unplug the power cord from
the outlet. The PLC maintains the electrical resistances and switches
off in the case of an excessive rise in temperature, thus avoiding the
danger that the coffee to enter in combustion.
When the machine is on the red lights on the buzzer to indicate that
the machine is running. When the machine has reached the tempera-
ture of the load and end-of-coffee roasting machine emits a warning
beep.
Checking the efciency of securities
Turn on the machine and check for proper operation of the switch (B)
and emergency push button (C). At the rst operation of roasting in the
applicant’s work shift, the efciency of acoustic signals. Check opera-
tion of red light located on the beeper sounds. Check the operation of
the engine rotation of the chamber of roasting: check the rotation of
the roasting chamber (1) Figure 7.
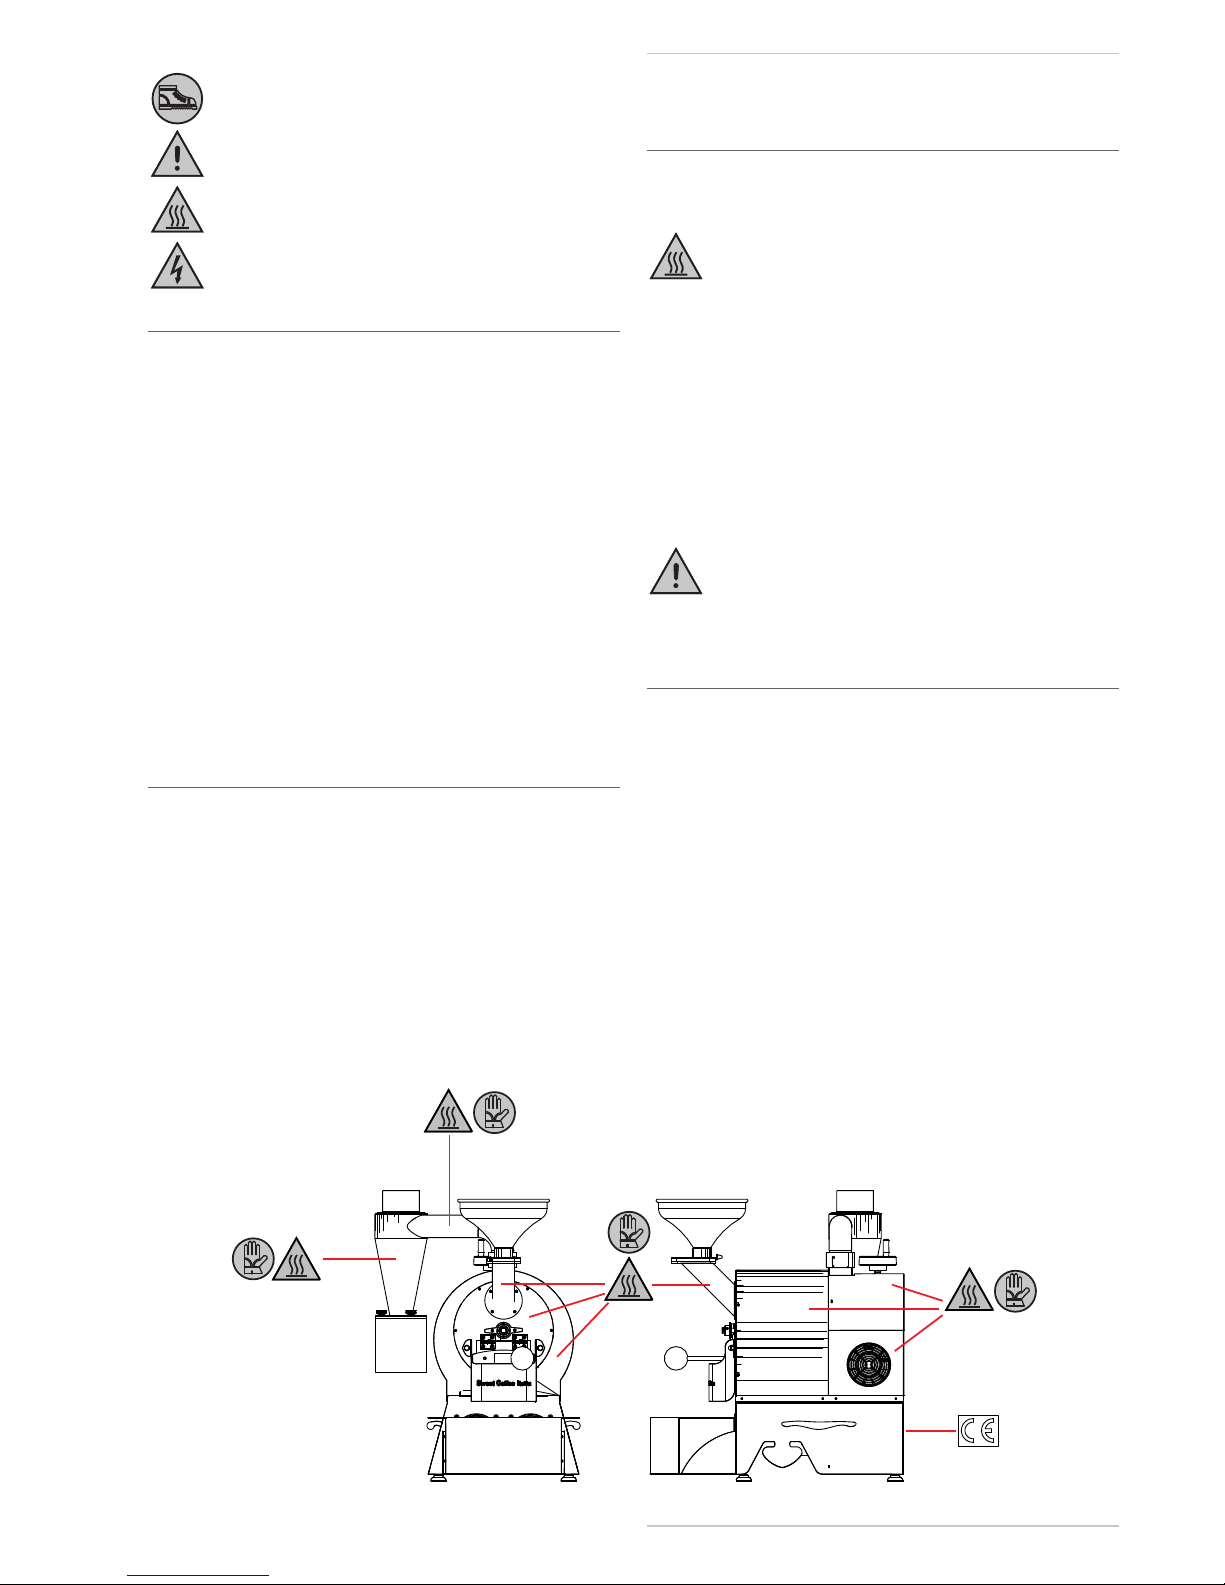
INSTRUCTIONS FOR USE
Warning!
Check at the beginning of each shift the efciency of safety
devices installed on the machine.
Do not leave the machine unattended during the toasting
cycle.
Always check that the shaft of the roasting chamber (1), Fig
7, which protrudes from the front of the machine is always
in rotation. The case is still off the machine immediately and
contact the Service Centre.