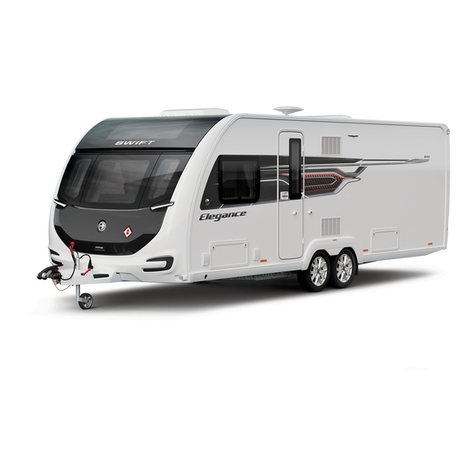
Swift Group 2009 Charisma User guide

WARRANTY
Warrantyandguaranteecover ................................ 2
6 year body shell integrity guarantee (‘Guarantee’) ............... 2
3 year SuperSure manufacturer’s warranty (‘Warranty’) ............ 2
General terms and conditions ................................. 3
What to do if you require assistance . . . . . . . . . . . . . . . . . . . . . . . . . . . 5
Touring caravans - annual service/inspection record . . . . . . . . . . . . . . 6
Annual service / inspection record stamps ...................... 7

Warranty
2
All the illustrations and descriptive matter in this
handbook are intended to give a general idea
of the caravan. Changing market and supply
situations and our policy of continuous product
development may prevent us from maintaining the
exact specifications detailed in this handbook. We
therefore reserve the right to alter specifications
as materials and conditions demand.
Dealers are not agents of Swift Group Limited,
the manufacturer of Swift Group caravans,
and have absolutely no authority to bind
the manufacturer by any express or implied
undertaking or representation.
WARRANTY AND
GUARANTEE COVER
All Swift Group caravans have a 6 year body
shell integrity guarantee and a 3 year SuperSure
manufacturer’s warranty from the date of
purchase (or hire purchase), which are subject
to a chargeable annual service, inspection and
moisture survey (‘Annual Service’) being carried
out at an authorised Swift Group Service Centre.
Original VAT invoices must be retained as proof
of Annual Services being carried out.
In the unusual event that a fault develops and
you need to claim under this Warranty and
Guarantee, your first contact should normally
be made through the dealer from whom the
caravan was purchased.
In certain circumstances, arrangements can be
made to have the claim dealt with by a different
authorised Swift Group Service Centre – see
final paragraph below for details. It is the
responsibility of the Purchaser to deliver the
caravan to and collect the caravan from the
Service Centre for all warranty work.
During the warranty period, subject to the
exclusions set out in this section of the
handbook and provided the warranty claim is
authorised by the manufacturer, Swift Group
Limited, the authorised Swift Group Service
Centre will repair (or at the option of the
manufacturer, replace) all defective parts of the
caravan at the expense of the manufacturer.
Swift Group Ltd reserves the right to examine
the caravan prior to commencement of repairs
or replacement of parts.
6 YEAR BODY SHELL INTEGRITY
GUARANTEE (‘GUARANTEE’)
The Guarantee extends to the
following items:
Body leaks and delamination: water ingress
through any permanently sealed seam joints or
delamination of panels and floor, being part of
the original manufacturer’s construction.
The manufacturer will honour the Guarantee for
72 months from the date of purchase, provided
that the caravan has had an Annual Service,
within 90 days before or 60 days after each
anniversary of the original date of purchase (or
hire purchase). The sixth Annual Service must,
however, be carried out before the expiry of
the 72 month period from the original date of
purchase (or hire purchase).
Specific exclusions from the Guarantee:
Seams and panels requiring repair must be part
of the original construction of the caravan and
must not have been tampered with or repaired
otherwise than by Swift Group Ltd or an
authorised Swift Group Service Centre.
Also see general terms and conditions.
3 YEAR SUPERSURE
MANUFACTURER’S WARRANTY
(‘WARRANTY’)
The manufacturer will honour the Warranty for
36 months from the date of purchase (or hire
purchase), provided that the caravan had an
Annual Service within 90 days before or 60
days after each anniversary of the original date
of purchase (or hire purchase).
The third Annual Service must, however, be
carried out before the expiry of the 36 month
period from the original date of purchase (or
hire purchase).
Warranty
3
In the first 12 months the Warranty
will cover:
Faults arising from a manufacturing defect
but not those which are a result of normal wear
and tear or those which relate to replacement
light bulbs.
Also not covered under the first year are faults
resulting from accidental damage or damage
caused by misuse of any component part of
the caravan.
In years 2 and 3 the warranty will cover:
• Watersystem;heater,freshwatertank,
water pump, water gauges, taps and
shower heads
• Heatingsystemandcomponents
• Mainproprietaryitemsi.efridge,toilet,
cooker
• Chassisandassociatedparts
• Auxiliaryelectrics,excludingbulbs
• Windows,excludingwindowfurnitureand
blinds
In years 2 and 3 the warranty will
specifically exclude:
• Allsoftfurnishings
• Audioequipment
• Microwave
• TV
GENERAL TERMS APPLYING
TO ALL THREE YEARS OF
WARRANTY PERIOD.
Provided that the caravan is used only for its
ordinary and intended purpose and has not
been subject to any treatment or conditions
which could not be reasonably foreseen by
Swift Group Ltd, the Warranty and Guarantee
will be honoured subject to the following
General Terms and Conditions which apply to
all three years of the Warranty period and all six
years of the Guarantee period. The caravan is
not covered for:
• Thefailureofacomponentforreasonsof
fair wear and tear.
• Damageresultingfromaccidents.
• Damageresultingfromfreezing,
over-heating or fire.
• Misuseorabuseofthecaravanor
of any component.
• Tyres,wheelsandjockeywheels
• Cosmeticnishestokitchensinks,cooker
tops, vanity units, shower trays.
• Normaldeterioration,corrosion,intrusionof
foreign or harmful bodies, lack of servicing
or negligence of any person other than
the Swift Group Limited which causes
stoppage of or impairment to the function
of any component of the caravan.
• Replacementofpartswhichhavereached
the end of their effective working life
because of age and/or usage.
• Cleaningoradjustmentofanyassemblies.
• Towingotherthanbyprivatecarsor4x4
vehicles used in place of cars.
• Thecostoftransporting,towingor
moving the caravan by any means
(or consequential costs relating to
transportation), to or from the place
of repair, which is the responsibility of
the owner.
• Routinemaintenanceitemswhichare
part of the Annual Service including brake
shoes, one shot nuts, lubricants, AKS pads,
rubber gas hose, the cleaning of the heater
and fridge flues, the replacement of gas
jets, the resealing and/or replacement of
shower room sealant, and the adjustment
and lubrication of locks.
The Warranty and the Guarantee will be
invalidated if the caravan has been neglected,
misused, modified, used for hire or reward
or any commercial use, or has been used
in competitive events. The caravan will be
deemed to have been neglected if it has not
had an Annual Service or has otherwise not
been serviced and maintained as required by
this handbook.

Warranty
4
The Warranty and the Guarantee only apply
to caravans purchased and used within the
UK, and for continuous journeys abroad of no
longer than 90 days per journey.
If any repairs are identified as being necessary
during an Annual Service, the caravan must be
made available to an authorised Swift Group
Service Centre within 6 weeks for the work
to be carried out. All new caravans must be
registered with the Swift Group Ltd within 6
weeks of purchase as new.
The benefit of this Warranty and Guarantee
may be transferred to a new owner if the
caravan is sold, provided that the caravan
has been serviced by an authorised Swift
Group Service Centre in accordance with
the requirements of this handbook, and
details of the change of ownership have been
supplied to Swift Group Ltd using the change
of ownership form set out in this handbook.
Failure to notify Swift Group Ltd of a change
of ownership within 30 days of such a change
will invalidate the Warranty and Guarantee.
You have legal rights under UK law governing
the sale of consumer goods.
This Warranty and Guarantee does not affect
your legal rights.
The name and address of the warranty and
Guarantee provider is:
Swift Group Limited,
DunswellRoad,
Cottingham,
East Yorkshire,
HU164JX.
To make a claim under this Warranty or
Guarantee, contact the Swift Group Service
Centre which supplied your caravan.
Alternatively, details of your nearest authorised
Swift Group Service Centre can be obtained
by contacting the Swift Group Customer Care
Departmenton01482875740orenquiringon
our website: www.swiftgroup.co.uk
WHAT TO DO IF YOU
REQUIRE ASSISTANCE
Congratulations on purchasing your new
caravan. We are confident that you will enjoy
manyhappyholidays.However,shouldyou
have an enquiry or require assistance with a
problem, we hope that this guide will be of
assistance to you.
If you have a problem, or enquiry with
regards to your new caravan, please follow
these steps:
1. ChecktheOwnersHandbook,paying
particular attention to the fault finding
advice at the back of the book.
2. Contact your supplying dealer
for assistance.
If you need to contact the Swift Group,
please be aware of the following:
1. WhencontactingSwiftSupercare,please
quote your name, postcode and serial
number of your caravan.
2. In most instances, the Customer Care Team
will involve your dealer in resolving the
issue you are experiencing.
3. If you are contacting the company by
email, letter or fax, the Customer Care
Team will respond to you within five
working days from the date of receiving the
correspondence.
4. IfyouarecallingtheCustomerCareTeam,
pleaseavoidwherepossible,Mondaysand
lunch times.
5. PleasebeawarethattheSwiftGroup
cannot send parts direct from the factory.
In all cases, without exception, your dealer
must place the order for you.

Warranty
5
TOURING CARAVANS - ANNUAL
SERVICE/INSPECTION RECORD
In order to comply with the warranty, you must
have your caravan inspected and serviced by
an authorised Swift Group Service Centre at
least once per year.
ItisimportantthattheOwner’sHandbook
is stamped on the appropriate page by the
authorised Swift Group Service Centre. Failure
to do this will invalidate the warranty and the
transfer of the warranty on the change
of ownership.
The inspection should take approximately two
to four hours and will cover the areas dealt
with in the annual service check list. Any areas
requiring service and/or maintenance will be
highlighted by your dealer and we recommend
that you authorise any necessary work to be
carried out.
NB.Itisessential,tovalidatethewarranty,
that an annual inspection be carried out by an
authorised Swift Group Service Centre covering
the items listed.
1. Dampandlaminationtest.
2. Coupling head and breakaway cable.
3. Jockeywheel.
4. Chassisandchassistobodysecurity.
5. Cornersteadies.
7. Tyres and tyre pressures.
8. Torquewheelnuts.
9. Brake rods and linkages.
10.Hubbearings,brakesandbrakeshoes.
11.Handbrakeoperationandperformance.
12.Suspensionandshockabsorbers(iftted).
13.13pinplugandcables.
14.Roadlights,wiringandreectors.
15.Internallightsand12VDCsystem.
16.Waterheater-gasand230VAC(iftted).
17.Hob,grillandoven(iftted).
18.Refrigerator230VAC,12VDCandgas.
19.Gassystem.
20. Water pump, taps and water system.
21.Mains230VACsystem.
22. Windows and fittings.
23. Smoke alarm and battery.
24.Rooflights.
25.Furniturehinges/staysetc.
26. Exterior locks and hinges.
27. Grab handle security.
28.Allinternalvents.
29. Oil seals.
30. Blinds and fly screens (if fitted).

TOWING CODE
Caravan towing code ....................................... 10
Caravanterms ............................................ 10
Towing vehicle terms ....................................... 11
Measurement of noseweight ................................. 12
Type of driving licence held .................................. 12
Glossary & checklist ........................................ 12
Useful memory aid ......................................... 14
Preparingfortheroad ...................................... 15
Moving off ................................................ 23
Reversing ................................................ 23
Speedlimits .............................................. 24
Caravanhandling .......................................... 24
Motorwaydriving .......................................... 24
ALKOsparewheelcarriertips ............................... 24
Changing a wheel .......................................... 25
Jackingpoints ............................................ 26
Stoppingonahill .......................................... 26
Arrivalonsite ............................................. 26

Towing code
10
CARAVAN TOWING CODE
This Code of Practice contains
recommendations jointly reviewed and
agreed by the following organisations:
TheNationalCaravanCouncil
The Caravan Club
The Camping and Caravanning Club
The Caravan Writers Guild
The Department for Transport
Scope of the Code
The Code applies to all trailer caravans of
maximumladenweightnotexceeding3500kg
(7,700 lbs), overall width not exceeding 2.3m
(7ft 6in approximately) and overall length not
exceeding 7m (23ft approximately), excluding
the drawbar and coupling.
Thisislegallythemaximumsizeoftrailer
that can be towed by a motor vehicle with a
maximumgrossweightoflessthan3500kg.
CARAVAN TERMS
Mass in Running Order:
The mass of the caravan as stated by the
caravan manufacturer, as new with standard
fixtures and fittings.
Note:Becauseofdifferencesintheweight
of materials supplied for the construction of
caravans, a tolerance has been allowed for in
theMassinRunningOrderweight.
Maximum User Payload:
The maximum allowable weight to be put into
the caravan whilst it is being towed. This is
made up of 3 sections:
Personal effects, optional equipment and
essential habitation equipment.
The user payload is the difference between the
MaximumTechnicallyPermissibleLadenMass
andtheMassinRunningOrder.
Essential Habitation Equipment:
Those items and fluids required for safe
and proper functioning of the equipment
for habitation as defined by manufacturer
of the caravan.
Personal Effects:
Those items which a user can choose to
carry in a caravan and which are not included
asEssentialHabitationEquipmentor
Optional equipment.
Optional Equipment:
Items made available by the manufacturer
over and above the standard specification of
the caravan.
Maximum Technically Permissible
Laden Mass:
The maximum weight for which the caravan is
designed for normal use when being towed on
a road, laden.
This mass takes into account specific operating
conditions including factors such as the
strength of materials, loading capacity
of tyres etc.
WARNING: Under no circumstances should
the maximum technically permissible laden
mass of this caravan be exceeded.
Upgrading of maximum technically
permissible laden mass:
Thestandard/declaredMTPLMquotedinthe
specification handbook and on new caravan
weightplates maybe of lower value than the
maximum possible.
If extra user payload is required, an upgrade
maybe available (model dependant), this must
be requested via your dealer.
If required you will be issued with the following:
(i) Newweightplategivingupgrade
weight detail
(ii) NewNCCCerticate(declaringthe
upgradedMTPLM
(iii) Manufacturersletterconrmingtheupgrade
forthatVehicleIdenticationNumber
Note:Tyrepressuresmayincrease
when upgrading
Nose weight:
That part of the static mass of the caravan
supported by the towing device on the rear of
the towing vehicle.

Towing code
11
Notes:
(i) When measuring the noseweight it is
important that the caravan is fully loaded.
Do not place extra items indiscriminately
into the caravan after this adjustment has
been made.
(ii) The caravan is intended to be towed
slightly nose heavy. The nose weight can be
adjusted by distribution of the load within
the caravan. The nose weight should be
approximately 7% of the actual laden weight
(but not greater than the hitch capacity) and
at the same time suit the towing vehicle. See
sectiononMeasurementofNoseWeight.
(iii) It is not recommended that you tow with
just a battery, spare wheel and gas bottles
as this may exceed the the permitted nose
weight. Additional payload must be placed
behind the axle to compensate for this.
TOWING VEHICLE TERMS
Kerb weight (Mass of Vehicle in Running Order):
The weight of the towing vehicle as defined by
the vehicle manufacturer. This is normally with
a full tank of fuel, with an adequate supply of
liquids incidental to the vehicles propulsion,
without driver or passengers, without any load
except loose tools and equipment with which
the vehicle is normally provided and without
any towing bracket.
YES NO
MAYBE
85%
Equal
Fig. A Car/Caravan
weight ratios
Caravan to Towing Vehicle Weight Ratio:
The towing vehicle to caravan weight ratio can
be determined by calculation and is equal to:
actual laden weight of caravan
x100%
Kerb weight of towing vehicle
The law requires that caravans & their
towing vehicles & the loads they carry must
be in such a condition that no danger or
nuisance is caused.
(Regulation100oftheRoadandVehicles
[ConstructionandUse]Regulations1986).
Power to weight ratio:
Nohardandfastrulescanbestatedbut,here
is a general guide.
(a) Conventional petrol engines with a capacity
uptoapproximately1500ccshouldbe
adequate for towing a caravan weighing
around85%ofthekerbweightofthe
towing vehicle.
(b) Above1500ccsuchenginesshould
manageacaravanweighingupto100%of
the kerb weight of the towing vehicle and
still give adequate performance.
Note:Thetowingvehiclemanufacturer’slimitis,

Towing code
12
in some cases, less than the kerb weight.
Vehicles with automatic transmission may need
an oil cooler fitting or the SAE rating of the
gearbox oil increasing when towing. The advice
of the vehicle manufacturer should be sought.
Mass in Running Order:
Caravanners can use a public weighbridge to
establish the mass in running order.
Note:Weighbridgeshavevaryingweight
tolerance levels.
Maximum Permissible Towing Mass:
The weight defined by the vehicle manufacturer
as being the maximum that the vehicle is
designed to tow.
Train Weight (Combination Weight):
The maximum combined weight of the towing
vehicle and trailer combination as specified by
the towing vehicle manufacturer.
MEASUREMENT OF NOSEWEIGHT
Noseweightmaybemeasuredusingapropriety
brand of noseweight indicator. Such equipment
is obtainable at your Caravan Dealer.
Note: These indicators have a varying
tolerance level.
Another simple method is to use bathroom
scales under the coupling head with a piece of
wood, fitted between the coupling head and the
scales, of such length that the caravan floor is
horizontalwiththejockeywheelraisedclearof
the ground. (Fig. A)
430mm
±35mm
Fig. A Measuring noseweight
Noseweightcanbeadjustedsimplyby
distribution of weights in the caravan.
Always lower jockey wheel before entering the
caravan and then raise before measuring again.
(See Loading).
Note:Theheightofthetowballonthetowing
vehicle, when laden, is also critical.
WARNING: Do not lift the coupling head by
hand when hitching the caravan to the car.
Always raise and lower the coupling head
by winding the handle on the jockey wheel
up and down.
TYPE OF DRIVING LICENCE HELD
In order to be able to tow a caravan a driver
must hold a Category B licence. Those
car drivers who passed their tests prior to
1January1997wouldhaveautomatically
obtainedCategoryB+E.However,anyone
whopassedtheirtestafter1january1997will
need to take a further test in order to obtain
a Category B+E if they wish to tow a car and
caravan combination whose train weight
exceeds3,500kg,orupto4,250ifthecaravan
islessthan750kgorifthecaravan’sMaximum
TechnicallyPermissibleLadenMassexceeds
the unladen weight of the car.
Note:Theunladenweightofacarisnormally
less than the kerbside weight.
GLOSSARY & CHECKLIST
Awnings - Can consist of just a simple top
sheet but may extend to a five sided frame tent
attached to the side of the caravan.
Fire blanket -approvedtoBS6575isidealfor
dealing with ‘fat pan’ fires.
Fire extinguisher - It is strongly recommended
that a fire extinguisher is carried in the caravan.
(For suitable types see Safety and Security).
Gas bottles - Bottled L.P. gas is the most
convenient portable source of fuel. Two bottles
are required for a constant supply.

Towing code
13
An initial deposit is payable on each cylinder.
Werecommendtheuseof5kgor6kgPropane
or 7kg Butane bottles. One position for use and
one for storage only. (For detailed information
see Services - Gas).
Jack - A suitable jack is essential (screw,
scissor,sidemountedorairjacktype).Many
car jacks are unsuitable.
Levellers - Levellers help level the caravan
from side to side before unhitching. Proprietary
products can be purchased from your caravan
dealer and need to be positioned as indicated
by a spirit level.
Spare Wheel - It is always advisable to carry a
spare wheel with your caravan.
Spirit Level - A spirit level is extremely useful
when siting the caravan.
Stabiliser - Stabilisers help to dampen the side
to side movement of the caravan. One end fits
to the car’s towing bracket and the other end to
the caravan. (See Stability)
Torque Wrench - A torque wrench is the only
way that the exact recommended torque can
be achieved for wheel nuts and bolts. (See
PreparingfortheRoad).
Towing Bracket -Neverusecheap
alternatives, obtain one manufactured by
a reputable company complying with the
relevant standards.
Any light passenger vehicle registered in the
UKonorafterAugust1st1998(Sregistered
plate) will require a type approved towbar
andtowball(to94/20/EC).Failuretota
homologated towbar and towball could result in
a prosecution and invalidation of your insurance
cover. Always check with your car manufacturer
or towbar manufacturer if in doubt.
Wooden Blocks - Wooden blocks typically
25cmsquareand2cmthickareidealfor
placing under corner steadies and jockey wheel
when the ground is uneven or soft.
Water Containers - Two containers are
required, one to carry fresh water to the
caravan and one for waste water, which needs
to be disposed of properly. Several types are
available including jerry cans, folding cans and
wheeled containers.
13 Pin Socket - One socket fitted to the car to
accept corresponding plugs from the caravan
this energises the road lights and caravan
auxiliary circuits.
12 Volt Battery - A deep cycling, heavy duty
rechargeable leisure type battery should be
purchased to provide back-up power for
lights and other electrical appliances. (See
Battery). The securing arrangements for the
battery compartment require a leisure battery
complyingwithEN60095-2inparticularthose
with ledges for fastening to the lower edge of
the long sides and having a maximum height of
190mmandwidthof175mm.
WARNING: Your caravan dealer should be
consulted if additional equipment is to be
fitted as strong points may or may not be
provided in the design.
Note:Fittingadditionalequipmentwillreduce
the caravan allowable payload.

Towing code
14
USEFUL
MEMORY AID
Car
Distilled water
External mirrors
Fan belt
Fire extinguisher
Jack
Jumpleads
Petrol can
Socket set
Spare bulbs
Spare keys
Spare wheel
Tool kit
Towball cover
Tow rope
Tyre pressure gauge
Warning triangle
Tyre Pump
Caravan
Awning pegs and poles
Awning ground sheet
Battery12voltcharger
Bucket
Corner steady brace
Corner steady pads
Coupling lock
Door mat
Fire blanket
Fire extinguisher
Fresh water container
Gas cylinder
Gas regulator
Jack
Levelling boards
Mallet
Site/caravan
mains lead
Spare bulbs
(MandatoryinE.C.)
Spare12vfuses
Spare high pressure
gas hose
Spare wheel
Spirit level
Toilet fluid
Waste water container
Wheel brace
Personal
After sun cream
First Aid Kit
Flannels
Hairbrushandcomb
Makeup.etc.
Raincoats
Toothbrush
Toothpaste
Scissors
Shampoo
Shaving kit
Shoe cleaning kit
Soap
Sun tan oil
Wellington boots
Domestic
Adhesive tape
Air freshener
Aluminium foil
Ashtrays
Bin liners
Binoculars
Bottle opener
Breadboard
Breadbin
Brush and dustpan
Butter dish
Camera and films
Carving knife
Cassette recorder
Chairs
Clock
Clothes brush
Clothes line
Coat hangers
Coffee percolator
Coolbox
Colander
Crockery
Cruet
Corkscrew
Cutlery
Dish cloth and brush
Dusters and polish
Disposable cloths
Egg cups
Electrical extension
lead
Floor cloth
Fly spray
Food
Food mixer
Frying pan
Glasses
Grill pan
Jugs
Kettle
Kitchen roll
Kitchen tools
Litter bin
Matches
Measuringjug
Milkjug
Mixingbowl
Needlesandthread
Oven gloves
Pegs
PiezoGaslighter
Potato peeler
Pressure cooker
Radio
Rubbishbin
Salad shaker
Saucepans
Scissors
Sieve
Sugar bowl
Shopping bags
Sleeping bags
Tea pot
Tea strainer
Tea towels
Table cloths
Table mats
Television
Tin opener
Tissues
Toilet paper
Torch
Towels
Toys & Games
Vacuum cleaner
Washing up bowl
Documents
Bail Bonds (some
Euro countries)
Bank and credit cards
Caravan Certificate
Cheque book
CRISdocument
Driving licence
Green Card
Insurance (some
Euro countries)
Mapsandguides
Money
MOTCerticate
VehicleRegistration
Documents

Towing code
15
PREPARING FOR THE ROAD
PRE-LOAD CHECKLIST
Caution: Never enter the caravan without
first lowering the four corner steadies with
the brace provided.
BEFORE LOADING CHECK:
- loose articles are stowed securely. Do
not stow tins, bottles or heavy items in
overhead lockers prior to towing.
- all lockers and cupboard doors are closed
and secured.
- all bunks are secure.
- all rooflights are closed and secured.
- main table is stored in its transit position.
- fridgeison12Voperationanddoorlock
is set.
- all windows are fully closed and latched.
Nevertowwithwindowsonnightsetting.
Leave all curtains and blinds open to aid
rear visibility.
- gas cylinders are correctly positioned,
secured and turned off.
- battery is secure and mains connecting
cable is disconnected and stowed.
- 12Vdistributionpanelselectorswitchisset
to the van position.
(a)
(c)
Fig. A Loading your caravan
(b)
(d)
WARNING: The fridge will only operate
in transit when the 12V distribution panel
selector switch is in the ‘VAN’ position.
WARNING: Turn off gas appliances except
those heating appliances designed to
function while the vehicle is in motion.
WARNING: Do not travel with televisions
or microwaves in overhead lockers unless
the appliance was supplied fitted to your
caravan by the manufacturer.
LOADING AND DISTRIBUTION OF WEIGHT
IN THE CARAVAN
Do not exceed recommended maximum
loading for your caravan.
Fig. A Sensible loading
Howtoapportionit
1. Loadheavyitemslowdownneartheoor
and mainly over or just in front of the
axle(s) (Fig. A).
Light Medium Heavy

Towing code
16
2. Load evenly right to left so that each
caravan wheel carries approximately the
same weight.
3. Do not load items at the extreme front or
rear since this can lead to instability due to
the ‘pendulum effect’.
4. Loadremaindertogiveasuitable
noseweight at the towing coupling.
Check noseweight.
Note: Do not overload car boot.
Note: Please take care to ensure that you
have allowed for the masses of all items
you intend to carry in the caravan.
WARNING: All heavy and/or voluminous
items (e.g. TV, radio etc) must be stored
securely before travelling.
Towing vehicle’s rear suspension
It is important that the towing vehicle’s rear
suspension is not deflected excessively by the
noseweight on the tow ball. If it is excessive the
steering and stability will be affected. (Fig. B)
The greater the towing vehicle’s tail overhang
(the distance between the rear axle and the tow
ball), the greater the effect the noseweight will
have on the towing vehicle’s rear suspension.
Fig. B Illustration of excessive deflection
of vehicle’s rear suspension
After trying out the caravan it may be found that
a stiffening of the rear suspension is necessary
- but note that this may give the towing vehicle
a firmer ride when not towing.
There are a number of suspension aids
available and advice should be sought on
which to use and how to fit. It is important to
ensure that the caravan is towed either level or
slightly nose down.
If you have any doubts about the suitability of
your towbar for towing a caravan consult the
towing bracket manufacturer.
DONOTexceedthe:
• GrossVehicleMass(G.V.M.oncarplate).
• MaximumTechnicallyPermissibleLaden
Mass(M.T.P.L.M.)onthecaravan.
• GrossVehicleCombinationMass(Train
Weight)(G.V.C.M.oncarplate).
• MaximumPermissibleTowingMass.
• VerticalStaticLoadonthe
caravan coupling.
• MaximumVerticalLoadonthe
car towball as specified by towing
vehicle manufacturer.
Stability
All our models are of a well balanced design
and should be exceptionally good towers.
MostmodelshaveanAL-KOstabilisertted
as standard. The common causes of poor
stability include:
(a) Worn springs or loose spring fixings on the
towing vehicle.
(b) Towing vehicle springs too soft.
(c) Insufficient noseweight.
(d) Noseofcaravanistowingtoohigh.
Galvanised steel chassis
Drilling of the galvanised steel chassis will
invalidate the warranty and must not be done.
Towball
The AL-KO stabiliser is designed to be used
with a swan neck, fixed or detachable towball.
If you use a ‘bolt on type’ towball you may need
to replace your towball with a special extended
neck towball.

Towing code
17
If you have a bolt on type towball you should
ask your dealer to check clearance around the
towball to allow for the stabiliser to articulate.
The AL-KO extended neck towball (available
from your dealer) is approved and marked
withtheapprovalnumberEC94/20.Failureto
provide enough clearance around the towball
may invalidate your stabiliser warranty.
Stabiliser friction pads
The AL-KO stabiliser uses ‘friction pads’
inside the coupling head to clamp the towball.
These pads must be kept free from grease and
contamination from the towball.
The friction pads should last approximately
50,000km(30,000miles)undernormaluse,if
correctly maintained.
Suitable towing vehicles
The caravan is manufactured for towing behind
normal road cars and is not suitable for towing
behind commercial vehicles. It is strongly
recommended that whenever a caravan is to be
towed over rough terrain, e.g. a farmer’s field or
track, great care should be taken to ensure that
no undue stress is placed upon the caravan
via the hitch mounting, i.e. reduce speed. If in
doubt, please consult the chassis manufac-
turer and the towing vehicle manufacturer
who will advise. Touring caravans based on
standard AL-KO chassis can be towed by four
wheel drive off road leisure vehicles providing
the unit is used to tow in a like manner to a
conventional road-going car and driven in the
same considered manner.
Towbar manufacturers should be consulted
before towing an uncompensated twin
axle caravan.
Snaking
This is a term used to denote an unstable car
and caravan combination where the caravan
‘weaves’ from side to side often causing a
similar swaying movement in the car itself.
Causes:
i) Unsuitable or unbalanced outfit.
ii) Incorrect loading or weight distribution.
iii) Excessive speed especially downhill.
iv) Side winds.
v) Overtaking.
vi) Being overtaken by a large fast
moving vehicle.
vii) Erratic driving.
viii) Insufficient tyre pressures.
ix) Mixingradialandcrossplytyres.
Cures:
Cases of persistent snaking can be alleviated
by the use of a stabiliser.
On the road
If you do find your outfit snaking, try to keep
the steering wheel in a central position as far as
possible, decelerate and avoid braking if possible.
Types of tyres fitted
The original tyres fitted by the manufacturer are
suitable for towing at maximum speed of up to
81mph(130kph).
Tyres
Caravan manufacturers choose the type,
size,prole,loadcarryingcapacitiesand
speed ratings to match the design masses of
there vehicles, adjusting the tyre pressures
to suit. Only change the type of tyres on your
caravan on expert advice from the caravan
manufacturer, or tyre manufacturer.
TYRE MAINTENANCE
Tread depth
Pay special attention to the amount of tread
remaining on your tyres, and measure them
regularly. Always replace tyres before they
reachtheminimumlegallimitof1.6mm.
Periodically tyres should be rotated to equalise
wear in the same manner as car tyres.
Pressures
The caravan manufacturers plate (fixed
adjacent to exterior door) and Technical
handbook contains information about caravan
loading and the required adjustments to tyre
pressures, which should be followed for safety.
Tyre pressures should always be checked and
corrected prior to each journey. It is vital
that tyre pressures are maintained at the
levels recommended by the manufacturer

Towing code
18
to ensure maximum tyre life, safety and
handling characteristics.
Over or under-inflating tyre is likely to seriously
impair their performance and may prejudice the
safe use of the vehicle.
Over-inflation increases overall tyre diameter,
decreases the amount of tread in contact with
the road, decreases sidewall flexibility and
affects road-adhesion.
Under-inflation decreases overall tyre diameter,
increases sidewall flexing, generates higher
tyre operating temperatures and difficult vehicle
handlingcharacteristics.Runninganunder-inated
tyre may cause premature tyre failure. Both over
and under-inflation adversely affect tyre life.
Treads
Keep tyre treads clean of stones and other
foreign bodies, and check regularly for
damage to the tread and sidewalls. It is vitally
important that any damage is checked out
by a tyre expert and any necessary repairs or
replacements are carried out immediately.
Tyre valves
Check tyre valves carefully. Ensure the caps
are in place free from dirt/ debris and that
there is no evidence of cracking or damage to
the valve stem
Tyre aging
Rubbercompoundsusedintyrescontain
chemicals that help to slow down the natural
agingprocessofuntreatedrubber.However,
tyres do deteriorate with age, which increases
the risk of tyre failure, and there are many ways
in which this can be spotted:
• Cracking/crazingonthesidewallofthe
tyre, caused by its flexing
• Distortionoftyretread
• Deformationofthecarcassofthetyre
There will also be a deterioration of the ride
quality caused by vibrations through the
tyre. This may signify the tyres performance
has been affected by age and should be
investigated as soon as possible
It is recommended that tyres are replaced
after 5 years service including the spare.
Tyres that display signs of aging should be
removed and not put to further use.
The effects of aging can be brought about
prematurely in several conditions. Tyres fitted
as spare wheels may age prematurely. If tyres
on caravans are not in regular use they should
be inspected before every journey, several
cleaning products may also harm the chemicals
intherubber.However,theageofatyrewill
affect its safety and increase the risk of failure,
and you should inspect tyres for the signs of
aging regularly.
THE TYRE LAW
Tyre pressures
Tyre pressures should be maintained at
or within a very close tolerance of the
recommended pressures.
Tyre tread depth and damage
When tyres become worn or damaged they
must be replaced. There must by law, be at
least1.6mmoftreaddepthacrossthecentre
3/4ofthewidthofthetreadthroughoutthe
entire circumference of the tyre. There must
be no damage to the tyre body - sidewalls or
tread, no bulges or cuts.
Tyre types
It is illegal to mix tyres of a different
construction on the same axle.
Note:Althoughthecaravanmaybettedwith
the same type of tyre as the towing vehicle,
the pressures specified are different. All charts
show values for cars and are therefore not
applicable for caravans.
PressuresdisplayedontyrewallsapplyONLY
inNorthAmericaandCanada.
Wheels
Caravan wheel bolts should be tightened to
atorqueof88Nm(65lb/ft)onsteelwheelsor
115Nm(85lb/ft)onalloywheelsandshould
be checked with the use of a torque wrench
regularly. Only use a spare wheel and tyre of the
typeandsizeprovidedwithyoucaravan.

Towing code
19
Wheel rims
Twosizesofwheelrimsareused5.5Jx14and
6Jx15,therimsizesarethesameforboth
steel and alloy rim, incorporating a double
safety hump which conforms to European
safetystandards.Checkthesizeonyour
caravan before replacing a rim.
Hitch head load capacity
The maximum vertical static load which can
be put upon the hitch head when connected is
100kg.Pleaserefertothetechnicaldatainyour
handbook. (But see also vehicle manufacturer’s
weight limits on towball loading.)
PRE-TOW CHECKLIST AND HITCH-UP FOR
AK 3004 STABILISER
Fig. A
Check Gas Locker, Battery Locker and
Cassette Toilet doors are secure.
Check wheelnuts, tyre pressures and
tyre conditions.
Fully raise all four corner steadies. (Fig. A).
Pick up any levelling pads or levelling boards.
Check rooflights/vents are securely closed.
Switch off gas supply and change over to
electricity if required.
Lock the caravan exterior door.
Fig. B
An assistant can help in the hitching operation
by standing on the left hand side of the
drawbar (facing rear of car) and extending an
armhorizontallytoindicatepositionofthe
coupling. When reversing aim the towball of the
cardirectlyatthecaravandrawbar.Remove
towball cover and keep in car.
Adjust the jockey wheel to ensure the cup is
high enough to slide over the towball.
Releasecaravanhandbrake.
Position cup over the ungreased towball,
release and lift forward the large red stabiliser
handle (Fig. B) lift forward the exposed smaller
black handle (Fig. B) until it clicks up.
Fig. C
The hitch head is fitted with a visual indicator
to show whether or not it is properly connected
to the towball. A green band will show
immediately below the red indicator button on
the hitch head when a proper connection has
been made. (See Fig. C)

Towing code
20
Adjust jockey wheel to lower cup on to the
ball. A click indicates it is fully engaged. Ensure
black handle has returned to its free position.
Secure caravan handbrake. (Fig. D)
Fig. D Handbrake
Connect breakaway cable as described on
page 22.
Ensure that the jockey wheel is fully wound up
and properly located in the slots, then release
the clamp handle, lift the whole unit as high as
possible and retighten the clamp handle.
Note:Ensurejockeywheellocatesinrecess
provided. Carelessness could result in damage
to the A frame cover.
Ensure the hitch is secured by checking the
visualindicator(seepage19).
WARNING: If the green band is showing
when the hitch head is not connected
to the towball there is a fault - contact
your Dealer.
Connectthe13pinplugtocarsocketensuring
there is enough loose cable for cornering,
ensuring they won’t drag on the ground.
Check all car and caravan roadlights are
working. Check round the caravan for anything
left behind.
Releasecaravanhandbrake,adjustallmirrors
from driving seat and proceed.
• Allroadlightsmustbeinworkingorder.
• Lensesandreectorsmustbein
good condition
• Bulbsmustbeofcorrectwattageforthe
application (see Service handbook).
WARNING: Do not cause any road lighting
to be obscured by the addition of any
options or accessories to your caravan.

Towing code
21

Towing code
22
Passengers
Passengers are forbidden to ride in a caravan.
BREAKAWAY CABLES
UK law requires that all caravans are fitted with a
safety device to provide protection in the unlikely
event of separation of the main coupling while
in motion. A device referred to as a ‘breakaway
cable’ fulfils this requirement and when fitted as
on your caravan is mandatory.
Purpose
To apply the caravans brakes if it becomes
separatedfromitstowingvehicle.Havingdone
this, the cable assembly is designed to part
allowing the caravan to come to a halt away
from the towing vehicle.
Identification
A thin steel cable with a red plastic coating
fitted with a means of attachment for
connection to the towing vehicle. Located
directly beneath the coupling head.
Operation
In the event of the main coupling of the
caravan separating from the towing vehicle,
the cable should be able to pull tight, without
any hindrance, engaging the caravan brakes.
The breakaway cable should not become taut
during normal use.
Correct procedure for use
Regularlycheckthecableandclipfordamage.
If in doubt contact your Swift Group dealer.
Makesurethecablerunsasstraightas
possible and goes through the cable guide
fitted underneath the caravan coupling head.
Determine whether or not the towing vehicle
towbar has a designated attachment point
(i.e. a part specifically designated for a
breakaway cable).
Where a point is designated on the towbar:
• Passthecablethroughtheattachment
pointandclipitbackonitself(gure1).
Fig. 1
• Donotclipdirectlyontothedesignated
point (figure 2) since the clip is not
designed for use in this way.
Fig. 2
Where there is no designated attachment point
on the towbar:
• Fixedball:Loopthecablearoundtheneck
of the towball in a single loop only. See
figure 3A and 3B.
Fig. 3a

Towing code
23
Fig. 3b
• Detachabletowball:Youmustseek
guidance on procedure from the towing
vehicle towbar manufacturer or supplier.
When the breakaway cable is attached, check
to ensure:
a) that the cable cannot snag in use on the
caravan coupling head, jockey wheel,
stabiliser or accessory e.g. bumper shield,
cycle carrier etc.
b) that there is sufficient slack in the cable
to allow the towing vehicle and caravan
to articulate fully without the cable ever
becoming taut and applying the brakes.
c) that it is not slack and can drag on the
ground. If left loose, the cable may scrape
along the ground and be weakened so
that it subsequently fails to do its job. The
cable may also be caught on an obstacle
when in motion thus engaging the caravan
brakes prematurely.
Havingfollowedthisadvice,shouldyoufeel
that a satisfactory coupling arrangement cannot
be achieved, consult your Swift Group dealer or
towbar supplier.
Mirrors
The driver of the towing vehicle must have an
adequate view of the rear.
If there is no rear view through the caravan it is
essential that additional exterior towing mirrors
are fitted. This is mandatory in some European
countries and drivers can face instant fines if
extension mirrors are not fitted.
Caution: Any rear view mirror must not
project more than 250 mm outside:
a) the width of the caravan when being towed.
b) the width of the towing vehicle when
driven solo.
Note:Anyrearviewmirrorttedshallbe‘e’
marked and cover the field of view as stipulated
by type approval requirements (Community
Directive2003/97or2005/27orECE
Regulation46.02orRegulation33oftheRoad
Vehicles(Construction&UseRegulation1986).
MOVING OFF
Let the clutch in smoothly.
Allow more engine speed to produce the power
to move the additional weight of the caravan.
Reducewearandtearonclutchand
transmission by taking extra care.
Change gears smoothly.
Try not to jerk the clutch.
REVERSING
When the towing vehicle is reversing, the
overrun device shaft is pushing in, applying the
brakes via the overrun lever, brake rod system,
bowden cables and the expander mechanism.
Fig. A Reversing
The backwards rotation of the brake drum
causes the secondary brake shoe to collapse
cancelling out the braking effect, allowing the
This manual suits for next models
1
Table of contents
Other Swift Group Motorhome manuals

Swift Group
Swift Group Bolero 630EW / E540 User manual

Swift Group
Swift Group 2013 Holiday Home User manual

Swift Group
Swift Group CARRERA User guide

Swift Group
Swift Group Basecamp 2018 User guide

Swift Group
Swift Group 2011 User manual

Swift Group
Swift Group Elegance User guide

Swift Group
Swift Group Bessacarr 2006 User guide

Swift Group
Swift Group Select 122 User guide

Swift Group
Swift Group Sprite Major 4 Release Note

Swift Group
Swift Group Select 122 2020 User guide