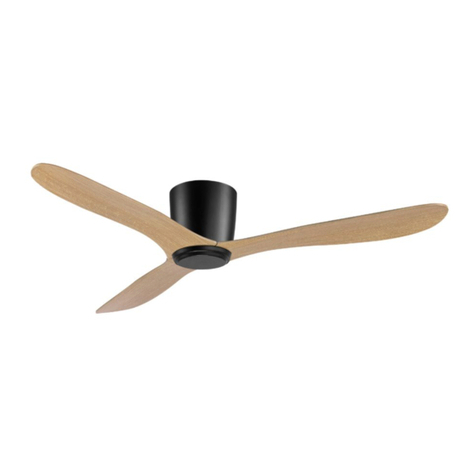
Swing BOULDER User manual

the
eco
breeze
Installation manual
for SWING ceiling fan
12
Year
Warranty
BOULDER ref: 85121 | 85084 | 85082
1

- Turn the fan off and wait for the blades to stop completely before performing any maintenance or cleaning.
- This fan is intended for indoor use only, and is not for installation in pergola, balconies, or wet places. Damage caused as a
result of exposure to water or chemicals is not covered by the warranty.
- This fan has an AC type motor.
- A light fitting is included with this fan.
- This ceiling fan is suitable for operation with a SWING LED GX53 light fitting.
- SWINGfansshouldonlybe installedand operatedusingSWING accessories,remotecontrol,downrods,lightfittingandblades.
- This ceiling fan must be securely connected to a solid structure. Under no circumstances should the Hanging bracket be
installed on plaster boards only!
- Use all screws provided with the fan! Failure to use all screws poses a safety hazard and may result in serious injury.
- Ensure that the accessories used to install the hanging bracket on the ceiling, are adapted to hold a moving weight of at least
30Kg
- The blades should be fitted to the fan motor only after the motor is hung properly on the ceiling. fitting the blades while the
motor is on the floor or on any other surface, may damage or cause them to bend.
- Before starting any kind of electrical work shut the power off at the circuit breaker in the fuse box.
- This ceiling fan must be grounded.
- Do not disconnect the plugs from the wiring and do not change the wiring in any way.
- Ensure that the minimum distance between the blades and the floor is 2.3 meters, and a minimum distance between the tip
of the blades and the wall is 30 cm.
- Ensure that the fan blades can rotate freely without any obstructions. (windows, doors, cupboards, etc.)
- After you install the fan make sure that all mounting components are secured to prevent the fan from falling.
- Do not insert anything into the fan blades while the fan is operating
* The warranty appendix is at the end of this manual
When installing the fan, make sure that a minimum distance from the walls and floor is maintained,
and that the blades can rotate freely without any obstructions when the fan is switched on.
General safety instructions
The distance
from the wall is
at least 30 cm
The distance from
the floor to the blade
is at least 2.3 meters
Be sure to read this manual and all safety information
carefully before installing your new fan.
Attention! The installation of the ceiling fan and its accessories shall be carried out in
accordance with the safety, wiring and installation instructions specified in this manual.
Installation not in accordance with the instructions may damage the fan and constitute a
violation of the warranty conditions specified in the Warranty*
3
SWING BOULDER
Fan Installation Instructions | Version 1.22
2

The parts of the fan Installation instructions
1. Opening the Packaging and Preparations Before the Installation
- Carefully remove the ceiling fan from the packaging and place the fan motor and blades on a cloth or soft surface.
Placing the motor or blades on a hard surface may damage the finish.
- This ceiling fan is provided with a set of matching blades. Do not mix or switch blades from different products. Use of
blades different from those supplied can cause a malfunction and will void your warranty.
- Before starting the installation verify that all the parts are present and available for use, including any accessories which
may be required for the installation. Use only original Swing fan accessories.
2. Hanging Bracket Installation
- There are 4 locking screws on the hanging bracket. Loosen two opposite screws and remove the other two opposite
screws.
- Fix the hanging bracket to a flat surface using suitable fasteners, which should be fastened to a timber joist or concrete
(the attached screws are intended for standard concrete. For other structure types, suitable installation fasteners should
be used).
- All screws provided should be used, and under no circumstances should the Hanging bracket be installed on
Plasterboard only.
1 | Hanging bracket
2 | Ceiling cover
3 | Fan motor
4 | Light fitting
5 | Kit of screws
6 | Balancing kit
7 | Wall switch
8 | Fan blades
8
5
6
7
1
2
4
3
Screws
Hanging bracket
5
SWING BOULDER
Fan Installation Instructions | Version 1.22
4

3. Mains Connection
- Connect the mains supply 220-240V to the terminal block in accordance with the markings.
Installation instructions
4. Mains Connection with remote control (Remote kit sold separately)
- Connect the mains supply 220-240V to the terminal block in accordance with the markings.
5. Hanging the fan motor and connecting the ceiling fan to the electricity supply
- Hang the fan motor on the hook on the hanging bracket to ease the connection of the terminal plug.
- While the fan motor is hung, connect the terminal plug connector (male to female).
Attention! As the fan motor is not installed, hold the fan in addition to the hanging hook.
Plug connection
6. Hanging the Fan
- Carefully lift the fan motor and place it on the hanging bracket
- Rotate the fan motor slightly and tighten all 4 screws.
7
SWING BOULDER
Fan Installation Instructions | Version 1.22
6

Installation instructions
8. Fitting the blades
- Loosen the screws from the light base and remove the light base from the fan motor (Figure 1).
- Remove the 3 blade screws from the fan motor (Figure 2).
- Insert the blade through the slots on the side of the fan motor.
- Insert the 3 screws through the blade and secure them to the motor. (Figure 3).
- Repeat this securing process for all other blades.
-Put the light base back in place and tighten the screws on the light base. (Figure 4).
1
3
2
4
9. Installing the light fitting
- Insert and rotate the light fitting counterclockwise to lock in place.
7. Connecting the ceiling cover
- Lift the ceiling cover over the hanging bracket.
-Rotate the ceiling cover until the cover locks in place.
9
SWING BOULDER
Fan Installation Instructions | Version 1.22
8

Your ceiling fan can operate in either summer or winter mode.
Summer mode - The reverse switch should be in the SUMMER position to make the fan rotate in a clockwise direction. The
airflow will be directed downwards, for cooling in summer.
Winter mode - The reverse switch should be in the WINTER position to make the fan rotate in a counter clockwise direction.
The airflow will be directed upwards assisting in the circulation of warm air, for energy conservation in winter.
Functions and operation of the wall controller
Setting fan direction for summer and winter
OFF position-
Fan off
Position 1-
High fan speed
Position 2-
Medium fan speed
Position 3-
Low fan speed
Toggle switch –
Light On/Off
Fan speed rotary switch
Light toggle switch
Winter
Winter
Summer Downwards airflow
Clockwise rotation Counter clockwise rotation
Upwards airflow
Summer
Reverse
switch
Attention! It is required to select a unique frequency value on the remote control for each of the fans.
This is to prevent frequency disruption and interference between the fans.
- Switch off the electricity supply to the fan by turning off the wall switch.
- Open the battery cover located on the back of the remote control.
- Select a unique frequency on the remote control by moving the frequency pins on the back of the remote
control.
- Close the battery cover.
- On the receiver open the black rubber cover and match the frequency that was set on the remote control by
moving the frequency pins.
- Insert the black rubber cover and place the receiver in the hanger bracket and close the ceiling cover.
- Switch back on the electricity supply to the fan.
Setting up the remote control
(If a remote is used and more than one ceiling fan is installed)
Remote controlReceiver
11

Functions and operation of the remote control
Attention!
- The remote control operates wirelessly and must be within a range of up to 8 metres from the fan.
- When changing functions, wait patiently for a few seconds for the fan to receive the transmission and perform
the operation, especially after changing the rotation direction of the blades.
- The remote control comes with a dedicated wall holder which can be installed using two screws.
- The indicator lights are not lit permanently, but are lit for one second, and then go off.
Switching the fan off
Switching the
light on or off
Set fan speed
to medium Set fan speed to low
LED indicator
Set fan speed to high
General operating instructions, troubleshooting
- Ensure that all screws are tightened, and the electrical connections are secure.
- Ensure that the fan blades can rotate without any obstructions.
- Ensure that the power is switched on and that the fan is connected to an electrical voltage.
- After you have verified that the fan is supplied with electrical voltage, Switch the fan on to
high speed for about 5 minutes.
Activating the fan
for the first time
Attention! It can take up to 30 seconds for the fan to reach the desired speed.
Note! Before starting any troubleshooting or repair activity, ensure that the mains supply
is disconnected.
Does the fan have trouble starting or will the fan not start at all?
- Check all electrical connections, including the wall switch and the circuit breaker in the fuse
box.
- Verify that there is no object/screw that prevents the movement of the blades.
- Ensure that the remote control battery is new and properly inserted.
- Verify that you pressed the fan switch button on the remote control.
- Switch the fan on to the highest speed.
- Verify that the remote control and fan are paired and if necessary re-pair the remote to the
fan (Page 12).
Poor Airflow?
- The fan may rotate in the reverse direction (Winter Mode) – check the Summer/Winter Mode
selection and ensure the mode is appropriately set for the season.
- Verify that the fan is appropriate for the size of the room.
- Check if the space between the ceiling and the blades is less than 20cm. In this case the
airflow will be significantly reduced.
Troubleshooting
Is the fan noisy?
- If it is a "mechanical" noise, make sure that the blades are tightened, all the screws are
securely tightened, the light fitting is correctly installed, and all the wiring is properly
connected.
- If it is an "electric" noise which is mainly heard in the evening or in the early morning, it may
be caused by electrical pulses which are sent over the electric lines.
Attention! Some noises cannot be prevented and are not covered under warranty.
13
SWING BOULDER
Fan Installation Instructions | Version 1.22
12

Is the fan wobbling or vibrating?
- If the fan wobbles or vibrates excessively, it may be due to the fact that the blades are loose
or unbalanced. In this case, ensure that all the blades are securely fastened to the fan, that
no screws are missing and that all the screws are tightened. Ensure the hanging bracket is
properly installed on the ceiling.
- If necessary, the blades can be balanced using the blade balancing kit, which is included
with the fan.
- If the ceiling fan wobbles in an extreme way – stop using the fan immediately and contact
customer service.
- All blade sets are grouped by weight as a set. Mixing blades from another fan can cause the
fan to wobble and vibrate.
- In order to maintain the appearance of the ceiling fan and its integrity, be sure to clean and
remove dust periodically (using nonabrasive detergents). Accumulation of dust and dirt is
not aesthetic and will lower the fans performance.
- Due to the fans natural movement some connections may become loose overtime. Check
the fans connections, blades and tighten screws if needed. (Not necessary to remove the fan
from the ceiling to perform)
Maintenance
Attention! To prevent long-term damage, it is important to balance the fan as soon as
possible. The balancing of the fan is not covered under warranty.
All SWING products are high-quality fans. The warranty applies to the motor, fan body, blades
and light fittings which are parts of the fans sold by SWING.
The installation must be performed according to this manual and must comply with local
electrical code.
Warranty Conditions
Products
Warranty Period
Warranty Conditions
- This warranty applies to all products manufactured by the SWING brand. Ceiling fans, ceiling
fans for outdoor conditions, industrial fans, and light fitting suitable for the ceiling fans. The
warranty does not cover bulbs and consumables.
- Damage caused as a result of improper installation or unreasonable use is not covered under
the warranty.
The warranty period for the SWING products is for one year. Beyond the one-year warranty
period, the following applies:
- The fan motor warranty is 12 years.
- The light fitting is 3 years.
The offered warranty for the SWING products is valid under the following conditions:
- Products should be used in accordance with the application specifications of the product.
- The warranty covers only product failures caused by defects in materials, workmanship and/
or manufacturing.
- Only licenced SWING technicians are authorized to service SWING products. Any service and/
or repair performed by a technician not authorized by SWING will void the warranty.
General operating instructions, troubleshooting
15
SWING BOULDER
Fan Installation Instructions | Version 1.22
14

- In the event of a product malfunction, SWING at its sole discretion, may decide whether to
repair components or products, provide similar products as a replacement, or refund the
original customers.
- SWING, at its sole discretion will choose whether to test the product at the customer's home,
or at a SWING laboratory.
- Repair under the warranty does not cover any damage as a result of voltage drops, lightning,
fluctuations in the mains voltage or connection to an alternative electricity supply (such as
solar systems).
- Damage caused as a result of aggressive handling during installation is not covered under
the warranty.
- If a defect is found in the fan when opening the package – do not install it, but notify the
company immediately, and return it to the place where it has been purchased.
- The customer or end users will bear all the costs arising from removing and reinstalling the
ceiling fans, as well as shipping costs of bringing and returning the products. All shipping
costs will be prepaid by the customer.
- Other costs such as: component replacement costs during installation, repairs caused by
installation failures, other types of damage and/or consequential damage – are not covered
under this warranty.
- If repair is required at the customer’s household – the cost of delivery, installation, and
operation of any special equipment (such as: scaffolding, forklifts), intended to allow access
to the ceiling fans – will apply to the customer/owner of the place.
- In any case, the company is not responsible and will not bear the costs of disassembling,
assembling, transporting or any other cost for the purpose of bringing the fan to the service
centre and returning it to the customer.
- A request for repair under warranty should be made immediately by opening a service ticket
via the website and if necessary, by presenting an original purchase invoice and returning
the defective product. This is so that the SWING representatives can check the validity of the
product warranty and the scope of the request.
In order to maintain the information in SWING's databases, it is advisable to fill in
the attached warranty form and send it to us immediately after buying the fan.
Additionally, to facilitate the identification and service process in the event of a
malfunction, it is recommended to attach the original purchase invoice to this form.
Repair of Product
Under Warranty
Submitting a Product
Repair Request Under
Warranty
Customer name:
Address:
Telephone:
Mobile phone:
Email:
The name of the shop where the purchase was made:
Date of purchase:
Product name:
Installer’s company name and address:
Date of installation:
Installer’s name:
Telephone:
How to contact us to use the warranty:
www.swingfans.com
It is recommended to send a copy of this form with an original purchase invoice
immediately after the installation so that the information is recorded in the company's
databases.
The form can be filled out online at: www.swingfans.com
Customer Details
Purchase Details
Installer Details (if applicable)
The warranty form will be accepted with:
1. This form is filled in with all the details.
2. Purchase invoice.
3. Installer details.
Warranty Form
Warranty Conditions
17
SWING BOULDER
Fan Installation Instructions | Version 1.22
16

19
SWING BOULDER
Fan Installation Instructions | Version 1.22
18

This manual suits for next models
3
Table of contents
Other Swing Fan manuals
Popular Fan manuals by other brands

Greenheck
Greenheck FDR-510 Specification sheet

Bryant
Bryant ERVBBSVB Product data

Daikin
Daikin Rebel Applied DPSA Installation and start-up manual

Fanimation
Fanimation GLIDEAIRE FPD8520 Series manual

Triangle Engineering
Triangle Engineering QB2 4223 Installation and operation instructions

Anslut
Anslut 412-019 User instructions