Sylvac VISIO 200 GL User manual

Mode d’emploi – Version démarrage rapide
Bedienungsanleitung - Schnellstart-Fassung
Instruction Manual –Quick Start version
SYLVAC-VISIO 200 GL
Machine de mesure optique avec système vidéo
Optoelektronisches Messgerät mit Videokamera
Vision machine with video system

2
1 MISE EN SERVICE DU SYSTÈME
1.1
Dépaquetage et
installation de
la machine
1.2
Raccordements
électriques
La machine doit être installée sur une surface
plane, capable de supporter son poids (98
kg).
La SYLVAC-VISIO 200 GL doit être soulevée
par ses côtés latéraux. Un dispositif de
bandes de levage peut également être
employé pour son déplacement.
Veillez à respecter les réglementations
générales et locales en matière de prévention
des accidents.
La machine doit être hors tension pour
procéder aux raccordements électriques.
Le câblage ci-dessous indique un
environnement typique, et peut varier selon le
type d’ordinateur utilisé. La position physique
de chaque connexion au PC dépendra des
caractéristiques de l’ordinateur choisi.
Vérifier la tension d’alimentation de
l’ordinateur et de l’écran avant de les
brancher au secteur.
Ne pas tenter de modifier la tension de
l’ordinateur/ contrôleur. Contacter votre agent
SYLVAC si la tension indiquée ne correspond
pas à votre réseau électrique.
2 DESCRIPTION DU SYSTÈME
2.1
Descriptiondu
système
A Plaque de verre
B Capot arrière
C Tête mobile de l’axe Z
D Table de translation de l’axe X
E Tabledetranslation del’axe Y
F Interrupteur ON/OFF

3
3 DÉMARRAGE RAPIDE DE LA MESURE AVEC SYLVAC-REFLEX VISTA
3.1
Démarrage
dusystème
1 Démarrer l’ordinateur. Assurez-vous que la
clé de protection SYLVAC-REFLEX Vista
est connectée.
2 Démarrer la machine en pressant sur
l’interrupteur localisé sur le côté droit de la
machine.
3 Lancer le logiciel SYLVAC-REFLEX Vista.
L’interface principale apparaît.
4 La fenêtre des compteurs XYZ affichent *---
-*, indiquant que les axes doivent être
initialisés. Déplacer chaque axe en passant
par le point médian (axes X et Y) et le point
supérieur (axe Z) jusqu’à obtenir une valeur
numérique.
5 Positionner la pièce à mesurer au centre
du verre.
6 Déplacer l’axe Z afin d’obtenir une image
nette et ajuster les sources lumineuses pour
une détection optimale des arrêtes.
A B C
A Eclairage diascopique
B Eclairage épiscopique annulaire
C Lumière coaxiale
7 Vous pouvez maintenant débuter vos
mesures et explorer les fonctionnalités du
logiciel SYLVAC- REFLEX Vista.
8 Après avoir effectué les modifications,
sauvegardez votre programme que vous
pourrez rappeler selon vos besoins.
Pour de plus amples informations sur le logiciel
SYLVAC-REFLEX Vista et votre machine
SYLVAC-VISIO200 GL, veuillez vous reporter aux
manuels disponibles sur le DVD fourni.

4
1 INBETRIEBNAHME
1.1
Auspacken und
Aufstellen vor Ort
1.2
Elektrische
Anschlüsse
Das Messgerät soll auf einer ebenen Fläche,
die das Gewicht des Gerätes tragen kann,
aufgestellt werden (98 kg).
Das SYLVAC-VISIO 200 GL wird an seinen
beiden Seiten hochgehoben. Zur Bewegung
des Gerätes können ebenso Hebebände
verwendet werden.
Alle allgemeinen und örtlichen
Vorsichtsmassnahmen hinsichtlich
Unfallverhütung sind unbedingt zu beachten.
Alle Anschlüsse sind mit ausgeschaltetem
Messgerät auszuführen.
Die nachstehende Verdrahtung stellt eine
typische Anordnung dar, und kann je nach
eingesetztem Rechner unterschiedlich sein.
Die Lage der jeweiligen Anschlussstellen am
Rechner hängt von den Eigenschaften des
gewählten Rechners an.
Vor dem Anschließen des Rechners
und des Bildschirms am Stromnetz ist
zu prüfen, ob die Netzspannung
übereinstimmt.
Unter keinen Umständen soll die Spannung
des Rechners/Kontrollers geändert werden.
Bei Nicht- übereinstimmung mit der
Netzspannung am Aufstellungsort ist Ihre
SYLVAC-Vertretung zu benach- richtigen.
2 ÜBERSICHT
2.1
Beschreibung
des Messgerätes
A Glasplatte
B Rückseitige Abdeckung
C Beweglicher Kopf (Z-Achse)
D Verschiebung der X-Achse
E Verschiebung der Y-Achse
F Ein-/Ausschalter

5
3 SCHNELLSTART DER MESSUNG BEIM MESSEN IN VERBINDUNG MIT SYLVAC-REFLEX
VISTA
3.1
Starten des
Systems
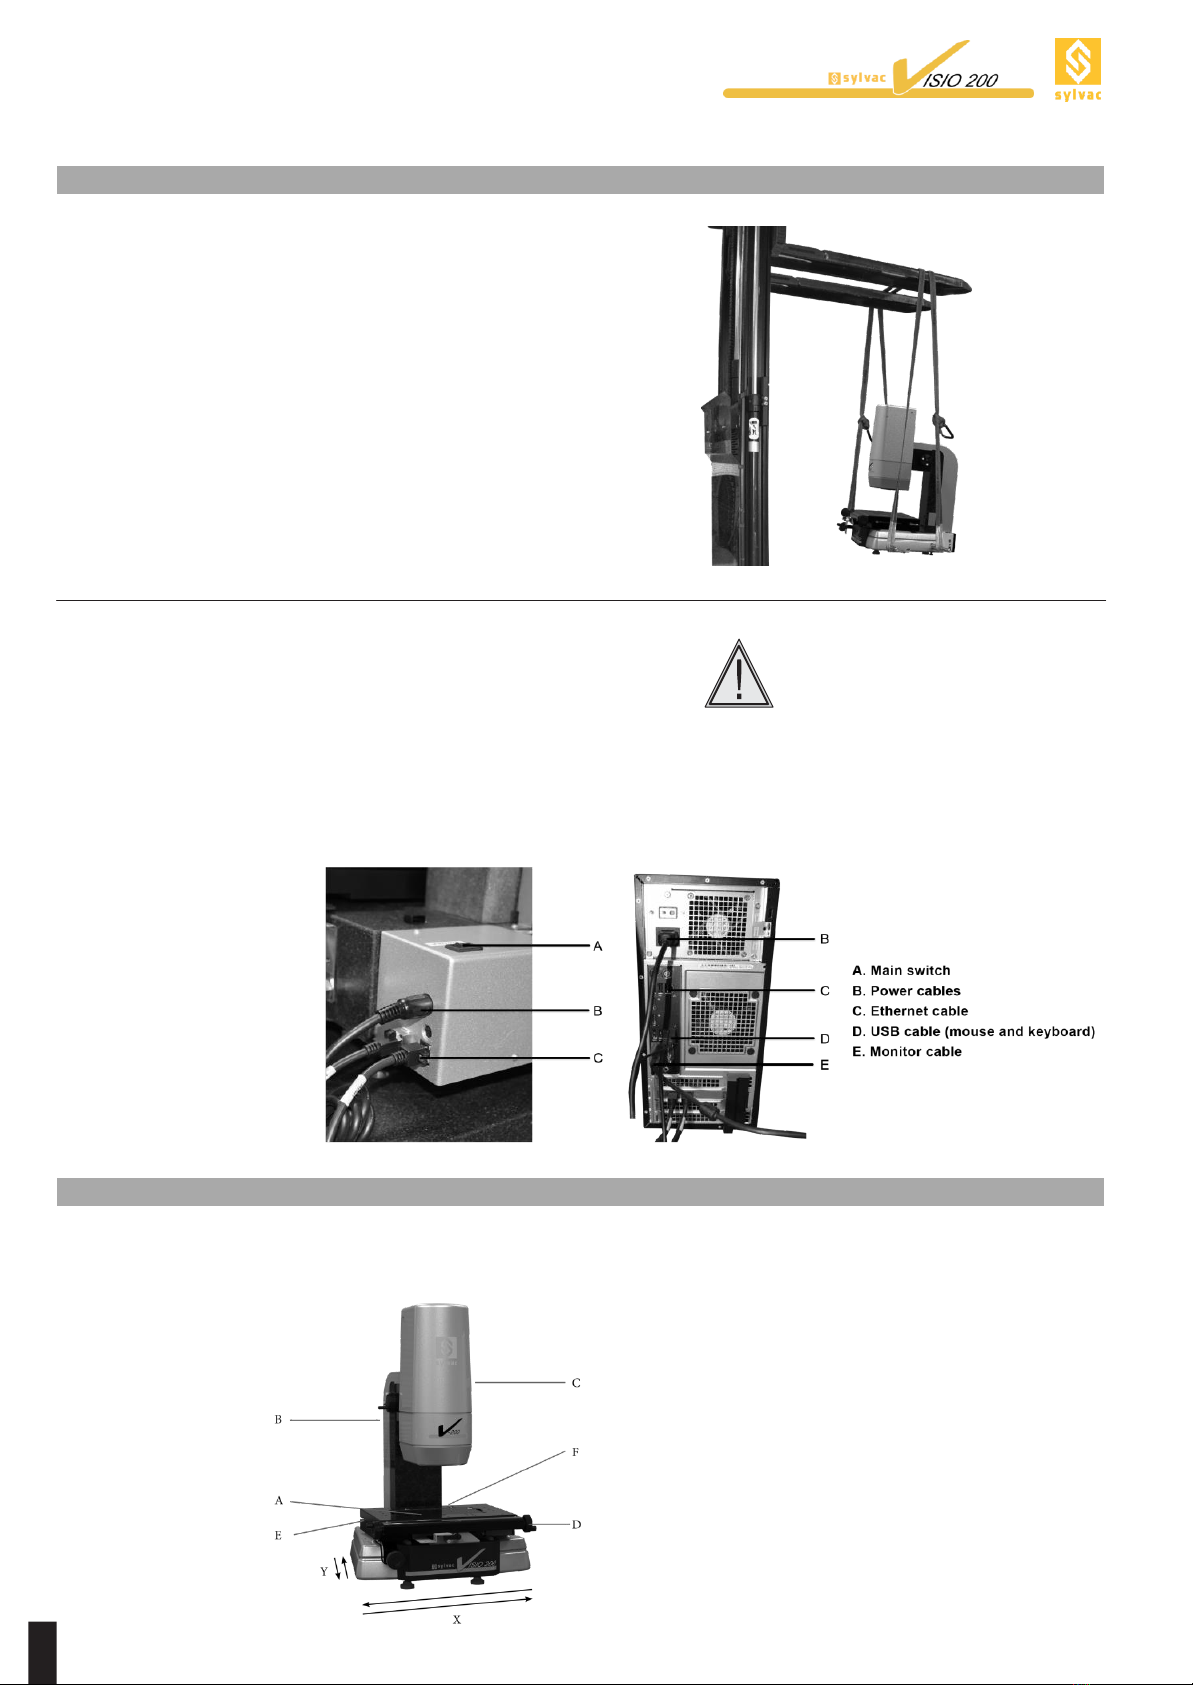
1 Rechner starten. Dabei sicherstellen,
dass der Dongle (Programmschutz)
SYLVAC-REFLEX Vista angeschlossen ist.
2 Messgerät durch Drücken des rechtsseitig
angebrachten Hauptschalters starten.
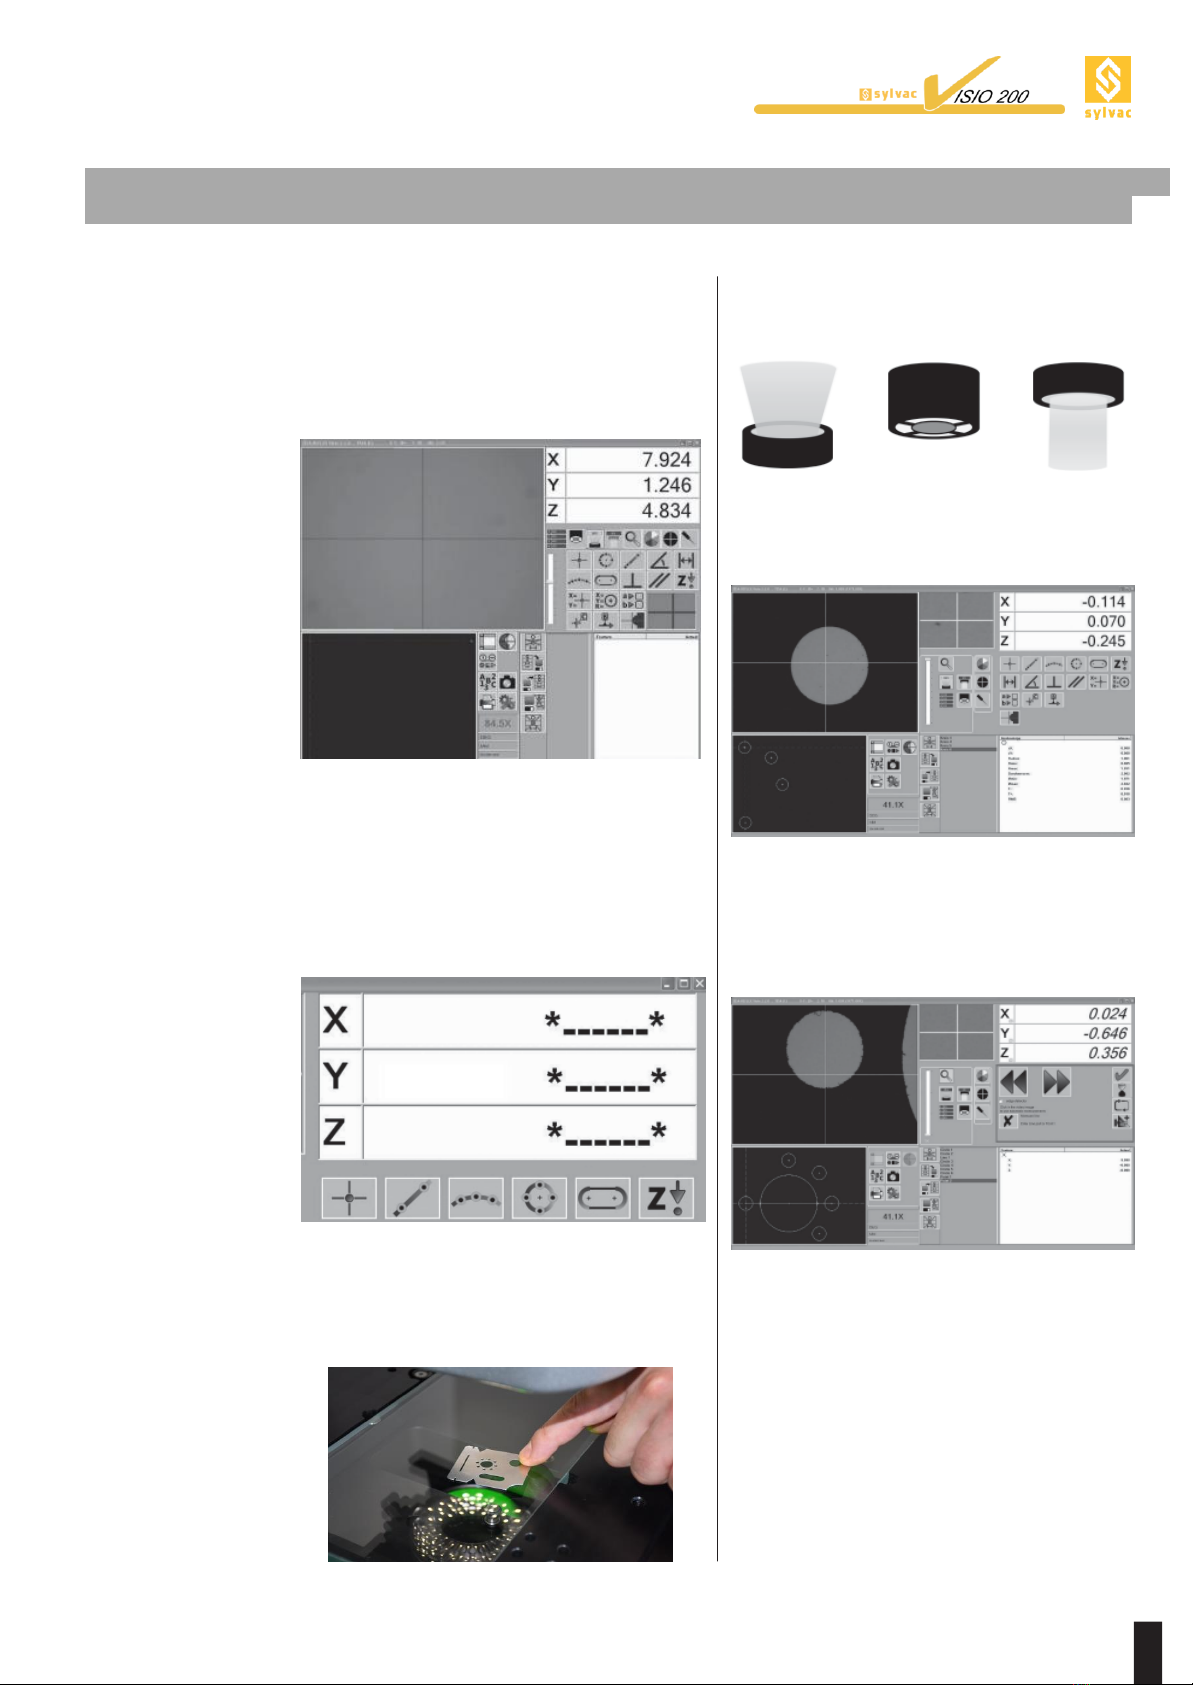
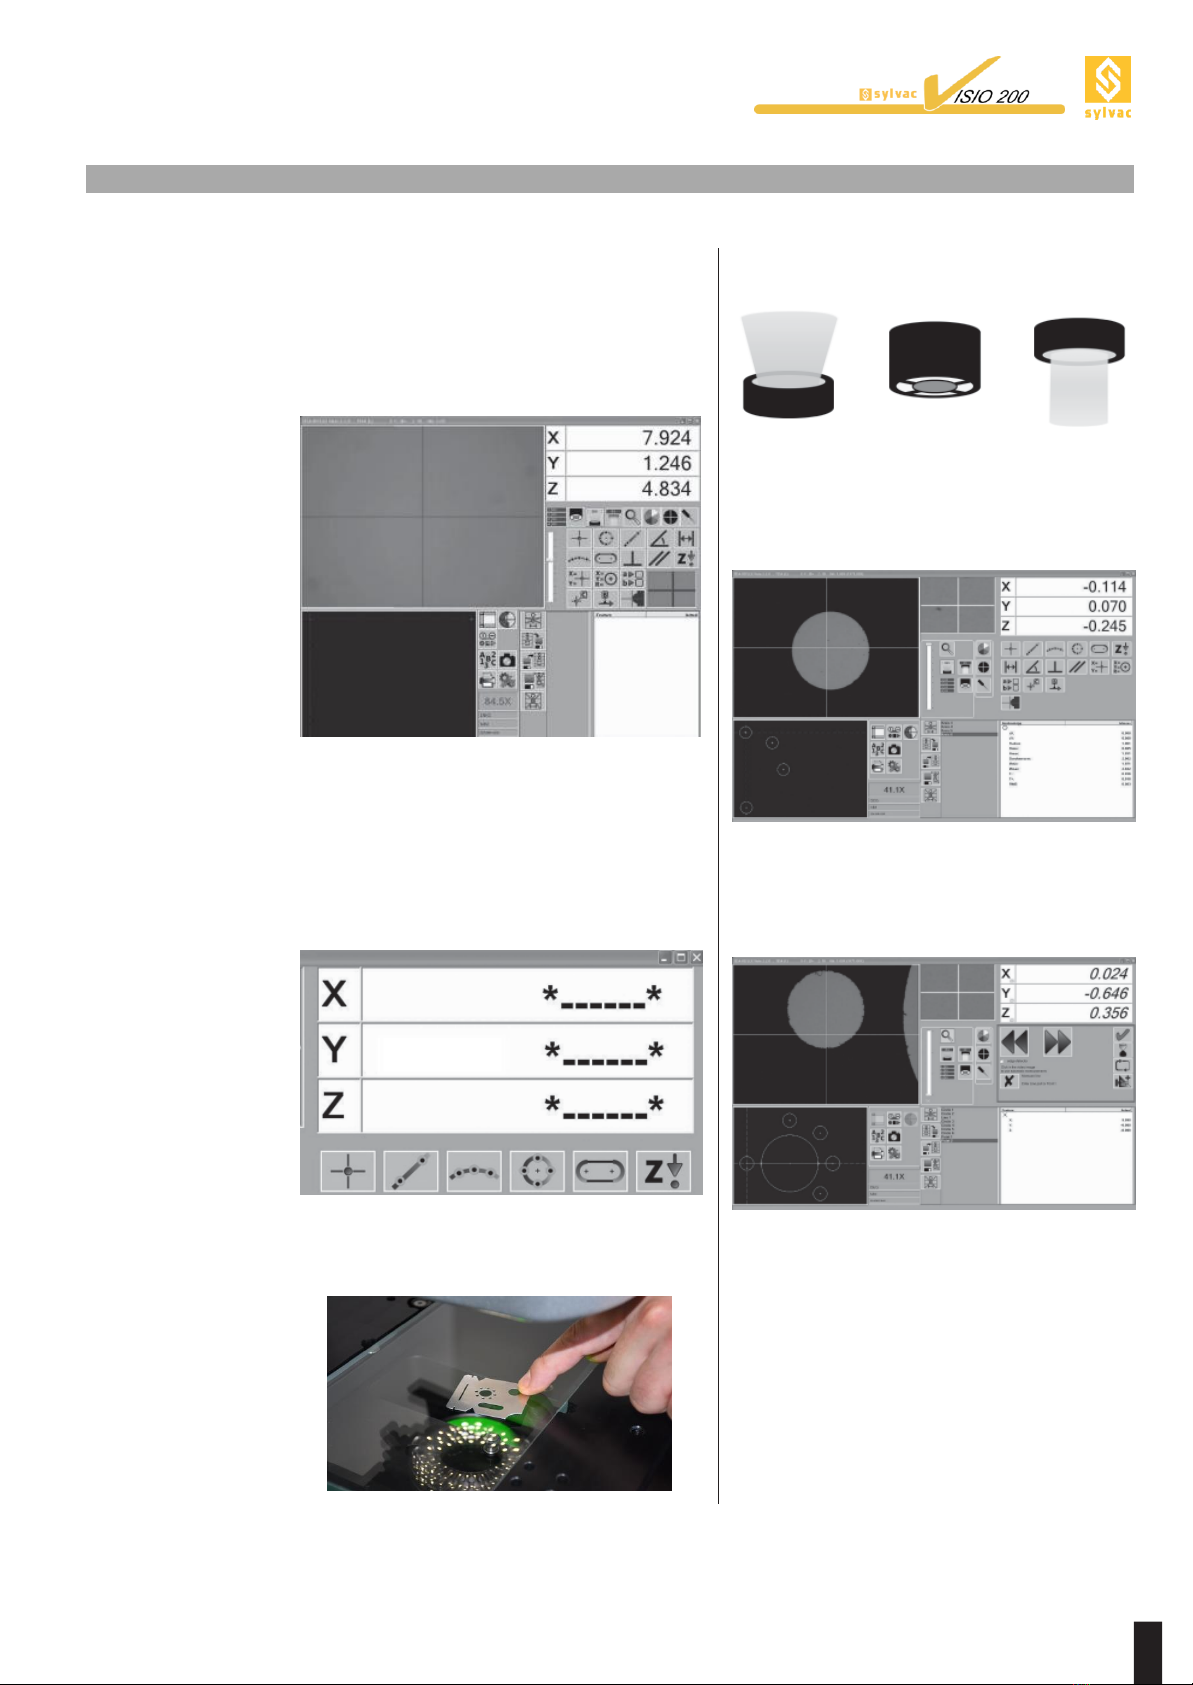
3 Software SYLVAC-REFLEX Vista starten.
Kurz danach erscheint das Hauptfenster.
4 Das in den XYZ-Feldern angezeigte
Symbol*----* verlangt die Initialisierung der
Koordinatenach- sen. Dazu jede Achse
über den Mittelpunkt (X- und Y-Achse) bzw.
den oberen Punkt (Z-Achse) soweit
bewegen, bis ein Zahlenwert angezeigt
wird.
5 Das zu messende Werkstück in der Mitte
de Glasplatte aufsetzen.
6 Z-Achse bewegen, bis die Abbildung richtig
scharf erscheint, und die Beleuchtungen zur
optimalen Erfassung der Kanten
entsprechend einstellen.
A B C
ADurchlichtbeleuchtung
B Ringförmige Auflichtbeleuchtung
CKoaxiallicht
7 Nun können Sie mit der Messungen
beginnen und die Funktionen der SYLVAC-
REFLEX Vista Software erforschen.
8 Nach erfolgten Änderungen, das Programm
für spätere Benutzung entsprechend Ihren
Bedürfnissen speichern.
Für weitere Informationen bezüglich der
SYLVAC REFLEX Vista Software sowie Ihres
SYLVAC VISION 200 GL Messgerätes,
konsultieren Sie bitte die Gebrauchsanleitung
auf der mitgelieferten DVD.

F
ON/OFF
switch
6
1 GETTING STARTED
1.1
Unpacking
and installing
the machine
1.2
Cable
connections
The machine must be installed on a flat
surface, capable of supporting its weight (98
kg).
The SYLVAC-VISIO 200 GL will be lifted on
both sides. Forklift lifting straps can also be
used to move the machine properly.
Strict adherence to your local and general
safety rules is essential to prevent
personal injury.
All cable connections must be made with the
machine switched off.
The wiring scheme below shows a typical
configuration and may vary according to the
host computer used. The physical position of
each connection to the chosen computer will
depend on its properties.
Before connecting both the computer
and monitor to the mains, check the
voltage on the data plate of each unit.
Never attempt to modify the voltage of the
computer/controller. If the indicated voltage
does not match that of your local mains
supply, call your SYLVAC agent or retailer.
2 OVERVIEW
2.1
Description
of the machine
A Glass plate
B Rear safety cover
C Z-axis moving head
D X-axis translation table
E Y-axis translation table

7
3 QUICK START RUNNING SYLVAC-REFLEX VISTA
3.1
Starting
up
1 Start the computer. Make sure the
SYLVAC-REFLEX Vista dongle is
connected.
2 Turn on the machine using the On/Off
switch located on the right side.
3 Start running the software and get the main
window as pictured below.
4 The XYZ-counter lines show *----*, telling
you that the coordinate axes must be
initialized. Move each axis until each
counter shows a numerical value, passing
through the midpoint (X- and Y- axes) as
well as the upper point (Z-axis).
5 Position the workpiece to be measured in
the middle of the glass plate.
6 Move Z-axis until you get a sharp image,
and set the light sources for optimum edge
detection.
A B C
A Diascopicillumination
B Ring-shapedepiscopicillumination
C Coaxiallight
7 Now you can start measuring and
investigate the many functions of the
SYLVAC- REFLEX Vista software.
8 When you have finished, save your
program. This will allow you to re-use it later
as required.
To find out more about the SYLVAC-REFLEX
Vista software and your SYLVAC-VISIO 200
GL, please refer to the appropriate instruction
manuals from the DVD provided with each
feature.
This manual suits for next models
2
Table of contents
Languages:
Popular Machine Vision System manuals by other brands

Humanware
Humanware BrailleNote Touch+ Command Summary

Pulsar
Pulsar FORWARD F455 operating instructions

Cognex
Cognex In-Sight D900 Series reference guide

SVS-Vistek
SVS-Vistek exo174 manual

Daheng Imaging
Daheng Imaging MERCURY GigE Series user manual

Sony
Sony Vision Exchange PEQ-C100 Instructions before use

Cognex
Cognex In-Sight 7000 Series Optional Configurations

PhaseOne
PhaseOne iXM-MV150F installation guide

Welch Allyn
Welch Allyn Spot quick reference

Allied Vision Technologies
Allied Vision Technologies Vimba C API Programmer's manual

Marshall Amplification
Marshall Amplification CV240-18X user manual

Nivisys
Nivisys DVS-110 Quick reference guide