Hand Held Programmer
Installation Instructions
Part No. CDCS000259 Rev B
Page 38/08
Synergy Lighting Controls Conyers Ga, 30012
TEL : (800)-533-2719 www.Synergylightingcontrols.com
Functional Operation
Turn all lighting ON
PRESS AND RELEASE
the ON/RAISE button to turn on all lighting
controlled by channels assigned to this station.
Turn all lighting OFF
PRESS AND RELEASE
the OFF/LOWER button to turn off all lighting
controlled by the channels assigned to this station.
NOTE: The ON and OFF functions only work with channels. You must
have SYRS stations programmed to control channels.
Master Raise
PRESS AND HOLD
the ON/RAISE button. All lighting controlled by
channels on this station will ramp up over a six second period as long as
the button is held down.
Master Lower
PRESS AND HOLD
the OFF/LOWER button. All lighting controlled by
channels on this station will ramp down over a six second period as long
as the button is held down.
Activate a preset
PRESS AND RELEASE
a PRESET button. The lighting will fade to the
levels saved in the preset over the fade time associated with the preset.
Manually Control a Channel
PRESS AND RELEASE
the CHANNEL button. The button will light.
PRESS AND RELEASE
the channel button(s) to be controlled. The
selected channel button(s) will light.
PRESS AND HOLD
the ON/RAISE
button to ramp the lighting up or
PRESS AND HOLD
the OFF/LOWER
button to ramp the lighting down.
PRESS AND RELEASE
the CHANNEL
button to end the sequence. All illuminated buttons will extinguish.
Saving a Preset
Saving a preset is a three step process. First, adjust the channel levels,
then set the fade time, and finally assign the preset to a numbered button.
Step 1: Adjust Channel Levels
PRESS AND RELEASE
the CHANNEL button. The button will light.
PRESS AND RELEASE
the numbered button for the first channel to
be adjusted. Use the ON/RAISE and/or OFF/LOWER buttons to
select the appropriate light level for the channel. Once the desired
level is achieved,
PRESS AND RELEASE
the numbered channel
button to extinguish the illuminated button, which deselects the
channel.
PRESS AND RELEASE
the numbered button for the next
channel to be adjusted. Repeat this process for all channels.
Step 2: Set the Fade Time
PRESS AND RELEASE
the FADE button. The button will light. Enter
the desired fade time using the numeric keys. Valid fade time entries
are 5, 10, 15, 30, 45, and 60 seconds. Press the FADE button until it
beeps.
Step 3: Choose a Button to Store the Preset
PRESS AND RELEASE
the PRESET button. The button will light.
PRESS AND RELEASE
a numbered button to store the preset. The
button will light.
PRESS AND HOLD
the PRESET button until it
beeps and all illuminated buttons extinguish. The numbered button
now stores the preset level, and pressing it will recall the stored light
levels.
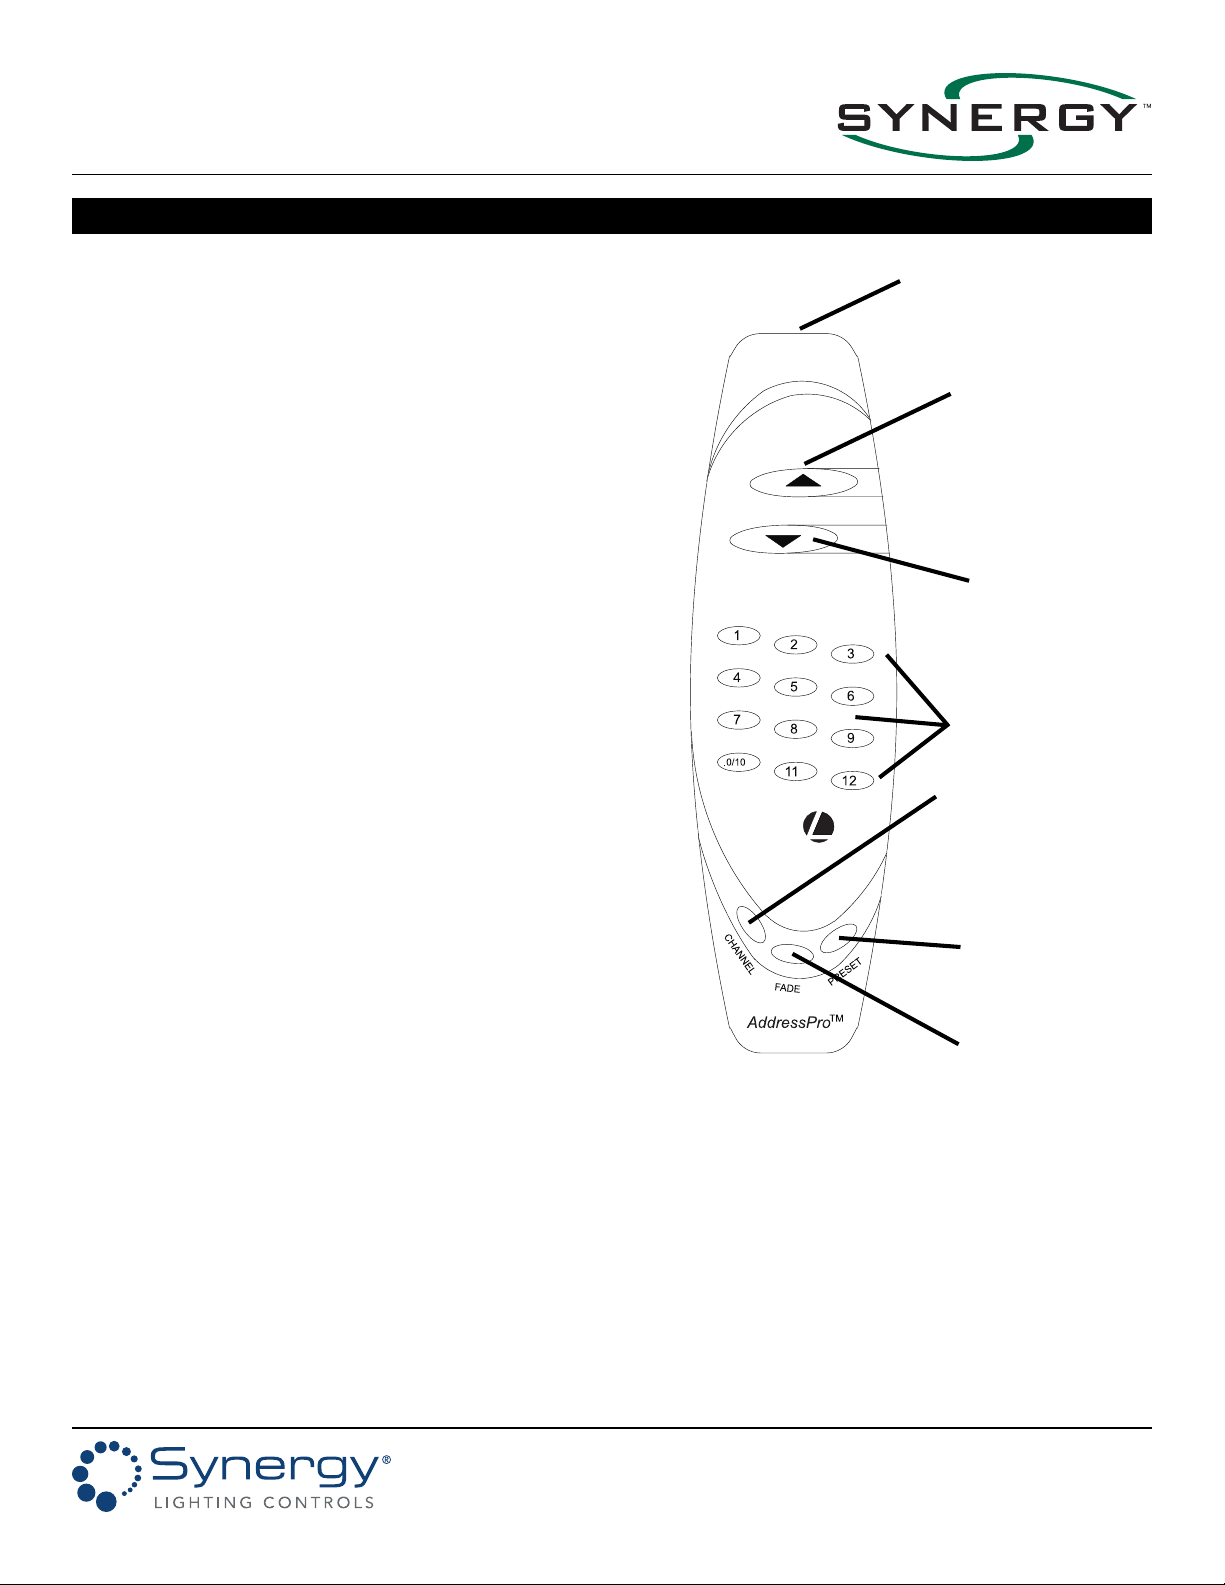
IR Transmitter
1-12 NUMBER
KEYS
ON/RAISE
OFF/LOWER
CHANNEL
FADE
PRESET