T-Home Comfort Pro CM 510 User manual

DECT Telephones
Comfort Pro CM 500/510
User Manual


1
Contents
General Information 9
Appropriate Use / Declaration of Conformity. . . . . . . . . . . . . . . . . . . . . . . . . . . . . . . . . . . 10
Safety Information . . . . . . . . . . . . . . . . . . . . . . . . . . . . . . . . . . . . . . . . . . . . . . . . . . . . . . . . . . 10
Overview and Basic Information . . . . . . . . . . . . . . . . . . . . . . . . . . . . . . . . . . . . . . . . . . . . . . 11
■Authorisation is Required. . . . . . . . . . . . . . . . . . . . . . . . . . . . . . . . . . . . . . . . . . . . . . . . 11
■Further Documentation. . . . . . . . . . . . . . . . . . . . . . . . . . . . . . . . . . . . . . . . . . . . . . . . . . 12
■DECT and GAP. . . . . . . . . . . . . . . . . . . . . . . . . . . . . . . . . . . . . . . . . . . . . . . . . . . . . . . . . 12
Installation 13
Scope of Delivery . . . . . . . . . . . . . . . . . . . . . . . . . . . . . . . . . . . . . . . . . . . . . . . . . . . . . . . . . . . 13
Inserting Standard Battery . . . . . . . . . . . . . . . . . . . . . . . . . . . . . . . . . . . . . . . . . . . . . . . . . . . 13
Inserting the Power Battery . . . . . . . . . . . . . . . . . . . . . . . . . . . . . . . . . . . . . . . . . . . . . . . . . . 14
Mounting / Removing a Bracket . . . . . . . . . . . . . . . . . . . . . . . . . . . . . . . . . . . . . . . . . . . . . 14
Lanyard Fastener . . . . . . . . . . . . . . . . . . . . . . . . . . . . . . . . . . . . . . . . . . . . . . . . . . . . . . . . . . . 15
Headset Socket/Bluetooth® . . . . . . . . . . . . . . . . . . . . . . . . . . . . . . . . . . . . . . . . . . . . . . . . . . . . . . . . . . . . . . .15
■Comfort Pro CM 510 : Removing the Cover . . . . . . . . . . . . . . . . . . . . . . . . . . . . . . . . 15
USB and External Charging Port. . . . . . . . . . . . . . . . . . . . . . . . . . . . . . . . . . . . . . . . . . . . . . 16
■Comfort Pro CM 510 – USB Port: Removing the Cover. . . . . . . . . . . . . . . . . . . . . . 16
Setting Up and Connecting the Charger “Comfort Pro CL 500” . . . . . . . . . . . . . . . . . . 16
Power Supply / Power Supply Unit. . . . . . . . . . . . . . . . . . . . . . . . . . . . . . . . . . . . . . . . . . . . 17

2
Micro SD Card . . . . . . . . . . . . . . . . . . . . . . . . . . . . . . . . . . . . . . . . . . . . . . . . . . . . . . . . . . . . . 18
Important Battery Information . . . . . . . . . . . . . . . . . . . . . . . . . . . . . . . . . . . . . . . . . . . . . . . . 18
■Precautionary Regulations during Usage. . . . . . . . . . . . . . . . . . . . . . . . . . . . . . . . . . 19
Commissioning 20
Charging and Usage Times . . . . . . . . . . . . . . . . . . . . . . . . . . . . . . . . . . . . . . . . . . . . . . . . . . 20
■Battery Charge Display. . . . . . . . . . . . . . . . . . . . . . . . . . . . . . . . . . . . . . . . . . . . . . . . . . 21
■Charge Warning . . . . . . . . . . . . . . . . . . . . . . . . . . . . . . . . . . . . . . . . . . . . . . . . . . . . . . . . 21
Mobile Unit Subscription (Checking In) . . . . . . . . . . . . . . . . . . . . . . . . . . . . . . . . . . . . . . . 22
■Registration . . . . . . . . . . . . . . . . . . . . . . . . . . . . . . . . . . . . . . . . . . . . . . . . . . . . . . . . . . . . 23
■Checking In. . . . . . . . . . . . . . . . . . . . . . . . . . . . . . . . . . . . . . . . . . . . . . . . . . . . . . . . . . . . 23
Functions 24
Operational Controls on the Mobile Unit. . . . . . . . . . . . . . . . . . . . . . . . . . . . . . . . . . . . . . . 24
Display Elements and Symbols. . . . . . . . . . . . . . . . . . . . . . . . . . . . . . . . . . . . . . . . . . . . . . . 25
■The Display . . . . . . . . . . . . . . . . . . . . . . . . . . . . . . . . . . . . . . . . . . . . . . . . . . . . . . . . . . . . 25
■Display Elements . . . . . . . . . . . . . . . . . . . . . . . . . . . . . . . . . . . . . . . . . . . . . . . . . . . . . . . 26
■Line of Softkeys and Idle Display . . . . . . . . . . . . . . . . . . . . . . . . . . . . . . . . . . . . . . . . . 27
The LED . . . . . . . . . . . . . . . . . . . . . . . . . . . . . . . . . . . . . . . . . . . . . . . . . . . . . . . . . . . . . . . . . . . 28
Illumination . . . . . . . . . . . . . . . . . . . . . . . . . . . . . . . . . . . . . . . . . . . . . . . . . . . . . . . . . . . . . . . . 28
Key Functions . . . . . . . . . . . . . . . . . . . . . . . . . . . . . . . . . . . . . . . . . . . . . . . . . . . . . . . . . . . . . . 29
Locking Your Telephone Interface by the System Administrator . . . . . . . . . . . . . . . . . . 33

3
Menu Navigation 34
Using Menus . . . . . . . . . . . . . . . . . . . . . . . . . . . . . . . . . . . . . . . . . . . . . . . . . . . . . . . . . . . . . . . 34
Example: Language Setting. . . . . . . . . . . . . . . . . . . . . . . . . . . . . . . . . . . . . . . . . . . . . . . . . . 35
The Editors . . . . . . . . . . . . . . . . . . . . . . . . . . . . . . . . . . . . . . . . . . . . . . . . . . . . . . . . . . . . . . . . 36
Basic Functions 38
Device Functions . . . . . . . . . . . . . . . . . . . . . . . . . . . . . . . . . . . . . . . . . . . . . . . . . . . . . . . . . . . 38
■Switching Mobile Unit On/Off . . . . . . . . . . . . . . . . . . . . . . . . . . . . . . . . . . . . . . . . . . . . 38
■Keylock / Phone lock. . . . . . . . . . . . . . . . . . . . . . . . . . . . . . . . . . . . . . . . . . . . . . . . . . . . 39
■Telephone Lock . . . . . . . . . . . . . . . . . . . . . . . . . . . . . . . . . . . . . . . . . . . . . . . . . . . . . . . . 39
■Speaker/Handsfree Use. . . . . . . . . . . . . . . . . . . . . . . . . . . . . . . . . . . . . . . . . . . . . . . . . 40
■Adjusting Volume During a Call . . . . . . . . . . . . . . . . . . . . . . . . . . . . . . . . . . . . . . . . . . 40
■Switch Ringer On/Off . . . . . . . . . . . . . . . . . . . . . . . . . . . . . . . . . . . . . . . . . . . . . . . . . . . 41
■Switch Off Ringer When Called. . . . . . . . . . . . . . . . . . . . . . . . . . . . . . . . . . . . . . . . . . . 41
■Vibra Call . . . . . . . . . . . . . . . . . . . . . . . . . . . . . . . . . . . . . . . . . . . . . . . . . . . . . . . . . . . . . . 41
■Muting Mobile Unit . . . . . . . . . . . . . . . . . . . . . . . . . . . . . . . . . . . . . . . . . . . . . . . . . . . . . 41
■Illumination/Display Dimming. . . . . . . . . . . . . . . . . . . . . . . . . . . . . . . . . . . . . . . . . . . . 42
■Display: Change Brightness. . . . . . . . . . . . . . . . . . . . . . . . . . . . . . . . . . . . . . . . . . . . . . 42
■Automatic Hide / Message Windows. . . . . . . . . . . . . . . . . . . . . . . . . . . . . . . . . . . . . . 42
■Event Window and Info Menu . . . . . . . . . . . . . . . . . . . . . . . . . . . . . . . . . . . . . . . . . . . . 42
■Date/Time . . . . . . . . . . . . . . . . . . . . . . . . . . . . . . . . . . . . . . . . . . . . . . . . . . . . . . . . . . . . . 43
Bluetooth®Headset Operation. . . . . . . . . . . . . . . . . . . . . . . . . . . . . . . . . . . . . . . . . . . . . . . 43
■Subscribing / Renaming / Unsubscribing Bluetooth Headset. . . . . . . . . . . . . . . . 43
■Telephoning via the Bluetooth Headset. . . . . . . . . . . . . . . . . . . . . . . . . . . . . . . . . . . . 44

4
Special Key (Hotkey) / VIP-List . . . . . . . . . . . . . . . . . . . . . . . . . . . . . . . . . . . . . . . . . . . . . . . 45
Special Functions. . . . . . . . . . . . . . . . . . . . . . . . . . . . . . . . . . . . . . . . . . . . . . . . . . . . . . . . . . . 45
■Emergency Call Key (SOS). . . . . . . . . . . . . . . . . . . . . . . . . . . . . . . . . . . . . . . . . . . . . . . 45
■The Alarm Sensor (Comfort Pro CM 510). . . . . . . . . . . . . . . . . . . . . . . . . . . . . . . . . . 46
Connections . . . . . . . . . . . . . . . . . . . . . . . . . . . . . . . . . . . . . . . . . . . . . . . . . . . . . . . . . . . . . . . 49
■Internal and External Call Numbers . . . . . . . . . . . . . . . . . . . . . . . . . . . . . . . . . . . . . . . 49
■External Seizure and Entry of Call Numbers. . . . . . . . . . . . . . . . . . . . . . . . . . . . . . . . 49
■Multiple Trunk Keys . . . . . . . . . . . . . . . . . . . . . . . . . . . . . . . . . . . . . . . . . . . . . . . . . . . . . 50
■Multiple Connections . . . . . . . . . . . . . . . . . . . . . . . . . . . . . . . . . . . . . . . . . . . . . . . . . . . 50
■DTMF Postdial/VF Signalling. . . . . . . . . . . . . . . . . . . . . . . . . . . . . . . . . . . . . . . . . . . . . 50
■Charge Display (Charges) . . . . . . . . . . . . . . . . . . . . . . . . . . . . . . . . . . . . . . . . . . . . . . . 51
■Transmission of Call Numbers. . . . . . . . . . . . . . . . . . . . . . . . . . . . . . . . . . . . . . . . . . . . 51
■Blocked/Unblocked Call Numbers . . . . . . . . . . . . . . . . . . . . . . . . . . . . . . . . . . . . . . . 52
■Keypad Dialling. . . . . . . . . . . . . . . . . . . . . . . . . . . . . . . . . . . . . . . . . . . . . . . . . . . . . . . . . 52
■Least Cost Routing (LCR). . . . . . . . . . . . . . . . . . . . . . . . . . . . . . . . . . . . . . . . . . . . . . . . 52
■Calls in the Call-Waiting Queue. . . . . . . . . . . . . . . . . . . . . . . . . . . . . . . . . . . . . . . . . . . 53
■Calls with Booking Numbers . . . . . . . . . . . . . . . . . . . . . . . . . . . . . . . . . . . . . . . . . . . . . 53
■Forwarding Calls . . . . . . . . . . . . . . . . . . . . . . . . . . . . . . . . . . . . . . . . . . . . . . . . . . . . . . . 54
Menu Before and During a Call. . . . . . . . . . . . . . . . . . . . . . . . . . . . . . . . . . . . . . . . . . . . . . . 56

5
Telephoning 57
External/Internal Calling. . . . . . . . . . . . . . . . . . . . . . . . . . . . . . . . . . . . . . . . . . . . . . . . . . . . . 57
■Dialling Directly. . . . . . . . . . . . . . . . . . . . . . . . . . . . . . . . . . . . . . . . . . . . . . . . . . . . . . . . . 57
■Pre-dialling. . . . . . . . . . . . . . . . . . . . . . . . . . . . . . . . . . . . . . . . . . . . . . . . . . . . . . . . . . . . . 57
■Making a Call from the Redial List . . . . . . . . . . . . . . . . . . . . . . . . . . . . . . . . . . . . . . . . 58
■Making Calls from the Caller List . . . . . . . . . . . . . . . . . . . . . . . . . . . . . . . . . . . . . . . . . 59
■Using Routes to Make Calls. . . . . . . . . . . . . . . . . . . . . . . . . . . . . . . . . . . . . . . . . . . . . . 61
■Menu when Dialling. . . . . . . . . . . . . . . . . . . . . . . . . . . . . . . . . . . . . . . . . . . . . . . . . . . . . 61
■Menu when Pre-dialling . . . . . . . . . . . . . . . . . . . . . . . . . . . . . . . . . . . . . . . . . . . . . . . . . 63
■Menu during Conversation. . . . . . . . . . . . . . . . . . . . . . . . . . . . . . . . . . . . . . . . . . . . . . . 64
■Menu if Subscriber Busy. . . . . . . . . . . . . . . . . . . . . . . . . . . . . . . . . . . . . . . . . . . . . . . . . 65
■Menu when Calling . . . . . . . . . . . . . . . . . . . . . . . . . . . . . . . . . . . . . . . . . . . . . . . . . . . . . 66
Ending a Call . . . . . . . . . . . . . . . . . . . . . . . . . . . . . . . . . . . . . . . . . . . . . . . . . . . . . . . . . . . . . . 67
Accepting Calls . . . . . . . . . . . . . . . . . . . . . . . . . . . . . . . . . . . . . . . . . . . . . . . . . . . . . . . . . . . . 67
■Calls During a Conversation . . . . . . . . . . . . . . . . . . . . . . . . . . . . . . . . . . . . . . . . . . . . . 69
■Incoming Call Menu . . . . . . . . . . . . . . . . . . . . . . . . . . . . . . . . . . . . . . . . . . . . . . . . . . . . 69
■Call Waiting Menu . . . . . . . . . . . . . . . . . . . . . . . . . . . . . . . . . . . . . . . . . . . . . . . . . . . . . . 70
Enquiry, Toggling, Transfer and Conference . . . . . . . . . . . . . . . . . . . . . . . . . . . . . . . . . . . 72
■Enquiry/Toggling . . . . . . . . . . . . . . . . . . . . . . . . . . . . . . . . . . . . . . . . . . . . . . . . . . . . . . . 72
■Transferring an Internal/External Call to an Internal Subscriber. . . . . . . . . . . . . . . 73
■Transferring an External Call to an External Subscriber. . . . . . . . . . . . . . . . . . . . . . 74
■Enquiry Call Menu . . . . . . . . . . . . . . . . . . . . . . . . . . . . . . . . . . . . . . . . . . . . . . . . . . . . . . 74
■Menu when Subscriber on Hold . . . . . . . . . . . . . . . . . . . . . . . . . . . . . . . . . . . . . . . . . . 76

6
■Three-Party-Conference . . . . . . . . . . . . . . . . . . . . . . . . . . . . . . . . . . . . . . . . . . . . . . . . . 77
■Menu during Conference . . . . . . . . . . . . . . . . . . . . . . . . . . . . . . . . . . . . . . . . . . . . . . . . 78
Special Calls/Conversations . . . . . . . . . . . . . . . . . . . . . . . . . . . . . . . . . . . . . . . . . . . . . . . . . 79
■Voicebox Queries. . . . . . . . . . . . . . . . . . . . . . . . . . . . . . . . . . . . . . . . . . . . . . . . . . . . . . . 79
■Parked Calls . . . . . . . . . . . . . . . . . . . . . . . . . . . . . . . . . . . . . . . . . . . . . . . . . . . . . . . . . . . 80
■Announcements (with and without Intercom) . . . . . . . . . . . . . . . . . . . . . . . . . . . . . . 81
■Callback. . . . . . . . . . . . . . . . . . . . . . . . . . . . . . . . . . . . . . . . . . . . . . . . . . . . . . . . . . . . . . . 83
■Baby Call . . . . . . . . . . . . . . . . . . . . . . . . . . . . . . . . . . . . . . . . . . . . . . . . . . . . . . . . . . . . . . 83
■Confirming Appointment/Alarm Clock . . . . . . . . . . . . . . . . . . . . . . . . . . . . . . . . . . . . 84
■Accepting an Appointment Call . . . . . . . . . . . . . . . . . . . . . . . . . . . . . . . . . . . . . . . . . . 84
■Doorbell, Door Opener . . . . . . . . . . . . . . . . . . . . . . . . . . . . . . . . . . . . . . . . . . . . . . . . . . 85
■Entrance Intercom Calls . . . . . . . . . . . . . . . . . . . . . . . . . . . . . . . . . . . . . . . . . . . . . . . . . 86
Phone Book 87
System Phone Book . . . . . . . . . . . . . . . . . . . . . . . . . . . . . . . . . . . . . . . . . . . . . . . . . . . . . . . . 87
■Calling from the Communications System Phone Book . . . . . . . . . . . . . . . . . . . . . 88
■Speed-Dialling . . . . . . . . . . . . . . . . . . . . . . . . . . . . . . . . . . . . . . . . . . . . . . . . . . . . . . . . . 89
■AddPhone Numbers from Lists to Communications System Phone Book . . . . . 89
Personal/Local Phone Book . . . . . . . . . . . . . . . . . . . . . . . . . . . . . . . . . . . . . . . . . . . . . . . . . 92
■Calling from the Personal/Local Phone Book . . . . . . . . . . . . . . . . . . . . . . . . . . . . . . 92
■Adding Entry to Personal/Local Phone Book. . . . . . . . . . . . . . . . . . . . . . . . . . . . . . . 92
■Editing Personal/Local Phone Book Entries . . . . . . . . . . . . . . . . . . . . . . . . . . . . . . . 94

7
The Device Menu 95
Information on the Display Symbols
in the Device-Menu . . . . . . . . . . . . . . . . . . . . . . . . . . . . . . . . . . . . . . . . . . . . . . . . . . . . . . . . . 95
Overview: Device Menu . . . . . . . . . . . . . . . . . . . . . . . . . . . . . . . . . . . . . . . . . . . . . . . . . . . . . 96
“Info” Menu . . . . . . . . . . . . . . . . . . . . . . . . . . . . . . . . . . . . . . . . . . . . . . . . . . . . . . . . . . . . . . . . 98
“Active features” Menu . . . . . . . . . . . . . . . . . . . . . . . . . . . . . . . . . . . . . . . . . . . . . . . . . . . . . 100
“Phone book” Menu . . . . . . . . . . . . . . . . . . . . . . . . . . . . . . . . . . . . . . . . . . . . . . . . . . . . . . . 101
“Un Park” Menu Entry . . . . . . . . . . . . . . . . . . . . . . . . . . . . . . . . . . . . . . . . . . . . . . . . . . . . . . 101
“Pickup” Menu Entry . . . . . . . . . . . . . . . . . . . . . . . . . . . . . . . . . . . . . . . . . . . . . . . . . . . . . . . 102
“Take” Menu Entry . . . . . . . . . . . . . . . . . . . . . . . . . . . . . . . . . . . . . . . . . . . . . . . . . . . . . . . . . 102
“Time/Alarms” Menu. . . . . . . . . . . . . . . . . . . . . . . . . . . . . . . . . . . . . . . . . . . . . . . . . . . . . . . 102
“Audio” Menu . . . . . . . . . . . . . . . . . . . . . . . . . . . . . . . . . . . . . . . . . . . . . . . . . . . . . . . . . . . . . 104
“Call filter” Menu . . . . . . . . . . . . . . . . . . . . . . . . . . . . . . . . . . . . . . . . . . . . . . . . . . . . . . . . . . 106
“System” Menu. . . . . . . . . . . . . . . . . . . . . . . . . . . . . . . . . . . . . . . . . . . . . . . . . . . . . . . . . . . . 107
“System menu” / Total Menu. . . . . . . . . . . . . . . . . . . . . . . . . . . . . . . . . . . . . . . . . . . . . . . . 108
■System menu: “Calls” . . . . . . . . . . . . . . . . . . . . . . . . . . . . . . . . . . . . . . . . . . . . . . . . . . 110
■System menu: “Call forwarding” . . . . . . . . . . . . . . . . . . . . . . . . . . . . . . . . . . . . . . . . . 113
■System menu: “Messages”. . . . . . . . . . . . . . . . . . . . . . . . . . . . . . . . . . . . . . . . . . . . . . 115
■System menu: “Protection” . . . . . . . . . . . . . . . . . . . . . . . . . . . . . . . . . . . . . . . . . . . . . 118
■System menu: “Connections” . . . . . . . . . . . . . . . . . . . . . . . . . . . . . . . . . . . . . . . . . . . 120
■System menu: “Phone book”. . . . . . . . . . . . . . . . . . . . . . . . . . . . . . . . . . . . . . . . . . . . 122
■System menu: “Applications” . . . . . . . . . . . . . . . . . . . . . . . . . . . . . . . . . . . . . . . . . . . 123
■System menu “Central settings” . . . . . . . . . . . . . . . . . . . . . . . . . . . . . . . . . . . . . . . . . 124

8
“Settings” Menu . . . . . . . . . . . . . . . . . . . . . . . . . . . . . . . . . . . . . . . . . . . . . . . . . . . . . . . . . . . 125
“Security” Menu . . . . . . . . . . . . . . . . . . . . . . . . . . . . . . . . . . . . . . . . . . . . . . . . . . . . . . . . . . . 128
“Profiles” Menu . . . . . . . . . . . . . . . . . . . . . . . . . . . . . . . . . . . . . . . . . . . . . . . . . . . . . . . . . . . 130
Key Programming 132
Programmable Keys . . . . . . . . . . . . . . . . . . . . . . . . . . . . . . . . . . . . . . . . . . . . . . . . . . . . . . . 132
Programmable Functions. . . . . . . . . . . . . . . . . . . . . . . . . . . . . . . . . . . . . . . . . . . . . . . . . . . 133
Appendix 136
Care and Maintenance . . . . . . . . . . . . . . . . . . . . . . . . . . . . . . . . . . . . . . . . . . . . . . . . . . . . . 136
Technical Data . . . . . . . . . . . . . . . . . . . . . . . . . . . . . . . . . . . . . . . . . . . . . . . . . . . . . . . . . . . 137
Buetooth Qualified Design Identity. . . . . . . . . . . . . . . . . . . . . . . . . . . . . . . . . . . . . . . . . . . 138
Menu Tree . . . . . . . . . . . . . . . . . . . . . . . . . . . . . . . . . . . . . . . . . . . . . . . . . . . . . . . . . . . . . . . . 138
Index 144
9
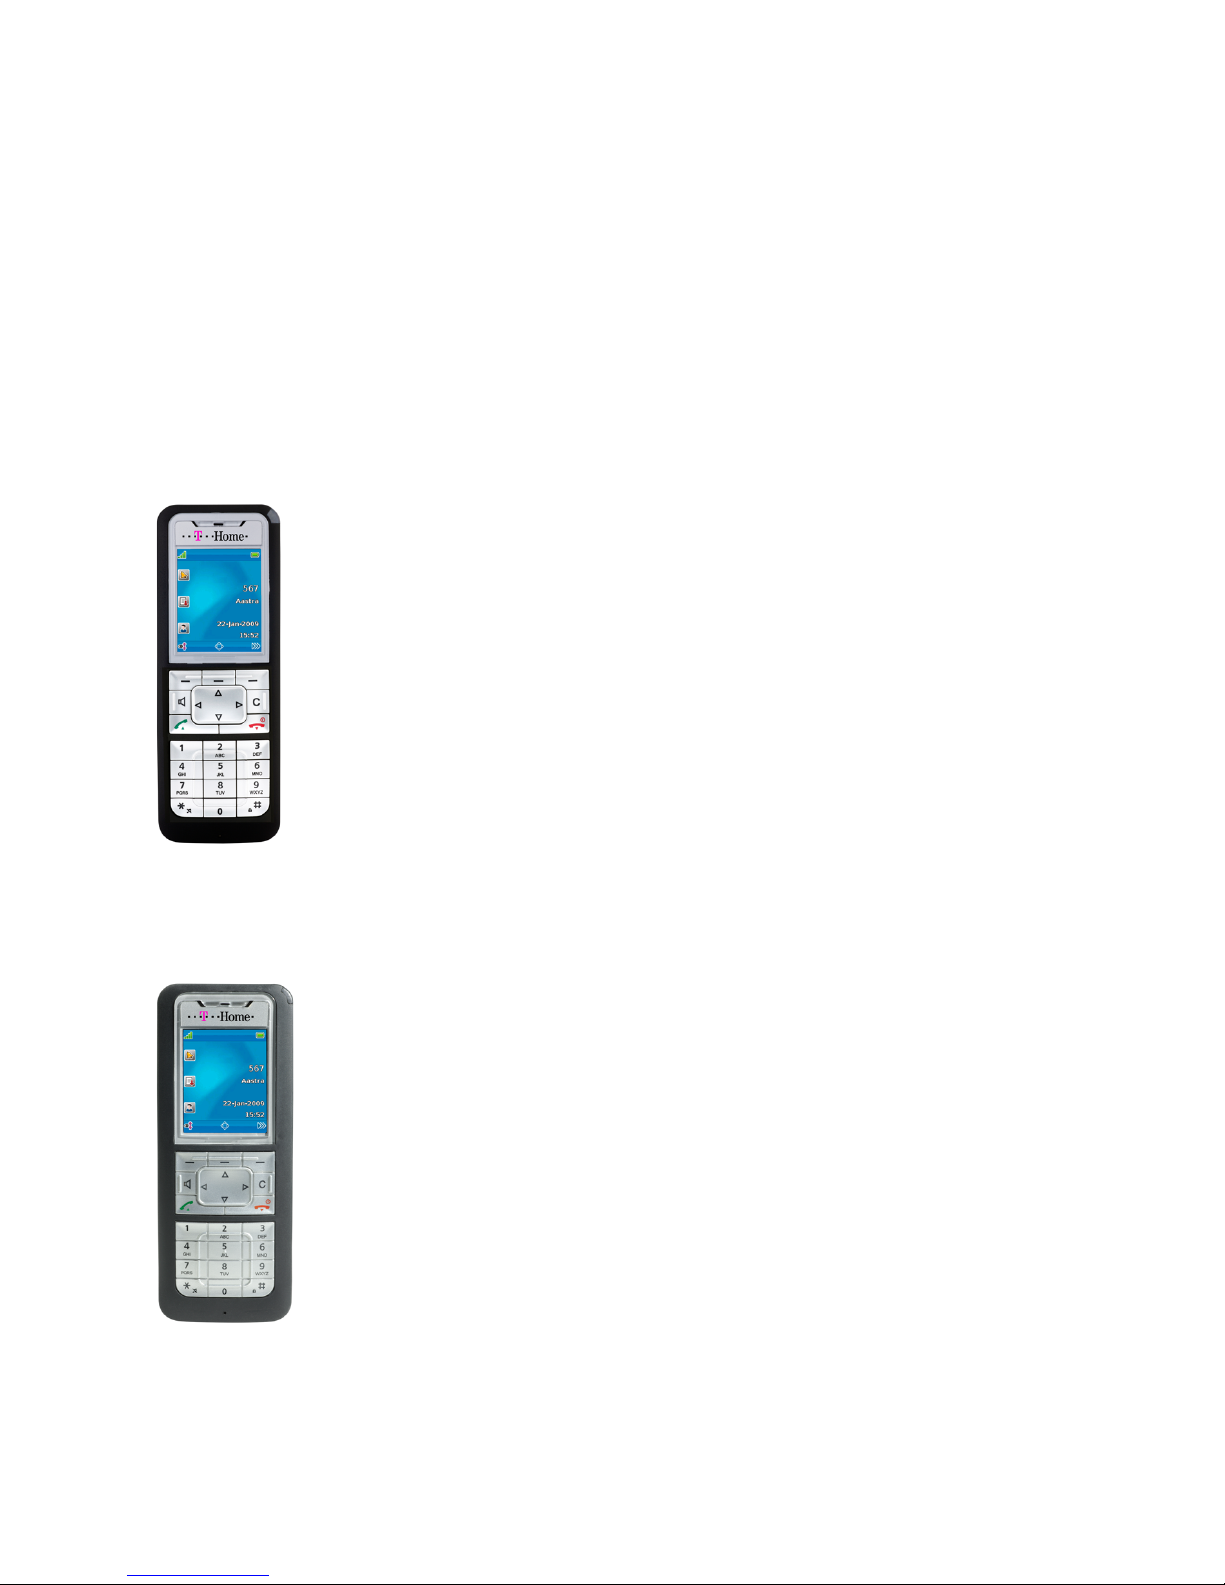
General Information
General Information
The DECT telephone Comfort Pro CM 500/510 is a cordless system telephone for operation on the
Comfort Pro communications system. You can also operate your DECT telephone on other communications
systems and thus use it at different locations. Operation on communications systems by other manufacturers
is still possible when they comply with the GAP standard.
There are two DECT telephone models available:
Comfort Pro CM 500
– 1 hotkey / 3 side buttons (programmable)
– 3 softkeys (2 of them programmable)
– 2 programmable navigation keys
– colour display
– caller list for up to 50 entries
– redial list for 50 entries
– private/local phone book / personal directory for 200 entries
– headset connection via cable or Bluetooth
– mini USB connection
– IP 50 ingress protection
Comfort Pro CM 510
– 1 hotkey / 3 side buttons (programmable)
– 3 softkeys (2 of them programmable)
– 2 programmable navigation keys
– colour display
– 1 emergency key (SOS)
– caller list for up to 50 entries
– redial list for 50 entries
– private/local phone book / personal directory for 200 entries
– sensor for man down, no movement, escape alarm
– headset connection via cable or Bluetooth
– mini USB connection
– IP 65 ingress protection (dust and jet-water protected)

10
General Information Appropriate Use / Declaration of Conformity
Appropriate Use / Declaration of
Conformity
This product can be operated on a DECT-GAP-compatible communications system in all EU member
countries. The telephone complies with radio-specific European-harmonised DECT standards.
The CE mark on the product confirms conformity with the technical regulations regarding user safety and
electromagnetic compatibility, valid as of the issue date of the corresponding Declaration of Conformity
according to European Directive 99/5/EC.
Safety Information
Please be sure to note the following when setting up, connecting and operating the telephone:
■Place the charger on an anti-slip mat.
■Position the connecting cable where it will not cause an accident!
■The charger may only be set up and operated within a closed building.
■Please refer to page 18 for important information on battery use.
■Do not lay down the mobile unit or set up the charger
– near heat sources,
– in direct sunlight,
– near other electrical devices generating strong, magnetic fields.
■Protect your telephone from moisture, dust, aggressive fluids and vapours.
■Connect only approved accessories.
■Only use the the power supply (ID No.: 23-001061-00) included with Comfort Pro CL 500 charger, see
also Setting Up and Connecting the Charger “Comfort Pro CL 500” on page 16.
■Do not use any power supply that is visibly damaged (ruptures, cracks of the housing).
■Switch off the mobile unit before you remove the batteries.

11
Overview and Basic Information General Information
■Research has demonstrated that in certain cases medical devices can be affected by portable
telephones (DECT) that are switched on. This is why when within medical institutions you should be sure
to comply with the regulations of the respective institution when using portable telephones.
SWarning! Never
– open the charger or the mobile device (aside from the battery compartment lid)!
– touch the plug contacts with sharp, metal objects!
– carry the charger by the connecting cable!
■Only use a slightly damp or an anti-static cloth to clean your telephone. Never use a dry cloth. Never use
cleansing agents.
■Do not use your telephone in areas at risk of explosion.
■Do not use Comfort Pro CM 500 in damp rooms (e.g. bath).
■Do not hold the telephone in the hands-free mode next to your ear as the volume can be very high.
■Set up and keep mobile device and accessories outside the reach of children.
Note for Persons Wearing Hearing Aids
Persons wearing hearing aids should keep in mind that when using the mobile device at sufficient volume,
the resulting radio signal interference produces an unpleasant humming noise.
Overview and Basic Information
Authorisation is Required
Most of the features mentioned in this manual can only be used when you have the corresponding user
authorisation. Your system administrator configures authorisations when configuring the communications
system.
Contact the system administrator when you have questions on specific features or are not able to use a
feature satisfactorily.

12
General Information Overview and Basic Information
Further Documentation
Please use the other included documentation on parts of your communications system. This documentation
is on the Comfort Pro product CD.
DECT and GAP
A digital radio connection is established between the mobile unit and the base station (Radio Fixed Part, RFP)
in accordance with the DECT standard (DECT = Digital Enhanced Cordless Telecommunications). The digital
channel ensures the best voice quality without static or background noise. The Generic Access Profile (GAP)
is used for signalling between the communications system and the mobile unit.
The Generic Access Profile (GAP) and the DECT standard define procedures according to which digital
cordless telephones can establish connections. The GAP standard applies independent of manufacturer,
meaning that communications systems and mobile units of various manufacturers can be combined. The
basic functions (telephoning, accepting calls) are always available in these combinations; other functions
(e.g. displaying the call number on the display, displaying connection charges) which your Comfort Pro
communications system provides along with your mobile unit, may not be available with other manufacturers’
communications systems. Please consult the corresponding manufacturer’s user guide or contact your
system administrator.
Information on Transmission Quality
■Due to digital transmission within the frequency range used – even within range depending on the
structural environment – dead spots can result . In this case, transmission quality can be lessened by
increased and brief transmission gaps. A slight movement outside the dead spot will re-establish the
usual transmission quality. When a caller goes out of range, the connection is disconnected.
■In order to avoid radio-related interference with other electronic devices, we recommend as great a
distance as possible (minimum of 1 m) between the charger or mobile unit and other devices (e.g. radios,
loudspeakers, etc).
■As is the case with any cordless telephone, the mobile unit uses radio signals which do not guarantee a
connection under all circumstances. This is why you should never completely rely on cordless telephones
for essential communication (e.g. for medical emergencies).

13
Scope of Delivery Installation
Installation
Scope of Delivery
This package includes:
■a mobile unit (Comfort Pro CM 500 or Comfort Pro CM 510)
■a standard battery
■belt clip
Inserting Standard Battery
Comfort Pro CM 500
Slide the battery compartment lid down until the catch
releases, then lift it. Insert the battery with the contacts
pointing down. Place the battery compartment lid on the unit
and slide it upwards until it clicks into place.
Comfort Pro CM 510
Loosen the two screws on the rear side of the mobile unit with
a suitable tool and remove the lid. Insert the battery with the
contacts pointing downwards, close the battery compartment
with the lid (insert lower down, press upwards) and screw it
shut again. Do not damage the rubber seal when putting it
back together.

14
Installation Inserting the Power Battery
Inserting the Power Battery
NNote: If you require a spare battery or power battery with the necessary battery
compartment lid, please contact the Deutsche Telekom hotline on 0180 5 1990
during normal office hours. The call costs 0.14 EUR per minute or part thereof for a
call from the Deutsche Telekom fixed line network.
Mounting / Removing a Bracket
You can order a battery with greater charge capacity (power
battery) as an accessory. It is thicker which means you need a
different battery compartment lid which protrudes ca. 6 mm
on the rear side of the device.
Mount the new battery compartment lid as described above.
You should first remove a bracket if mounted.
Comfort Pro CM 500
The bracket that comes with the product is placed on the two
openings at the upper end of the mobile unit and snapped into
place by pressing on it. To remove the bracket, press in the
little recesses of the edge of the bracket and pull the bracket
apart somewhat.

15
Lanyard Fastener Installation
Lanyard Fastener
Headset Socket/Bluetooth®
All mobile units have a 2.5 mm jack socket on the bottom for connecting a headset. Use recommended
headsets only.
Furthermore, the mobile units have a Bluetooth interface (2.0) for operating corresponding headsets. The
Bluetooth interface can be used for transmitting audio data only with a headset.
Buetooth Qualified Design Identity
The Bluetooth QDID for your Comfort Pro CM 500/510 is: B014700.
Safety Precaution
Headsets (earphones and headphones) can produce tones which are very loud and high. When you are
exposed to such tones, this can lead to hearing damage. Before using a headset, please adjust the volume to
the lowest possible level. You can make these settings for cable-connected headsets in the >
Audio
>
Volume
>
Headset (cable)
menu (see page 104). Adjust the setting directly on the device with
Bluetooth headsets (please consult the device user guide). When telephoning with the headset, adjust the
volume – if necessary – slowly.
Comfort Pro CM 510 : Removing the Cover
The opening of the headset socket is closed with an undetachable cover. If a headset is not used, please be
sure to close the opening to be sure the device can be operated in accordance with its protection class.
Remove the cover by tugging it out of the housing on the upper edge.
Never tug it out on the lower edge!
There are two openings on the upper part of the
bracket. The lower end of the lanyard can be fed
through them (please mount with the bracket
removed). Lanyards are available as accessories.

16
Installation USB and External Charging Port
USB and External Charging Port
There is a mini USB port (2.0) on the lower right side of the mobile unit. It has two functions:
■As an interface for connecting to the PC e.g. to load data to/from the device. When the mobile unit is
connected to a PC it is charged simultaneously. The charging process is slower, however, than when the
mobile unit is charged in the charger.
■As a connection socket for a USB charger. This charging process is also slower than when charging in the
charger.
Be sure to use only a shielded USB cable.
Comfort Pro CM 510 – USB Port: Removing the Cover
The opening of the USB port is closed with an undetachable cover. If a USB cable is not used, please be sure
to close the opening to be sure the device can be operated in accordance with its protection class. Remove
the cover by tugging it out of the housing on the upper edge.
Never tug it out on the lower edge!
Setting Up and Connecting the Charger
“Comfort Pro CL 500”
As additional component you can purchase the Comfort Pro CL 500 charger
(material no. 40246042).
Comfort Pro CM 500: The mobile unit can be operated without changing the charger.
Comfort Pro CM 510: When operating the mobile unit, you
have to remove the two lateral guides in the charger. These
are easy to lift up on the inner edge using a fingernail or a
paper clip.

17
Power Supply / Power Supply Unit Installation
You can also remove the guides by pressing a suitable screwdriver in the longish
holes on the bottom of the charger.
Connect the power supply unit with the charger and place the connecting cable
through the cable guide. If necessary, change the connector of the power supply (see Power Supply / Power
Supply Unit on page 17).
Where to Set It Up
Your telephone is made for normal usage conditions. Today’s furniture is coated with a sheer myriad of
lacquers and plastics and treated with various lacquer care products. It is possible that some of these
materials contain components which can attack and deteriorate the plastic feet of the charging station. The
device feet altered by these foreign substances may leave undesirable marks on furniture surfaces.
For understandable reasons, the manufacturer cannot assume liability for these types of damage. This is why
you should use an anti-slip mat under your charging station – particularly with furniture that is new or has
been freshened up with lacquer care products.
NNote: Please make sure you do not set up the charging station in the space where
doors or windows open: Damage Risk!
Power Supply / Power Supply Unit
The power supply unit is suitable for 100V to 240V alternating current (50-60 Hz). It comes with 4 inter-
changeable adapters so it can be used practically anywhere worldwide. As needed, put the connector on the
power supply used in your country. Mounting varies slightly as there are two variants of the power supply
connector:
Variant 1: Position the switch on the power supply at OPEN and slide the connector in place upwards and off.
Stick the desired new connector into the power supply and lock it by positioning the switch at LOCK.
Variant 2: Remove the connector if one is there by pressing OPEN. Then place the desired new connector
into the power supply slightly diagonally with the TOP designation showing upwards. Press it down until it
clicks into place.
When you wish to disconnect the charger from the power supply, pull the power supply unit plug out of the
mains socket. If there is a power outage, all memory data (programme and user data) are saved on the mobile
unit without alteration.

18
Installation Micro SD Card
Micro SD Card
Under the mobile unit battery there is a recess for inserting a micro SD card. In the current scope of delivery
this has no function and will serve future applications. When inserting batteries, be careful not to damage the
insertion recess.
Important Battery Information
Devices are operated using a Li-ion battery (standard and power battery).
Be sure to read the following precautionary regulations before using the battery for the first time. Retain these
precautionary regulations and all operating instructions close at hand for later reference.
Not observing any of the following precautionary battery operation regulations is hazardous and can lead to
overheating, inflammation and explosion.
■CAUTION: Explosion hazard when battery replaced improperly.
■Never use the battery for providing power to other devices. It is exclusively for supplying power to the
mobile units.
■Never use or leave the battery near open flames.
■Never put the battery in a microwave oven, throw it into a fire or expose it to extreme heat in any other way.
■Never carry or store the battery together with electroconductive articles (necklaces, pencil leads, etc.)
■Never take apart the battery or modify it in any way or subject it to powerful blows.
■Never immerse the battery in freshwater or saltwater.
■Never use or leave the battery in direct sunlight, or in a car parked in direct sunlight or anywhere else with
high temperatures.
■If you ever notice any fluid leakage, an unusual smell, accumulation of heat, discolouring, deformation or
any other abnormal condition while using, charging or storing the battery, remove it immediately from the
mobile unit and keep it away from open flames.
Table of contents
Other T-Home Cordless Telephone manuals


