• Inspect the area where the equipment is to be used and remove all stones, sticks, wire,
bones and other foreign, hard objects before mowing; they could be thrown by the blade.
• Never mow while barefoot or wearing open toe sandals or thongs.
Wear long trousers and heavy-duty shoes. It is advisable to wear suitable eye and hearing
protection.
• Read the Owner’s Manual carefully and know the controls. Learn how to stop the engine
quickly in an emergency.
• Stop the engine and disconnect the spark plug lead before attempting to clear blockages,
checking or working on the mower.
• Never attempt to adjust cutting height with the engine running.
• Never operate the equipment in wet grass, always be sure of your footings, keep a firm grip on
the handles and walk, never run and never walk backwards while cutting grass.
• Check all nuts, bolts and screws before starting. Always be sure your mower is in a safe
operating condition. Use only replacement parts made or guaranteed by Talon Tools.
• Refuel outdoors only. Do not smoke while refueling engine. Add fuel before starting the
engine. Never remove fuel cap with engine running or add petrol while the engine is
running. If petrol is spilt, do not attempt to start the engine. Clean all spilt fuel and move the
mower away from the spilled area. Avoid creating any source of ignition until petrol vapours
have dissipated.
•Replace worn or damaged blades, as worn blades and worn bolts are major hazards.
• Mow only in good daylight.
•Do not operate the engine in a confined space where exhaust fumes can collect, as they
can be lethal.
• Do not put hands or feet near or under rotating parts. Always keep clear of the blades and
discharge opening.
• Stop the engine whenever you leave the mower even for a moment, before cleaning and
when making any adjustments or inspections.
• Mow across the face of slope, never up and down. Exercise extreme caution when
changing direction on slopes. Do not mow excessively steep slopes.
•Stop the engine when crossing gravel driveways, walks or roads.
• Start the engine carefully with feet well away from the blades.
• Store fuel in a cool place in an approved container specifically designed for the purpose. In
AU
SPECIFICATIONS
MODEL NO. . . . . . . . . . . . . . . . . . . . . . . . . . . . . . . . . . . . . . . . . . . . . . . . . . . . . . . . . . . . . . . . . . . . . . . . . . . . . . .AM3065
Engine: . . . . . . . . . . . . . . . . . . . . . . . . . . . . . . . . . . . . . . . . . . . . . . . . . . . . . . . . . . . . .Talon Optiva 550 OHV Four Stroke
Engine Speed . . . . . . . . . . . . . . . . . . . . . . . . . . . . . . . . . . . . . . . . . . . . . . . . . . . . . . . . . . . . . . . . . . . . . . . . . . . .3600 r.p.m
Fuel Tank Capacity . . . . . . . . . . . . . . . . . . . . . . . . . . . . . . . . . . . . . . . . . . . . . . . . . . . . . . . . . . . . . . . . . . . . . . . . . . .900ml
Oil Tank Capacity . . . . . . . . . . . . . . . . . . . . . . . . . . . . . . . . . . . . . . . . . . . . . . . . . . . . . . . . . . . . . . . . . . . . . . . . . . . .500ml
Air Cleaner Element . . . . . . . . . . . . . . . . . . . . . . . . . . . . . . . . . . . . . . . . . . . . . . . . . . . . . . . . . . . . . . . . . . .Paper Cartridge
Air Cleaner Location . . . . . . . . . . . . . . . . . . . . . . . . . . . . . . . . . . . . . . . . . . . . . . . . . . . . . . . . . . . . . . . . . . . . . .Handle Bar
Cutting Width . . . . . . . . . . . . . . . . . . . . . . . . . . . . . . . . . . . . . . . . . . . . . . . . . . . . . . . . . . . . . . . . . . . . . . . . . . .480cm (19”)
Blades . . . . . . . . . . . . . . . . . . . . . . . . . . . . . . . . . . . . . . . . . . . . . . . . . . . . . . . . . . . . . . . . . . . . . . . . . . . . . . .4 Swing Back
Height Adjustment . . . . . . . . . . . . . . . . . . . . . . . . . . . . . . . . . . . . . . . . . . . . . . . . . . . . . . . . . . . . .12 Position Single Lever
Cutting Heights . . . . . . . . . . . . . . . . . . . . . . . . . . . . . . . . . . . . . . . . . . . . . . . . . . . . . . . . . . . . . . . . . . . . . . .15mm to 66mm
Wheel Size (F/Rmm) . . . . . . . . . . . . . . . . . . . . . . . . . . . . . . . . . . . . . . . . . . . . . . . . . . . . . . . . . . . . . . . . . . . . .200/200mm
Bearing Type . . . . . . . . . . . . . . . . . . . . . . . . . . . . . . . . . . . . . . . . . . . . . . . . . . . . . . . . . . . . . . . . . . . . . . . . . .Ball Bearings
Tread . . . . . . . . . . . . . . . . . . . . . . . . . . . . . . . . . . . . . . . . . . . . . . . . . . . . . . . . . . . . . . . . . . . . . . . . . . . . . . . . . . . . .Rubber
Grass Catcher . . . . . . . . . . . . . . . . . . . . . . . . . . . . . . . . . . . . . . . . . . . . . . . . . . . . . . . . . . . . . . . . . . . . . .53L Solid Plastic
Mulching Plug . . . . . . . . . . . . . . . . . . . . . . . . . . . . . . . . . . . . . . . . . . . . . . . . . . . . . . . . . . . . . . . . . . . . . . . . . . . . . . . . .Yes
Under Deck Wash Port . . . . . . . . . . . . . . . . . . . . . . . . . . . . . . . . . . . . . . . . . . . . . . . . . . . . . . . . . . . . . . . . . . . . . . . . . .Yes
Weight (Incl. Catcher) . . . . . . . . . . . . . . . . . . . . . . . . . . . . . . . . . . . . . . . . . . . . . . . . . . . . . . . . . . . . . . . . . . . . . . . . . .39kg
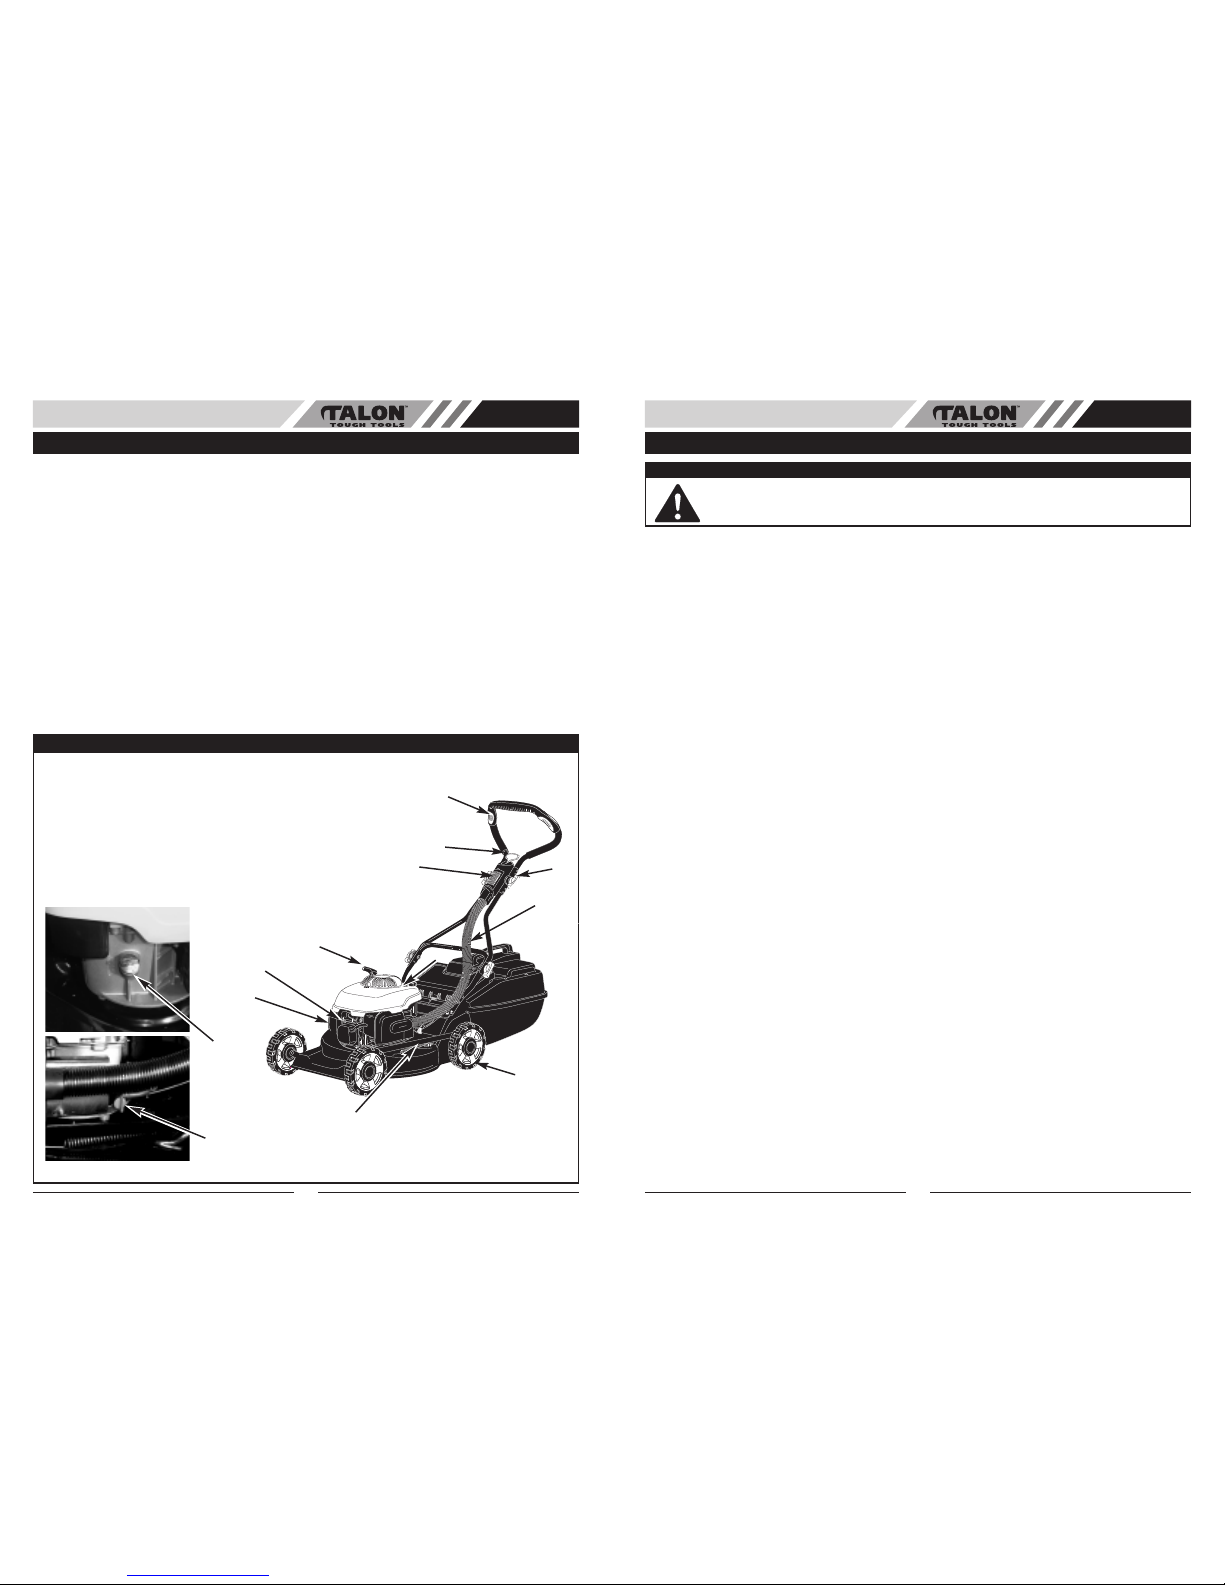
GENERAL IDENTIFICATION
1
7
9
10
12
5
4
1. Adjustable Handle
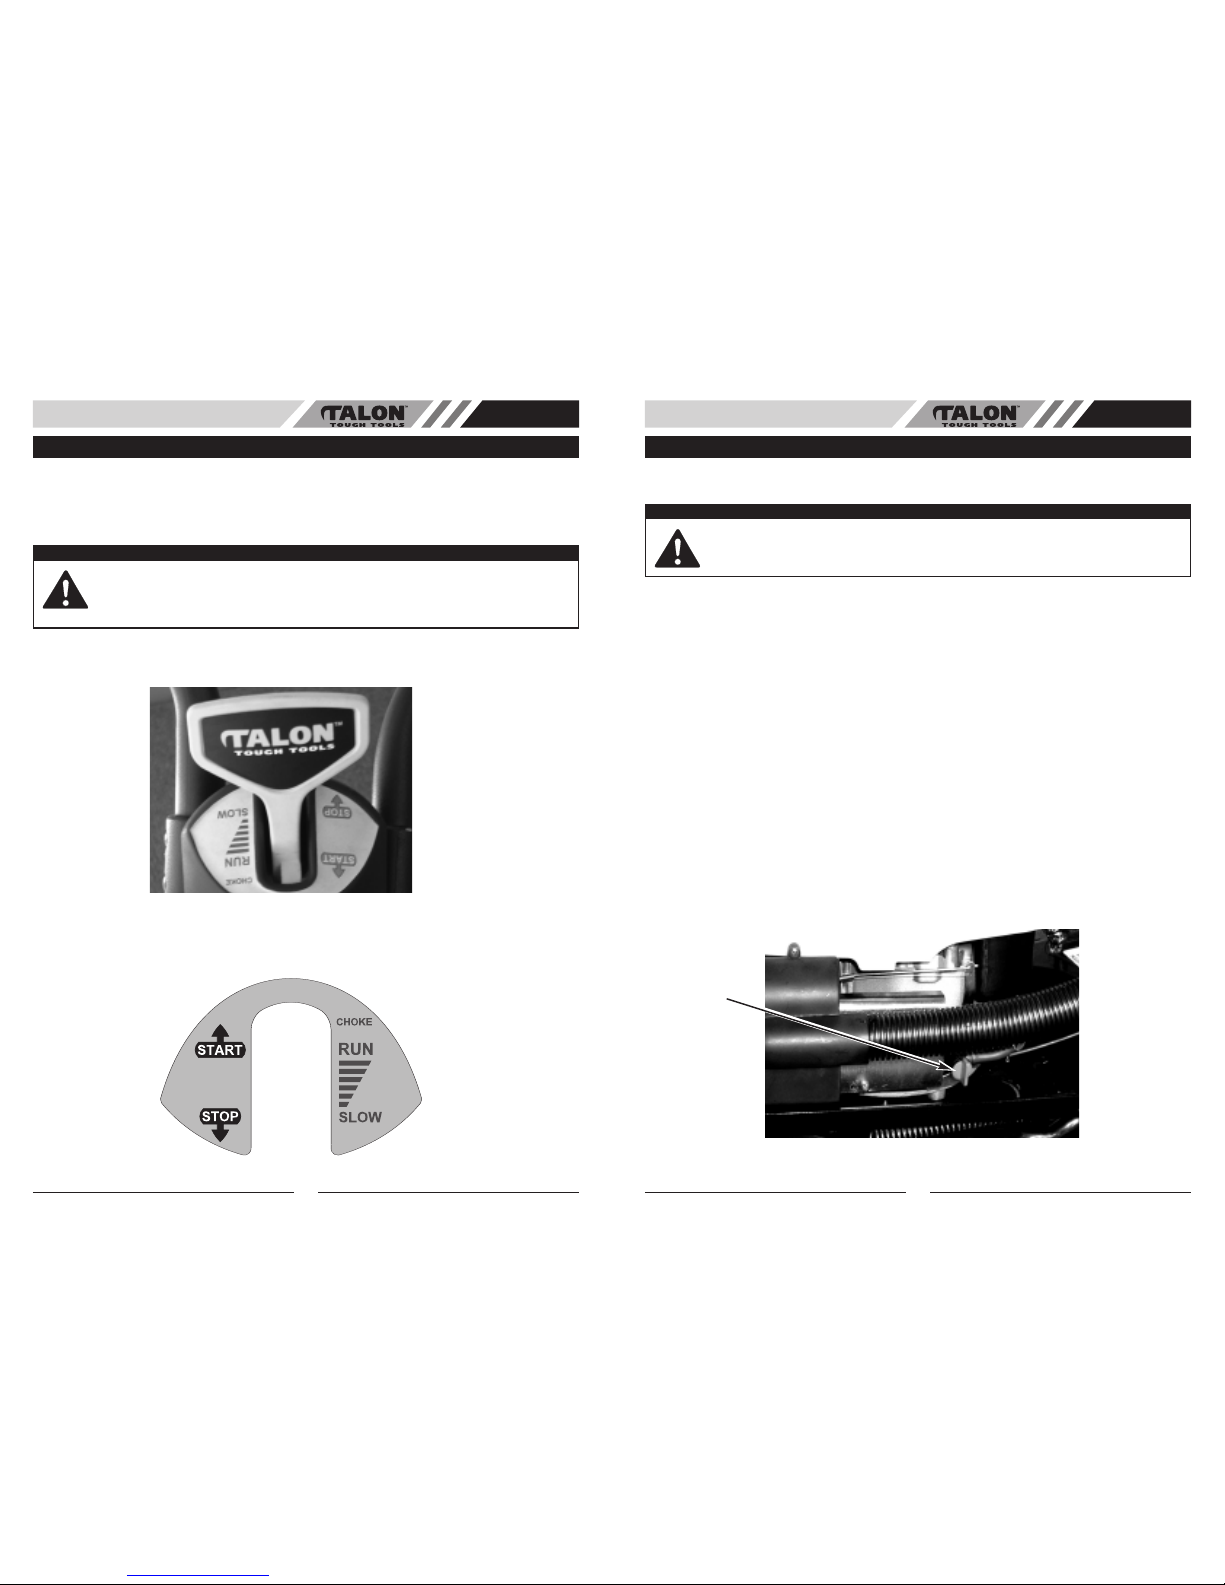
2. Engine Control Lever
3. High Intake Air Cleaner
4. Air Tube
5. Locking Knob
6. Starter Handle
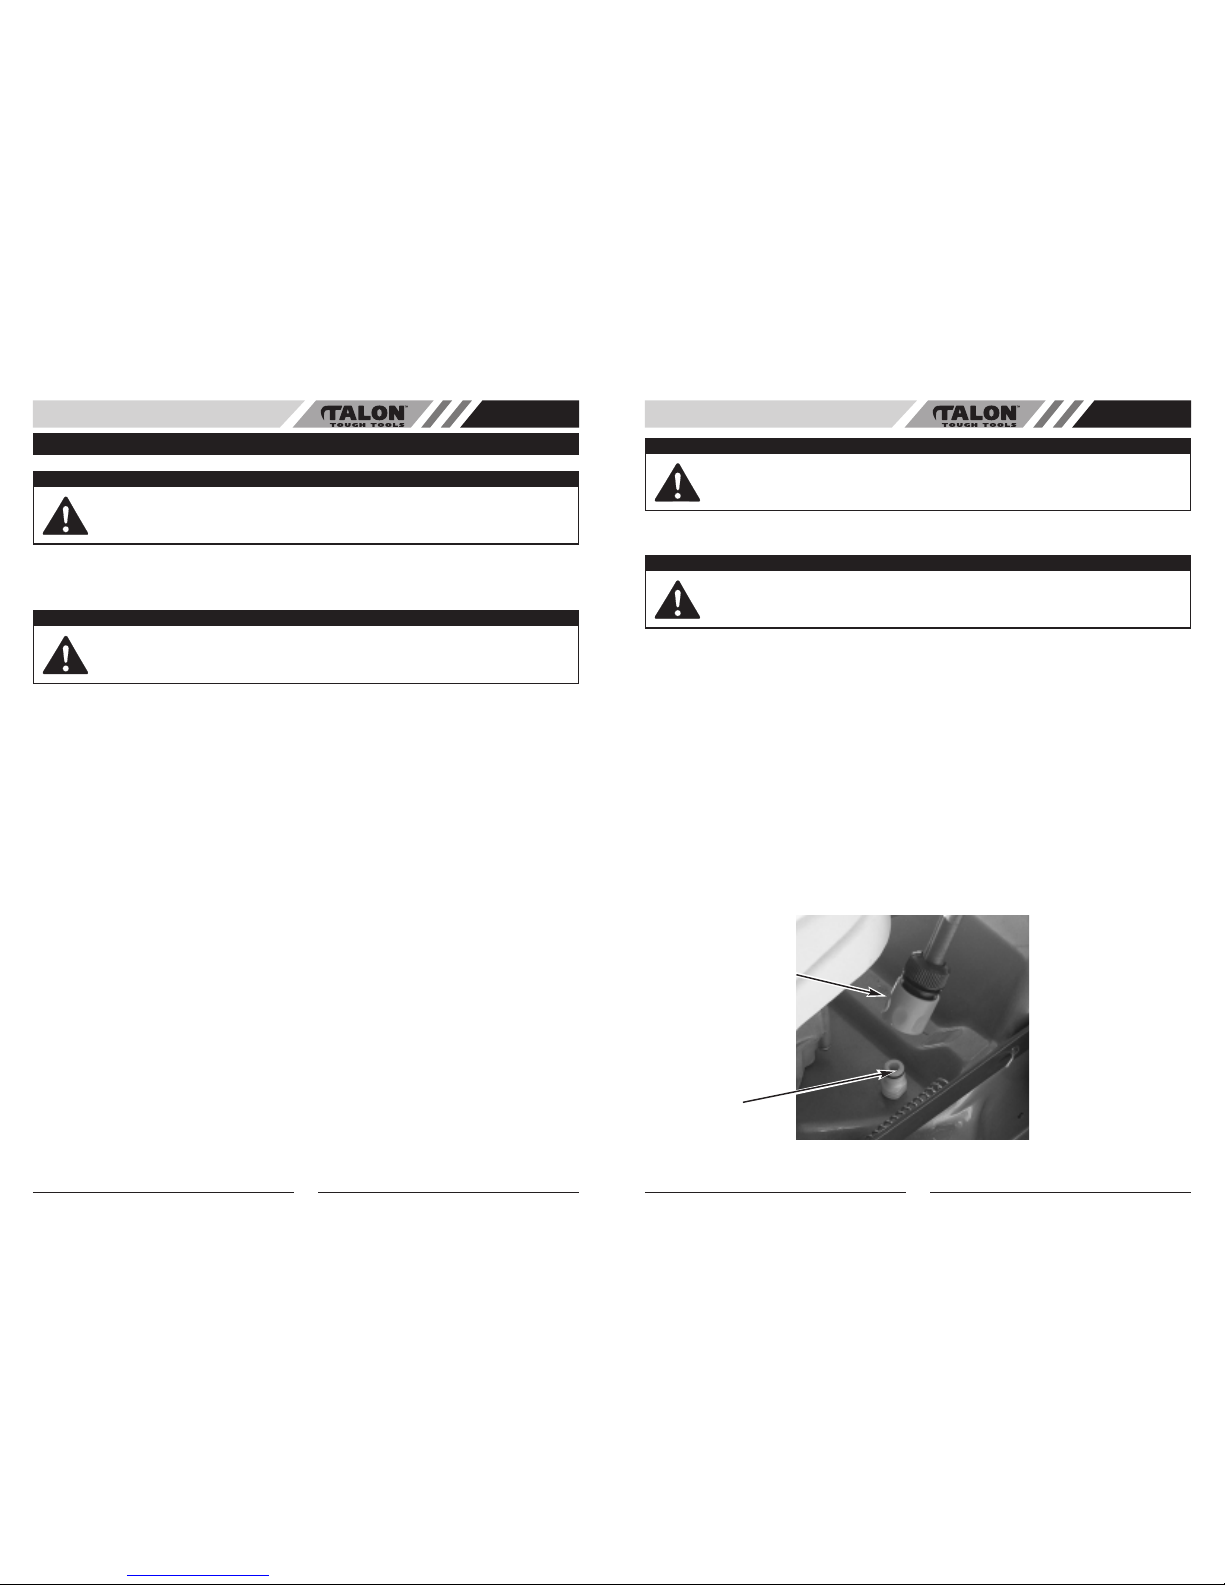
7. Fuel Filler Cap
8. Oil Filler Cap
9. Muffler Housing
10. Under Deck Wash Connector
11. Spark Plug
12. Cast Aluminium Ball Bearing
Wheels
13. Fuel Tap
AU
SAFETY INSTRUCTIONS
WARNING
The safety of user and others involved. Personal injury may result if information is
disregarded.
5
2
3
4
6
11
8
13