6
Directions for Firing Stro es and Channel Operation
To Fire Stro es
To fire strobe lights using the MicroSync®II, you need a MicroSync®II transmitter
and a MicroSync®II receiver. Follow these easy steps:
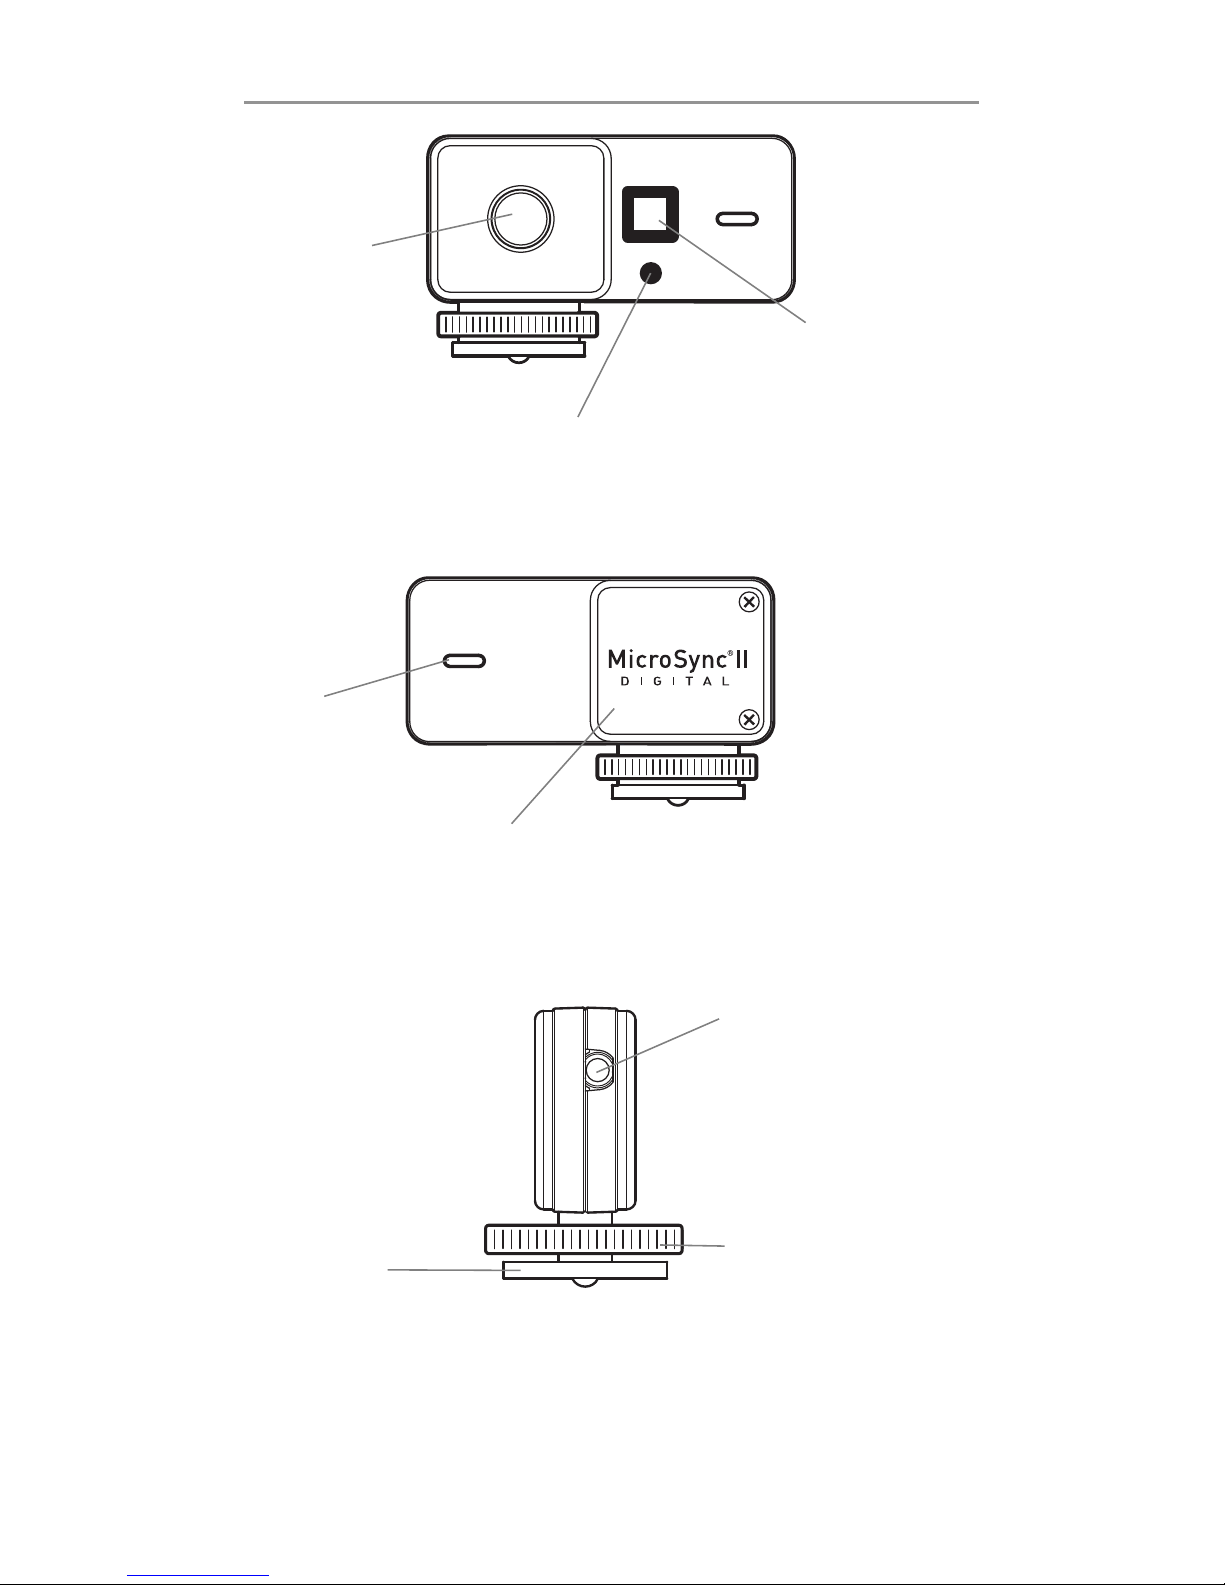
1. Insert the transmitter into the hot shoe of your camera and turn your camera on.
If your camera doesn’t have a hot shoe, visit www.microsyncdigital.com to learn
how to fire strobes from cameras without a hot shoe.
2. Open the receiver’s battery compartment door by pulling down on the side of
the receiver with the grooves on it.
3. Install the two included “AA” batteries (observe the polarity of the batteries as
indicated).
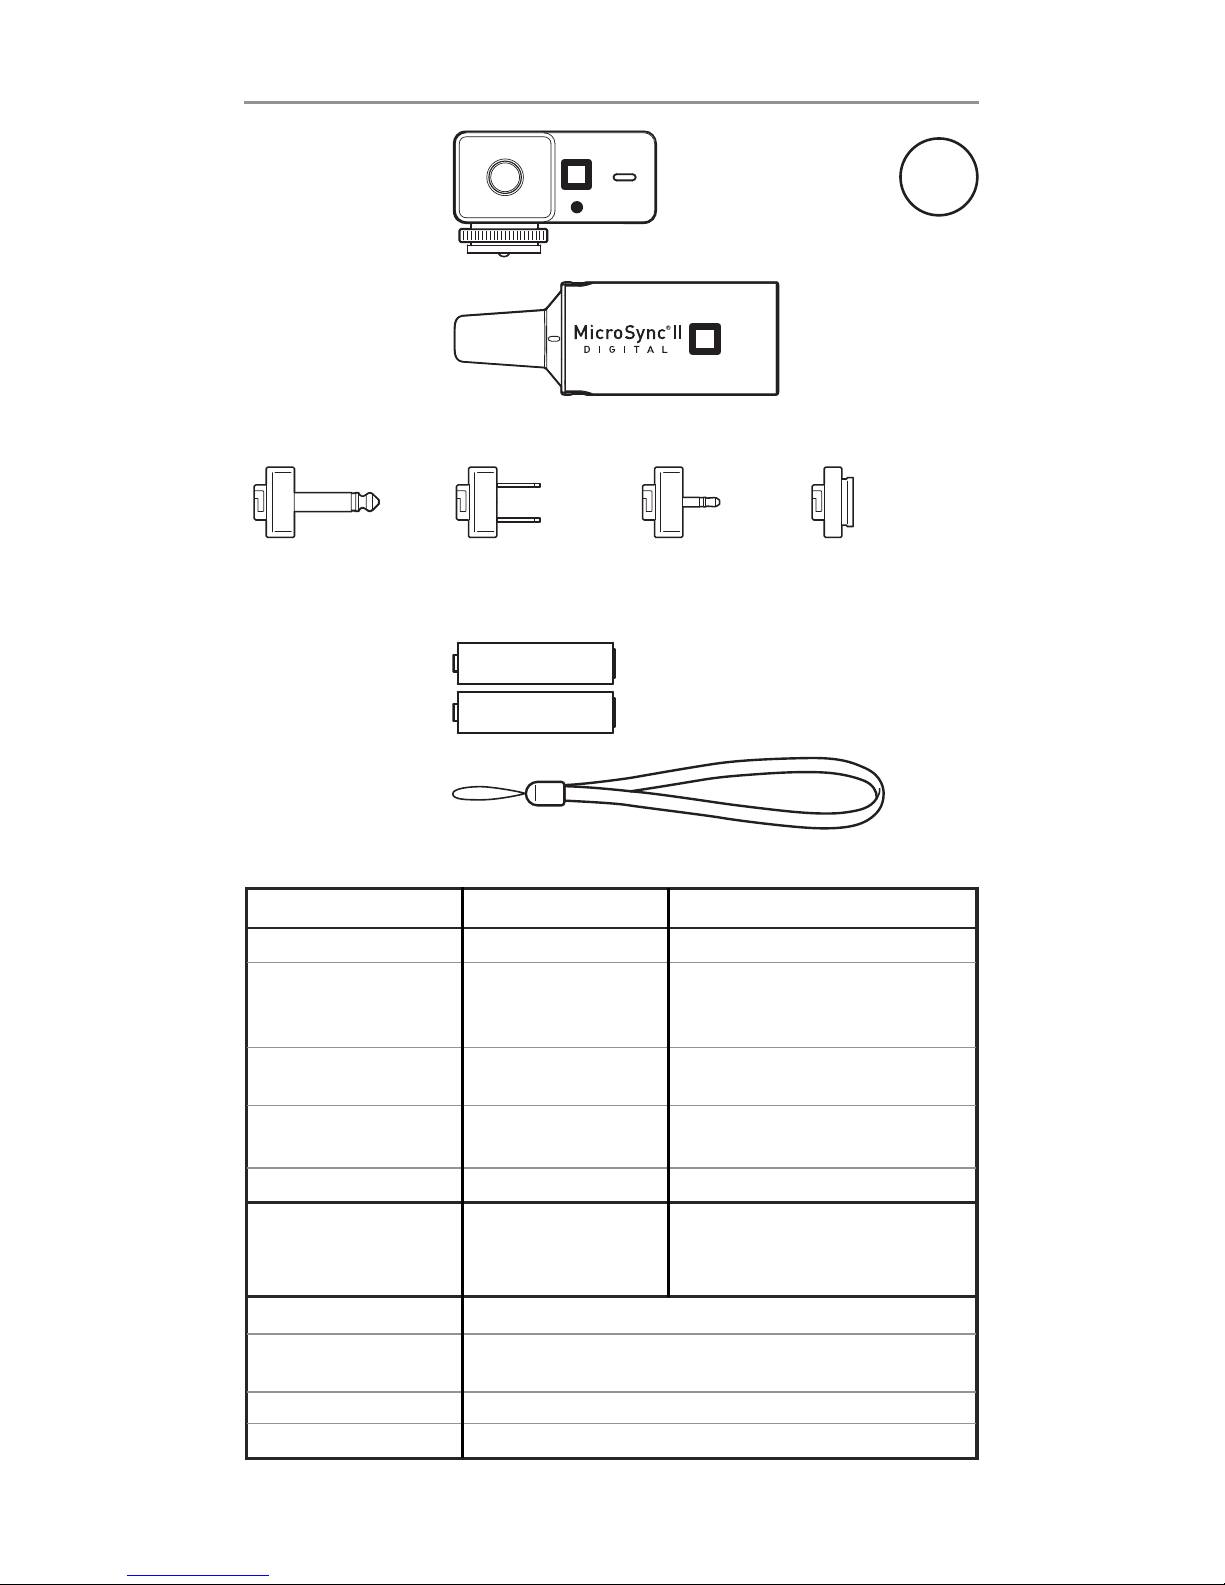
4. A set of four interchangeable plugs are supplied with the MicroSync®II. Each
plug has a bayonet-type mount for attaching it to the receiver. Select the plug
type that corresponds to your strobe’s sync input. Insert plug adapter into the
receiver base and turn the plug adapter clockwise to lock (see illustration on
page 5). If the plugs supplied are not compatible with your strobe, you may be
able to connect the receiver to your strobe with a cable. Visit
www.microsyncdigital.com for information about available cables.
5. Plug the receiver into the sync socket of your power pack or monolight.
6. Shoot!
To Change or Synchronize Channels
The MicroSync®II has 16 channels. The transmitter and receiver must be on the
same channel. Both the transmitter and the receiver are set to channel 1 at the
factory. The receiver also automatically resets to channel 1 when the batteries are
removed and reinstalled.
Please note: Channels 1-4 of the MicroSync®II are compatible with channels 1-4
of the previous version of the MicroSync®and have the same sync speed and
range as the previous version of the MicroSync®. Channel 16 has been designed
with less sensitivity in order to work with strobes that produce interference. As a
result, this channel has a maximum range of approximately 20 feet.
To change or synchronize the channels, follow these steps:
1. Turn on your power pack or monolight.
2. Plug the receiver into the sync socket of the power pack or monolight.
3. While standing within three feet of the receiver, press the channel select
button on the transmitter. The transmitter’s LCD screen will display the current
channel. Press the channel select button again to select the next channel.
The transmitter will wirelessly synchronize the receiver to the last selected
channel. The receiver’s LCD screen will then display the channel selected.
Please note: This channel changing or synchronizing procedure must be done
within three feet of the receiver and within 10 seconds of plugging the receiver in
to a strobe or power pack. After 10 seconds the receiver will lock itself to the last
selected channel. This feature ensures that another MicroSync®II user cannot
inadvertently change the channel of your MicroSync®II receiver.