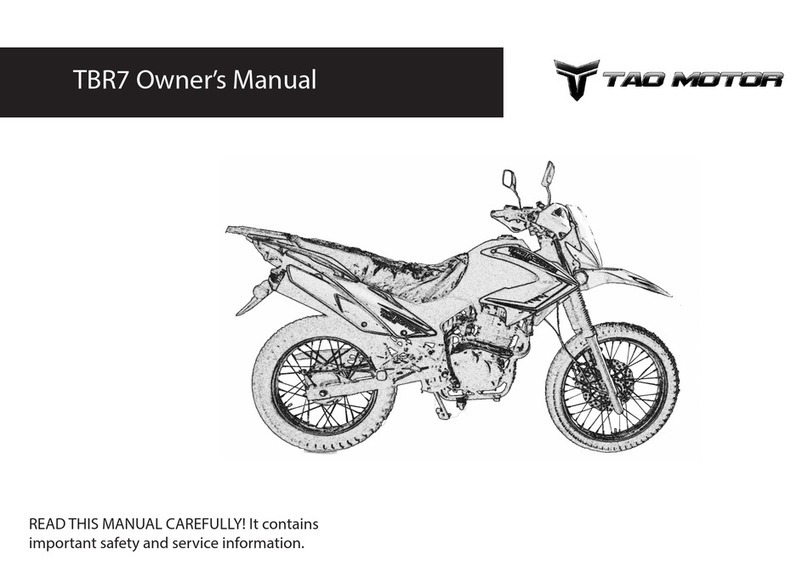
Tao Motor TBR7 User manual

READ THIS MANUAL CAREFULLY! It contains
important safety and service information.
TBR7 Owner’s Manual
THIS IS AN UNAUTHORIZED EDIT OF THE ORIGINAL MANUAL.
IT HAS BEEN EDITED FOR SPELLING AND CLARITY AND IS IN
NO WAY ENDORSED OR ACKNOWLEDGED BY TAO MOTOR.
THE EDIT IS INTENDED TO ENHANCE THE ORIGINAL MANUAL
AND NOT REPLACE IT.

This vehicle should only be assembled and prepped by an authorized
Tao Motor Dealer or professional motorcycle mechanic. You should
never try or attempt assembly of this vehicle; it should be done by
professionals. Death or serious injury could result from failure to
follow these warnings and instructions.
Please read carefully before operating this vehicle!

Thank you for your purchasing the Tao Motor TBR7 motorcycle.
This manual covers the main data, basic structure, and main procedures of operation, adjustment,
maintenance and troubleshooting of this motorcycle. Products are always subject to further improvement,
which will cause some difference between the vehicle and this manual.

SAFETY INFORMATION ................................................................. 1-3
WARNING & SAFETY LABELS ............................................................ 4
SPECIFICATIONS ............................................................................ 5,6
DESCRIPTION ................................................................................ 7-9
INSTRUMENT CLUSTER................................................................... 10
IGNITION SWITCH .......................................................................... 11
FUEL COCK/VALVE ......................................................................... 12
STARTING ENGINE ........................................................................ 13
MAIN SWITCH ............................................................................... 14
HEADLIGHT, HORN, TURN SIGNAL SWITCH ASSEMBLY ................... 15
GEAR SHIFTER ................................................................................ 16
ENGINE OIL .................................................................................... 17
ENGINE OIL CHANGE ...................................................................... 18
SPARK PLUG .................................................................................. 19
AIR FILTER ELEMENT ...................................................................... 20
THROTTLE CABLE ........................................................................... 21
ENGINE IDLE ADJUSTMENT ............................................................. 22
CLUTCH LEVER ADJUSMENT ............................................................ 23
HYDRAULIC FRONT BRAKE .............................................................. 24
REAR BRAKE ................................................................................... 25
SIDE STAND, SPROCKET .................................................................. 26
DRIVE CHAIN .................................................................................. 27
CHAIN ADJUSMENT ........................................................................ 28
DRIVE CHAIN LUBRICATION ............................................................ 29
BATTERY ......................................................................................... 30
BATTERY CHARGING ....................................................................... 31
WASHING VEHICLE ........................................................................ 32
MAINTENANCE SCHEDULE ............................................................. 33
GENERAL MAINTENANCE AND LUBRICATION CHART ................. 34-36
PERIODIC MAINTENANCE RECORD ................................................. 37
ELECTRICAL DIAGRAM .................................................................... 38
EMISSION CONTROL SYSTEM WARRANTY.................................. 39-42
TABLE OF CONTENTS

SAFETY INFORMATION
Important Safety Information
Take responsibility for your own safety and understand the challenges you can meet while riding.
There is much that you can do to protect yourself when you ride. You'll find many helpful recommendations throughout this manual. The
following are a few that we consider most important.
Always Wear a Helmet
Helmets significantly reduce the number and severity of head injuries, so always wear an approved motorcycle helmet and make sure your
passenger does the same. We also recommend that you wear eye protection, motorcycle boots, gloves, and other protective gear.
Learning how to ride your motorcycle
Take time to become familiar with how this motorcycle works and handles. Practice in a safe area until you build your skills and get accustomed
to the motorcycle's size and weight.
Because many accidents involve inexperienced or untrained riders, we urge all riders to take a certified course approved safety learning class.
Developing off-road riding skills is a gradual step-by-step process. Start by practicing at low speeds in a safe area and slowly build your skills.
On-Road Riding
The most frequent motorcycle collision happens when a car turns left in front of a motorcycle. Another common situation is a car moving
suddenly into your lane.
Always pay attention to other vehicles around you, and do not assume that other drivers see you. Be prepared to stop quickly or make an
evasive maneuver.
Make yourself more visible, wear bright reflective clothing, position yourself so other drivers can see you, signal before turning or changing
lanes, and use your horn when it will help others notice you.
Be Alert for Off-Road Hazards
The terrain can present a variety of challenges when you ride off-road. Continually "read" the terrain for unexpected turns, drop-offs, rocks,
ruts and other hazards. Always keep your speed low enough to allow time to see and react to hazards.
11

SAFETY INFORMATION
Ride Within Your Limits
Pushing limits is another major cause of motorcycle accidents. Never ride beyond your personal abilities or faster than conditions warrant.
Remember that alcohol, drugs, fatigue, and inattention can significantly reduce your ability to make good judgments and ride safely.
Don't Drink and Ride
Alcohol and riding don't mix. Even one drink can reduce your ability to respond to changing conditions, and your reaction time gets worse with
every additional drink. So don't drink and ride, and don't let your friends drink and ride either.
Keep Your TBR7 In Safe Operating Condition
It's important to keep your motorcycle properly maintained and in safe riding condition. Having a breakdown can be difficult, especially if you
are stranded off-road far from help. To help avoid problems, inspect your motorcycle before every ride and perform all recommended
maintenance. Never exceed load limits.
Modification
Modifying your motorcycle or using non OEM parts or accessories can make your motorcycle unsafe. Before you consider making any
modifications or adding an accessory, be sure to read the following information.
Improper accessories or modifications can cause a crash in which you can be seriously hurt or killed.
Follow all instructions in this owner's manual regarding accessories and modifications.
Tao Motor recommends that you use only genuine OEM accessories that have been specifically designed and tested for your motorcycle.
2

• Motorcycle boots with non-slip soles to help protect your feet and ankles.
•Leather gloves to help protect your hands.
•A motorcycle riding suit or jacket for comfort as well as protection.
Bright-colored and reflective clothing can help make you more noticeable in traffic. A void loose clothes that could get caught on any part
of your motorcycle.
Rider Training
Developing your riding skills is an on-going process. Even if you have ridden other motorcycles, take time to become familiar with how this
motorcycle works and handles. Practice riding the motorcycle in a safe area to build your skills. Do not ride in traffic until you get
accustomed to the motorcycle's controls, and feel comfortable with its size and weight.
SAFETY INFORMATION
Helmets and Eye Protection
A helmet is your most important piece of riding gear because it offers the best protection against head injuries. A helmet should fit your
head comfortably and securely. A bright-colored helmet and reflective strips can make you more noticeable in traffic.
An open-face helmet offers some protection, but a full-face helmet offers more. Regardless of the style, look for a DOT (Department of
Transportation) sticker in any helmet you buy (USA only). Always wear a face shield or goggles to protect your eyes and help your vision.
Warning
Not wearing a helmet increases the chance of serious injury or death in a crash.
Be sure you and your passenger always wear a helmet, eye protection, and other protective apparel when you ride.
On-Road Gear
In addition to a helmet and eye protection, we also recommend:
33

WARNING & SAFETY LABELS
Please read and understand all of the labels on your TBR7. These labels contain important information for safe and proper operation. Never
remove any labels from your motorcycle. If a label becomes difficult to read or comes off, request a new replacement label from your local Tao
Motor dealer.
44

SPECIFICATIONS
ModelTBR 7 Displacement 229cc
Overall Length
2040mm
Cylinder Bore×Stroke
67mm×65mm
Overall Width
840mm
Compression Ratio
9.1:1
Overall Height
1200mm
Power Output/Max. RPM 11kW/6500 RPM
Wheelbase
1345mm
Maximum Torque @ RPM 17.5N.m @ 5500 RPM
Dry Weight 130 kg Idle RPM 1500 RPM ±150
Max. Load
150kg(including the driver)
Front Wheel
90/90-19
Spark Plug
D8EA
Rear Wheel
110/90-17
Spark Plug Gap
0.6mm~0.8mm
Maxiumum Speed
≧90km/h
Valve Clearance Intake Valve:0.04mm~0.06mm
Braking Distance
≦7m(30km/h)
Exhaust Valve:0.04mm~0.06mm
Max. Incline
≧20°
Continued...
55

SPECIFICATIONS
Volume of Lubricating Oil
1.1L
Fuse
10A
Fuel Tank Capacity 12.5L
Battery
12V9Ah
Transmission Gear RatiosIgnition Type
C.D.I
1st gear
2.909
2nd gear
1.867
3rd gear
1.389
4th gear
1.150
5th gear
0.9545
66

DESCRIPTION
Left Rear View Mirror
Speedometer
Ignition Key Switch
Right Rear View Mirror
Front Brake Lever
Throttle
Engine Start Switch
Left handlebar
Clutch Lever
Horn Button
77

The VIN is on the right side of the frame.
Fuel Cock/Fuel Valve Gear Shifter Side Stand Rear Wheel
DESCRIPTION
8

Kick Start Lever Rear Brake Lever Front Shock Absorber Front Wheel
Exhaust Muffler
Seat Cushion
Rear View Mirror
Front Turn Signals
DESCRIPTION
9

2
6
No.Name Description
1Speedometer Shows speed in mph and km/h.
2Turn Signal Indicator Indicates turn signal operation.
3
High Beam Indicator Lit when high beam is on.
4
Gear Position Display Shows currently selected gear.
5
Neutral Indicator Comes on when the transmission is Neutral.
6
Fuel Level Display Indicates fuel level.
7
Odometer Total distance ridden.
1
1
8
4
5
7
8
Trip Odometer Reset Knob Turn the knob to reset the trip odometer.
3
INSTRUMENT CLUSTER
10

Position Function Remarks
OFF To stop the vehicle engine.
(Turns off the electrical system.)
The key can be
removed.
ON For starting or riding the vehicle.
(Turns on the electrical system.) The key cannot be
removed
LOCK Locks the steering. The key can be
removed. LOCK
OFF
ON
IGNITION SWITCH
1111

RESERVE:
With the handle of the fuel cock set to the "RES"
position, the fuel is supplied from the reserve.
(Note:The reserved fuel can only be used when
the normal supply is run out.)In this
case, refueling should be done as soon as
possible, there is only 1.1L of fuel left for use.
OFF
ON
RES
Fuel valve lever
STORAGE:
Drain gasoline from the fuel tank and
carburetor if being stored for more than
over 48hrs.
FUEL COCK/VALVE
FUEL TANK
The fuel tank capacity is 12.5L in total including 1.1L of Reserve. 91 Octane or higher
unleaded fuel is required for this motorcycle.
To fuel the vehicle, support the vehicle by the main stand, unlock fuel cap with ignition
key and fill with fuel. Close fuel tank cap and remove key.
FUEL COCK/FUEL VALVE
The fuel cock/valve supplies fuel from the tank to the carburetor.
The fuel cock/valve lever positions are explained as follows and shown in the illustrations.
FUEL OFF:
Arrow mark positioned over “OFF” position. Fuel is off and fuel will not flow to the
carburetor. Always turn the fuel valve to the"‘OFF" position and allow the engine to idle
until it burns remaining fuel in the line when the vehicle is being stored. Once the fuel in
the line has been cleared, drain the carburetor bowl. Following this procedure will help
reduce corrosion and carburetor damage.
FUEL ON:
Arrow mark positioned over “On” position. Fuel is on and fuel will flow to the carburetor.
12

1. Turn the fuel valve lever to the "ON" position.
2. Turn the ignition key to the "ON" position.
3. Set "RUN
" position on main switch.
4. Set Gear box to "Neutral" position. "N" will be displayed on the instrument
cluster.
5. Set the choke lever to the cold start position (all the way up).
6. Press and hold start button until the engine starts.
Manual start can be accomplished by pushing down on kick start lever
rapidly until the engine starts.
Never hold the start button for more than 10 seconds per try. It may be
necessary to twist the throttle lever a small amount to start the engine.
7. When engine warms up, move the choke lever down.
Choke lever must be in the off position (all the way down) in order to
operate the vehicle .
STARTING ENGINE (COLD)
1. Turn the fuel valve lever to "ON" position.
2. Turn the ignition key to the "ON" position.
3. Set "RUN
"position on main switch.
4. Set Gear box to "Neutral" position. "N" will be displayed on instrument
cluster.
5. Set the choke lever to the warm start position (all the way down).
6. Press and hold start button until the engine starts, or push down on kick
start lever rapidly until the engine starts.
Never hold the start button for more than 10 seconds per try. It may be
necessary to twist the throttle lever a small amount to start the engine.
STARTING ENGINE (WARM)
STARTING ENGINE
13
Engine can also be started in any gear by
depressing clutch lever and pressing the start
button at the same time
We recommend starting the engine in
Neutral gear only.
NOTE
NOTE

MAIN SWITCH
Start Button
Push start button to crank the engine with starter.
See the starting instructions on the previous page before
starting the engine. Engine Stop/Kill Switch
Engine Run Switch
Engine Start Button
Engine Start/Stop Switch
Use this switch to "Stop " the engine in an emergency
situation. The engine will not start when this switch is set to
this position.
Set this switch to "Run " position before starting the
engine.
14

①
②
③
④
HEADLIGHT, HORN, TURN SIGNAL SWITCH ASSEMBLY
1. Headlight Switch
The Headlight Switch has three positions OFF, Running Light, Headlight
ON. It’s always recommended you ride with the headlight ON all the time.
2. Headlight High/ Low beam switch
High beam.
Low beam.
3. Turn signal switch
Move Switch to left or right to activate the turn signal.
4. Horn button
Press and hold to sound the horn.
15

Gear Select Lever Up
5
4
3
2
N
1
Gear Select Lever Down
GEAR SHIFTER
Your motorcycle transmission has 5 forward gears in one-down, four-up shift pattern.
Start the engine and let it warm up at idle speed. Apply the clutch lever and select 1st
gear, slowly releasing the clutch lever. A small amount of throttle may be needed to
move forward.
16
Other manuals for TBR7
1
Table of contents
Other Tao Motor Motorcycle manuals
Popular Motorcycle manuals by other brands

KTM
KTM 125 SX EU 2014 Setup instructions

MOTO GUZZI
MOTO GUZZI Sport 1100i 2007 owner's manual

Coleman
Coleman CT200U-EX V Assembly instructions

Zero Motorcycles
Zero Motorcycles FX 2022 owner's manual

BMW Motorrad
BMW Motorrad R 1250 GS 2020 Rider's manual

MOTO GUZZI
MOTO GUZZI GRISO Use and maintenance book