TaoTronics TT-CM001 User manual

Questions or Concerns?
support@taotronics.com
COFFEE MAKER
User Manual
TAOTRONICS

THANK YOU
FOR BEING OUR CUSTOMER
Your purchase is truly appreciated!
We hope you are over-the-moon with our product!

Deutsch
LANGUAGES
English
Français
Español
Italiano
01
19
33
47
61

IMPORTANT SAFETY
INSTRUCTIONS
Great-Tasting
Coffee, No Mess
01
CONTENTS
IMPORTANT SAFETY INSTRUCTIONS 02
KNOWING YOUR COFFEE MAKER 05
USING YOUR COFFEE MAKER 09
CLEANING AND MAINTENANCE 13
TROUBLESHOOTING 15
EN

03 Coffee Maker 04
Coffee Maker
WHEN USING ELECTRICAL
APPLIANCES, BASIC
SAFETY PRECAUTIONS
SHOULD ALWAYS BE
FOLLOWED TO REDUCE
THE RISK OF FIRE,
ELECTRICAL SHOCK,
AND/OR INJURY TO
PERSONS INCLUDING
THE FOLLOWING
DANGER
DO NOT touch or hold the
mains plug with wet hands.
DO NOT cover the steam
outlet on the top of product.
DO NOT touch the carafe
due to high temperature.
INTENDED USE
· This appliance is not intended for use by persons (including children) with reduced physical sensory or mental
capabilities, or lack of experience and knowledge, unless they have been given supervision or instruction
concerning use of the appliance by a person responsible for their safety.
· Children should be supervised to ensure that they do not play with the appliance. Keep the appliance out of
reach of children. Do not leave the appliance unattended.
· This appliance is intended to be used in household and similar applications such as:
– staff kitchen areas in shops, offices and other working environments
– farm houses
– by clients in hotels, motels and other residential type environments
– bed and breakfast type environments
· Do not use the coffee maker for other purposes or allow it work in environments apart from above.
ELECTRICITY SAFETY
· The coffee maker must be operated at the rated voltage. The electrical voltage must correspond with the
voltage stated on the label of the appliance.
· To prevent electric shock, do not place the power cord, plug or device in water or other liquids.
· Never continue to use the coffee maker in the event of damage to the electrical components; if the power cord,
main leads or major parts are damaged, it must be replaced by the manufacturer, its service agent or similarly
qualified persons in order to avoid a hazard.
· The power cord should not be hung from the edge of the table or the power cord placed on a hot surface.
· Always unplug from the socket when power off, not in use, after brewing process or before cleaning, and do not
pull the power cord.
RELATED TO USE
· Do not touch the hot plate and burn the surface. Be careful to get burnt by steam.
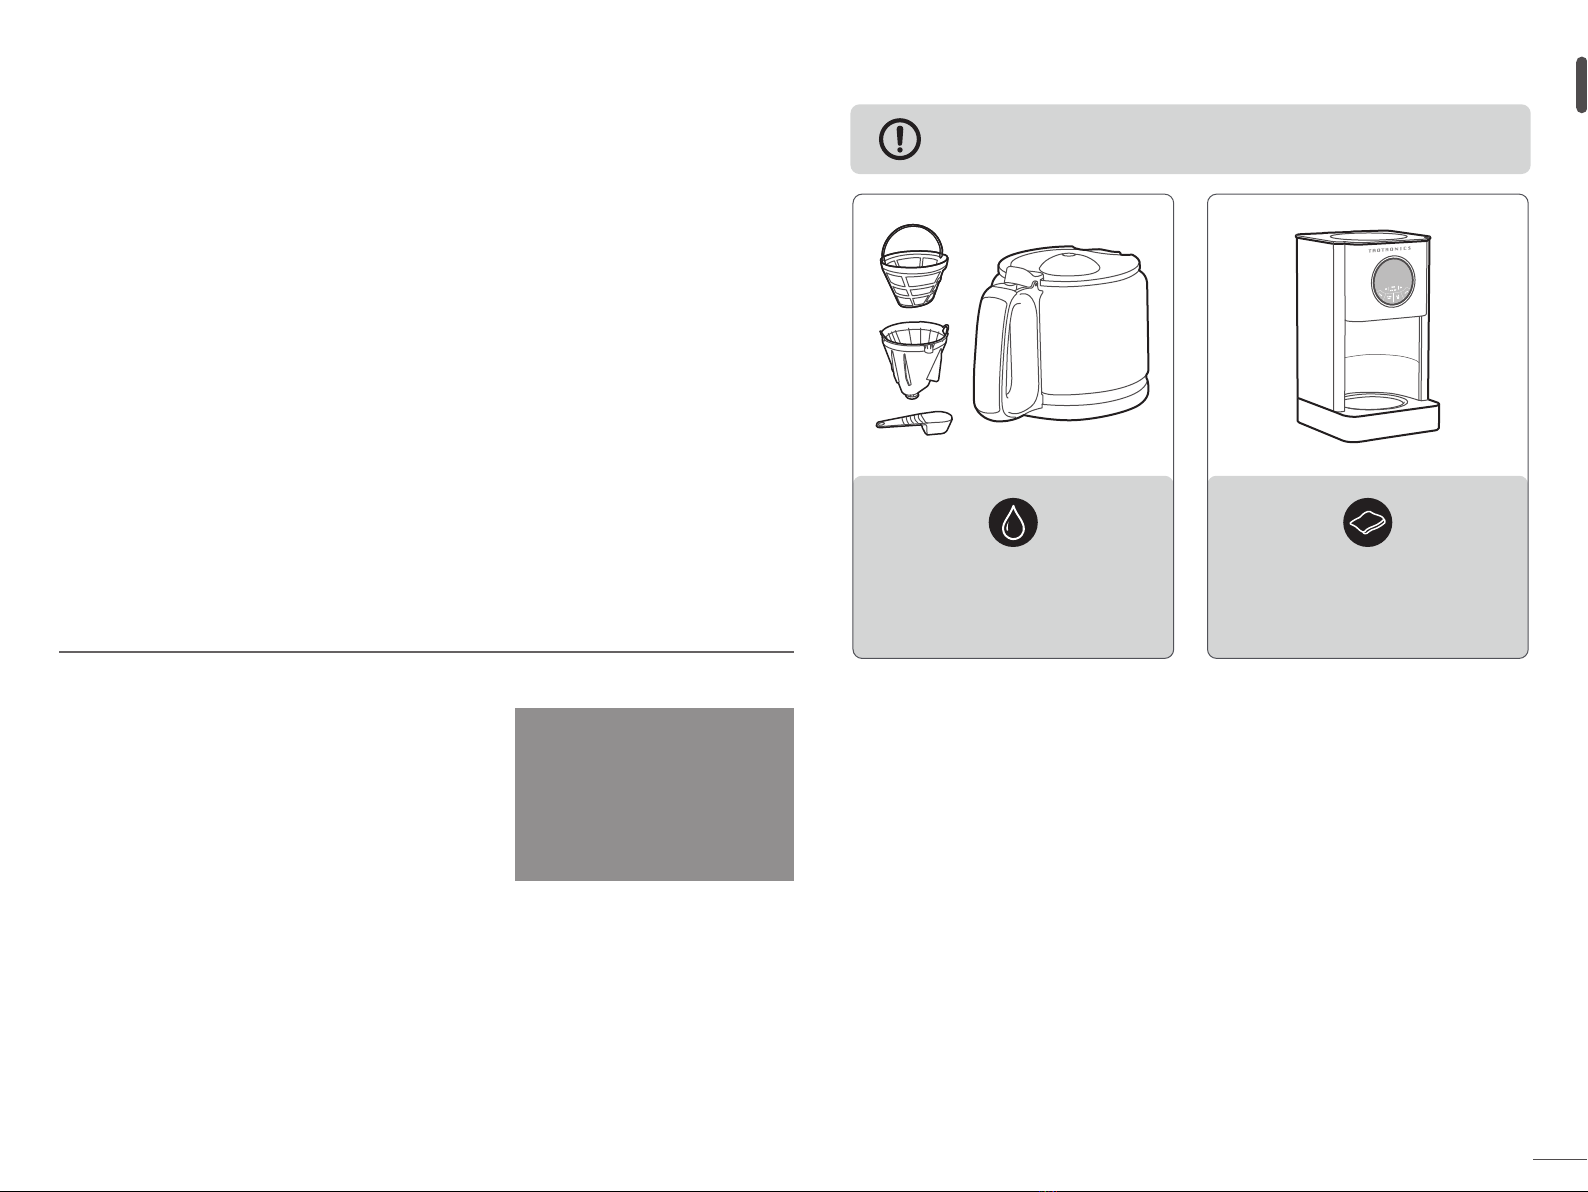
· Don't let your coffee maker work without water. Purified water is recommended.
· Do not stand on the appliance. The appliance must not be immersed.
· Use of non-jointed accessories may cause fire, electric shock or personal injury.
· When working in the coffee pot more than one hundred times, please clean the surface of the water tank and
the hot plate in time.
· Cool before opening or removing parts and before cleaning the unit. Between brewing processes, switch off
the appliance and let it cool down for about 5 minutes. Then refill with cold water.
· The carafe is designed for this device. Ensure the carafe is placed properly in its position when brewing coffee.
Never use it at the top of the range. Do not place the heat carafe on a damp, cold surface. Do not use a broken
carafe or a loose or weakened carafe. Do not clean the carafe with detergent, steel wool pad or other abrasive
material.
HOUSEHOLD USE ONLY
SAVE THESE INSTRUCTIONS
HAVE YOUR COFFEE MAKER
CHECKED REGULARLY FOR ANY
SIGN OF MALFUNCTION!
Stop using, check FAQ and contact TaoTronics Support Team.
Check if plug, cord or appliance is damaged
Regular Check
IMPORTANT SAFEGUARDS

Specifications
Rated Voltage
Rated Power
Water Tank Capacity
Carafe Capacity
220-240V
1000W
1.8L
1.8L
06
Coffee Maker
KNOWING YOUR
COFFEE MAKER
02
Water Tank Cover
Water Gauge
Water Tank
Power Cord
Spout
Funnel
Control Panel
& Display
Carafe
Product Diagram
Great-Tasting
Coffee, No Mess

07 Coffee Maker 08
Coffee Maker
Control Panel
Brew/Auto
OFF Button
Minute Button
Program Button
1-4/MuteCarafe
Temperature
Clean Button
Hour Button
LED Display
LED
DISPLAY Display time and functions.
Blinking means setting, solid means confirmed.
HR/MIN
BUTTON
In standby status, tap to enter time settings.
When setting time, tap to increase time, hold for quick increase.
· Standby & Reservation: 0-12 AM/PM
· Keep-warm: 0-4 hours
BREW/AUTO
OFF BUTTON
Brewing: Tap to start/cancel brewing coffee.
Reservation: Tap to confirm/exit reservation.
Cleaning: Tap to start/cancel cleaning.
CLEAN
BUTTON Tap to enter/exit clean mode.
CARAFE
TEMP
BUTTON
Tap to select keep-warm level among Low/Medium/High.
Hold to enter keep-warm time settings
(Default keep-warm time: 30 min).
PROG
BUTTON Tap to enter/exit reservation mode.
1-4/MUTE
BUTTON
· Tap to brew with/without 1-4 cup function.
*1-4 cup function: Drip more slowly to increase concentration.
· Hold to mute/unmute button tone.
*BREW/AUTO OFF button cannot be mute.

10
Coffee Maker
USING YOUR
COFFEE MAKER
03
Before first use, boil water for several times to remove odor (No need to add coffee or filter paper).
Brewing Coffee
1 spoon of ground coffee can make 1 cup of great coffee. You can adjust the
concentration by controlling the coffee amount or brewing with 1-4 function.
1.
Open the water tank cover and fill with
cold water. (DO NOT exceed the MAX
water level line.)
2.
Put the filter basket in the funnel and
add ground coffee into the filter
basket.
1
2
1
2
3.
Close the water tank cover.
Plug into a socket.
1
2
· It will enter keep-warm mode automatically after brewing finished.
· When the keep-warm time is up (Default time: 30 min), it will enter standby status.
· During brewing and keep-warm, the HR/MIN/PROG button is invalid.
4.
Tap BREW/AUTO OFF button to
start brewing.
Great-Tasting
Coffee, No Mess

11 Coffee Maker 12
Coffee Maker
Reservation for Brewing
Always align clock time with local time before setting the preset time.
1. In standby status, tap PROG button to enter reservation mode.
2. Tap HR/MIN button to set the preset time, and the time is confirmed with blinking for 5s, then
start with BREW/AUTO OFF button.
3. Tap CARAFE TEMP button to set the keep-warm level. When the clock runs to the preset time,
it will start brewing automatically.
· When PROG light blinks, tapping PROG button or no operation in 10s will
exit the reservation settings.
· Tap PROG button again to show the preset time.
· Tap BREW/AUTO OFF button again to cancel the preset time.
Additional Features
1. Clock Settings
1. In standby status, tap HR/MIN button once to enter clock settings.
2. Tap HR/MIN button to increase 1 increment by each tap; Hold HR button to increase rapidly.
3. No operation in 5s indicates that clock setting is done.
2. Keep Warm Settings
2.1 Keep-warm time settings
Set the keep-warm time before setting the preset time as it cannot be
changed during brewing process.
1. In standby status, hold the CARAFE TEMP button to enter keep-warm time settings.
2. When AUTO OFF light is blinking, set the keep-warm time with HR/MIN buttons.
3. No operation in 10s will confirm the keep-warm time and exit keep-warm time settings.
2.2 Keep-warm levels
· The default keep-warm level is Medium.
· Tap CARAFE TEMP button repeatedly to select keep-warm level among Low/Medium/High.
· Tap CARAFE TEMP button to display current keep-warm level when level light is off.
TEMPERATURE
RANGE FOR
KEEP-WARM LEVELS
Low temperature: ≥75°C
Medium temperature: ≥78°C
High temperature: ≥81°C
3.CLEAN Function
After using for certain times, the CLEAN light will start blinking indicating the appliance needs
cleaning. After the CLEAN function is performed completely, the CLEAN light stops blinking.
When this light illuminates or you want to perform cleaning, take the following steps:
1. Fill the tank with cold water to the Max water level line. Tap CLEAN button and
BREW/AUTO OFF button to enter CLEAN mode.
2. The appliance will work for 1 min and stop for 2 min repeatedly, until one beep is heard.
3. Under CLEAN mode, tap CLEAN or BREW/AUTO OFF to exit the mode, CLEAN light goes off.
4. Restore to Factory Settings
In standby status, press and hold HR and MIN button simultaneously, 3 beeps will be heard, the
coffee maker restores to factory settings.
Coffee Sharing !

14
Coffee Maker
CLEANING AND
MAINTENANCE
04
Regular Cleaning
Always unplug the appliance and let the heated board to cool down
before cleaning or maintenance.
Carafe, funnel and filter basket can be
cleaned with warm water, washing
liquid and a soft brush. These parts
can be washed in a dishwasher.
Wipe down the outer surface with
a damp cloth. There might be condensed
water dropped onto the heated board,
clean the related parts with a dry cloth.
Descaling
· To ensure that your coffee maker make perfect coffee persistently, clean it from time to time.
· The frequency of cleaning depends on water quality and frequency of utilization.
· The harder the water is in your area, the more often the machine needs to be descaled.
You can consult the water hardness at your local waterworks.
Environmental Tip
· An electronic appliance should, when it is no longer capable of functioning be disposed with
least possible environmental damage. The appliance should be disposed according to the
local regulations in your municipality, in most cases you can discharge the appliance at your
local recycling center.
· Grounds and coffee filter can be disposed via a compost container.
Great-Tasting
Coffee, No Mess

16
Coffee Maker
TROUBLE-
SHOOTING
05
About Coffee Maker
Is the coffee maker noisy? · Brewing and dripping sounds during working is
normal. These sounds will not affect brewing
process and can remind you when brewing is
completed.
· Three beep sounds will be heard after brewing
and keeping warm.
· Beep sounds and button tone can be muted by
holding the mute button.
Does the coffee maker have a
heat preservation function? Yes. It can keep warm as long as 4 hours, and the
temperature level can be adjusted among
Low/Medium/High.
Will the coffee maker
automatically stop working
after brewing?
After keeping warm ends, the coffee maker will
enter standby status automatically.
When do I need to clean the
coffee maker?
· When the coffee maker detects certain using
times, the CLEAN light will be blinking,
indicating cleaning is needed.
· You can manually clean the coffee maker after
use regularly. (See “Cleaning and Maintenance”
section)
About Brewing
How long does it take to
make coffee? Technically it takes about 15 minutes to brew
12 cups of coffee, 8 minutes for 6 cups.
Can I make a reservation
for brewing? Yes, it has a 24H reservation function.
(See “Reservation for Brewing” section)
Is the coffee hot enough? The freshly brewed coffee is above 80℃.
You can set three keep-warm levels to maintain
the coffee temperature.
Can filter papers be used? · This product comes with a permanent filter
basket. It is recommended not to use filter paper.
· If you have to use filter papers, remove the filter
basket, otherwise dripping speed might slow down.
Great-Tasting
Coffee, No Mess

17 Coffee Maker 18
Coffee Maker
Other Issues
Why is the displayed time
incorrect? Align it with the local time before power on
each time. (See “Clock Settings” section)
What does E1/E2/E3 mean on
the LED display? The system detects that some functional errors,
it is recommended not to continue using it.
The troubleshooting guide addresses the most common problems.
If problems persist, feel free to contact the Customer Support at
Thanks for choosing TaoTronics Coffee Maker.
This product is covered with TaoTronics product and labor warranty for
12 months from the date of its original purchase.
The warranty will not apply in cases of:
- Accident, misuse, or repairs performed by unauthorized personnel.
- Any unit that has been tampered with or used for commercial purpose.
- Normal wear and tear of wearable parts.
- Use of force, damage caused by external influences.
- Damage caused by non-observance of the User Manual,
e.g. connection to an unsuitable mains supply or
non-compliance with the instructions.
- Partially or completely dismantled appliances.
- Defects caused by or resulting from damages from shipping or from
repairs, service, or alteration to the product or any of its parts that have
been performed by a repair person not authorized by TaoTronics.
We can only provide after sales service for
products that are sold by TaoTronics or
TaoTronics authorized retailers and
distributors. If you have purchased your
unit from a different place, please contact
your seller for return and warranty issues.
※Please have your invoice and order ID
ready before contacting Customer
Support.
WARRANTY AND SERVICE

WISSENSWERTES
ÜBER IHRE
KAFFEEMASCHINE
Gut schmeckender
Kaffee, kein Chaos
01
INHALTSVERZEICHNIS
WISSENSWERTES ÜBER IHRE KAFFEEMASCHINE 20
VERWENDUNG IHRER KAFFEEMASCHINE 24
REINIGUNG UND PFLEGE 28
PROBLEMLÖSUNG 30
DE

21 Coffee Maker 22
Coffee Maker
Spezifikationen
Nennspannung
Nennleistung
Fassungsvermögen des Wassertanks
Fassungsvermögen der Karaffe
220-240V
1000W
1,8L
1,8L
Wassertank-
Deckel
Wasser-
standsanzeige
Wassertank
Stromkabel
Ausguss
Trichter
Bedienfeld
& Display
Karaffe
Produktabbildung
Bedienfeld
Brüh-/Auto-
Aus-Taste
Minuten-Taste
Programm-Taste
1-4/
Stummschalten
Karaffent-
emperatur
Reinigungs-
Taste
Stunden-Taste
LED-Anzeige
LED-
ANZEIGE Zeigt Zeit und Funktionen an.
Blinken bedeutet Einstellung, konstantes Leuchten bedeutet bestätigt.
HR/MIN-
TASTE
Tippen Sie im Standby-Modus darauf , um die Zeiteinstellungen
einzugeben. Antippen, um die Zeit beim Einstellen zu erhöhen,
gedrückt halten, um sie schnell zu erhöhen.
· Standby & Vormerken: 0-12 AM/PM
· Warmhalten: 0-4 Stunden
BRÜH-/AUTO
-AUS-TASTE
Brühen: Antippen, um die Kaffeezubereitung zu starten/abzubrechen.
Vormerken: Antippen, um die Vormerkung zu bestätigen/ausschalten.
Reinigung: Antippen,um die Reinigung zu starten/abzubrechen.
REINIGUNGS-
TASTE Antippen, um den Reinigungsmodus aufzurufen/auszuschalten.

23 Coffee Maker
KARAFFENT-
EMPERATUR-
TASTE
Antippen, um die Warmhaltestufe auf Niedrig/Mittel/Hoch zu stellen.
Gedrückt halten, um die Einstellungen für die Warmhaltezeit
einzugeben (Standard-Warmhaltezeit: 30 min).
PROG-
TASTE Antippen, um den Reservierungsmodus aufzurufen/auszuschalten.
1-4/STUMM-
SCHALTTASTE
· Antippen, um mit/ohne 1-4-Tassen-Funktion zu brühen.
*1-4-Tassen-Funktion: Langsamer tropfen lassen, um die
Konzentration zu erhöhen.
· Gedrückt halten, um den Tastenton stummzuschalten/aufzuheben.
*Die Taste BREW/AUTO OFF kann nicht stummgeschaltet werden. VERWENDUNG
IHRER
KAFFEEMASCHINE
Gut schmeckender
Kaffee, kein Chaos
02

25 Coffee Maker 26
Coffee Maker
Vor dem ersten Gebrauch mehrmals Wasser kochen, um Geruch zu entfernen.
(Sie brauchen keinen Kaffee oder Filterpapier hinzuzugeben.)
Kaffee brühen
1 Löffel gemahlener Kaffee kann 1 Tasse großartigen Kaffee ergeben. Sie können
die Konzentration einstellen, indem Sie die Kaffeemenge anpassen oder mit der
Funktion 1-4 brühen.
1.
Öffnen Sie den Wassertankdeckel und
füllen Sie ihn mit kaltem Wasser.
(Überschreiten Sie NICHT die MAX-
Wasserstandslinie).
2.
Setzen Sie den Filterkorb in den Trichter
und geben Sie gemahlenen Kaffee in
den Filterkorb.
1
2
1
2
3.
Schließen Sie den Wassertankdeckel.
Stecken Sie den Stecker in eine Steckdose.
1
2
· Nach Beendigung des Brühvorgangs geht das Gerät automatisch in den
Warmhaltemodus über.
· Wenn die Warmhaltezeit abgelaufen ist (Standardzeit: 30 min), geht das Gerät in
den Standby-Modus über.
· Während des Brühens und Warmhaltens sind die Tasten HR/MIN/PROG ungültig.
4.
Tippen Sie die Taste BREW/AUTO OFF
an, um den Brühvorgang zu starten.
Vormerken zum Brühen
Stimmen Sie die Uhrzeit immer mit der Ortszeit ab, bevor Sie
die Vorwahlzeit einstellen.
1. Tippen Sie im Standby-Modus auf die Taste PROG, um den Vormerkmodus aufzurufen.
2. Tippen Sie auf die Taste HR/MIN, um die voreingestellte Zeit einzustellen. Die Zeit wird bestätigt
wenn es 5 Sekunden langes Blinken. Beginnen Sie dann mit der Taste BREW / AUTO OFF.
3. Tippen Sie auf die Taste CARAFE TEMP, um die Warmhaltestufe einzustellen. Wenn die Uhr
die voreingestellte Zeit erreicht hat, beginnt das Gerät automatisch mit dem Brühen.
· Wenn das PROG-Lämpchen blinkt, werden die Vormerk-Einstellungen durch
Antippen der PROG-Taste oder, wenn innerhalb von 10s keine Eingabe erfolgt,
ausschalten.
· Tippen Sie erneut auf die Taste PROG, um die eingestellte Zeit anzuzeigen.
· Tippen Sie erneut auf die Taste BREW/AUTO OFF, um die eingestellte Zeit
abzubrechen.
Zusätzliche Funktionen
1. Uhreinstellungen
1. Tippen Sie im Standby-Modus einmal auf die Taste HR/MIN, um die Uhreinstellungen aufzurufen.
2. Tippen Sie auf die Taste HR/MIN, um mit jedem Antippen um 1 zu erhöhen; halten Sie die Taste
HR gedrückt, um schnell zu erhöhen.
3. 5s lang keine Eingabe schließt die Uhreinstellung ab.
2. Warmhalte-Einstellungen
2.1 Einstellungen der Warmhaltezeit
Stellen Sie die Warmhaltezeit ein, bevor Sie die Vormerk-Zeit einstellen, da sie
während des Brühvorgangs nicht verändert werden kann.

1. Halten Sie im Standby-Modus die Taste CARAFE TEMP gedrückt, um die Warmhalte-
Zeiteinstellungen aufzurufen.
2. Wenn die Anzeige AUTO OFF blinkt, stellen Sie die Warmhaltezeit mit den Tasten HR/MIN ein.
3. Wenn innerhalb von 10s keine Eingabe erfolgt, wird die Warmhaltezeit bestätigt und die
Einstellungen der Warmhaltezeit ausschalten.
2.2 Warmhalte-Stufen
· Die Standard-Warmhaltestufe ist Mittel.
· Tippen Sie wiederholt auf die Taste CARAFE TEMP, um die Warmhaltestufe auf
Niedrig/Mittel/Hoch zu stellen.
· Tippen Sie auf die Taste CARAFE TEMP, um die aktuelle Warmhaltestufe anzuzeigen,
wenn die Stufenanzeige aus ist.
TEMPERA-
TURBEREICH FÜR
WARMHALTESTUFEN
Niedrige Temperatur: ≥75°C
Mittlere Temperatur: ≥78°C
Hohe Temperatur: ≥81°C
3. CLEAN-Funktion
Nach einer gewissen Betriebszeit beginnt die CLEAN-Anzeige zu blinken und zeigt damit
an, dass das Gerät gereinigt werden muss. Nachdem die CLEAN-Funktion vollständig
ausgeführt wurde, hört das CLEAN-Lämpchen auf zu blinken. Wenn dieses Lämpchen
leuchtet oder Sie eine Reinigung durchführen wollen, gehen Sie wie folgt vor:
1. Füllen Sie den Tank bis zur Max-Wasserstandslinie mit kaltem Wasser. Tippen Sie auf die Taste
CLEAN und die Taste BREW/AUTO OFF, um den Reinigungsmodus aufzurufen.
2. Das Gerät arbeitet wiederholt 1 min und stoppt dann 2 min lang, bis ein Piepton ertönt.
3. Tippen Sie im Reinigungsmodus auf CLEAN oder BREW/AUTO OFF, um den Modus
auszuschalten, die CLEAN-Anzeige erlischt.
4. Auf Werkseinstellungen zurücksetzen
Halten Sie die HR- und MIN-Taste im Standby-Modus gleichzeitig gedrückt, ertönen 3 Pieptöne.
Die Kaffeemaschine stellt dann die Werkseinstellungen wieder her.
REINIGUNG
UND PFLEGE
Gut schmeckender
Kaffee, kein Chaos
03
27 Coffee Maker

Regelmäßige Reinigung
Ziehen Sie immer den Netzstecker des Geräts und lassen Sie die Heizplatte
abkühlen, bevor Sie sie reinigen oder warten.
Karaffe, Trichter und Filterkorb können
mit warmem Wasser, Spülmittel und
einer weichen Bürste gereinigt werden.
Diese Teile können in der Spülmaschine
gereinigt werden.
Wischen Sie die Außenfläche mit
einem feuchten Tuch ab.
Es kann Kondenswasser auf die
Heizplatte getropft sein; reinigen Sie die
entsprechenden Teile mit einem
trockenen Tuch.
Entkalken
· Um sicherzustellen, dass Ihre Kaffeemaschine dauerhaft perfekten Kaffee zubereitet, sollten Sie
sie von Zeit zu Zeit reinigen.
· Die Reinigungsfrequenz hängt von der Wasserqualität und der Nutzungsintensität ab.
· Je härter das Wasser in Ihrer Region ist, desto häufiger muss das Gerät entkalkt werden.
Sie können die Wasserhärte bei Ihrem örtlichen Wasserwerk erfragen.
Umwelt-Tipp
· Ein elektronisches Gerät sollte, wenn es nicht mehr funktionsfähig ist, mit möglichst geringer
Umweltbelastung entsorgt werden. Entsorgen Sie das Gerät entsprechend den örtlichen
Vorschriften Ihrer Gemeinde; in den meisten Fällen können Sie das Gerät bei Ihrer örtlichen
Recyclingstelle abgeben.
· Kaffeesatz und Kaffeefilter können über einen Kompostbehälter entsorgt werden.
29 Coffee Maker
PROBLE-
MLÖSUNG
Gut schmeckender
Kaffee, kein Chaos
04

31 Coffee Maker 32
Coffee Maker
Zur Kaffeemaschine
Ist die Kaffeemaschine laut? · Brüh- und Tropfgeräusche im Betrieb sind
normal. Diese Geräusche haben keinen Einfluss
auf den Brühvorgang und können Sie darauf
hinweisen, wann der Brühvorgang
abgeschlossen ist.
· Nach dem Brühen und Warmhalten ertönen drei
Signaltöne.
· Signaltöne und Tastentöne können durch
Gedrückthalten der Stummschalttaste
stummgeschaltet werden.
Verfügt die Kaffeemaschine
über eine Warmhaltefunktion? Ja. Sie kann bis zu 4 Stunden lang warm halten.
Die Temperaturstufe kann auf Niedrig/Mittel/
Hoch eingestellt werden.
Schaltet sich die Kaffeemaschine
nach dem Brühvorgang
automatisch ab?
Nach dem Warmhalten wechselt die
Kaffeemaschine automatisch in den
Standby-Status.
Wann muss ich die
Kaffeemaschine reinigen?
· Sobald die Kaffeemaschine eine bestimmte
Nutzungsdauer registriert hat, blinkt die CLEAN-
Anzeige. Dies bedeutet, dass eine Reinigung
erforderlich ist.
· Sie können die Kaffeemaschine nach dem
Gebrauch regelmäßig manuell reinigen.
(Siehe Abschnitt "Reinigung und Wartung")
Zum Brühen
Wie lange dauert es,
Kaffee zuzubereiten? Technisch gesehen dauert es etwa 15 Minuten,
um 12 Tassen Kaffee zu brühen und 8 Minuten
für 6 Tassen.
Kann ich eine Vormerkung
fürs Brühen einstellen? Ja, es gibt eine 24H-Vormerkfunktion.
(Siehe Abschnitt “Vormerken zum Brühen”)
Ist der Kaffee heiß genug? Der frisch gebrühte Kaffee ist über 80°C heiß.
Sie können drei Warmhaltestufen einstellen,
um die Kaffeetemperatur zu halten.
Können Filtertüten verwendet
werden?
· Dieses Produkt ist mit einem Dauerfilterkorb
ausgestattet. Es wird nicht empfohlen, Filtertüten
zu verwenden.
· Wenn Sie Filtertüten verwenden müssen,
entfernen Sie den Filterkorb, da sich die
Tropfgeschwindigkeit sonst verlangsamen kann.
Andere Themen
Warum ist die angezeigte
Zeit falsch? Stimmen Sie sie vor jedem Einschalten auf die
Ortszeit ab. (Siehe Abschnitt “Uhreinstellungen”)
Was bedeutet E1/E2/E3 auf
der LED-Anzeige? Das System hat einige Funktionsfehler
festgestellt; es wird empfohlen, es nicht weiter
zu verwenden.
Die folgende Problemlösung behandelt die häufigsten Probleme.
Sollte das Problem bestehen bleiben, kontaktieren Sie gerne
unseren Kundenservice unter

CATALOGUE
CONNAÎTRE SA CAFETIÈRE 34
UTILISATION DE VOTRE CAFETIÈRE 38
NETTOYAGE ET L'ENTRETIEN 42
DÉPANNAGE 44
FR
CONNAÎTRE SA
CAFETIÈRE
Bon Café,
Sans Gâchis
01
Table of contents
Languages: