TAYLOR GUITARS TECH SHEET/PAGE 1 O f 2
Understanding the Taylor Expression System®
and tone levels for your Taylor ES:
1) Start Position: Turn all three controls on the
guitar to the center detent position. In this
position the Bass and Treble are flat and the
Volume is at the midway point.
2) Turn the volume knob on your amplifier or
mixer all the way down. Plug in the guitar.
3) Set the tone controls on your amplifier or
mixer to flat or a neutral position. NOTE:
Some acoustic guitar amplifiers do not have
active EQ (tone controls). In that instance,
finding a neutral tone spot can be a bit more
challenging but is not impossible. Setting all
the tone controls on the same number is a
good place to start.
4) Slowly raise the mixer or amplifier volume
level to a comfortable level, then adjust the
tone controls on your guitar to suit your
personal taste.
Battery Usage
The ES requires one 9-volt battery. Taylor rec-
ommends Duracell® for optimal performance and
long life. A new battery will provide 40-50 hours of
plugged-in use. The ES conserves battery life using
a standard, automatic on/off system. The ES is in an
“off” state until a cable is inserted, which activates
the preamp. Removing the cable will return the
system to the “off” mode and conserve battery life.
An LED battery life indicator is located inside the
soundhole on the preamp circuit board. (If your
amplified tone begins to sound distorted,the battery
Volume
Treble
Bass
Y
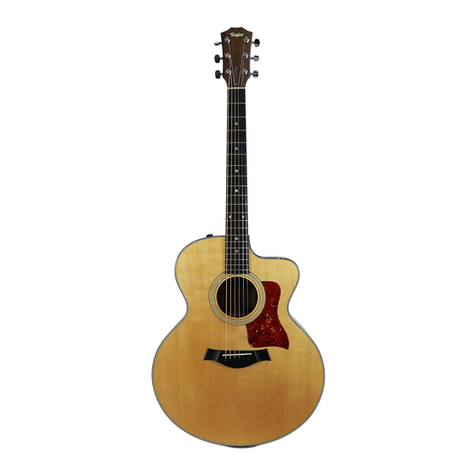
our new Taylor
guitar features the
Taylor Expression
System® (ES) — a ground-
breaking concept in acous-
tic guitar amplification. It
combines a state-of-the-
art pickup system with
a “professional audio”-
quality preamp. Taylor
Guitars developed propri-
etary sensing technology
for the ES, utilizing the gui-
tar’s entire soundboard
to create a network of
magnetic, surface-sensing
microphones. A strategical-
ly-placed Dynamic Body
Sensor™ captures vibra-
tions in the top of the guitar.
A patented Dynamic
String Sensor™ mounted
beneath the fretboard
measures string vibrations
and converts them into
an electronic signal. The
advanced design is seam-
lessly integrated into your
guitar, allowing for
total control with three
unobtrusive, side-mounted knobs. Your guitar’s
natural tone will sing loud, clear and true.
Connections
The Taylor ES is designed to be plugged-in using
a standard quarter-inch guitar cable, which will work
in every circumstance: with an acoustic guitar ampli-
fier, a standard direct box, or any other guitar-ready
application. The ES also is designed to be“Pro Ready,”
which means it can be plugged directly into a “bal-
anced line level input” such as an input on a mixer
using a TRS to XLR cable.The result is a higher signal
level, which translates into the ability to drive long
cable distances without any frequency loss, due to the
low impedance of the system. With this application,
you can plug directly into a stage snake or recording/
mixing console without the use of a direct box.
Tone Controls
Three knobs allow for simple, accurate control of
your guitar’s amplified tone.Using the knobs to adjust
the bass, treble and volume will give you the ability to
shape your tone considerably. We encourage you to
experiment with different control settings.
L-R: Standard quarter-inch TRS cords (straight and
right angle); XLR (male) connector
Copyright 2010 Taylor Guitars.All Rights Reserved.
Expression System tone controls: (L-R) Volume, Treble, Bass
Control Arrangement
Volume: closest to front of guitar
Treble: center position
Bass: closest to back of guitar
All three controls on the ES are designed to indicate
a center position, commonly know as a detent. By
rotating each knob back and forth, you should feel
a small “bump” at the center marker. For bass and
treble, the center position indicates the “off” or “flat”
mode. The center point of the volume knob indicates
half of the highest volume output.
You also can adjust your guitar's amplified tone
using an on/off switch that controls a magnetic body
sensor affixed to the underside of the guitar's top.The
switch is located on the preamp circuit board inside
the soundhole, near the red LED battery indicator
light.Turning off the body sensor leaves the magnetic
neck/string sensor (located beneath the end of the
fretboard extension) as the active pickup, giving you
a different tonal voice.
Plugging In
Follow these simple steps to set the proper volume
