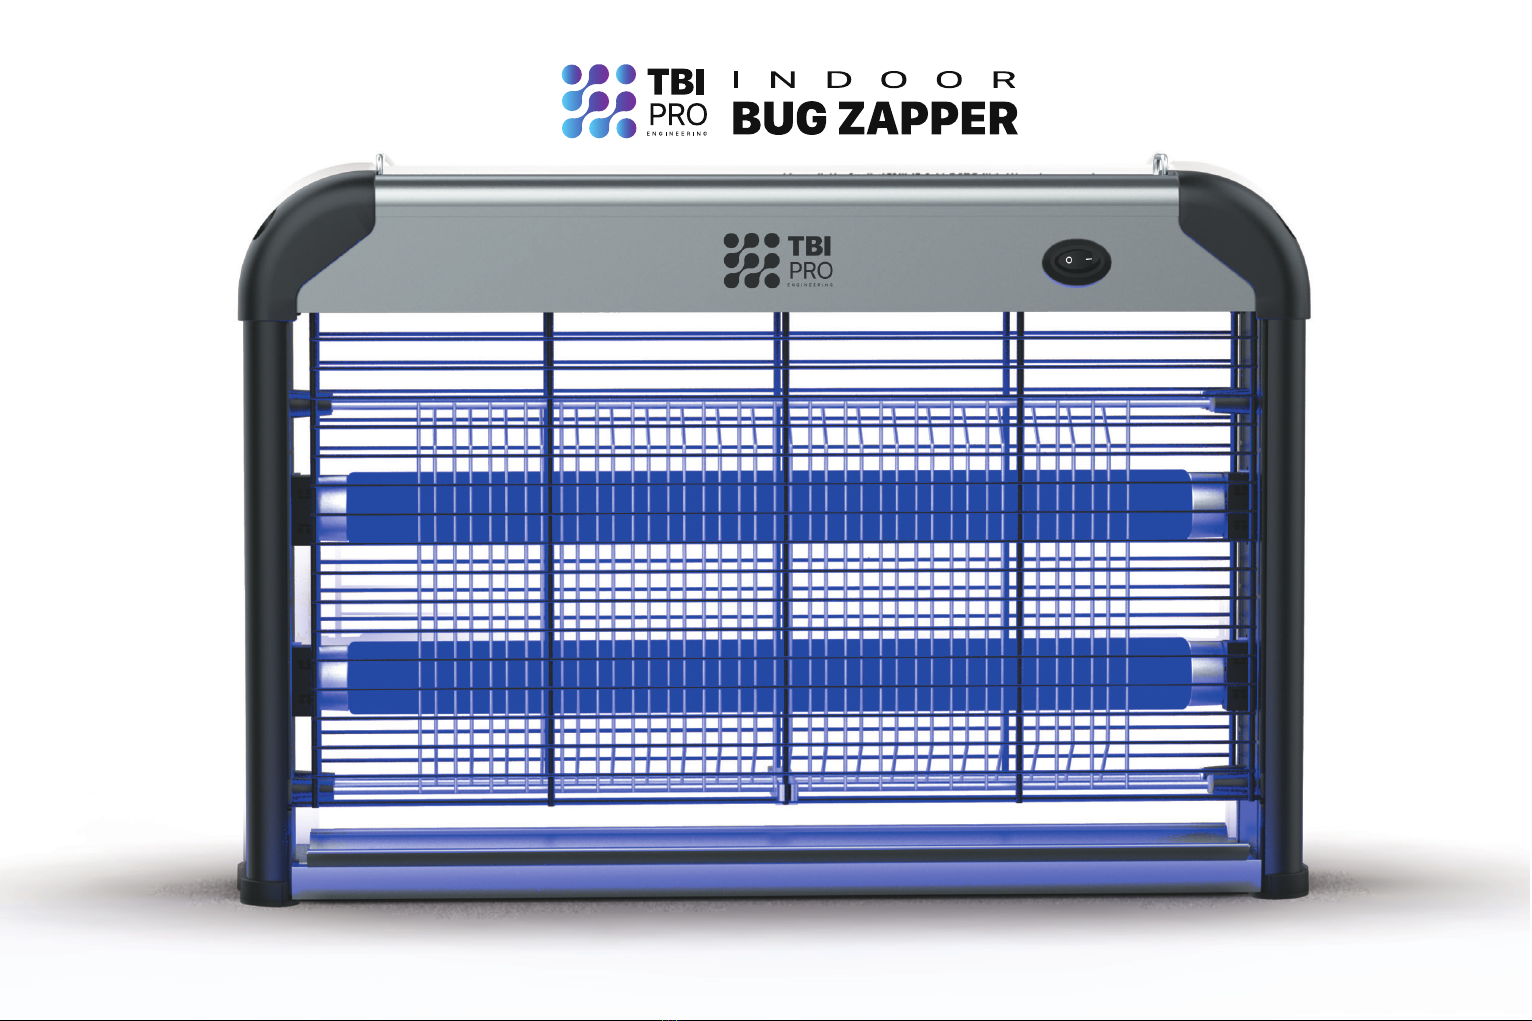
TBI Pro Indoor BUG ZAPPER User manual
USER MANUAL

2
SECTIONS
Operating principle and notice
Recommendations for installing
Rules for installing
In Package
Advantages and where to use
Precautionary measures
Device operation
Cleaning
How to replace the light Tubes
How to change attractant
Specification
3
4
4
5
6
7
9
11
12
15
17
Please read this manual carefully before operating.

3
OPERATING PRINCIPLE AND NOTICE
The principle of operation of an electric trap for insects: the highly
efficient fitting tube emits special ultraviolet waves and attracts
Mosquitoes, Flies, Moth, and others flying insects.
Insects fly to the lamp and are struck by the electric current from the
conductive grid located in front of the trap lamp.
The device is environmentally safe and hygienic, smoke-free and non-
toxic and at the same time it is modern and effective.
It does not include pesticides. The built-in lamp is harmless to people,
pets or plants.
It is suitable for installation in office rooms, private homes and other
rooms in which these insects appear.
The device is highly efficient and energy-saving. It is designed for
continuous use and is ready to provide you with a long mosquito-free
pastime for many years.
Caution High
Voltage!

4
RECOMMENDATIONS FOR INSTALLING
RULES FOR INSTALLING
The device must be suspended using a
chain (included).
You can also place it upright on the table.
Suggested suspension height: keep
the product hanged at a height of 1.2
m=4 ft at a distance of 0.3m=1 feet from
the wall.
The device must be outside the area
of movement of vehicles, people and
animals (to avoid mechanical damage).
The device must be outside the zone of
“drafts and high humidity”.
The device should be away from direct
sunlight and street precipitation.
The device can be mounted on the ceiling
using a hanging chain.
For installation, drill holes with a 9 mm drill.
Depth 80-90 mm., Insert into the dowel
holes.
Into dowel are screwed hooks, on which
an insecticidal lamp is subsequently
suspended using a chain.
Connect thedevicetothe110V powersupply
network.
Check the performance of the bug zapper.
The device should be installed strictly
horizontally under the removable tray for
flies, preferably in a dark place in the room.

5
IN PACKAGE
1 x Silver color
Chain
1 x Attractant
1 x Detachable dead bug tray
2 x Additional
free UV tubes
1 x Indoor Bug Zapper
with 2 tubes included
6
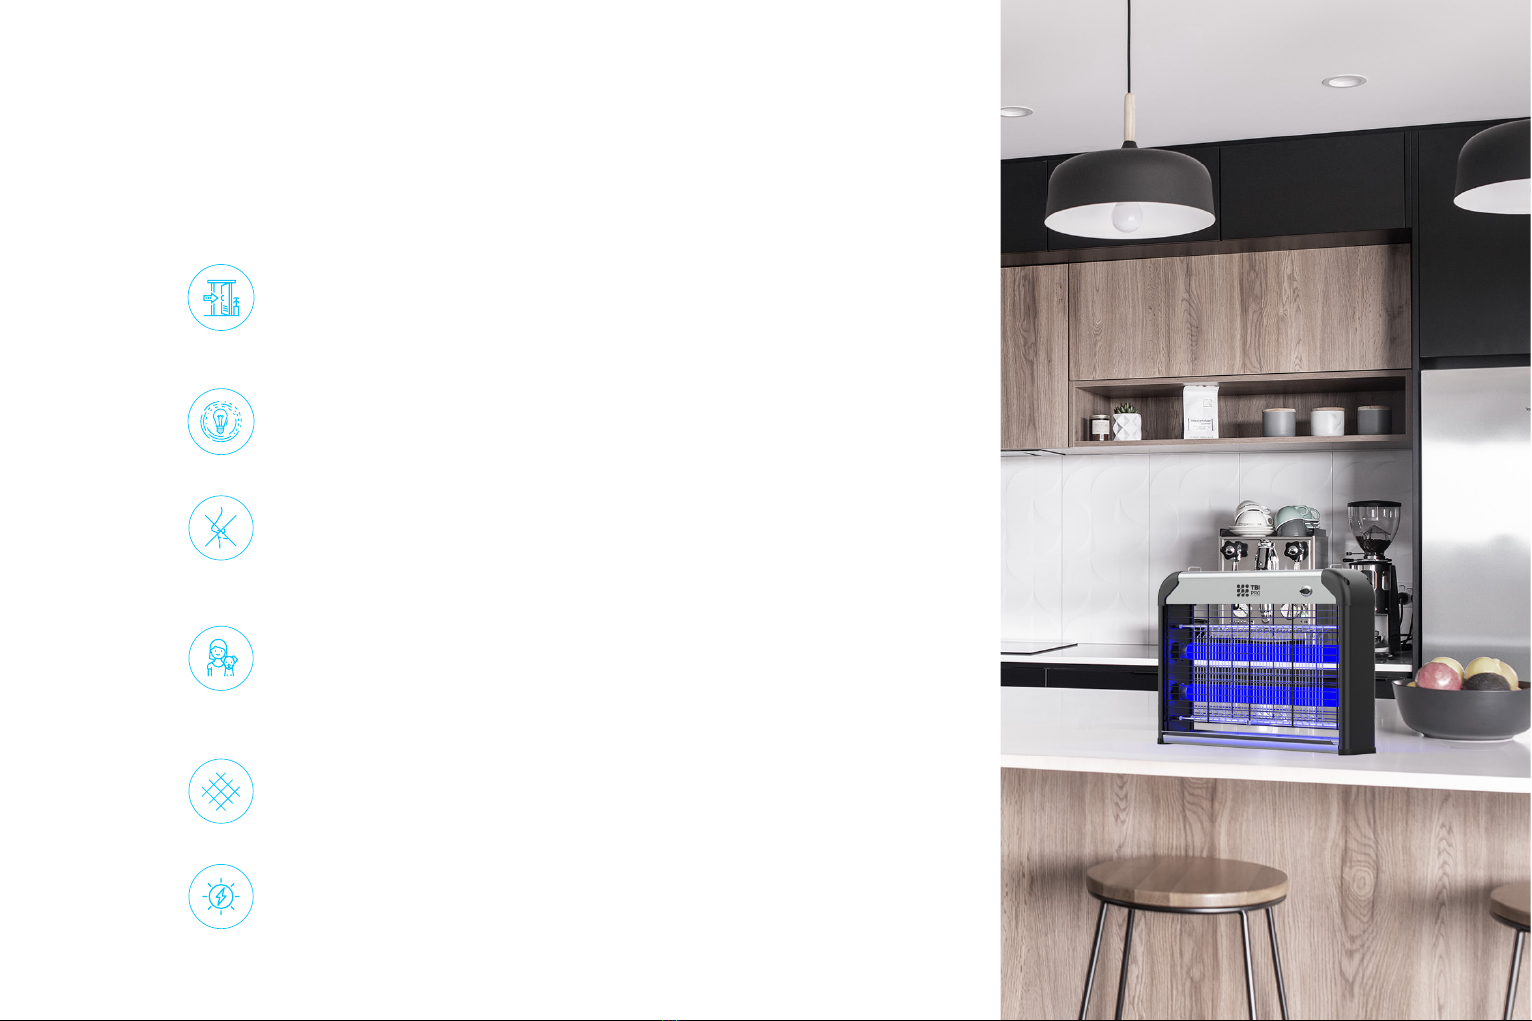
ADVANTAGES AND WHERE TO USE
Lowpower consumptionofthedevice.
The Bug Zapper is ideal for indoor use such as in
the house’s bedroom, living room, hotel, restaurant
kitchens, office, factories, butcher storage areas,
hospitals, and more.
The soft violet light emitted by the device is safe for
health. The device can be used as a night lamp.
The device does not emit extraneous odors.
Thisapplianceisnotharmfultohumans,animalsandthe
environment, how it uses a safe working principle. The
voltage inside the device used to kill insects, absolutely
safe for people and animals.
Body protection grills to prevent accidental ingress
foreign objects.

7
PRECAUTIONARY MEASURESЕ
Before first use, check the power supply.
They must match 110 V
Use the appliance for domestic purposes only in accordance
with this instruction manual. Do not use the appliance outdoors.
Do not allow children, as well as people who do not have
sufficient skills, to use the appliance without supervision and /
or prior instruction.
Do not let children play with the appliance in operation.
Do not install the device in a place where flammable gas or
explosive substances are accumulated.
While the appliance is in operation, do not touch the metal
inner grid with your fingers or any objects, as this may result in
electric shock.
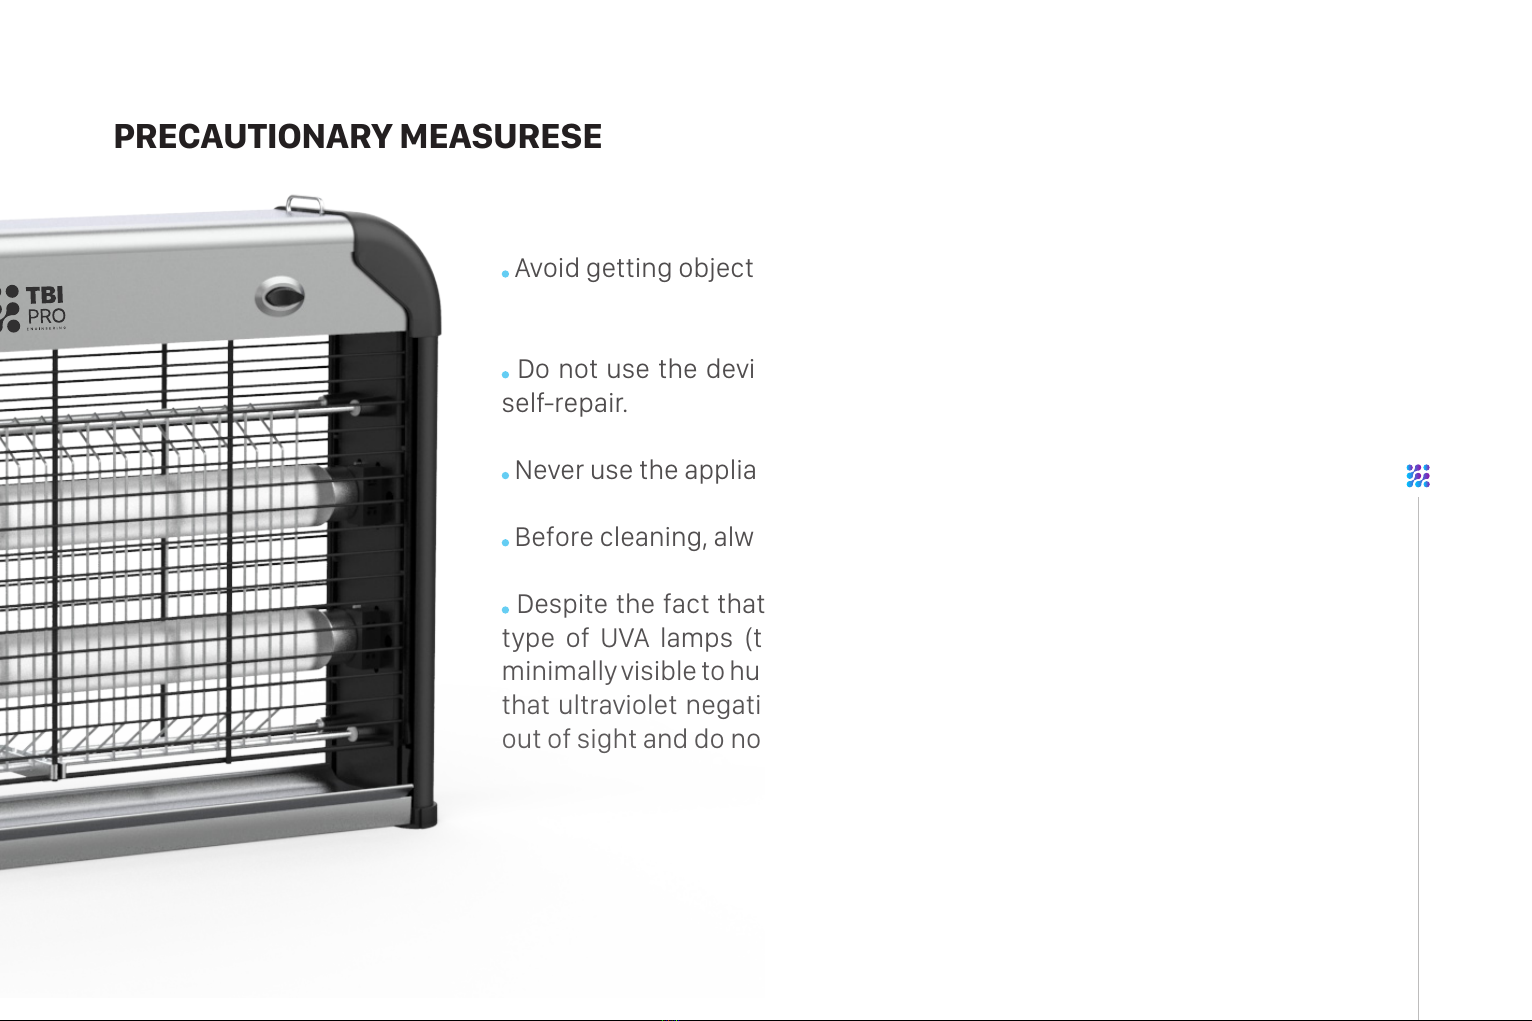
8
PRECAUTIONARY MEASURESЕ
Avoid getting objects inside.
Do not use the device with defective parts or disassemble it for
self-repair.
Never use the appliance with a damaged power cable or plug.
Before cleaning, always unplug the appliance.
Despite the fact that the lamps used in the device belong to the
type of UVA lamps (the so-called “black light” lamps, which are
minimally visible tohumans)arethe most safeforhealth, remember
that ultraviolet negatively affects the retina. Try to put the device
out of sight and do not hold your eyes on it for a long time.
9
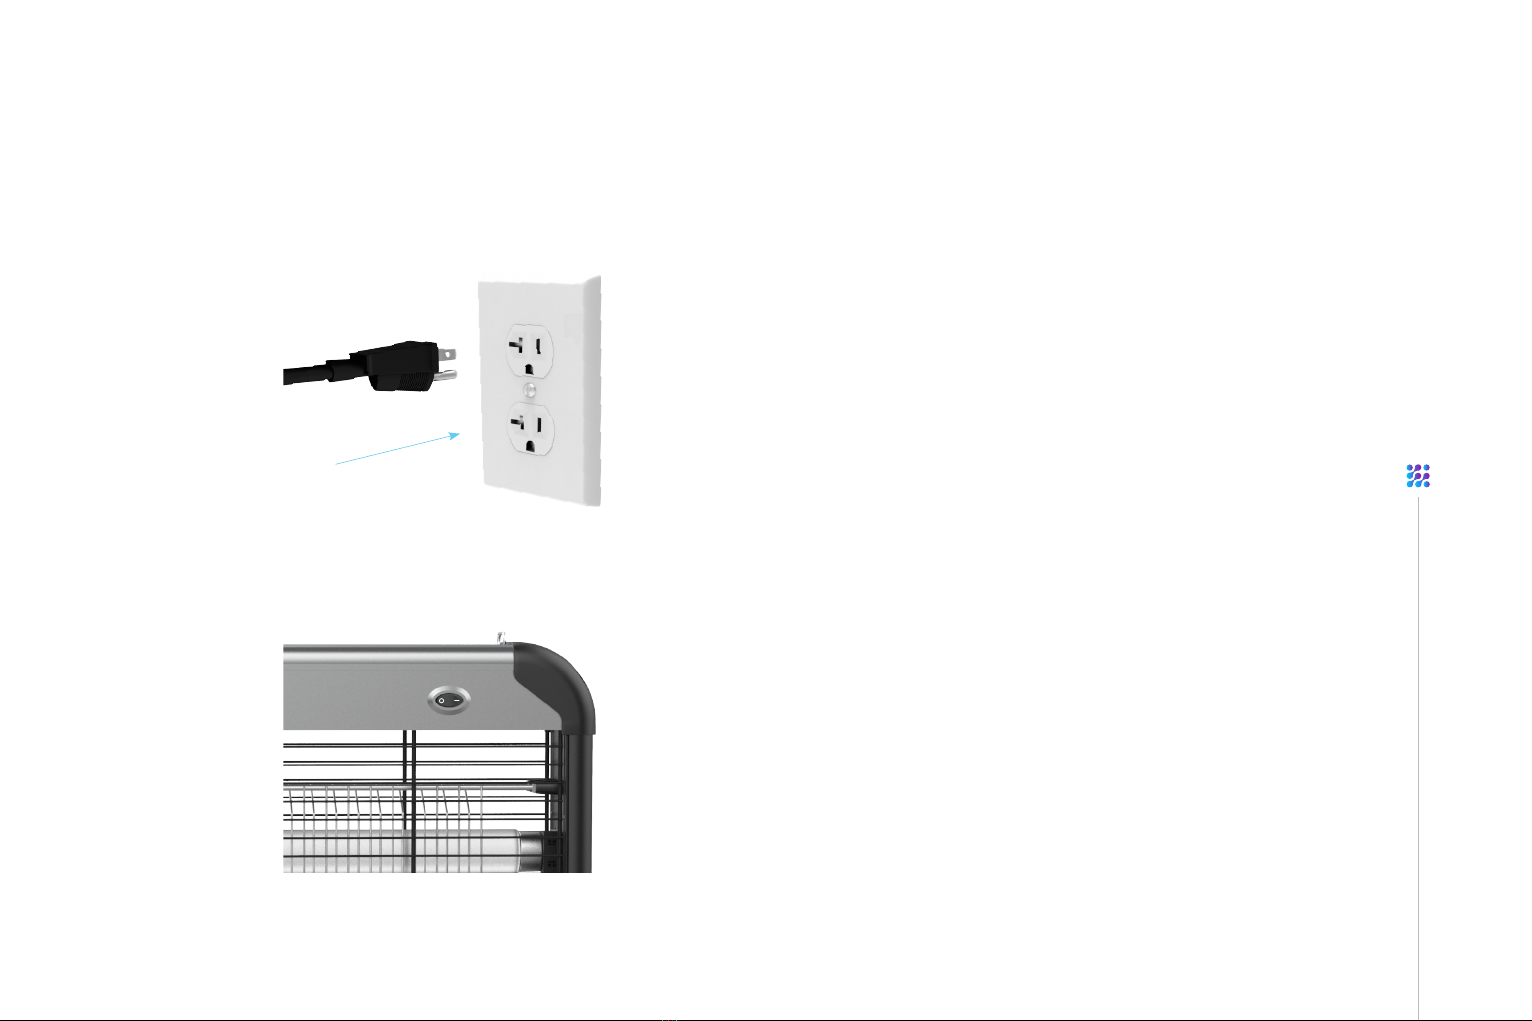
DEVICE OPERATION
STEP 1
STEP 2
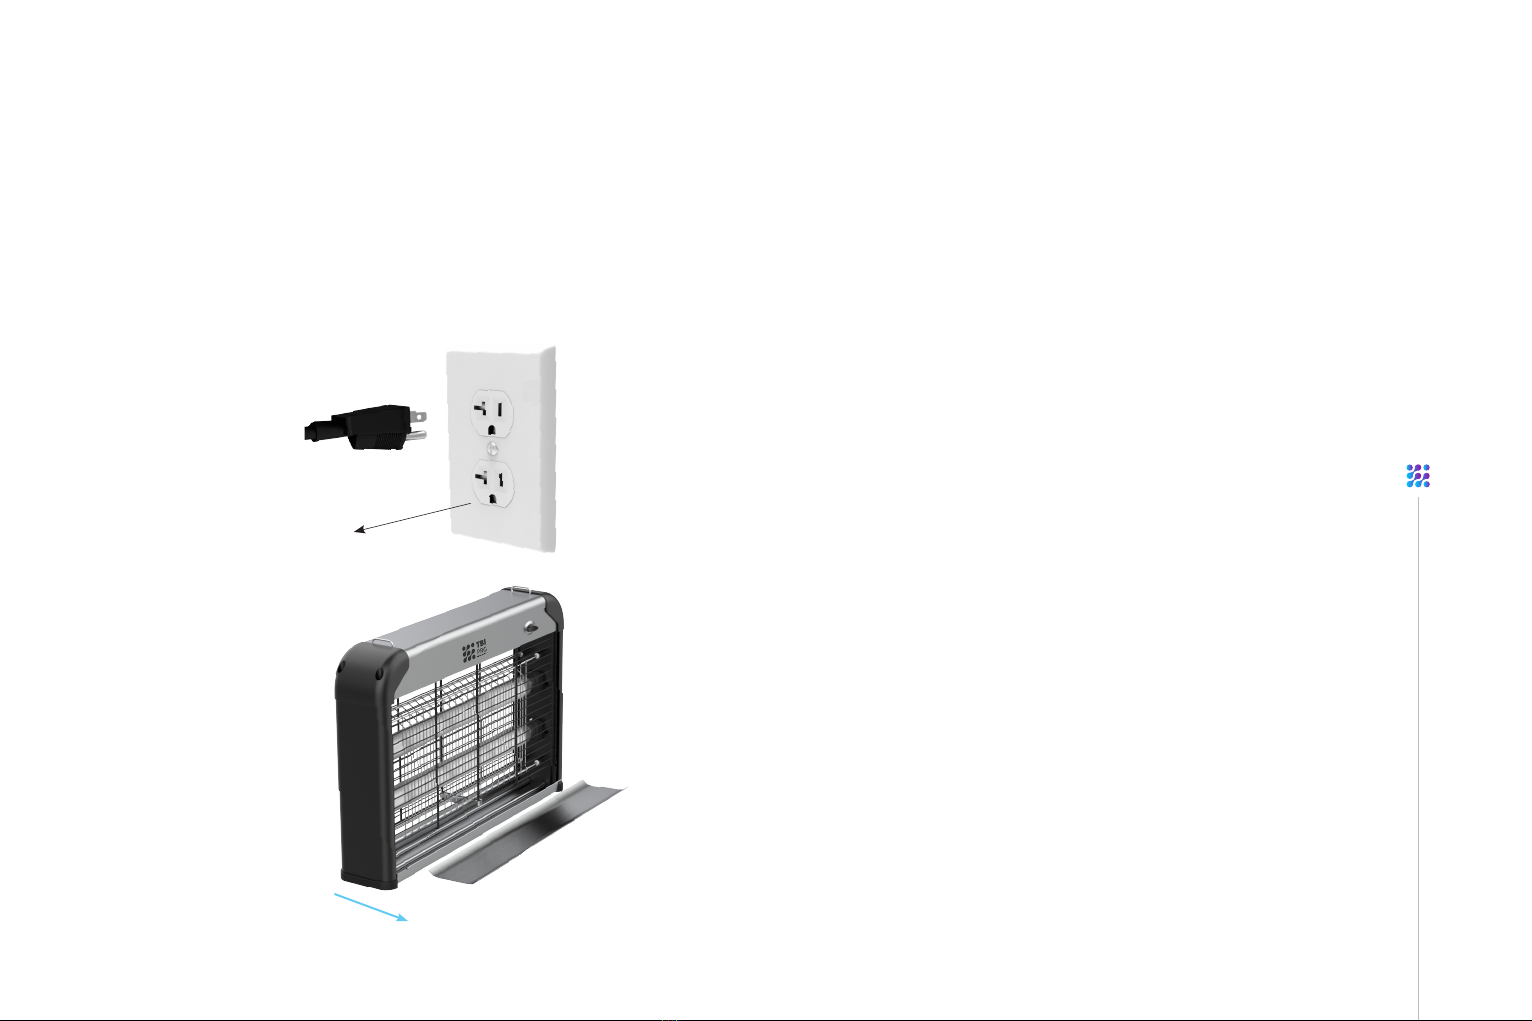
Plug in the appliance.
Switch the Button to position «-»
it means On

10
DEVICE OPERATION
STEP 3
STEP 4
The lamp lights up in purple. This means that
the appliance has started working.
Insects will fly through the protective grid of the
body and, touching the internal grid under current,
die. In this case, faint cotton will be heard.

11
CLEANING
If you want to clean or repair the appliance, first make sure that
the power supply is cut off.
Allow the power supply to discharge, otherwise the possibility
of electric shock is not excluded.
Remember to periodically clean the appliance.
When cleaning, the appliance should never be immersed in
water, be careful not to get it in the rain.
12
HOW TO REPLACE THE LIGHT TUBES
STEP 1
STEP 2
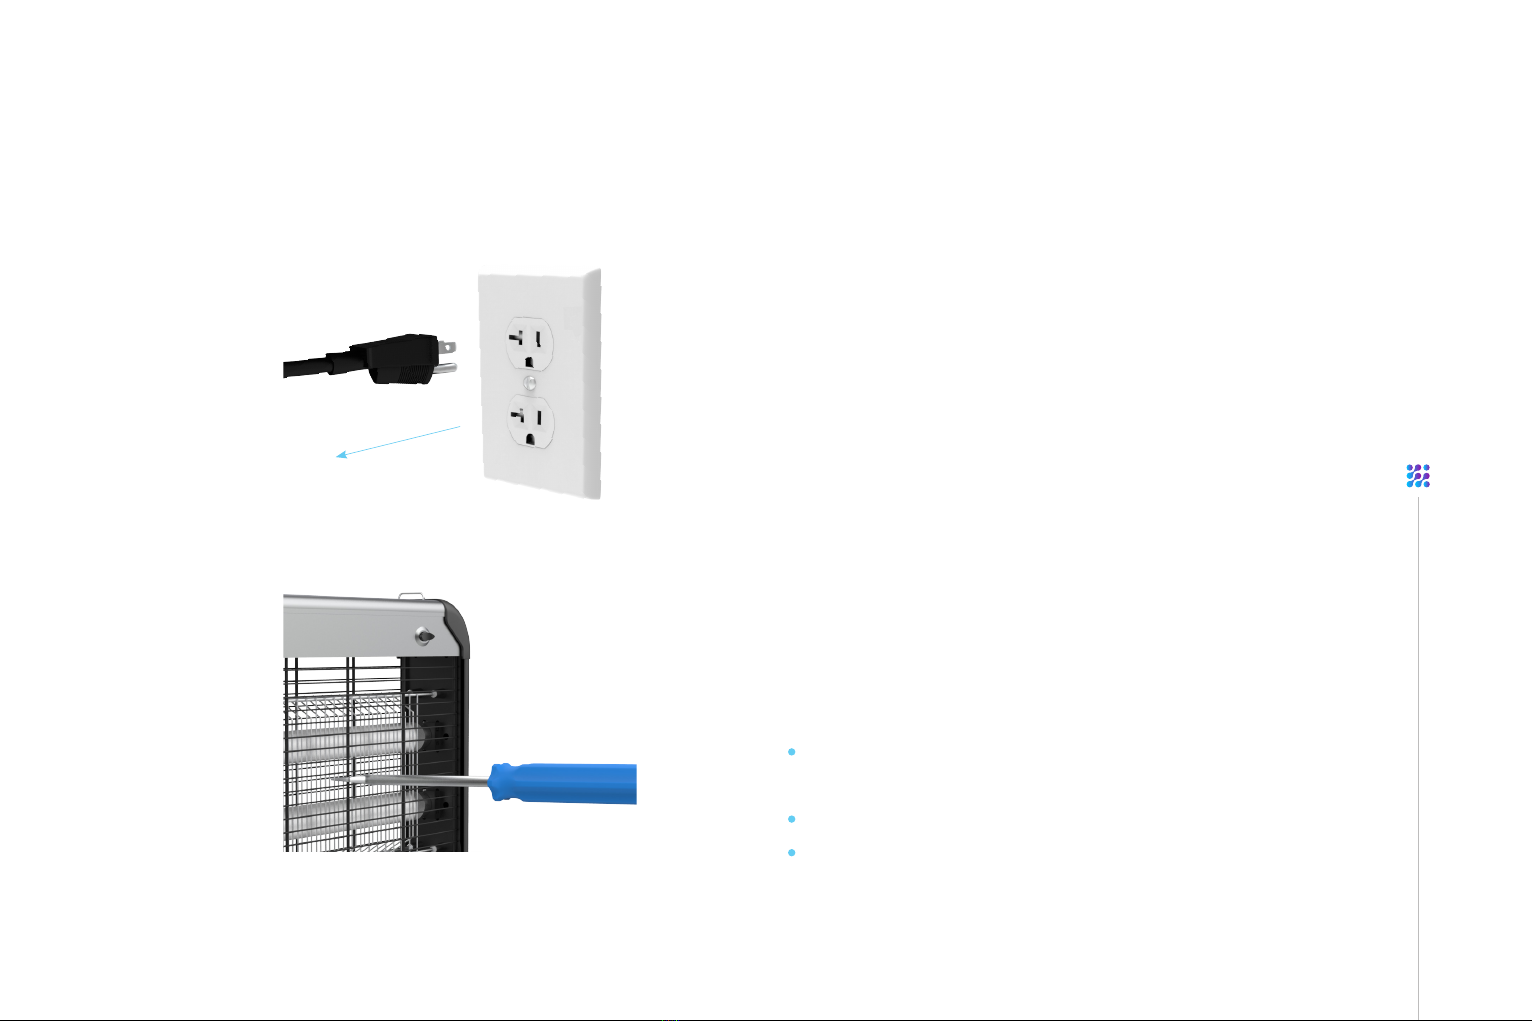
Unplug the power cord.
ENSURE screwdriver and hands are Dry! Discharge
the internal electrified grid by using a dielectric
screwdriver:
Insert the metal tip of the screwdriver onto the
internal electrified grid.
You may hear and see a zap.
insert the metal tip of the screwdriver onto the
internal electrified grid until there are no zaps.
13
HOW TO REPLACE THE LIGHT TUBES
STEP 3
STEP 4
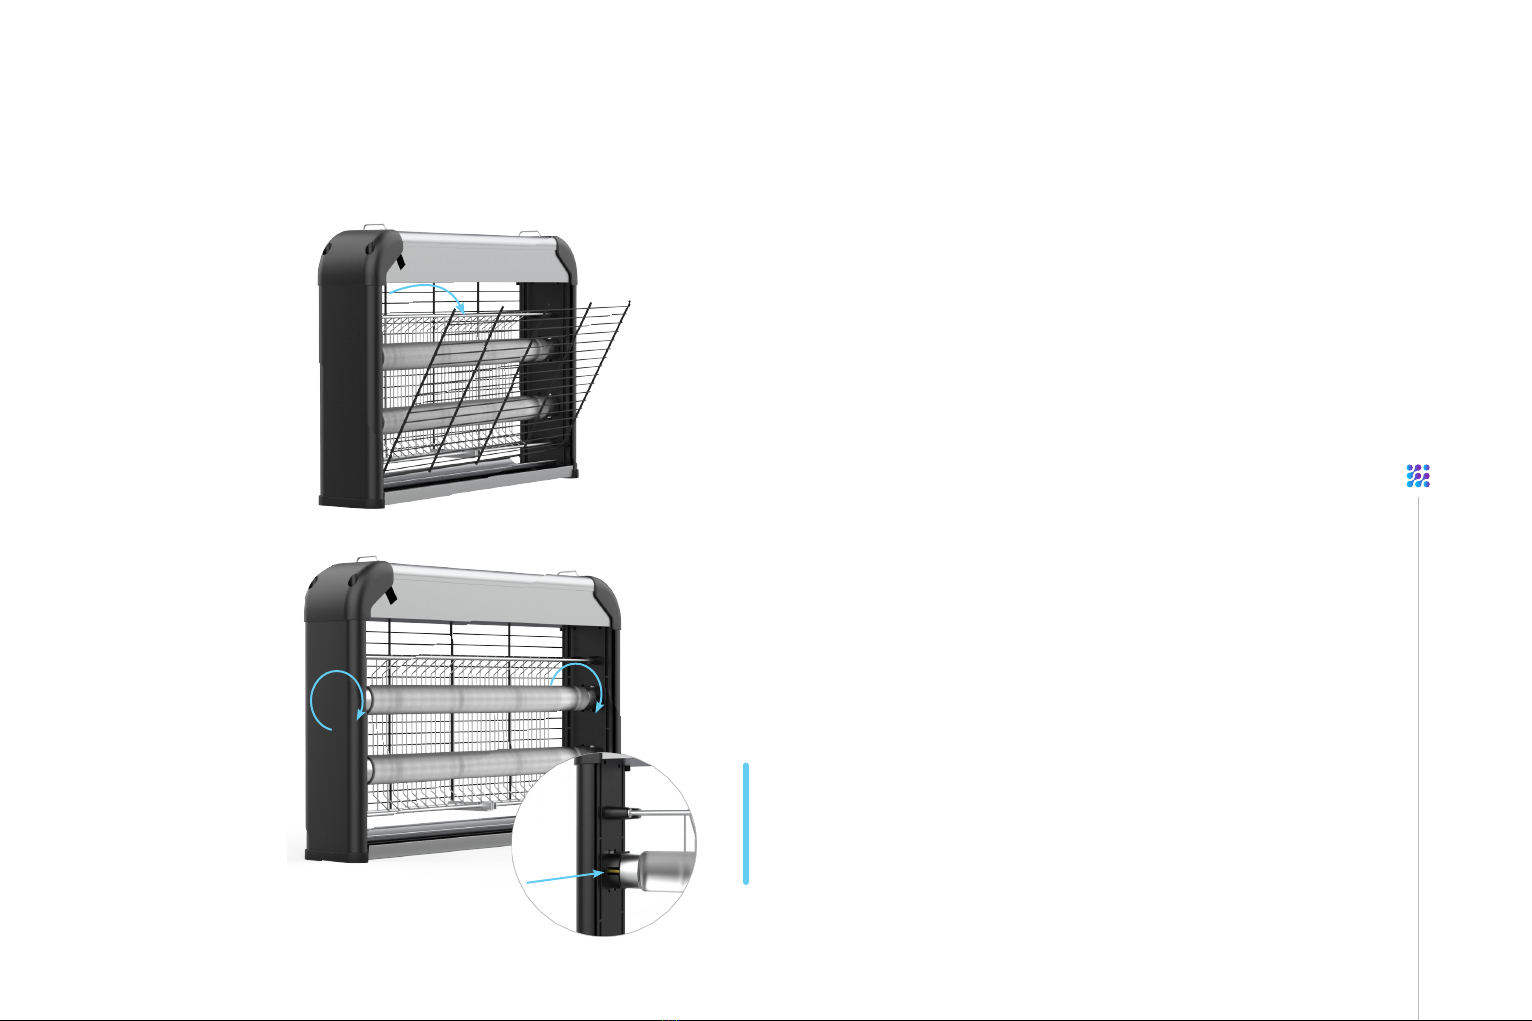
Flip the device 180 degrees to the back of the device.
Press the black protective grid down to the bottom. The
protective grid is spring-loaded, then lower it down.
Rotate gently the tubes until you see the golden tube plug
from the tube socket gap. When you see the golden tube
plug connector in the tube socket gap, then you have
scrolled everything correctly. After that, carefully remove
the lamp from the connector.
ATTENTION: When replacing the lamp tube, you should
hold the lamp head part. Do not grab the transparent
glass tube to avoid leaving fingerprints, sweat and dirt,
which will affect the ultraviolet transmission effect.
14
HOW TO REPLACE THE LIGHT TUBES
STEP 5
STEP 6
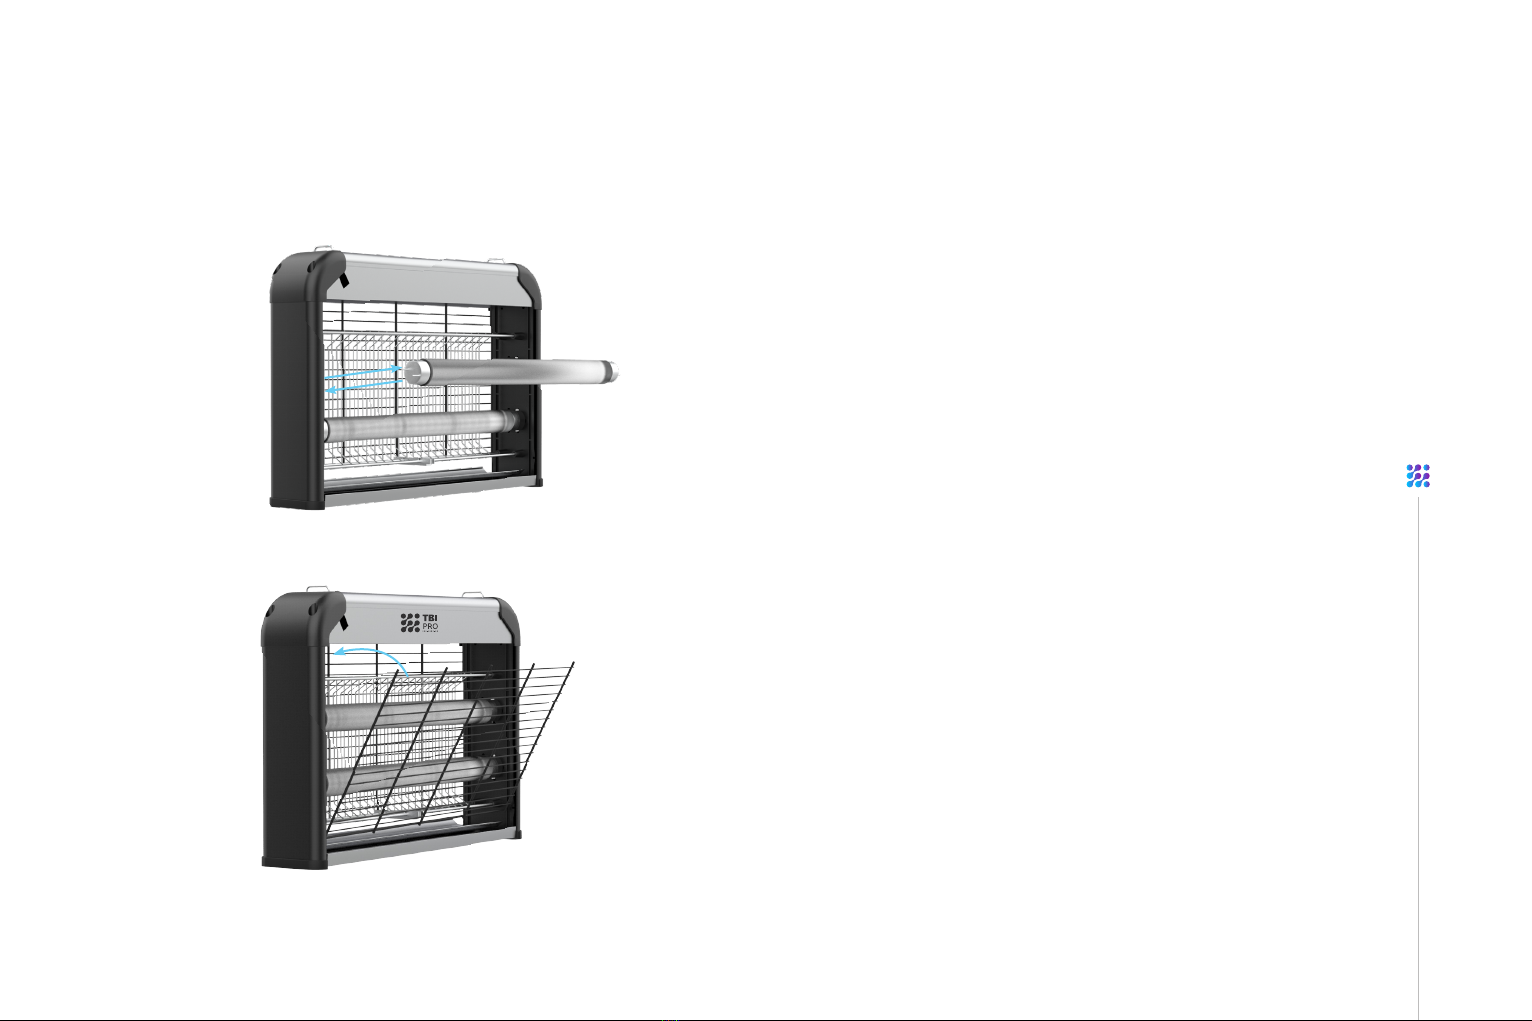
Insert the replacement tubes with new extra free
2 tubes. Insert the replacement tubes with gold
connectors into the tube socket gap, and gently scroll
clockwise.
Close the protective grid. Press on it so that it closes.
Insert the electrical plug to an outlet and turn on the
bug zapper to check the light of the tubes.
15
HOW TO CHANGE ATTRACTANT
STEP 1
STEP 2
Unplug the power cord.
Remove the Bug Tray.
For best results, replace the attractant
cartridge every 30 days.

16
HOW TO CHANGE ATTRACTANT
STEP 3
STEP 4
Remove the attractant cartridge from the sealed
pouch and remove the protective cover from the
face of the cartridge.
Avoid touching the openings in the
cartridge and always wash your hands
thoroughly after contact.
Place the attractant at the spot marked in bug tray
on the picture.
Wash hands thoroughly after handling.
Back the Bug tray in the Bug Zapper bottom.

17
SPECIFICATION
Power
Safety
Material
Charge UL cord length
Input voltage
Grids
Wave length
Attraction area
High voltage metal grid
Cover area
Certification
20 W (2 x 10 watt UV Tubes)
360° Child-proof protective grid
Aluminum silver + electroplating Black aluminum
2m=7 ft long cord with UL list
110V,60Hz
Forceful electric grid that instantly zaps approaching
insects.
Removable outer grid for easy cleaning.
365 nm
Indoor
3000v with improved low noise AC
6000 square feet effective coverage
CE FCC EPA
Table of contents
Popular Insect Control Equipment manuals by other brands

ThermaCell
ThermaCell MR450 Directions for use

Flextailgear
Flextailgear MAX REPEL user guide

One Stop Gardens
One Stop Gardens 96415 Assembly and operation instructions

ThermaCell
ThermaCell Backpacker Directions for use

Good Way
Good Way AQ-FG-GTC Operating and maintenance instructions

MO-EL
MO-EL MO-LIGHT 310A Directions for installation, use and maintenance


