Teac AD-500 User manual

ad-500
`
Compact Disc Player/Reverse Cassette Deck
3D0007500A
D
Thanks for buying a TEAC. Read this manual carefully to get the best
performance from this unit.
Nous vous remercions pour l’achat d’un appareil TEAC.
Lire ce manuel avec attention pour obtenir les meilleures performances
possibles de cet appareil.
Vielen Dank für den Kauf dieses TEAC-Geräts.
Bitte lesen Sie diese Anleitung sorgfältig durch, um die Leistungs-
fähigkeit dieses Geräts optimal nutzen zu können.
Grazie per aver acquistato un prodotto TEAC.
Leggere attentamente questo manuale per ottenere le migliori
prestazioni da questo apparecchio.
Enhorabuena por la adquisición de un TEAC.
Lea detenidamente este manual a fin de obtener el mejor rendimiento de
esta unidad.
Dank u voor de aanschaf van een TEAC.
Lees deze gebruiksaanwijzing aandachtig door teneinde de beste
prestaties van dit toestel te verkrijgen.
OWNER’S MANUAL ......................... 4
MANUEL DU PROPRIETAIRE...........17
BEDIENUNGSANLEITUNG................30
MANUALE DI ISTRUZIONI ...............44
MANUAL DEL USUARIO ..................57
GEBRUIKSAANWIJZING ..................70
NEDERLANDS ESPAÑOL ITALIANO DEUTSCH FRANÇAIS ENGLISH
This appliance has a serial number located
on the rear panel. Please record the model
number and serial number and retain them
for your records.
Model number
Serial number
WARNING: TO PREVENT FIRE OR SHOCK
HAZARD, DO NOT EXPOSE THIS
APPLIANCE TO RAIN OR MOISTURE.
The exclamation point within an equilateral triangle is intended to alert the user to the
presence of important operating and maintenance (servicing) instructions in the literature
accompanying the appliance.
The lightning flash with arrowhead symbol, within an equilateral triangle, is intended to alert
the user to the presence of uninsulated “dangerous voltage” within the product’s enclosure
that may be of sufficient magnitude to constitute a risk of electric shock to persons.
CAUTION: TO REDUCE THE RISK OF ELECTRIC SHOCK, DO NOT
REMOVE COVER (OR BACK). NO USER-SERVICEABLE PARTS INSIDE.
REFER SERVICING TO QUALIFIED SERVICE PERSONNEL.
Ü
ÿ
Ÿ

_ 2_
IMPORTANT SAFETY INSTRUCTIONS
CAUTION:
OORead all of these Instructions.
OOSave these Instructions for later use.
OOFollow all Warnings and Instructions marked on the audio
equipment.
1) Read Instructions — All the safety and operating instructions
should be read before the product is operated.
2) Retain Instructions — The safety and operating instructions should
be retained for future reference.
3) Heed Warnings — All warnings on the product and in the operating
instructions should be adhered to.
4) Follow Instructions — All operating and use instructions should be
followed.
5) Cleaning — Unplug this product from the wall outlet before
cleaning. Do not use liquid cleaners or aerosol cleaners. Use a damp
cloth for cleaning.
6) Attachments — Do not use attachments not recommended by the
product manufacturer as they may cause hazards.
7) Water and Moisture — Do not use this product near water _for
example, near a bath tub, wash bowl, kitchen sink, or laundry tub; in a
wet basement; or near a swimming pool; and the like.
8) Accessories — Do not place this product on an unstable cart,
stand, tripod, bracket, or table. The product may fall, causing serious
injury to a child or adult, and serious damage to the product. Use only
with a cart, stand, tripod, bracket, or table recommended by the
manufacturer, or sold with the product. Any mounting of the product
should follow the manufacturer’s instructions, and should use a
mounting accessory recommended by the manufacturer.
9) A product and cart combination should be moved with care. Quick
stops, excessive force, and uneven surfaces may cause the product
and cart combination to overturn.
10) Ventilation — Slots and openings in the cabinet are provided for
ventilation and to ensure reliable operation of the product and to protect
it from overheating, and these openings must not be blocked or
covered. The openings should never be blocked by placing the product
on a bed, sofa, rug, or other similar surface. This product should not be
placed in a built-in installation such as a bookcase or rack unless proper
ventilation is provided or the manufacturer’s instructions have been
adhered to.
11) Power Sources — This product should be operated only from the
type of power source indicated on the marking label. If you are not sure
of the type of power supply to your home, consult your product dealer or
local power company. For products intended to operate from battery
power, or other sources, refer to the operating instructions.
12) Grounding or Polarization — This product may be equipped with a
polarized alternating-current line plug (a plug having one blade wider
than the other). This plug will fit into the power outlet only one way. This
is a safety feature. If you are unable to insert the plug fully into the
outlet, try reversing the plug. If the plug should still fail to fit, contact your
electrician to replace your obsolete outlet. Do not defeat the safety
purpose of the polarized plug.
13) Power-Cord Protection — Power-supply cords should be routed
so that they are not likely to be walked on or pinched by items placed
upon or against them, paying particular attention to cords at plugs,
convenience receptacles, and the point where they exit from the
product.
14) Outdoor Antenna Grounding — If an outside antenna or cable
system is connected to the product, be sure the antenna or cable
system is grounded so as to provide some protection against voltage
surges and built-up static charges. Article 810 of the National Electrical
Code, ANSI/NFPA 70, provides information with regard to proper
grounding of the mast and supporting structure, grounding of the lead-in
wire to an antenna discharge unit, size of grounding conductors,
location of antenna-discharge unit, connection to grounding electrodes,
and requirements for the grounding electrode.
"Note to CATV system installer:
This reminder is provided to call the CATV system installer’s attention to
Section 820-40 of the NEC which provides guidelines for proper
grounding and, in particular, specifies that the cable ground shall be
connected to the grounding system of the building, as close to the point
of cable entry as practical.
ANTENNA
LEAD IN
WIRE
ANTENNA
DISCHARGE UNIT
(NEC SECTION 810-20)
GROUNDING CONDUCTORS
(NEC SECTION 810-21)
GROUND CLAMPS
POWER SERVICE GROUNDING
ELECTRODE SYSTEM
(NEC ART 250. PART H)
NEC - NATIONAL ELECTRICAL CODE
ELECTRIC
SERVICE
EQUIPMENT
Example of Antenna Grounding as per
National Electrical Code, ANSI/NFPA 70
GROUND
CLAMP
15) Lightning — For added protection for this product during a lightning
storm, or when it is left unattended and unused for long periods of time,
unplug it from the wall outlet and disconnect the antenna or cable
system. This will prevent damage to the product due to lightning and
power-line surges.
16) Power Lines — An outside antenna system should not be located
in the vicinity of overhead power lines or other electric light or power
circuits, or where it can fall into such power lines or circuits. When
installing an outside antenna system, extreme care should be taken to
keep from touching such power lines or circuits as contact with them
might be fatal.
17) Overloading — Do not overload wall outlets, extension cords, or
integral convenience receptacles as this can result in risk of fire or
electric shock.
18) Object and Liquid Entry — Never push objects of any kind into
this product through openings as they may touch dangerous voltage
points or short-out parts that could result in a fire or electric shock.
Never spill liquid of any kind on the product.
19) Servicing — Do not attempt to service this product yourself as
opening or removing covers may expose you to dangerous voltage or
other hazards. Refer all servicing to qualified service personnel.
20) Damage Requiring Service — Unplug this product from the wall
outlet and refer servicing to qualified service personnel under the
following conditions:
a) when the power-supply cord or plug is damaged.
b) if liquid has been spilled, or objects have fallen into the product.
c) if the product has been exposed to rain or water.
d) if the product does not operate normally by following the operating
instructions. Adjust only those controls that are covered by the
operating instructions as an improper adjustment of other controls may
result in damage and will often require extensive work by a qualified
technician to restore the product to its normal operation.
e) if the product has been dropped or damaged in any way.
f ) when the product exhibits a distinct change in performance _ this
indicates a need for service.
21) Replacement Parts — When replacement parts are required, be
sure the service technician has used replacement parts specified by the
manufacturer or have the same characteristics as the original part.
Unauthorized substitutions may result in fire, electric shock, or other
hazards.
22) Safety Check — Upon completion of any service or repairs to this
product, ask the service technician to perform safety checks to
determine that the product is in proper operating condition.
23) Wall or Ceiling Mounting — The product should be mounted to a
wall or ceiling only as recommended by the manufacturer.
24) Heat — The product should be situated away from heat sources
such as radiators, heat registers, stoves, or other products (including
amplifiers) that produce heat.

_ 3_
SAFETY INFORMATION
OCAUTION OACHYUNG OOBSERVERA OADVARSEL
This product has been designed and manufactured according to FDA regulations "title 21, CFR, chapter 1, subchapter J, based on the Radiation
Control for Health and Safety Act of 1968", and is classified as a class 1 laser product. There is no hazardous invisible laser radiation during
operation because invisible laser radiation emitted inside of this product is completely confined in the protective housings.
The label required in this regulation is shown 1.
OCAUTION
-DO NOT REMOVE THE PROTECTIVE HOUSING USING A SCREWDRIVER.
-USE OF CONTROLS OR ADJUSTMENTS OR PERFORMANCE OF PROCEDURES OTHER THAN THOSE SPECIFIED HEREIN MAY RESULT IN
HAZARDOUS RADIATION EXPOSURE.
-IF THIS PRODUCT DEVELOPS TROUBLE, CONTACT YOUR NEAREST QUALIFIED SERVICE PERSONNEL, AND DO NOT USE THE PRODUCT IN ITS
DAMAGED STATE.
Optical pickup: Type : KSS-212B
Manufacturer : SONY Corporation
Laser output : Less than 0.4 mW on the objective lens
Wavelength : 760_800nm
1THIS LABEL IS ATTACHED TO THE PLACE AS ILLUSTRATED TO
INFORM THAT THE APPARATUS CONTAINS A LASER
COMPONENT.
1DIESE AUFKLEBEMARKE IST AN DEM IN DER ABBILDUNG
GEZEIGTEN ORT ANGEBRACHT UM DARAUF HINZUWEISEN,
DASS IM INNERN DES GERÄTS EINE LASER-KOMPONENTE
BEFINDET.
1PÅSKRIFTEN SITTER PÅ APPARATEN SOM VISAS SOM
UPPMANING OM ATT APPARATEN OMFATTAR EN INBYGGD
LASERKOMPONENT.
1DETTE MÆRKAT ER ANBRAGT SOM VIST I ILLUSTRATIONEN FOR
AT ADVARE BRUGEREN OM AT APPARATET INDEHOLDER EN
LASERKOMPONENT.
2DETTE MÆRKAT ER SOM VIST PÅ ILLUSTRATIONEN ANBRAGT
PÅ INDERSIDEN AF TOPDÆKSLET FOR AT ADVARE BRUGEREN
OM AT YDERLIGERE FREMTRÆNGEN VIL VÆRE FORBUNDET
MED FARE FOR AT UDSÆTTE SIG FOR LASERSTRÅLING.
ADVARSEL — BETJENING AF ANDRE KONTROLLER OG
REGULATORER ELLER BENYTTELES AF ANDRE
FREMGANGSMÅDER END BESKREVET HERI ER FORBUNDET
MED FARE FOR UDSÆTTELSE FOR LASERSTRÅLING.
VARING: APPARATEN INNEHÅLLER LASER LOMPONENT MED
STRÅLNING ÖVERSTIGANDE KLASS 1.
"ADVARSEL: USYNLIG LASERSTRÅLING VED ÅBNING NAR
SIKKERHEDSAFBRYDERE ER UDE AF FUNKTION. UNDGÅ
UDSAETTELSE FOR STRÅLING"
"VAROITUS! SUOJAKOTELOA EI SAA AVATA. LAITE SISÄLTÄÄ
LASERDIODIN. JOKA LÄHETTÄ (NÄKYMÄTÖNTÄ) SILMILLE
VAARALLISTA LASERSÄTEILYÄ".
ADVARSEL: USYNLIG LASERBESTRÅLING NÅR DENNE
DELEN ER ÅPEN OG SIKKERHETSSPERREN ER UTKOBLET
UNNGÅ UTSETTELSE FOR STRÅLING.
CLASS 1 LASER PRODUCT
LUOKAN 1 LASERLAITE
KLASS 1 LASERAPPARAT
CERTIFICATION
THIS PRODUCT COMPLIES WITH DHHS
RULES 21 CFR SUBCHAPTER J APPLI-
CABLE AT DATE OF MANUFACTURE
TEAC CORPORATION
3-7-3 NAKA-CHO, MUSASHINO-SHI, TOKYO, JAPAN
MANUFACTURED TIF
For U.S.A.
1
2
CAUTION - INVISIBLE LASER RADIATION WHEN OPEN AND
INTERLOCKS DEFEATED. AVOID EXPOSURE TO BEAM.
VORSICHT! UNSICHTBARE LASERSTRAHLUNGTRITT AUS.
WENN DECKEL GEÖFFNET UND WENN
SICHERHEITSVERRIEGELUNG ÜBERBRÜCKT IST.
NICHT DEM STRAHL AUSSETZEN !
VARNING - OSYNLIG LASERSTRÅLNING NÄR DENNA DEL
ÄR ÖPPNAD OCH SPÄRR ÄR URKOPPLAD.
STRÄLEN ÄR FARLIG.
ADVARSEL -USYNLIG LASERSTRÅLING VED ÅBNING, NÅR
SIKKERHEDSAFBRYDERE ER UDE AF FUNKTION.
UNDGÅ UDSÆTTELSE FOR STRÅLING.
VAROITUS! SUOJAKOTELOA EI SAA AVATA. LAITE SISÄLTÄÄ
LASERDIODIN, JOKA LÄHETTÄÄ (NÄKYMÄTÖNTÄ)
SILMILLE VAARALLISTA LASERSÄTEILYÄ.
ADVARSEL -USYNLIG LASERBESTRÅLING NÅR DENNE DELEN ER
ÅPEN OG SIKKERHETSSPERREN ER UTKOBLET.
UNNGÅ UTSETTELSE FOR STRÅLING.
1

_ 4_
Before Use
OChoose the installation location of your
unit carefully. Avoid placing it in direct
sunlight or close to a source of heat.
Also avoid locations subject to
vibrations and excessive dust, heat,
cold or moisture. Keep away from such
sources that hum, such as transformers
or motors.
ODo not open the cabinet as this might
result in damage to the circuitry or
electrical shock. If a foreign object
should get into the set, contact your
dealer.
OWhen removing the power plug from
the wall outlet, always pull directly on
the plug, never yank the cord.
OBe sure not to handle discs with dirty
fingers. Never insert a disc which has a
crack on the surface.
ODo not attempt to clean the unit with
chemical solvents as this might damage
the finish. Use a clean, dry cloth.
OKeep this manual in a safe place for
future reference.
This unit has been designed specifically for
reproduction of compact discs bearing the
"˛" mark. No other discs can be
reproduced.
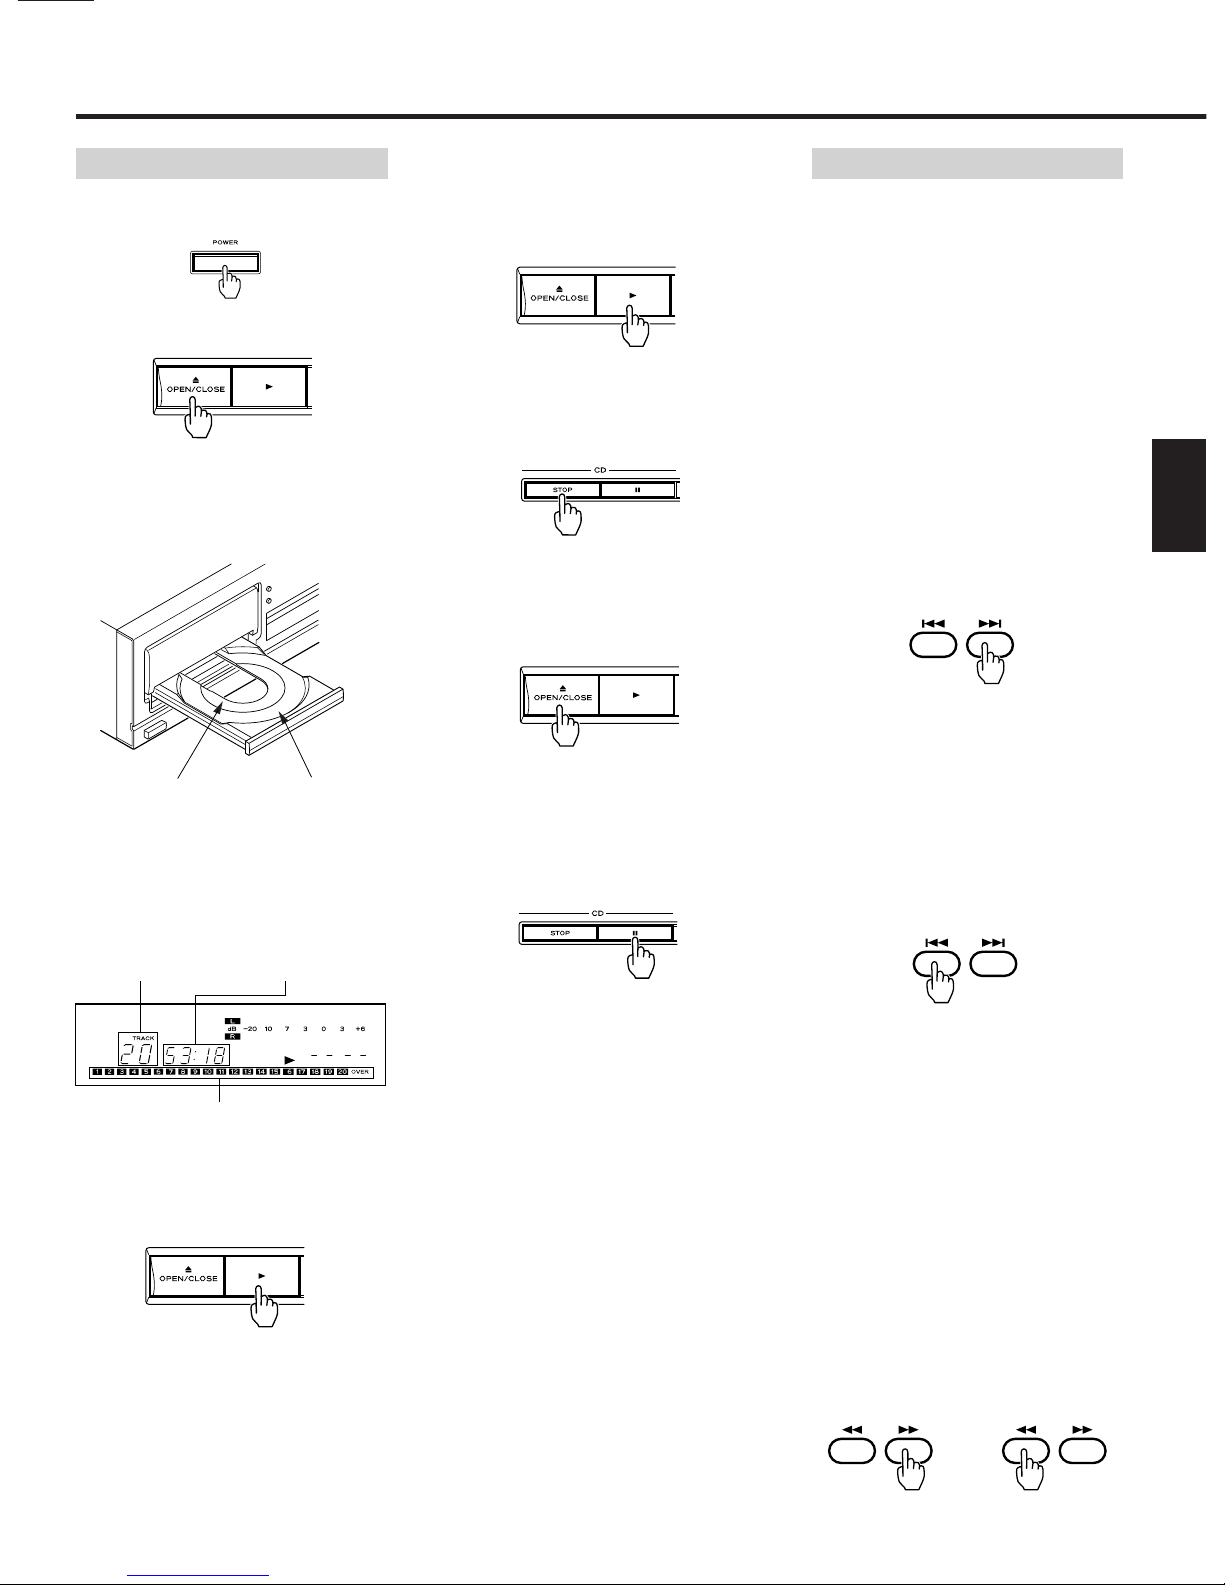
OAlways place the compact disc in the
disc tray with the label facing upward.
(Compact discs can be played only on
one side.)
OTo remove a disc from its storage case,
press down on the center of the case
and lift the disc out, holding it carefully
by the edges.
How to remove the disc
How to hold the disc
OFingerprints and dust should be
carefully wiped off the disc's recorded
surface with a soft cloth.
Wipe radially
ODo not use thinner, benzine or alcohol
as they damage the surface of the
disc's plastic surface.
ODiscs should be returned to their cases
after use to avoid serious scratches
that could cause the laser pickup to
"skip."
ODo not expose discs to direct sunlight or
high humidity and temperature for
extended periods.
Long exposure to high temperatures
can warp the disc.
ODo not stick paper or write anything
with a ballpoint pen on the surface of
the label side.
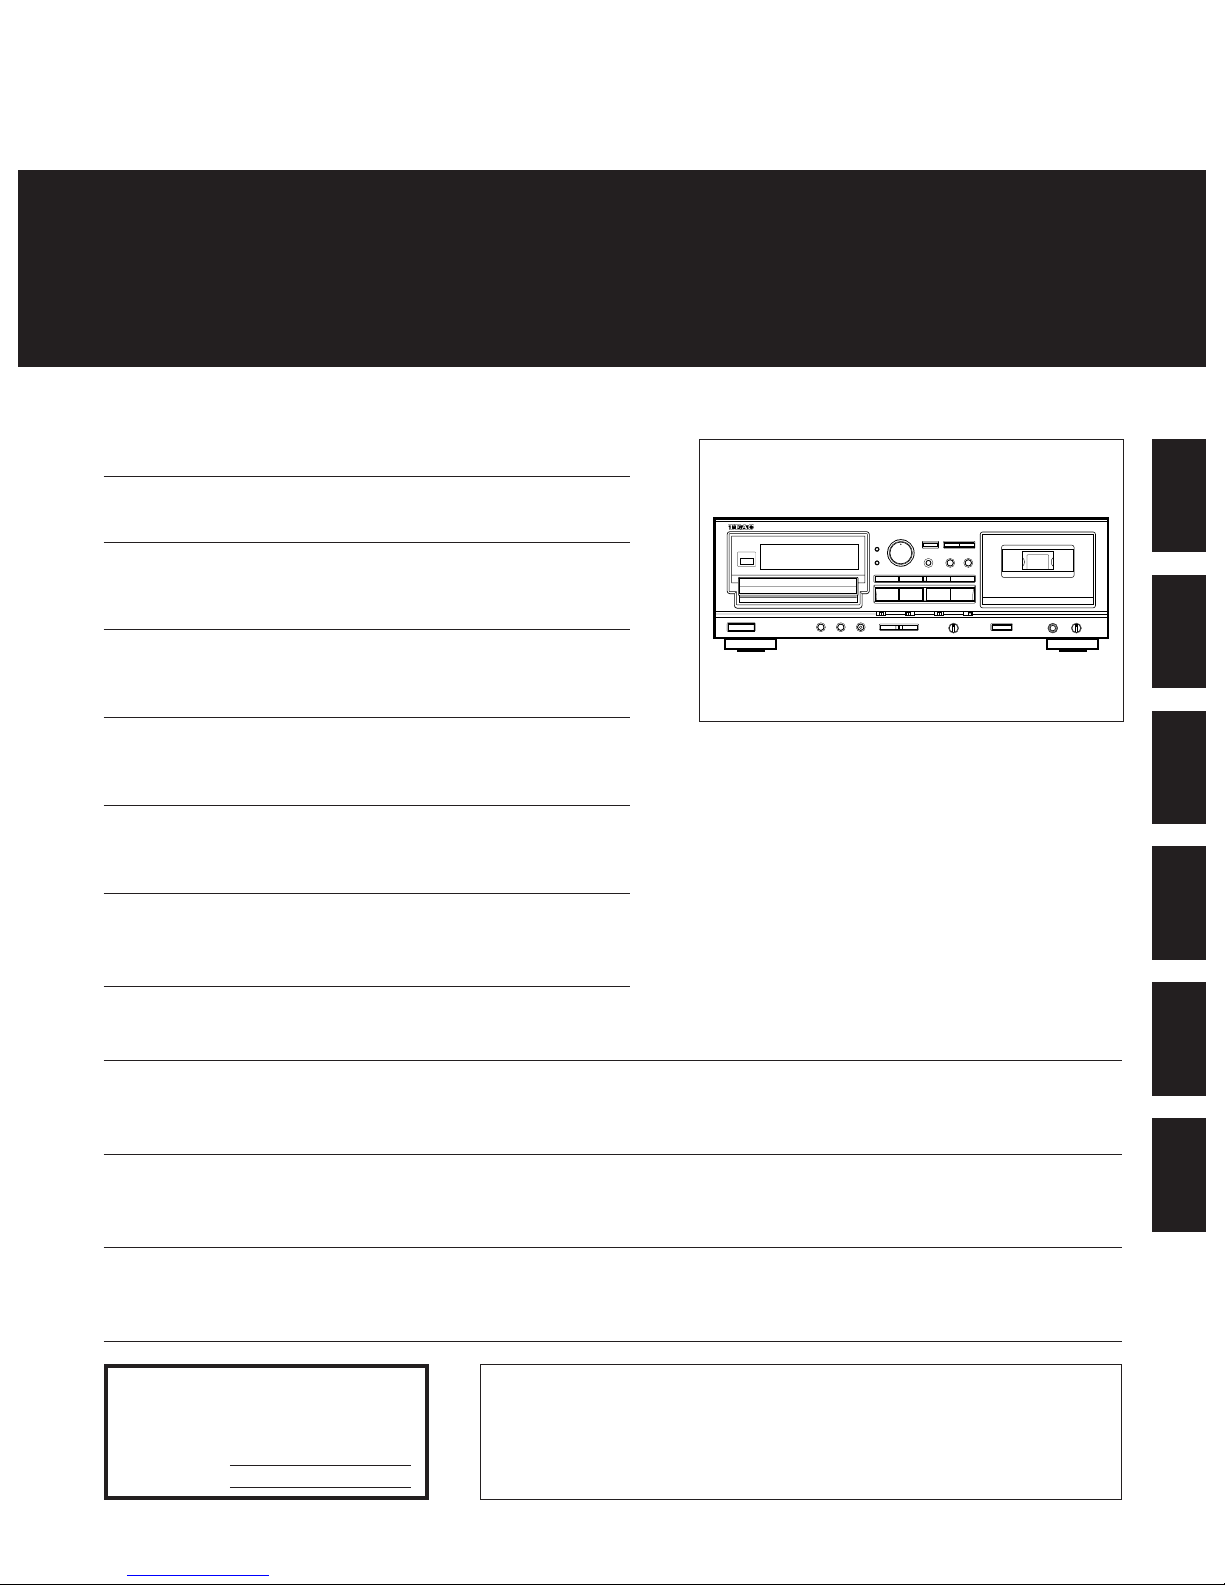
Read This Before Operating
Handling the Tapes
Cassette Tape
Handling the Discs Remote control unit
Do not store tapes in the following places:
‚On top of heaters, exposed to direct
sunlight or in any other places with high
temperatures.
ONear speakers, on TV sets or amplifiers
or where they would be exposed to
strong magnetic fields.
OWhere humidity is high and in dirty,
dusty places.
OAvoid dropping or subjecting cassettes
to excessive shocks.
OAs C-120 tapes are physically weak and
could become entangled in the
transport mechanism, do not use them.
Tape Selection:
For the automatic tape select function to
work properly, metal and chrome (cobalt)
tapes must have identification holes.
*Dolby noise reduction manufactered under
license from Dolby Laboratories Licensing
Corporation.
“DOLBY” and the double-D symbol ∂
are trademarks of Dolby Laboratories
Licensing Corporation.
When operating the remote control unit,
point it towards the remote sensor on the
front panel of the unit.
ªBattery Installation
1. Remove the battery compartment
cover.
2. Insert two “AA” (R6, SUM-3) dry
batteries.
Make sure that the batteries are
inserted with their positive ≠and
negative –poles positioned correctly.
3. Close the cover until it clicks.
Battery Replacement.
If you notice that the distance between
the remote control unit and the unit for
correct operation becomes shorter, it
indicates that the batteries are exhaust-
ed. In this case replace the batteries with
new ones.
Precautions concerning batteries
OBe sure to insert the batteries with
correct positive ≠and negative –
polarities.
OUse batteries of the same type. Never
use different types of batteries
together.
ORechargeable and non-rechargeable
batteries can be used. Refer to the
precautions on their labels.
OWhen the remote control unit is not to
be used for a long time (more than a
month), remove the batteries from the
remote control unit to prevent them
from leaking. If they leak, wipe away
the liquid inside the battery
compartment and replace the batteries
with new ones.
ODo not heat or disassemble batteries
and never dispose of old batteries by
throwing them in fire.

OBefore connection, turn off all
components and pay special attention
to left (L) and right (R) channel
indications.
ORead the owner's manual of each
component you intend to use with this
unit.
∑Signal cords
LINE IN / OUT terminals
Connect the LINE IN terminals to the TAPE
REC terminals and connect the LINE OUT
terminals to the TAPE PLAY terminals of the
stereo amplifier using RCA pin plug cords.
OLINE OUT terminals output the compact
disc or cassette deck tape signal. When
both compact disc and tape are played
back, the tape sound has priority.
CD LINE OUT terminals
Connect the CD LINE OUT terminals to the
CD, DAT or AUX terminals of the stereo
amplifier using RCA pin plug cords.
OCD LINE OUT terminals always output
the disc signal.
Caution:
If the CD player interferes with the tuner,
TV reciever, etc., allow a reasonable
distance between them.
∑Power cord
Be sure to connect the power cord to an
AC outlet which supplies the correct
voltage.
∑Headphones
When using headphones, connect the
headphone plug into the PHONES jack.
OAdjust the level of the signals output
from the phones jack.
_ 5_
Connections
ENGLISH
ENGLISH
IMPORTANT (for U.K. Customers)
DO NOT cut off the mains plug from this
equipment. If the plug fitted is not
suitable for the power points in your
home or the cable is too short to reach
a power point, then obtain an
appropriate safety approved extension
lead or consult your dealer.
If nonetheless the mains plug is cut off,
remove the fuse and dispose of the plug
immediately, to avoid a possible shock
hazard by inadvertent connection to the
mains supply.
If this product is not provided with a
mains plug, or one has to be fitted, then
follow the instructions given below:
IMPORTANT. DO NOT make any
connection to the larger terminal which
is marked with the letter E or by the
safety earth symbol ç or coloured
GREEN or GREEN-and-YELLOW.
The wires in the mains lead on this
product are coloured in accordance
with the following code:
BLUE: NEUTRAL
BROWN: LIVE
As these colours may not correspond
with the coloured markings identifying
the terminals in your plug proceed as
follows:
The wire which is coloured BLUE must
be connected to the terminal which is
marked with the letter N or coloured
BLACK.
The wire which is coloured BROWN
must be connected to the terminal
which is marked with the letter L or
coloured RED.
When replacing the fuse only a
correctly rated approved type should
be used and be sure to re-fit the fuse
cover.
IF IN DOUBT — CONSULT A
COMPETENT ELECTRICIAN.
Be sure to remove the power cord from the
AC outlet before repositioning the voltage
converter switch.
1. Locate the voltage selector on the rear
panel.
2. Using a flat-bladed screwdriver, set to
the appropriate 230 V or 120 V position
according to your area.
Voltage Conversion
(For general export models)
Stereo Amplifier
AD-500

_ 6_
Name of Each Control
1POWER switch
2REMOTE SENSOR
3Multi-function display window
aREPEAT indicator
bAuto space indicator (A. SPACE)
cDELETE indicator
dTime mode indicator
eProgram indicator (PGM)
fSHUFFLE indicator
gCD input indicator (IN)
hTAPE/CD indicator
iREC indicator
jTape PLAY indicator
kLevel meter
lTape counter
mINTRO play indicator
nCD pause/play indicator (ƒ/∏)
oTrack indicator
pTime counter
qDUB indicator
rTape reverse/pause/forward
indicator (”ƒ∏)
sMusic calendar
4OPEN/CLOSE button
5CD play button (å)
6CD STOP button
7CD pause button (ƒ)
8Return-To-Zero button (RTZ)
9Counter clear button (CLEAR)
0REC LEVEL control
qContinuous play button (CD-TAPE
CONT PLAY)
wCD DUBBING button
eRECORD button
rREC MUTE button
tRewind and fast forward/CPS buttons
(Ú CPS ÆÒ)
yTape STOP button
uTape pause button (ƒ)
iCassette holder
oDisc tray
pREPEAT 1/ALL button
aPROGRAM button
sSHUFFLE button
dTIMER switch
fMUSIC SKIP buttons (Ú/Æ)
gSOURCE switch
hReverse mode switch (REV MODE)
jPITCH CONTROL knob
kDOLBY NR switch
lEJECT button
;Tape play buttons (”/∏)
zPHONES jack
xHeadphones LEVEL knob
cTIME button
vINTRO CHECK button
bAUTO SPACE button
nA-B button
mCD SEARCH buttons (/Ò)
,SINGLE button
.CHECK button
/CLEAR button
!DELETE button

∑Even if the disc tray is open ...
When the åbutton is pressed:
The disc tray will close and playback starts
from the first track.
∑To stop playback
Press the STOP button. The player enters
the Stop mode.
To unload the disc:
Press the OPEN/CLOSE button; playback
stops and the disc tray will slide out, and
all functions are reset to their initial
settings.
To temporarily suspend playback (Pause
mode):
Press the ƒbutton. Playback stops at the
current position and the ƒindicator lights
steadily. To resume playback from the
same position, press the ∏or ƒbutton.
CAUTION :
ODo not force the tray by hand during
opening and closing operations.
_ 7_
ENGLISH
1. Press the POWER switch.
2. Press the OPEN/CLOSE button.
The disc tray will slide out. Place the
disc gently on the tray with its label side
facing upward. The disc is set within
the disc guides at the center of the tray.
3. Press the OPEN/CLOSE button again.
The disc tray will close.
Several seconds later, the following
information is displayed.
4. Press the CD PLAY (∏) button.
Disc playback starts from the first track,
and the ∏(play) indicator will light.
ODuring playback, the number of the
currently played tune blinks on the
music calendar.
OWhen tunes have been played, their
numbers will disappear from the Music
Calendar display.
CD Player
Basic Operation
For 8 cm (3-inch)
CD singles
For 12 cm (5-inch)
Compact Discs
Tune numbers on disc up to 20
Total number of
tunes on the disc
Total playback
time of disc
∑Music search using MUSIC
SKIP buttons (Ú/Æ)
The beginning of any tune can be easily
located using the Ú/ÆMUSIC SKIP
buttons. This operation is indicated clearly
in the TRACK display.
OThis operation is possible even in the
Program Playback mode. However,
only programmed tunes will be
detected.
∑To skip to the next tune
Press the Æbutton.
The player will skip ahead to the next tune
each time the Æbutton is pressed. The
player can be advanced to the last tune
this way, but once the beginning of the last
tune is reached, the player will not
advance even if the Æbutton is pressed.
∑To skip back to the previous tune
Press the Úbutton.
The player will skip back one tune each
time the Úbutton is pressed. If this
button is pressed in the middle of a tune,
the player will skip back to the beginning of
the current tune. To make it skip back to
the previous tune, the button must be
pressed twice.
In this way, the player can be returned to
the beginning of the first tune on the disc.
∑Music search using SEARCH
buttons (/Ò)
During playback or in the Pause mode,
hold down the Òbutton of the remote
control or the Æbutton of the main unit
to move the playing position quickly in the
forward direction, and hold down the
button of the remote control or the Ú
button of the main unit to move quickly in
the reverse direction.
During the manual search operation, sound
will be audible but the output level will be
lowered. This lets you search for any
required portion while checking the sound.
When the desired position is reached,
release the button to reenter the previous
mode.
Music Search Operation
or

_ 8_
∑To display the total program
time
In the Program mode, press the TIME
button to display the total program time.
Pressing the TIME button again will return
the CD player to the Program mode.
∑To review the program contents
1. Press the CHECK button in the Program
mode.
The first programmed track number will
light and "P-01" will blink in the display.
2. Each time the CHECK button is pressed,
the next programmed track number will
light.
"P-XX (Program number)" will blink in
the display.
OWhen the last programmed track
number is displayed, pressing the
CHECK button will return the CD player
to the Program mode, allowing you to
add tracks to the program.
OThe track numbers stored in the
program memory will be displayed on
the Music Calendar. However, please
note that the Calendar can handle only
up to track 20. If higher track numbers
are entered in the Program memory, the
OVER indicator will light.
∑To cancel a programmed track
Pressing the CLEAR button will cancel the
last programmed track.
∑Delete programming
This is the opposite to normal pro-
gramming, and is used to program tunes
which are not to be played. Use it when
there are tunes on the disc you don't want
to listen to.
1. Press the STOP button.
2. Press the DELETE button.
The CD player enters the Delete
Program mode.
The "DELETE" and "PGM" indicators light
in the display.
3. Alternately press the Ú MUSIC Æ
button(s) and the PROGRAM button in
any desired order.
4. Press the PLAY button.
Delete-programmed playback starts.
OIn the Delete-Program mode, pressing
the TIME button will display the total
time of the non-deleted tracks. Pressing
the TIME button again will return the
player to the Delete-Program mode.
OPressing the CHECK button in the
Delete-Program mode will display the
first deleted track number.
Each time the CHECK button is pressed,
the next deleted track number will be
displayed. When the last deleted track
number is displayed, pressing the
CHECK button will return the player to
the Delete-Program mode, allowing you
to delete other tracks.
OPressing the CLEAR button will cancel
the last delete-programmed track.
OPressing the STOP button when the
player is stopped will clear the delete-
program memory.
The program playback function allows you
to program up to 20 tunes (tracks) for
playback in any desired order.
∑Programming required tunes
1. Press the STOP button.
2. Press the PROGRAM button.
The player enters the Program mode.
The PGM indicator lights in the display.
3. Alternately press the ÚMUSIC SKIP
Æbutton(s) and the PROGRAM
button in the following order.
4. Press the ∏button.
Programmed playback starts from the
first programmed tune.
OProgramming tunes is possible only
when the player is in the Stop mode.
OThe programmed contents will be held
in memory even after programmed
playback has been completed or when
programmed playback is stopped by
pressing the STOP button.
OWhen the STOP button is pressed in the
stop mode, the contents of the program
are erased.
OTo release the program mode, press the
program button again.
ODuring program playback, the TOTAL
REMAIN time display shows the total
remaining time of the programmed
tunes, from the current position.
OIf tunes with numbers higher than 32
are programmed, TOTAL time may not
appear in the display. ("nn:nn" appears
in the display)
Program Playback
Example
To program tunes in the order 5 @2 @
8 in the Stop mode.
(select 5) (select 2)(enter)
(select 8) (enter)(enter)

_ 9_
ENGLISH
The repeat function allows repeat
playback of any single tune, the entire disc,
or any desired portion on the disc
designated by two (start and end) points.
OThe repeat functions can be released
by pressing the repeat button again.
∑To repeat one tune
(Single Repeat mode)
1. Press the REPEAT 1/ALL button.
The REPEAT and SINGLE indicators
light.
2. Select the required tune by pressing
the ÚÆ button.
The selected tune is played, then when
the end of the tune is reached, the
player will return to the beginning of the
tune and playback starts again. In this
way, the selected tune will be played
back repeatedly.
∑To repeat an entire disc
(All Repeat mode)
1. Press the REPEAT 1/ALL button twice.
The REPEAT and ALL indicators light.
2. Press the PLAY button.
Playback starts and, when the end of
the disc is reached, the player will
return to the beginning of the first tune,
and then playback continues
repeatedly.
∑To repeat a designated section
(A-B Repeat mode)
1. Start playback from any point before
the section to be designated.
2. Designate the point at which repeat
playback should start (point A) by
pressing the A-B button.
The REPEAT and A - indicators light and
the B indicator blinks to show that point
A has been entered.
3. When the portion at which repeat
playback should end is reached, press
the A-B button again to designate point
B.
The B indicator is changed to light
steadily to show that the A-B repeat
function has been activated.
The player automatically returns to
point A and restarts playback.
When play reaches point B, the player
returns to point A and starts playback
again, repeatedly.
OAfter designating point A, when quick
searching point B, use the Òor Æ
button instead of playing back normally.
OWhen the A-B button is pressed again
during block repeat play, block repeat
playback will be released.
∑Programmed repeat playback
The repeat function can be activated even
in the Programmed Playback mode.
To repeat all the programmed tunes, press
the 1/ALL button twice. (At this time, check
that the REPEAT and ALL indicators light.)
Repeat Function
1. Press the SHUFFLE button in the Stop
mode.
The SHUFFLE indicator lights in the
display.
2. Press the CD PLAY button.
Tracks will be randomly selected and
played back.
OPress the Æbutton with the random
play function engaged to select a tune
at random. Press the Úbutton to
replay the currently played tune from its
beginning.
OA tune cannot be replayed after it has
been played in this mode.
OTo release the random play function
while it is engaged, press the SHUFFLE
button again. Tunes will play back in
their normal designated order, starting
from the currently played tune.
RANDOM Playback

_ 10 _
The time counter shows various time
readouts, as follows.
1Total disc playback time
After the disc tray is closed with a disc
loaded, the total disc playback time and
total number of tunes on the disc are
displayed.
2Elapsed time display
When playback begins, the elapsed time
of the tune being played is displayed in
minutes and seconds.
3Remaining time display (REMAIN)
Displayed when the TIME button is
pressed once. This provides an easy
check of the remaining time of the tune
being played.
4Total remaining time display
(TOTAL REMAIN)
Displayed when the TIME button is
pressed twice. The time displayed is
the total remaining playback time from
the position being played, to the end of
the disc; the counter counts down to
"00:00" during playback.
ODisplayed after the TIME button is
pressed three times. The time displayed
is the elapsed playback time 2.
OIn Normal Playback mode, if a tune with
a number higher than 32 is being
played, the remaining time will not be
displayed in the time counter even
when the TIME button is pressed.
Instead, "nn:nn" will be indicated on the
time indicator.
The intro check function allows only the
beginning of each track to be played for 10
seconds.
1. Press the INTRO CHECK button.
The INTRO and ∏indicators will be
indicated.
2. Press the INTRO CHECK button again to
clear the intro check function.
OThe intro check function also works
together with SHUFFLE, PROGRAM and
REPEAT ALL functions.
Time Counter Display Auto Spacing
Intro Check Function
1. Press the single button. The SINGLE
indicator will light in the display.
2. Press the Ú/ÆMUSIC SKIP
buttons corresponding to the required
tune.
3. A single tune will be played back, after
which the player will enter the stop
mode.
OTo release the Single mode, press the
SINGLE button again.
Single Playback
When this function is activated, an interval
of approx. 4 seconds will be inserted
between tunes automatically, so they are
played back with a fixed spacing.
To activate this, press the AUTO SPACE
button so that the A.SPACE indicator lights
in the display.
When the auto space button is pressed
again, the indicator goes off and the auto
spacing function is released.

_ 11 _
ENGLISH
1. Press the POWER switch ON.
2. Set the REV MODE switch to the
required tape travel mode.
3. Load a pre-recorded cassette with its
open edge facing down and side A
facing toward you.
4. Select ON/OFF of the DOLBY NR system.
5. Press the ”or ∏button to start
playback.
6. Adjust the volume with the amplifier's
volume control.
OTo stop playback, press the STOP
button.
Playback
The tape counter counts up when the tape
is moving forward and down when the tape
is being rewound. The display can be
cleared by pressing the COUNTER CLEAR
button, which resets the counter index to
"0000".
Tape Counter
Cassette Deck Operation
COUNTER CLEAR
REC REVEL STOP
RECORD
SOURCE
REV MODE
POWER
EJECT
DOLBY NR
1. Press the POWER switch ON.
2. Set the REV MODE switch.
OIf you want to make a bi-directional
recording, set the REV MODE switch to
the πor øposition.
OWhen starting to record with ”
ú
, one
side recording is performed.
OSet to the “position if recording is to
be made on a single side of the tape.
3. Load a recordable cassette.
OCheck that the safety tabs on the spine
of the cassette are in place. If they
have been broken off, block the holes
with adhesive tape.
4. Select the SOURCE switch.
OWhen selecting "CD", the built-in CD
player's output is selected as a source.
OWhen selecting "LINE", the external
signal from "LINE IN" is selected as a
source.
5. Select ON/OFF of the DOLBY NR system.
6. Press the RECORD button and the deck
enters the Record-Pause mode (REC
and ƒindicators light).
7. Adjust the recording level with the REC
LEVEL control so that the loudest sound
to be recorded just makes the meters
briefly reach around the "0 dB" point (for
Normal or Chrome tapes) or the "+3 dB"
point (for Metal tapes).
Recording
Metal
Normal or chrome
Loading a Cassette Tape
1. Use your finger or a pencil to turn the
cassette's hub and take up any slack
tape.
Note: Avoid touching the tape.
Fingerprints attract dust and dirt.
2. Press the eject button (∫)* to open
the cassette compartment door.
3. Load the cassette tape with its open
edge facing down.
4. Gently close the compartment door.
*Notes:
OThe cassette holder cannot be
opened during recording or playback.
OIf the power has been switched off
during play or recording, ejecting the
cassette may be impossible. In such
a case, switch the power on and
press the eject button again.
8. Press the ƒPAUSE button again to start
recording.
OTo stop recording temporarily, press the
ƒPAUSE button. To restart the tape,
press the ƒPAUSE button or ”∏play
button. During the Record-Pause mode,
if the button whose ”, ∏indicator is
lit is pressed, recording will start;
however, if the button whose ”, ∏
indicator is not lit is pressed, only the
tape direction will change; to restart the
tape, press the button again.
OTo stop recording, press the STOP
button.
Anything previously recorded on the tape
will automatically be erased when you
make a new recording on it. It can also be
erased by "recording" on it with the REC
LEVEL control set to "0".
CAUTION
Recording pre-recorded tapes, records, or
other published or broadcast material may
infringe copyright laws. Check before
recording.
Erasing

_ 12 _
You can change the tape speed during
playback, allowing to change the pitch of
the reproduced sound.
By turning the PITCH CONTROL to the right,
the tape speed becomes faster, resulting in
higher pitch. By turning it to the left, the
tape speed becomes slower, resulting in
lower pitch.
OAt the fully clockwise position, the tape
speed is approx. 12% faster .
OAt the fully counter-clockwise position,
the tape speed is approx. 12% slower.
Pitch Control
OIf, by using the Ò, the required CPS
number setting is exceeded, use the
button to count down the CPS
number until the required CPS number
is displayed.
OWhen the Òbutton is pressed, the
next tune is counted as "1" and when
the button is pressed, the current
tune is counted as "1".
2. The tape is fast-wound to detect blanks
between tunes until the required tune is
reached. Then playback starts from the
beginning of the designated tune.
Notes on CPS
CPS operates by detecting and counting
blanks of about 4 seconds, the standard
interval between tunes. Therefore, with
the following types of tapes, search
functions may not work correctly.
OWhen the intervals between tunes
cannot be detected.
–Intervals of less than 4 seconds.
–High levels of noise in intervals.
–Long low level sections (in classical
music, etc.)
CPS allows the selection and playback of
any tune up to 15 tunes ahead or before
the one being played. This function
operates by detecting blank spaces of at
least 4 seconds between tunes. These
blanks can be created using the REC MUTE
function.
Notes:
OIn the following steps 1 and 2, to
simplify the description, the explanation
is given for "forward playback" (∏
direction). A similar procedure should
be used for "reverse playback".
OThe Ò(Fast Forward) and
(Rewind) buttons act as CPS buttons
during playback. This is why the main
unit indicates "Ú CPS ÆÒ"
for these buttons, while the remote
control unit shows just "Ò". In
the following explanation, these buttons
are described as just "" and "Ò".
1. During forward playback, press the
or Òbutton repeatedly until the
number of tunes to be skipped appears
in the counter display. Use the Ò
button for searching a tune following
the current tune and button for a
tune before the current tune. Refer to
the chart "How to Select any Required
Tune Using CPS".
CPS (Computomatic Program Search)
’
’
’
’
’
’
(1) (2)
(4)(3)
How to Select Any Required Tune Using CPS
Ex: See (1). To select the 3rd tune past the current tape position, select "CP03".
Current tape position
Direction of
tape travel
Following Before
In example (1), if "t" is less than
4 seconds, it will not be counted
as a blank. Designate "CP-02"
instead of "CP-03" to select the
3rd tune in this case.
’
Current tape position
BeforeFollowing
Direction
of tape
travel
In the Stop mode, the Òbuttons act
as fast forward and rewind buttons.
OIn the Playback mode, these buttons act
as CPS buttons.
Fast Wind
By pressing the RTZ (Return To Zero)
button, the tape will locate the "0000" point
and stop.
OThe RTZ function does not work when
the tape counter indicates a number
between "9996" and "0004".
RTZ (Return To Zero) Function
or

Using the CD DUBBING function, a CD-to-
tape copy can be done easily and simply.
1. Load a compact disc.
2. Load a recordable cassette.
3. Select ON/OFF of the DOLBY NR system.
OIn the CD DUBBING mode, the REC
LEVEL control has no effect, as the
recording level is automatically
adjusted internally.
∑To record from the beginning of
the tape
Press the CD DUBBING button in the Stop
mode.
The tape is rewound to the beginning of
Side A and the counter is reset to "0000",
while the CD player is in the Pause mode at
the beginning of the first CD track.
After mute-recording for approx. 10
seconds (to avoid the leader tape), the
cassette deck drops into the Recording
mode while the CD player starts playback.
∑To record from any desired
position of the tape
1. Move the tape to the desired position
and press the STOP button.
2. Press the RECORD button.
The deck enters the Record-Pause
mode.
3. Press the CD DUBBING button.
CD-to-tape copying starts from the
current tape position.
OWhile CD DUBBING is engaged, only
the STOP (CD), STOP (TAPE),
OPEN/CLOSE and TIME buttons are
operational.
∑Designating CD tracks to be
recorded on Side A or Side B
(A-B Program Dubbing)
By using the A-B Program Dubbing
function, you can designate CD tracks to
be recorded on Side A or Side B.
1. Press the PROGRAM button.
2. Press the A-B button.
"A-" blinks and "B" lights in the display,
indicating that the CD player is now in
the "Side A program" mode.
3. Program tracks to be recorded on Side
A of the tape.
Perform the procedures described in
step 3 in the "Program Playback" section
on page 8.
OTo display the total program time, press
the TIME button in the Program mode. It
will help you to fit the total recording
time to the tape length. Pressing the
TIME button again will return the CD
player to the Program mode.
4. Press the A-B button.
"A-" lights and "B" blinks in the display,
indicating that the CD player is now in
the "Side B program" mode.
5. Program tracks to be recorded on Side
B of the tape.
OPressing the A-B button in the Side B
Program mode will return the CD player
to the Side A Program mode.
6. Press the CD DUBBING button.
The tape is rewound to the beginning of
side A and the counter is reset to "0000",
while the CD player is in the Pause
mode at the first track of the Side A
program.
After mute-recording for approx. 10
seconds (to avoid the leader tape), the
cassette deck drops into the Recording
mode while the CD player starts the
program playback.
OIf you press the RECORD button before
pressing the CD DUBBING button, the
recording will start from the current
tape position (without rewinding the
tape to the beginning).
OIf the tape on Side A ends before 01:30
(1 minute 30 seconds) of the current CD
track has been played, the recording of
Side B will start with that track. (except
with A-B Program Dubbing)
OWhen the CD player finishes playback,
the CD DUBBING mode is released.
OIf the tape comes to the end of Side B
before the CD player finishes playback,
the CD DUBBING mode is canceled.
_ 13 _
ENGLISH
∑Automatic spacing operation for
4-second blanks (during re-
cording)
Press the REC MUTE button during
recording. The tape movement
continues and a blank space of about 4
seconds is recorded (the RECORD
indicator blinks). The deck then enters
the Record-Pause mode automatically
(both the RECORD and PAUSE
indicators light).
To restart recording, press the PAUSE
button (the PAUSE indicator goes off).
∑Automatic spacing operation for 4-
second blanks (during record-pause)
In the Record-Pause mode, pressing the
REC MUTE button will initiate the above
record-muting operation automatically.
The deck then returns to the Record-
Pause mode.
∑For a blank of more than 4 seconds
During recording, hold the REC MUTE
button depressed for longer than 4
seconds. A blank space will be left as
long as the button is pressed. Release
the button to enter the Record-Pause
mode. To restart recording, press the
PAUSE button.
ODuring record muting operation (while
the RECORD indicator is blinking),
pressing the REC MUTE button again
will release the record muting operation
and recording will restart without
stopping the tape.
Record Muting Operation
Copying from CD to Tape
or

The unit has a timer controlled function.
This lets you start playback or recording
operations at any desired time when an
optional audio timer is used.
∑Timer Playback of CD or Cassette
1. Connect the unit and your stereo
system to an audio timer as shown in
the diagram.
2. Set the power switches of all
components to ON.
3. Load a disc or a prerecorded cassette.
4. Set the timer switch to the CD or TAPE
position.
5. Set the audio timer to the required start
(power on) and stop (power off) times.
When this setting is completed, the
power to all components will be
switched off.
6. When the preset start time is reached,
power will be supplied and playback
will start automatically.
∑Timer Recording
1. Select the amplifier's input which this
deck is capable of recording.
2. Select the source to be recorded (FM,
AM, etc.).
3. Load a recordable cassette and set the
[TIMER] switch to [REC].
4. Set the audio timer to the required start
(power on) and stop (power off) times.
When this setting is completed, the
power to all components will be
switched off.
5. When the preset start time is reached,
power will be supplied and recording
will start automatically.
In the Continuous Playback mode, once
either the CD player or cassette deck
finishes (or stops) playback, the other
starts playback automatically.
1. Press CD-TAPE CONT PLAY button.
"TAPE" and "CD" blink in the display.
2. (For example) Press the CD Play button.
The CD player starts playback.
"CD" blinks in the display.
3. When the CD player stops, the cassette
deck automatically starts playback.
"TAPE" blinks in the display.
Afterward, when one stops, the other
starts.
ORegardless of whether one machine
(CD player or cassette deck) is stopped
forcibly by pressing the STOP button or
automatically at the end of playback,
the other machine starts playback.
OYou may change the CD or tape while it
is in Stop mode.
OTo release the Continuous Playback
mode, press the CD-TAPE CONT PLAY
button again.
_ 14 _
Timer-controlled operation
Continuous Playback
between CD and Tape
Audio timer
Tuner
To AC outlet of
the timer
To AC outlet of
the tuner
To amplifier's
AC outlet
Amplifier
AD-500
Timer Connection

_ 15 _
ENGLISH
Basic troubleshooting of this unit is similar to troubleshooting of any other electrical or electronic equipment. Always check the most obvious
possible causes first. To give you a few ideas of what to look for, check the following:
Troubleshooting
Problem Probable cause Remedy
General
No power when POWER is pressed. Power plug not inserted securely. Plug in securely.
Hum Pin-cord plug not connected securely. Re-connect plug securely.
Noise in tuner. Too close to tuner. Keep a reasonable distance between
them or switch off the power of
this unit.
No audio output. Connection to stereo system is incorrect. Check connections.
Remote control unit operation is POWER switch set to OFF. Set switch to ON.
impossible. Batteries not inserted in remote control. Insert batteries.
CD player
No playback when disc is loaded. Disc loaded with label side down. Load with label side up.
Disc dirty. Clean disc surface.
No audio output. Connection to stereo system is incorrect. Check connections.
No CD output The cassette deck is in Playback mode. Stop the deck. Or connect the
CD output with the amplifier.
A single tune can only be played. SINGLE button engaged. Press button to disengage it.
No program playback. PROGRAM button not pressed. Press button to display PGM.
Mistracking (sound jumping). Player receiving vibration or shock. Change the installation position
of this unit.
Disc dirty. Clean disc surface.
Cassette deck
Low sound quality The heads are dirty. Clean the heads.
The heads are magnetized. Demagnetize the heads using
the TEAC E-3.
The position of the Dolby NR switch is Change the position.
not correct.
Strange sound The pitch control has been changed. Set the pitch control pot to the
center position.
Impossible to record The record protection tabs of the Put adhesive tape on the tab hole.
cassette are broken off.
The heads are dirty. Clean the heads.
Recording level is too low. Turn the REC LEVEL pot to the right.

_ 16 _
General
Power requirements:
120/230 V AC, 50–60 Hz
(U.S.A./Canada/general export model)
230 V AC, 50 Hz (Europe/U.K. model)
240 V AC, 50 Hz (Australia model)
Power consumption: 14 W
Dimensions (W x H x D):
435 x 145 x 290 mm (17-1/8" x 5-3/4" x
11-7/16")
Weight: 5.3 kg (11.7 lbs.)
Standard Accessories
Wireless remote control RC-619,
Pin plug cord x 2,
Battery (SUM-3, "AA", "R6" type) x 2
OImprovements may result in specifi-
cation or feature changes without
notice.
OPhotos and illustrations may differ
slightly from production models.
CD player section
(Audio)
Number of channels: 2
Frequency response: 10 - 20,000 Hz ± 0.5 dB
Signal-to-noise ratio: 90 dB
Dynamic range: 90 dB
Total harmonic distortion: 0.02% (1 kHz)
Wow and flutter:
Unmeasurable (quartz accuracy)
Channel separation: 75 dB
Output: 2 Vrms
Digital filter: 4-times oversampling
Analog filter: 3rd order
(Signal format)
Sampling frequency: 44.1 kHz
D/A converter: 16-bit linear/channel
Channel bit rate: 4.3218 Mb/sec.
Channel modulation code: EFM
Error correction: CIRC
(Pickup)
Type: Objective lens drive, optical 3-beam
laser pickup.
Objective Lens:
2-dimensional parallel drive
Laser Type:
GaAIAs type semiconductor laser
Wave length: 780 nm
Cassette section
Track system: 4-track 2-channel stereo
Heads: Record/playback x 1 (rotary
reverse), erase x 1
Type of tape: Cassette tape C-60, C-90
Tape speed: 4.76 cm/sec.
Motor: DC servo motor x 1
Wow and flutter: 0.08% (W. RMS)
Frequency response (overall):
50 – 15,000 Hz ± 3 dB, metal
50 – 15,000 Hz ± 3 dB, chrome
50 – 14,000 Hz ± 3 dB, normal
Signal-to-noise ratio (overall):
59 dB (Dolby NR off, 3% THD level,
weighted),
69 dB (DOLBY NR on, over 5 kHz)
Fast winding time: Approx. 120 sec. (with
C-60)
Input: Line; 87 mV (input impedance of 50
kohms or more)
Output: Line; 0.46 V (load impedance of 50
kohms or more)
Headphones; 1 mV/8 ohms
Specifications
The heads and tape path should be
cleaned and demagnetized periodically.
Cleaning tape path
OApply head cleaning fluid* to a cotton
bud or soft cloth, and lightly rub the
heads, capstan and all metal parts in
the tape path.
OAlso clean the pinch roller using rubber
cleaning fluid*.
*Both are available in TEAC Tape
Cleaning Kits HC-2 and RC-2 in the
U.S.A. or TZ-261 in other areas.
Maintenance
Demagnetizing heads
Be sure that the power is off, then
demagnetize the heads using a TEAC E-3
demagnetizer. For details of its use, read
its instructions.
Pinch Roller
Capstan
Erase Head Record/Play Head

_ 17 _
FRANÇAIS
Avant utilisation
OEviter de placer l'appareil en plein soleil
ou près d'une source de chaleur. Eviter
également les endroits sujets aux
vibrations et à la poussière excessive,
la chaleur, le froid ou l'humidité.
L'éloigner de sources de bruit, comme
les transformateurs ou les moteurs.
‚Ne pas ouvrir le coffret, pour ne pas
endommager circuits ou provoquer des
chocs électriques. Si un objet étranger
pénètre dans l'appareil, contacter le
revendeur.
‚Ne pas manipuler les disques avec les
doigts sales. Ne jamais introduire un
disque qui a une fêlure en surface.
‚Pour retirer la fiche d'alimentation de la
prise de courant, toujours tirer
directement sur la fiche, ne jamais tirer
sur le cordon.
‚Ne pas tenter de nettoyer l'appareil
avec des solvants chimiques qui
pourraient endommager la finition.
Utiliser un chiffon sec et propre.
‚Conserver ce manuel dans un lieu sûr
pour toute référence ultérieure.
Cet appareil a été spécialement conçu
pour la reproduction de disques
audionumériques portant la marque "˛".
D'autres disques ne peuvent pas être
reproduits.
‚Toujours placer le disque audio-
numérique sur le tiroir de disque avec
son étiquette tournée vers le haut. (Les
disques audionumériques ne peuvent
être lus que sur une seule face.)
‚Pour retirer un disque de sa boîte de
rangement, appuyer sur le centre de la
boîte et lever le disque, en le tenant
soigneusement par les bords.
Comment retirer le disque
Comment tenir le disque
OLes empreintes digitales et la poussière
doivent être soigneusement essuyées
de la surface enregistrée du disque
avec un chiffon doux.
Essuyer du centre vers l'extérieur
ONe pas utiliser de diluant, de benzine ou
d'alcool qui endommageraient la
surface de plastique du disque.
‚Les disques doivent être remis dans
leur boîte après utilisation pour éviter
des rayures qui pourraient faire "sauter"
le capteur laser.
‚Ne pas exposer les disques en plein
soleil ou à une humidité et une
température élevées pendant de
longtemps. Une longue exposition à des
températures élevées peut gauchir le
disque.
A lire ceci avant utilisation
Manipulation des cassettes
Cassette
Manipulation des disques
Ne pas ranger les cassettes dans les
endroits suivants :
‚Au-dessus d'appareils de chauffage, en
plein soleil ou des températures
élevées.
‚Près de haut-parleurs, sur un téléviseur
ou un amplificateur ou des endroits où
elles pourraient être exposées à des
champs magnétiques puissants.
‚Dans des endroits sales et poussiéreux
ou exposés à l'humidité.
‚Eviter de faire tomber des cassettes ou
de leur faire subir des chocs excessifs.
‚Comme les bandes des cassettes C120
sont peu résistantes et peuvent
facilement se coincer dans le
mécanisme de transport, ne pas les
utiliser.
Sélection de bande:
Pour que la fonctionne sélection
automatique de bande fonctionne
correctement, les cassettes à bande métal
et chrome (cobalt) doivent avoir des trous
d'identification.
*Réduction de bruit Dolby fabriqué sous
license de Dolby Laboratories Licensing
Corporation.
DOLBY et le symbole double-D ∂sont
des marques de Dolby Laboratories
Licensing Corporation.
‚Ne pas coller de papier ni écrire avec
un stylo à bille sur la surface du côté de
l'étiquette.
Pour utiliser la télécommande, la pointer
vers le capteur de télécommande du
panneau avant de l'appareil.
ªMise en place des piles
Télécommande
1. Retirer le couvercle du compartiment
des piles.
2. Introduire deux piles "AA" (R6, SUM-3)
S'assurer que les piles sont installées
correctement en respectant la polarité
plus ±et moins —.
3. Fermer le couvercle jusqu'à son déclic.
Remplacement des piles
Si vous remarquez que la distance entre la
télécommande et l'appareil devient plus
courte pour assurer un fonctionnement
correct, c'est que les piles sont usées.
Dans ce cas, remplacer les piles par des
neuves.
Précautions à observer concernant les
piles
OBien placer les piles en respectant la
polarité plus (+) et moins (–).
OUtiliser des piles du même type. Ne
jamais utiliser ensemble différents
types de piles.
ODes piles ou des batteries peuvent être
utilisées. Se référer aux précautions à
observer sur leurs étiquettes.
OSi la télécommande n'est pas utilisée
pendant une longue période (plus d'un
mois), retirer les piles de la
télécommande pour éviter des fuites
des piles. Si elles coulent, bien essuyer
le liquide dans le compartiment des
piles et remplacer les piles par des
neuves.
ONe pas chauffer, ni démonter les piles
et ne jamais les mettre au feu.

_ 18 _
OAvant de raccorder le combiné lecteur
CD-cassette, éteindre tous les appareils
et bien repérer les canaux gauche (L) et
droit (R).
OLire le mode d'emploi de chaque
appareil utilisé avec le combiné lecteur
CD-cassette.
∑Cordons de liaison
Prises d'entrée/sortie de ligne (LINE
IN/OUT)
Raccorder les prises LINE IN aux prises
TAPE REC et les prises LINE OUT aux
prises TAPE PLAY de l'amplificateur stéréo
à l'aide des cordons de liaison à fiches
RCA.
OLes prises LINE OUT fournissent le
signal du lecteur CD ou de la platine à
cassette. Quand ces deux appareils
sont en mode de lecture, le son fourni
par la platine à cassette a priorité.
Prises CD LINE OUT
Raccorder les prises CD LINE OUT aux
prises CD, DAT ou AUX de l'amplificateur
stéréo à l'aide des cordons de liaison à
fiches RCA.
OLes prises CD LINE OUT fournissent
toujours le signal du lecteur de disque
compact.
Attention:
Si le lecteur CD produit des interférences
sur le syntoniseur, le téléviseur, etc.,
laisser une distance raisonnable entre ces
appareils.
∑Cordon d'alimentation
Bien raccorder le cordon d'alimentation à
une prise secteur CA sous tension.
∑Casque d'écoute
Pour utiliser un casque d'écoute, brancher
la fiche du casque à la prise PHONES.
ORégler le niveau de sortie de la prise
casque.
Raccordements
Bien débrancher le cordon d'alimentation
de la prise secteur avant de repositionner
le sélecteur de tension.
1. Localiser le sélecteur de tension sur le
panneau arrière.
2. En utilisant un tournevis à lame plate,
régler sur la position appropriée 230 V
ou 120 V en fonction de la tension
locale.
Changement de tension
(Pour les modèles universel)
AD-500
Prise secteur CA
Cordon de liaison
à fiches RCA
Cordon de liaison
à fiches RCA
Cordon de liaison
à fiches RCA
Amplificateur stéréo
A CD, DAT
ou AUX
A
TAPE PLAY
A
TAPE REC

_ 19 _
FRANÇAIS
Nomenclature
1Interrupteur d'alimentation (POWER)
2Récepteur du signal de télécommande
3Afficheur à fonctions multiples
aIndicateur de répétition (REPEAT)
bIndicateur d'espacement
automatique (A.SPACE)
cIndicateur d'effacement (DELETE)
dIndicateur de mode d'affichage du
temps
eIndicateur de mode de
programmation (PGM)
fIndicateur de lecture aléatoire
(SHUFFLE)
gIndicateur d'entrée CD (IN)
hIndicateur de cassette/CD (TAPE/CD)
iIndicateur d'enregistrement (REC)
jIndicateur de lecture de cassette
(PLAY)
kDécibelmètres
lCompteur de bande
mIndicateur de lecture des
introductions (INTRO)
nIndicateur de pause/lecture de CD
(ƒ/∏)
oIndicateur de plage
pCompteur temporel
qIndicateur de copie (DUB)
rIndicateur de lecture de face arrière/
pause/lecture de face avant (”ƒ∏)
sCalendrier musical
4Touche d'ouverture/fermeture
(OPEN/CLOSE)
5Touche de lecture de CD (å)
6Touche d'arrêt de CD (CD STOP)
7Touche de pause de CD (ƒ)
8Touche de retour au point zéro (RTZ)
9Touche de remise à zéro du compteur
(COUNTER CLEAR)
0Commande de réglage du niveau
d'enregistrement (REC LEVEL)
qTouche de lecture continue (CD-TAPE CONT PLAY)
wTouche de copie de CD (CD DUBBING)
eTouche d'enregistrement (RECORD)
rTouche d'enregistrement silencieux (REC MUTE)
tTouches de rembobinage et d'avance rapide/
Recherche automatique(Ú CPS ÆÒ)
yTouche d'arrêt de cassette (STOP)
uTouche de pause de cassette (ƒ)
iPorte-cassette
oTiroir de disque
pTouche de lecture répétée plage/disque
(REPEAT 1/ALL)
aTouche de programmation de plages (PROGRAM)
sTouche de lecture aléatoire (SHUFFLE)
dSélecteur de minuterie (TIMER)
fTouches de saut de plage (MUSIC SKIP (Ú/Æ))
gSélecteur de source (SOURCE)
hSélecteur de sens de défilement (REV MODE)
jBouton de réglage de l'acuité du son
(PITCH CONTROL)
kCommutateur de réducteur de bruit (DOLBY NR)
lTouche d'éjection (EJECT)
;Touches de lecture de cassette (”/∏)
zPrise de casque (PHONES)
xBouton de réglage de niveau au casque (LEVEL)
cTouche d'affichage du temps (TIME)
vTouche de contrôle des introductions (INTRO
CHECK)
bTouche d'espacement automatique (AUTO SPACE)
nTouche A-B
mTouches de recherche de plage de CD SEARCH
(/Ò)
,Touche de lecture de plage unique (SINGLE)
.Touche de contrôle de plages programmées
(CHECK)
/Touche d'annulation de plages programmées
(CLEAR)
!Touche d'effacement (DELETE)

∑Si le tiroir du disque est ouvert...
Lorsque la touche ∏est pressée:
Le tiroir se fermera et la lecture
commencera à de la première plage.
∑Pour arrêter la lecture
Appuyer sur la touche STOP. Le lecteur
entre en mode d'arret.
Pour retirer le disque:
Appuyer sur la touche OPEN/CLOSE; La
lecture s'arrête et le tiroir ressort, et toutes
les fonctions reviennent à leur réglage
initial.
Pour arrêter momentanément la lecture
(mode de pause):
Appuyer sur la touche ƒ. La lecture
s'arrête à la position du capteur.
L'indicateur ƒs'allume. Pour reprendre la
lecture à partir de la même position,
appuyer sur la touche ∏ou ƒ.
PRECAUTION:
ONe pas forcer le tiroir lors de
l'ouverture et de la fermeture.
1. Appuyer sur l'interrupteur d'alimenta-
tion POWER.
2. Appuyer sur la touche OPEN/CLOSE.
Le tiroir du disque s'ouvre. Placer avec
précaution le disque sur le tiroir avec la
surface imprimée dirigée vers le haut.
Le disque doit être positionné dans les
guides de disque au centre du tiroir.
3. Appuyer à nouveau sur la touche
OPEN/CLOSE.
Le tiroir du disque se referme.
Quelques secondes plus tard,
l'information suivante est affichée.
4. Appuyer sur la touche CD PLAY (∏).
La lecture du disque commence à
partir de la première plage, et
l'indicateur ∏(lecture) s'allume.
OPendant la lecture, le numéro de la
plage en cours de lecture clignote sur
le calendrier musical.
OAprès la lecture d'une plage, son
numéro disparaît de l'affichage du
calendrier musical.
_ 20 _
Lecteur CD
Fonctionnement de base
For 8 cm (3-inch)
CD singles
For 12 cm (5-inch)
Compact Discs
Tune numbers on disc up to 20
Total number of
tunes on the disc
Total playback
time of disc
∑Pour passer à la plage suivante
Appuyer sur la touche Æ.
Le lecteur passera au début de la plage
suivante à chaque pression sur la touche
Æ. Le lecteur peut ainsi être avancé
jusqu à la dernière plage, mais une fois
que le début de la dernière plage est
atteint, le lecteur n'avance plus même si la
touche Æest pressée.
∑Pour revenir à la plage précédente
Appuyer sur la touche Ú.
Le lecteur reviendra en arrière d'une plage
à chaque pression sur la touche Ú. Si
cette touche est pressée au milieu d'une
plage, le lecteur revient au début de la
plage actuelle. Pour revenir à la plage
précédente, la touche doit être pressée
deux fois.
Il est ainsi possible de revenir au début de
la première plage du disque.
∑Recherche de plage avec les
touches (/Ò)
Pendant la lecture ou la pause de lecture,
appuyer en continu sur la touche Òde
la télécommande, ou Æde l'appareil,
pour rechercher plus rapidement une
plage vers l'avant, et appuyer en continu
sur de la télécommande, ou Úde
l'appareil, pour rechercher plus rapide-
ment une plage vers l'arrière.
Pendant la recherche manuelle, le son est
audible mais le niveau sonore est réduit.
N'importe quelle position sur le disque
peut ainsi être localisée. Quand la position
souhaitée est atteinte, relâcher la touche
pour revenir au mode normal.
Fonctionnement de la recherche
musicale
or
Nombre total de plages
sur le disque
Disques simples
de 8 cm
Disques
audionumériques
de 12 cm
Numéros de plage sur le disque jusqu'à 20
Temps total de
lecture du disque
∑Recherche musicale en utili-
sant les touches MUSIC SKIP
(Ú/Æ)
Le début d'une plage peut facilement être
localisé en utilisant les touches MUSIC
SKIP Úet Æ. Ce fonctionnement est
clairement indiqué sur l'affichage TRACK.
OCette opération est possible même en
mode de lecture programmée; dans ce
cas, cependant, seules les plages
programmées seront détectées.
ou
Table of contents
Languages:
Other Teac CD Player manuals