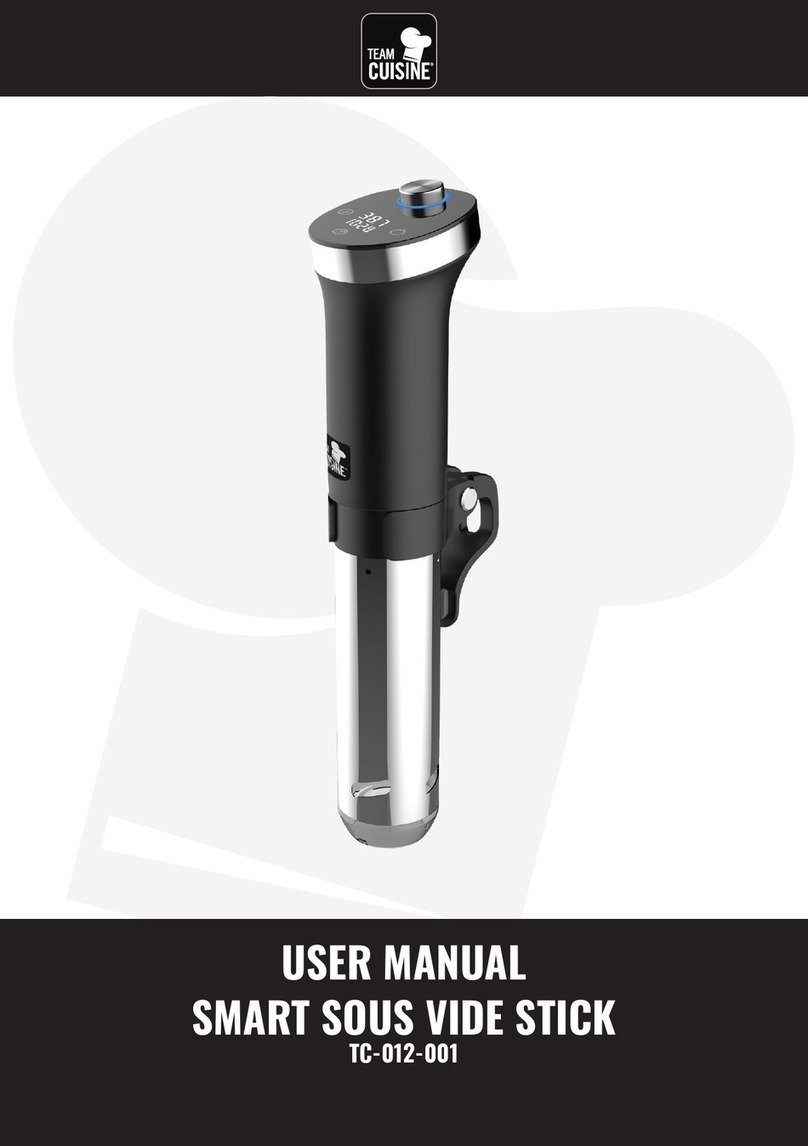
TEAM CUISINE SOUS-VIDE STICK User manual

Operating instructions
EN
SOUS-VIDE STICK
TC-002-001

2 EN
www.team-cuisine.com
Contents
1. Device overview ........................................................................................................... 4
2. Intended purpose ........................................................................................................ 5
3. Safety instructions ....................................................................................................... 6
4. Items supplied .............................................................................................................. 7
5. The sous-vide cooking method .................................................................................. 8
5.1 What is sous-vide? ....................................................................................................................... 9
5.2 Advantages of sous-vide ........................................................................................................... 10
5.3 Things to remember with sous-vide ..................................................................................... 11
5.4 Required accessories .................................................................................................................. 12
5.5 Recommended accessories ...................................................................................................... 13
6. Operating the device ................................................................................................... 14
6.1 Preparing the water bath .......................................................................................................... 15
6.2 Making settings ............................................................................................................................ 16
6.3 Phase 1: heating up ..................................................................................................................... 17
6.4 Phase 2: Sous-vide cooking ...................................................................................................... 18
7. Tips and tricks .............................................................................................................. 19
7.1 Suitable food for sous-vide ...................................................................................................... 20
7.2 Unsuitable food for sous-vide ................................................................................................. 21
7.3 Reverse cooking ........................................................................................................................... 22
7.4 Tips .................................................................................................................................................... 23
8. Cooking times and recipes .......................................................................................... 24
8.1 Cooking meat to the core temperature ............................................................................... 25
8.2 Cooking table ................................................................................................................................ 26
8.3 Recipes ............................................................................................................................................. 27
9. Cleaning, descaling and storage ................................................................................ 28
9.1 Cleaning .......................................................................................................................................... 29
9.2 Descaling ........................................................................................................................................ 30
9.3 Removing and reattaching the metal casing (Figure C) ................................................ 31
9.4 Storage ............................................................................................................................................ 32
10. Disposal ........................................................................................................................ 33
11. Troubleshooting .......................................................................................................... 34
12. Technical specifications .............................................................................................. 35
13. Customer service ......................................................................................................... 36

EN 3
www.team-cuisine.com
Thank you for your trust!
Congratulations on your new sous-vide stick.
For safe handling of the product and in order
to get to know the entire scope of features:
• Thoroughly read these user instruc-
tions prior to initial use.
• Above all, observe the safety instruc-
tions!
• The device should only be used as de-
scribed in these user instructions.
• Keep these user instructions for infor-
mation purposes.
• If you pass the device on to someone
else, please include this copy of the
user instructions. The user instructions
are a component of the product.
We hope you enjoy using your new sous-vide
stick!

4 EN
www.team-cuisine.com
1. Device overview
1
2
4
7
3
5
8
10
11
6
12
13
141516
3
5
7
6
3
4
8
9
17
ABC
9

EN 5
www.team-cuisine.com
1Power cable with mains plug
2Base unit
3Clamp
4Metal casing
5Plastic foot
6MIN Marking for minimum water level
7MAXMarking for maximum water level
8Arrow marking (for metal casing)
9Lock symbols (for metal casing)
10 LED:
- is lit red: standby
- is lit blue: program phase 1: device is heating up to set temperature
- flashes blue: program phase 2: set time is running with set temperature being
maintained
11 Control elements
12 Display
13 Switch on / Start program
Keep pressed for approx. 3 seconds: stop program and switch to standby
14 Keep pressed for approx. 3 seconds: open setting mode
Press briefly: switch between settings: temperature, hours, minutes
15 In setting mode: decrease values
16 In setting mode: increase values
17 Propeller (Figure C)
2. Intended purpose
Use the device exclusively for heating and
maintaining the controlled temperature of a
water bath for purposes of sous-vide cooking.
The device is designed for private home use
and must not be used for commercial purpos-
es.
The device must only be used indoors.
Foreseeable misuse
WARNING! Risk of material damage!
~Use the sous-vide stick exclusively for
heating tap water. The device is not suita-
ble for other liquids.
~All food must be placed into the water
bath vacuum-packed in a heat-resistant
plastic bag. The food must never be
placed directly into the water bath.
NOTE: a vacuum-sealing device is not includ-
ed with the items supplied.

6 EN
www.team-cuisine.com
3. Safety instructions
Warnings
If necessary, the following warnings will be
used in these user instructions:
DANGER! High risk: failure to observe
this warning may result in injury to
life and limb.
WARNING! Moderate risk: failure to observe
this warning may result in injury or serious
material damage.
CAUTION: low risk: failure to observe this
warning may result in minor injury or material
damage.
NOTE: circumstances and specifics that must
be observed when handling the device.
Instructions for safe operation
~This device can be used by children from the age of 8 and people
with restricted physical, sensory or intellectual abilities or people
without adequate experience and/or understanding, if they are su-
pervised or instructed on how to use this device safely and if they
are aware of the resulting dangers. Children must not play with the
device. Cleaning and user maintenance must not be performed by
unsupervised children unless they are older than 8 years and super-
vised.
~Children under the age of 8 must be kept away from the device and
the power cable.
~The sous-vide stick must be attached to a stable pot using the
clamp, such that it cannot fall into the water.
~The volume of the pot for the water bath must be approx. 6 to
15 litres.
~The pot must be standing on a stable, vibration-free, level work sur-
face.
~The sous-vide stick must be immersed in water at least up to the
MIN marking, and not beyond the MAX marking.
~Do not insert the mains plug into a wall socket until the sous-vide
stick is securely attached, and the water level is between the MIN
and MAX markings.
~Pull out the mains plug before removing the sous-vide stick from
the water.
~The heating element still remains hot after the mains plug is pulled
out. Do not touch the hot metal casing of the device! Do not place
the hot device on flammable or heat-sensitive surfaces (e.g. plastic).

EN 7
www.team-cuisine.com
~If the mains power cable of this device should become damaged, it
must be replaced by the manufacturer, the manufacturer's custom-
er service department or a similarly qualified specialist, in order to
avoid any hazards.
~The base unit, the mains power cable and the mains plug must not
be immersed in water or any other liquids.
~If liquid gets into the device above the MAX marking, pull out the
mains plug immediately. Have the device checked before reusing.
~Do not use any abrasive or corrosive cleaning agents.
~This device is not intended to be operated using an external timer
clock or a separate remote control system.
DANGER for children
~Risk of death through severe burns! Nev-
er lay the power cable such that children
can pull down the device and the water
bath.
~Packing materials are not children's toys.
Children should not be allowed to play
with the plastic bags. There is a risk of
suffocation.
~Keep the device out of the reach of chil-
dren.
DANGER to and from pets and
livestock
~Electrical devices can represent danger
to pets and livestock. In addition, animals
can also cause damage to the device. For
this reason you should keep animals
away from electrical devices at all times.
DANGER! Risk of electric shock
due to moisture
~Never touch the device with wet hands.
DANGER! Risk of electric shock
~Do not use the device if the device or the
mains power cable has any visible dam-
age, or if the device has previously been
dropped.
~Only connect the mains plug to a proper-
ly installed and easily accessible earthed
wall socket whose voltage corresponds
to the specifications on the rating plate.
The wall socket must continue to be easi-
ly accessible after the device is plugged
in.
~Ensure that the mains power cable can-
not be damaged by sharp edges or hot
points.
~When using the device, ensure that the
mains power cable cannot be trapped or
crushed.
~Even after it has been switched off, the
device has not been completely discon-
nected from the mains. In order to fully
disconnect it, pull out the mains plug.
~When removing the mains plug from the
wall socket, always pull the plug and nev-
er the cable.
~Disconnect the mains plug from the wall
socket.
…if there is a fault,
…when you are not using the device,
…before you clean the device and
…during thunderstorms.
~To avoid any risk, do not make modifica-
tions to the product.

8 EN
www.team-cuisine.com
FIRE HAZARD
~It is not necessary to constantly supervise
during operation, but just to check regu-
larly. This applies in particular when very
long cooking times are set.
DANGER! Risk of injury through
burning
~Only transport or empty the water bath
when it has cooled down.
~Do not reach into the water with bare
hands when you place the bag into or re-
move it from the water bath.
~Wait for the device to cool down before
cleaning.
WARNING! Risk of material damage
~Ensure that the water level does not fall
below the MIN marking. If this happens,
the device will switch off to avoid over-
heating.
~Only place completely sealed foods into
the water bath. If water gets in, it would
have a negative effect on the food, and
could spoil it.
~Never place or lay the device on hot sur-
faces (e.g. hot plates) or near heat sourc-
es or open fire.
4. Items supplied
1 sous-vide stick
1 copy of the user instructions
Before using for the first time
• Remove all packing material.
• Check that the device is undamaged.
5. The sous-vide cooking
method
5.1 What is sous-vide?
The dream of every hobby cook: a steak that is
pink and juicy on the inside, crispy on the out-
side. But unfortunately it does not always
work using conventional methods, or it re-
quires exact timing. Sous-vide makes cooking
easier, and almost always yields perfect re-
sults.
In principle, sous-vide is nothing more than
the slow cooking of vacuum-sealed food.
On the one hand, sous-vide is a very simple
method for achieving excellent results when
preparing food. On the other hand, sous-vide
is a clear rejection of the “always-in-a-rush” at-
titude of our age.
Professional cooks have been using this meth-
od for many years. With the new sous-vide
stick, this cooking method is now also afforda-
ble and easy to use for hobby cooks at home.
5.2 Advantages of sous-vide
• By precisely setting and maintaining the
temperature of the water bath, the cook-
ing process is directly matched to the
structure and characteristics of the food.
• Large quantities can easily be prepared.
The final preparation can then take place
very quickly (e.g. briefly searing steaks).
• It is not a case of “every second counts”.
The core temperature of the food being
cooked can never rise higher than the
water temperature. This cooking method
therefore forgives small deviations in
terms of temperature and timing.
• You have perfect control over the aroma
and the texture of the food.
• The vacuum-sealing process ensures that
the food loses neither aroma nor fluids.
This means that fish and meat remain de-

EN 9
www.team-cuisine.com
liciously juicy at all times, and do not be-
come dry.
• The vacuum-sealing process causes mari-
nades to penetrate deeper and more in-
tensively into the food. You will
experience an entirely new intensity of
marinated food.
5.3 Things to remember with sous-
vide
• Sous-vide cooking is a slow-cooking
method. Take the extended time in the
water bath into consideration when plan-
ning the individual cooking stages.
• The device works in two phases: in phase
1, the water bath is heated to the set tem-
perature. In phase 2, the temperature is
kept steady and the vacuum-packed
food cooks slowly in the water bath.
• If you wish to shorten the heating time
(phase 1), fill the pot with warm water.
The water should not be hotter than the
desired cooking temperature, however.
• For the correct temperature and cooking
time settings, you can find guideline val-
ues in the cooking table (see “Cooking ta-
ble” on page 37).
• Only vacuum-packed food must be
placed in the water bath.
• Because the food is not boiled or well-
done, great emphasis must be placed on
hygiene. All parts that come into contact
with raw or semi-raw food must immedi-
ately be cleaned, in order to avoid trans-
mission of bacteria to other kitchen
utensils.
• After cooking, the food must be eaten
immediately, processed further, or must
be cooled down inside the vacuum bag
using iced water and then stored in the
0°C section of the refrigerator.
• Ensure that you use high-quality bags
that are heat and cold-resistant. On the
packaging of the vacuum bags, you can
find the temperature specifications for
which the bag is designed.
• Before placing the food to be cooked into
the water, ensure that the bag is tightly
sealed. If water gets inside, it would spoil
the food or make it taste watery and fla-
vourless.
• The food to be cooked must always be
completely covered with water. If it floats,
place a plate on the food to be cooked.
• Ensure that the individual vacuum bags
are completely surrounded by water.
• Frozen food must be thawed before
cooking. Quick thawing in the water bath
damages the structure of the food. Fur-
thermore, it is almost impossible to de-
fine a cooking time for frozen food.
5.4 Required accessories
Sous-vide is not possible without vacuum-
packed food.
The following accessories are not included
with the items supplied, but are required:
- Vacuum-sealing device
- Cold and heat-resistant vacuum bags
- A sufficiently large pot for the water bath
(volume approx. 6 - 15 litres).
5.5 Recommended accessories
During longer periods of cooking in an open
pot, the hot water evaporates. This means en-
ergy is lost and the water level can fall below
the MIN marking6.
In order to reduce the evaporation of hot wa-
ter, we recommend the use of insulating balls
that float on the surface of the water bath. You
can order these.

10 EN
www.team-cuisine.com
6. Operating the device
DANGER! Risk of electric shock!
~Do not insert the mains plug1into a wall
socket until the sous-vide stick is securely
attached, and the water level is between
the MIN6 and MAX7 markings.
~Only connect the mains plug1to a prop-
erly installed and easily accessible wall
socket whose voltage corresponds to the
specifications on the rating plate. The
wall socket must still be easily accessible
after connection.
~If liquid gets into the device above the
MAX marking7, pull out the mains
plug1immediately. Have the device
checked before reusing.
6.1 Preparing the water bath
DANGER for children
~Risk of death through severe burns! Nev-
er lay the power cable1such that chil-
dren can pull down the device and the
water bath.
1. Place the pot on a level, non-slip surface
that is not sensitive to water or heat. A
suitable wall socket should be nearby.
2. Figure A: attach the sous-vide stick to
the edge of the pot using the clamp3.
The plastic foot5may rest on the bottom
of the pot.
3. Figure B: fill the pot with warm tap wa-
ter, at least up to the MIN marking6on
the sous-vide stick and not further than
the MAX marking7. Remember that the
water level will rise later when the vacu-
um bags are inserted.
4. Connect the mains plug1with the wall
socket. You will hear a beep and all dis-
plays will briefly light up. The LED10 and
the button 13 will then be lit red.
6.2 Making settings
1. Press the button 13. The display
shows the temperature that is set. The
button 14 flashes.
2. Use the buttons 16 and 15 to set
the desired temperature between 0 °C
(C 0.0) and 90 °C (C 90.0).
- Each time the buttons are pressed, the
temperature changes in increments of
0.5 degrees.
- Hold the button down to change the
setting quickly.
3. Press the button 14 briefly to set the
cooking time. The display12 shows the
time that is set. The hours flash.
4. Use the buttons 16 and 15 to set
the number of hours between 00 and 99.
5. Press the button 14 briefly to set the
minutes. The minutes flash.
6. Use the buttons 16 and 15 to set
the number of minutes between 00 and
59.
NOTE: if the program has already been start-
ed, you can open the setting mode by holding
down the button 14 for approx. 3 seconds.
Press the button briefly to switch between
the various settings: temperature, hours, min-
utes.

EN 11
www.team-cuisine.com
6.3 Phase 1: heating up
1. Briefly press the button 13 to start the
program. The LED10 and the button
are lit blue. The device begins to heat up
and circulate the water. The display12
shows the temperature actually meas-
ured, and counts upwards in increments
of 0.1 degrees.
(Phase 1)
NOTE: if the temperature actually measured is
higher than the set temperature, add small
portions of cold water. This can accelerate the
cooling process.
2. Phase 1 (heating time) is complete once
the water bath has reached the set tem-
perature.
6.4 Phase 2: Sous-vide cooking
Phase 2 begins automatically as soon as phase
1 is complete. You will hear two beeps, and
the LED10 will flash blue.
The display12 will show the following two
displays, alternating approx. every 5 seconds:
- The set cooking time is counting down.
- The current measured temperature is dis-
played.
1. As soon as you hear these two beeps and
the LED10 flashes blue, place the vacu-
um bags into the water bath. Ensure that
the water level does not rise above the
marking MAX7. If necessary, scoop out
water with a cup.
2. Do not overfill the water bath. The vacu-
um bags must be surrounded by water
on all sides.
NOTE: if bags are pressed firmly against one
another, the cooking time becomes longer
and impossible to calculate.
3. The bags should be underwater. If they
float on the surface, cover them e.g. with
a plate.
4. During long cooking times, water evapo-
rates from the water bath. You should
therefore check from time to time to en-
sure that the water level does not fall be-
low the MIN marking6. If necessary, top
it up using a cup with small portions of
warm water.
NOTES:
• When topping up the water, ensure that
no larger temperature fluctuations take
place. Avoid cold water and large por-
tions.
• If the water level falls below the MIN
marking6, you will hear 3 beeps and the
device will switch itself off. This is a safety
function, which protects against over-
heating. If this occurs, top up the water.
You can then continue to use the device
normally.
5. When the cooking time (phase 2) has ex-
pired, you will hear 3 beeps, and the dis-
play12 will show End. The device
switches to standby. The LED10 and the
13 button are lit red.
6. Remove the vacuum bags from the water
bath using appropriate kitchen utensils
(e.g. kitchen or barbecue tongs).
7. Pull out the mains plug1.
8. Cut open the vacuum bag and remove
the cooked food.
9. Depending on the type of cooked food, it
can either be served immediately, or may
need to be processed further (e.g. quickly
seared) before being served.

12 EN
www.team-cuisine.com
7. Tips and tricks
7.1 Suitable food for sous-vide
Meat is particularly suitable for the sous-vide
method, which absolutely includes second
choice cuts. The long cooking time and a cor-
responding marinade mean that even less
choice cuts become soft as butter.
But this method is also suitable for fish and
hard vegetables, eggs and hard fruit.
The full range of possibilities can be found in
a sous-vide cookbook, which you can obtain
e.g. in a specialist book shop.
7.2 Unsuitable food for sous-vide
• The following foods are not suitable at all
for the sous-vide method:
cabbage, leek, chard, spinach, and
green
vegetables that easily overcook, such as
cauliflower, Brussels sprouts, or broccoli.
• Green vegetables emit sulphurous gases,
which cannot escape during this process,
and which therefore have a negative ef-
fect on the taste.
7.3 Reverse cooking
• You can also sear meat at the start of the
process. You can then add the desired
spices or a marinade, and then vacuum-
seal it. After sous-vide cooking, the meat
can then be served immediately. This
method is most suitable for roasting cuts.
7.4 Tips
• Marinating: the combination of vacuum-
packing with marinade and slow cooking
in the water bath offers very intense taste
experiences.
• First test using the sous-vide method us-
ing your usual seasoning process on
small pieces of food. The spices may react
differently during the vacuum-sealing
process. Salt and garlic in particular are
perceived more intensely, and generally
need to be used more conservatively
than with other cooking methods.
• Food to be marinated should be vacuum-
packed with the marinade a day earlier
and placed in the refrigerator. In the case
of small pieces (e.g. small scallops), the
marinating and vacuum-sealing can take
place a few hours beforehand.
• Ensure that vacuum bags are not pressed
together in the water bath. Wherever the
bags are in continuous contact, the food
has a different cooking temperature.
• The sous-vide stick is not a device for
boiling water. It is therefore advisable for
the water already to be at the desired
temperature when poured into the water
container. You can thus avoid extended
waiting times when heating the water.
• Ensure that the water is not hotter than
the desired temperature, as this could fal-
sify the results.

EN 13
www.team-cuisine.com
8. Cooking times and reci-
pes
8.1 Cooking meat to the core
temperature
The following table shows how done a piece
of meat is when the specified core tempera-
ture has been reached. This does not change,
even after longer periods in the water bath,
because the core temperature in the food can
never rise higher than the set water tempera-
ture.
The core temperature is the temperature in
the centre of the food.
Table for beef, pork, lamb and game
Bear in mind that it is only safe to eat poultry
when it is completely cooked through, in or-
der to avoid the risk of salmonella infection.
8.2 Cooking table
The times indicated in the following table are
guidelines. The actual cooking time depends
on:
• the size and freshness of the food;
• the quality and properties of the product;
• for meat: the breed of animal;
• the filling volume and shape (flat or
round) of the vacuum bag;
• personal preferences (steak medium or
well done; vegetables firm or soft);
• The specifications are valid for one vacu-
um bag.
NOTES:
• Ensure that all pieces are approximately
equal in size/thickness.
• Prepare the vegetables by cutting off
stems and cutting large vegetables into
pieces of equal size.
• Poultry in particular must be fully cooked
through in order to avoid the risk of sal-
monella infection. Poultry should ideally
be seared briefly before serving.
Core tempera-
ture Cooking level
49 °C blue - almost raw
52 °C - 55 °C rare/bloody - narrow mar-
gin is cooked
55 °C - 60 °C medium rare - a thick pro-
portion is still pink
60 °C - 65 °C medium - pink inside
65.5 °C - 68 °C medium well - almost
cooked through
68 °C - 71 °C well done - fully cooked
through

14 EN
www.team-cuisine.com
Food to be
cooked Cooking level Thickness/
weight
Temperature
of water bath
Cooking time in
water bath
Beef
fillet, steak
medium rare 30 mm 56 °C 50 min
medium rare 40 mm 56 °C 75 min
Beef
Roast beef
medium Strip
60 mm
56 °C 6 hours
Beef
Flank steak
medium 57 °C 12 hours
Pork
fillet
well done 30 mm 60 °C 2 hours
well done 40 mm 60 °C 2.5 hours
Pork neck well done 700 g 68 °C 24 hours
Rack of lamb medium 10 -15 mm 56 °C 45 min
Chicken breast well done 20 - 25 mm 72 °C 2 hours
Turkey breast well done 15 - 30 mm 72 °C 2 hours
Duck breast well done 15 - 25 mm 72 °C 3 hours
Goose breast well done 20 mm 80 °C 8 hours
Salmon tender 25 mm 45 °C 20 min
Cod tender 25 mm 52 °C 40 min
Ocean perch tender 25 mm 47 °C 20 min
Prawns done lined up 85 °C 20 min
Scallops firm 18 - 25 mm 47 °C 30 min
Potatoes well done small,
halved
85 °C 1 hour
Carrots somewhat firm approx.10
mm
85 °C 40 min
green beans
(frozen prod-
uct, thawed)
somewhat firm 82 °C 30 min
Asparagus firm lined up 82 °C 25 min
Eggs in shell Yolk thick
egg white almost en-
tirely liquid
62 °C 1 hour
Eggs in shell Yolk creamy
egg white more solid
66 °C 1 hour
Eggs in shell Yolk solid
egg white solid
75 °C 1 hour

EN 15
www.team-cuisine.com
8.3 Recipes
Please find the cooking times in the table or in
your sous-vide cookbook.
Beef tenderloin
1. Season the meat with a little salt.
2. Vacuum-seal the meat.
3. Place the bag into the water bath.
4. At the end of the program, remove the
meat from the bag and dab it dry with a
paper towel.
5. Heat butter or oil in a pan, and sear the
fillet briefly on both sides. During sear-
ing, season to taste. Add coarse black
pepper only at the end of the frying pro-
cess.
Roast beef
1. Season the meat with a little salt.
2. Vacuum-seal the meat.
3. Place the bag into the water bath.
4. At the end of the program, remove the
meat from the bag and dab it dry with a
paper towel.
5. Heat butter or oil in a pan, and sear the
roast beef briefly on two sides or on all
sides. During searing, season to taste.
Add coarse black pepper only at the end
of the frying process.
This goes particularly well:
• fried potatoes
• tartar sauce
Rack of lamb
1. Press 1-2 cloves of garlic into a little olive
oil.
2. Add a little salt and pepper to the oil and
mix it all with a fork.
3. Drag the rack of lamb through the oil,
and place the cutlets individually or next
to one another in the vacuum bag.
4. Vacuum-seal the meat.
5. Place the vacuum-sealed meat in the re-
frigerator for approx. 12 hours.
6. Place the bag into the water bath.
7. At the end of the program, remove the
meat from the bag and dab it dry with a
paper towel.
8. Heat olive oil in a pan and sear the lamb
cutlets briefly from both sides, so that
they take on a nice colour.
This goes particularly well:
• Herb crust (follow-up process in the ov-
en)
•hottomatoes
• fried courgette slices
Mediterranean chicken breast
1. Take one medium-sized tomato and sev-
eral slices of courgette per vacuum bag.
Cut the tomatoes into small cubes, and
the courgette into thin slices.
2. Press one clove of garlic.
3. Mix the tomatoes with the courgette and
the garlic, add a table spoon of olive oil,
and mix it all with a fork.
4. Salt and pepper the chicken breasts, and
then very briefly and fiercely sear them in
an oiled pan.
5. Place the chicken breasts individually
into the vacuum bag and then add the
vegetables to the chicken breast.
6. Vacuum-seal the meat.
7. Place the bag into the water bath.
8. At the end of the program, remove the
meat and vegetables from the bag, and
place it directly onto the plate.
This goes particularly well:
• fresh baguette
•pasta

16 EN
www.team-cuisine.com
Asparagus
1. Peel and wash the asparagus.
2. Cut off the bottom ends.
3. Salt the asparagus stems.
4. Place the asparagus stems next to one
another in the vacuum bag.
5. Use a knife to spread a little butter on the
asparagus.
6. Vacuum-seal the asparagus.
7. Place the bag into the water bath.
This goes particularly well:
• baby potatoes
• raw ham or a Wiener Schnitzel
• grilled salmon fillet
Carrots for antipasti
1. Peel and wash the carrots.
2. Cut off the bottom ends and then cut the
carrots into slices.
3. Pour a little olive oil into a bowl.
4. Press 1-2 cloves of garlic into the oil.
5. Add a teaspoon of rosemary, a little fen-
nel and a pinch of salt and pepper to the
oil.
6. Stir all ingredients into the oil with a fork.
7. Place the carrot slices into the vacuum
bag.
8. Pour the oil into the vacuum bag.
9. Vacuum-seal the carrots.
10. Leave the bag(s) in the refrigerator over-
night.
11. Place the bag into the water bath.
12. Pour the carrots into a bowl. They can be
enjoyed hot or cold.
This goes particularly well:
• Other antipasti such as marinated olives,
courgette etc.
Salmon
1. Wash the salmon and then dab it dry. If
the fish still has its skin, leave it on. It will
hold the fish together later, and can be
deliciously fried on.
2. Cut one to two slices off a lemon.
3. Repeatedly stab a fork into the pulp of
the lemon.
4. Place the salmon, the slices of lemon, and
1-2 leaves of sage into the vacuum bag.
5. Vacuum-seal the salmon.
6. Place the bag into the water bath.
7. After the end of the program, carefully re-
move the salmon from the bag, using a
spatula (fish slice) if possible.
8. Dab the salmon dry using paper towel.
9. Heat butter or oil in a pan, and sear the
salmon briefly on both sides. During sear-
ing, season to taste.
This goes particularly well:
• Asparagus, green vegetables
• Potatoes
• Horseradish sauce
Tuna (semi-raw)
1. Wash the tuna and then dab it dry. If the
fish still has its skin, leave it on. It will hold
the fish together later, and can be deli-
ciously fried on.
2. Scatter a few grains of sea salt on the tu-
na.
3. Place the tuna into the vacuum bag.
4. Vacuum-seal the tuna.
5. Place the bag into the water bath.
6. After the end of the program, carefully re-
move the tuna from the bag, using a
spatula (fish slice) if possible.
7. Dab the tuna dry using paper towel.
8. Heat butter or oil in a pan, and sear the
tuna briefly on both sides. During sear-
ing, season to taste. Add coarse black
pepper only at the end of the frying pro-
cess.
This goes particularly well:
• Wasabi, soy sauce
•Rice
•Garlicbread

EN 17
www.team-cuisine.com
9. Cleaning, descaling and
storage
9.1 Cleaning
Clean the device prior to its first use!
DANGER! Risk of injury through
burning/scalding!
~
Allow the device to cool down completely
before you clean it or put it away.
DANGER! Risk of electric shock!
~Prior to cleaning, disconnect the mains
plug1of the device.
DANGER! Risk of electric shock due
to moisture!
~The base unit2, the power cable and the
mains plug1must not be immersed in
water or any other liquids.
WARNING! Risk of material damage!
~Do not use any sharp or abrasive clean-
ing agents.
• Clean the device after every use.
Cleaning the sous-vide stick
1. Clean the sous-vide stick with a damp
cloth.
2. Allow the device to dry completely (in-
cluding the inside of the metal casing4
and the plastic foot5) before you put it
away.
Cleaning kitchen utensils
• All kitchen utensils (knives, forks, chop-
ping boards) that come into contact with
raw food must immediately be cleaned,
ideally using hot, soapy water. Comply
with any cleaning instructions for the
kitchen utensils.
9.2 Descaling
After some time, the cooking process will re-
sult in limescale being deposited in parts of
the sous-vide stick (depending on the hard-
ness of the water used). You should remove
this at regular intervals, because otherwise
the power consumption of the device will in-
crease.
For the normal descaling process, you can
leave the sous-vide stick assembled. In the
case of stubborn limescale, you should first re-
move the metal casing (see“Removing and
reattaching the metal casing (Figure C)” on
page 42).
NOTE: comply with the dosing notes on the
packaging of the citric acid. The dosing de-
scribed here relates to pure, crystalline citric
acid.
1. Prepare a solution using cold tap water
and crystalline citric acid. Use approx. 2 -
3 tablespoons of citric acid for 1 litre of
water.
2. Prepare a water bath using this solution
(see “Preparing the water bath” on
page 34). The water level should come to
just below the MAX marking7.
3. Connect the mains plug1with a wall
socket.
4. Set a temperature of 70 °C and a time of
20 minutes, and start the program (see
“Making settings” on page 34).
5. When the program is complete, allow the
water bath and the device to cool down.
6. Pour away the citric acid solution and
rinse the pot and device thoroughly with
cold water.
7. Allow the device to dry completely (in-
cluding the inside of the metal casing4
and the plastic foot5) before you put it
away.

18 EN
www.team-cuisine.com
9.3 Removing and reattaching the
metal casing (Figure C)
The metal casing4can be removed ...
…so that any stubborn limescale can be
removed more easily or
…if foreign objects or dirt have gotten
inside the metal casing.
1. Hold down the clamp3in order to keep
it open.
2. Rotate the metal casing4clockwise so
that the arrow marking8points to the
open lock symbol9. Carefully pull the
metal casing off downwards.
3. You can now release the clamp3again.
NOTE: be careful not to damage the small
propeller17.
4. Hold down the clamp3again in order to
keep it open.
5. Replace the metal casing4so that the ar-
row marking8points to the open lock
symbol9.
6. Rotate the metal casing4anticlockwise
until the arrow marking8points to the
closed lock symbol9.
9.4 Storage
WARNING! Risk of material damage!
~Store the device protected against dust
and dirt and out of the reach of children.
• Allow the device to dry completely (in-
cluding the inside of the metal casing4
and the plastic foot5) before you put it
away.
10. Disposal
This product is subject to the
provisions of European Direc-
tive
2012/19/EC. The symbol
showing a wheelie bin crossed
through indicates that the
product requires separate re-
fuse collection in the European Union. This
applies to the product and all accessories
marked with this symbol. Products marked as
such may not be discarded with normal do-
mestic waste, but must be taken to a collec-
tion point for recycling electrical and
electronic devices. Recycling helps to reduce
the consumption of raw materials and protect
the environment. For information on disposal
and the location of the nearest recycling cen-
tre, contact e.g. your City Cleaning Depart-
ment or refer to the Yellow Pages.
Packaging
When disposing of the packaging, make sure
you comply with the environmental regula-
tions applicable in your country.

EN 19
www.team-cuisine.com
11. Troubleshooting
If your device fails to function as required,
please try this checklist first. Perhaps there is
only a minor problem, and you can solve it
yourself.
DANGER! Risk of electric shock!
~Do not attempt to repair the device your-
self under any circumstances.
Fault Possible causes/Action
No function
• Has the device been
connected to the pow-
er supply?
• Is the device switched
on?
Long heating
time (phase 1)
• Did you fill with very
cold water? This ex-
tends the heating time
required.
Food not yet
cooked after
the specified
time
• Is the food significantly
thicker than described
in the recipe or the ta-
ble?
• Were the vacuum bags
pressed tightly togeth-
er during the cooking
process?
• Did you set the right
temperature?
• Either vacuum-seal the
food again and return
it to the water bath, or
continue cooking it
with another method.
A great deal of
water in the
vacuum bag
• This indicates an error
during the vacuum-
packing process. The
vacuum bag was not
properly closed.
The device
switches itself
off before the
end of the set
cooking time.
• Did the water level fall
below the MIN mark-
ing6? Top up the wa-
ter.
Error code EE1
displayed.
• Water level below the
MIN marking6? Top
up the water.
• In all other cases: pull
out the mains plug and
have the device
checked.
Fault Possible causes/Action

20 EN
www.team-cuisine.com
12. Technical specifications
Symbols used
Subject to technical modification.
Model: TC-002-001
Mains voltage: 220-240 V ~ 50 - 60 Hz
Protection class: I
Protection type: IPX7
(protected against tem-
porary immersion)
Power rating: approx. 1000 W
Temperature
range:
0°C-90°C
(adjustable in 0.5 °C incre-
ments)
Heating time: 8 L from 24.4 °C to 60 °C in
25 min.
Water circulation approx. 8 L / min.
With the CE marking, Team-
Cuisine declares the conformity
with EU guidelines.
It is only permitted for devices with
this symbol to be operated indoors
(dry environment).
This symbol reminds you to dis-
pose of the packaging in an envi-
ronmentally friendly manner.
Recyclable materials: cardboard
(except corrugated cardboard)
This manual suits for next models
1
Table of contents
Other TEAM CUISINE Kitchen Appliance manuals
