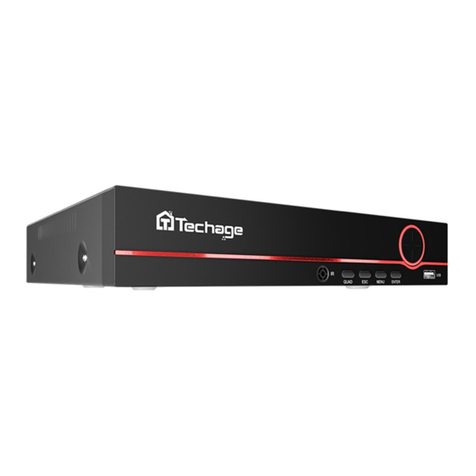
Techage Wireless Cameras NVR Kit Instruction manual

Security Expert for Your Home and Business
www.techage.com
HD LCD SCREEN
screen
POWER HDD
Quick
User Guide
Wireless Cameras NVR Kit

01. Connect Your System 002
02. View on Smartphone 006
03. View on PC Client Software 010
04. View on PC via IE from LAN and WAN 011
05. Add Camera by Matching Code 013
06. Record Video and Audio
07. Playback Video and Audio
014
016
08. Video Detection 016
09. Backup Videos to USB Storage 017
10. Email Alert 017
Table of Contents

1
Preface
Before Installation
About the NVR
Thank you for purchasing Techage security system. Techage is committed to providing
customers with high quality and reliable security products and solutions.
This quick user guide will help you learn fast and make it work easily. For detailed and latest
user manual, please find it on our website: www.techage.com
If you meet any troubles when following the manual, please visit our website:
Http//:techage.com/support.php You can find FAQ answers, videos and documents needed here.
This quick user guide is subject to change without previous notice due to hardware and
software upgrade.
All the wireless cameras in the systems are already paired into the NVR in factory. This wireless
system will require some cabling. It’s highly recommended that all products and components to
be tested before installation and cabling.
A
bou
t th
e
NV
R
be tested before installation and cabli
ng.
1
2
5
4
3
6
77
8
1. Screen On/Off Button: Turn on/Off the video screen
2. Power Port : For DC power adapter input ( DC 12V 2A or bigger)
3. USB Port : For USB mouse and video backup .
4. WAN Port : Connect your NVR to Internet.
5. HDMI Port : For viewing on HDTV.
6. Audio Out Port : For a speaker to play the audio.
7. Wireless Antennas: Double Antennas to get cameras wireless signal
8. HDD Cover

2
21
3
4IPC with RJ45 Connector
1. DC Power Port: For 12V 1A Power Adapter
2. RJ45 Port : For Ethernet cable when coding the camera into the NVR.
3. Speaker: For two way video talk or alert voice play.
4. Microphone : For picking up Audio. (For different cameras, the position may be different)
01/ Connect Your System
HD LCD SCREEN
screen
POWER HDD
Display Device for Remote View
Router
NVR
HDMI
Power supply
Power supply
Power supply
Mouse
TV Monitor
IP Camera
For the Two Way Audio & Video Cameras

3
1.1 Install antennas for cameras.
1.2 Power on the cameras with power adapters (12V 1A).
1.3 Connect the NVR to Router with an Ethernet cable.
1.4 Plug the mouse (included) into the USB port at the right side of the NVR.
1.5 Power the NVR with its power adapter (12V 2A or with larger output).
1.6 Switch on the NVR Screen button
1.Connect Your System
Right Click the mouse> System Setup, then you will be asked for password, as factory default it
is none. Just leave it blank and Click"OK".
Change the Password
All the wireless cameras in the kit are already matched to the NVR. After the NVR is turned on,
there will be live images of cameras shown on the monitor in seconds.
2. Camera Mounting Spots
3. Extend Wireless WiFi Range
Go to System Admin> User>Set Password. And write down the new password on a note so that
you do not forget it.
2.1 Mount the cameras where within the WiFi range, plug the power adapters into the camera
2.2 The cameras start to stream videos to NVR within 1 minute.
2.3 If it does not display video, the reasons may be: there are too many obstacles in between or
too far from the NVR. Please try to move the cameras closer to the NVR or try to extend the
wireless WiFi range.
3.1 Right Installation and Directions for the Antennas
According to the wireless signal transmission character of antenna, the antennas of cameras
should overlap or parallel to NVR WiFi wireless signal, as pictures shown below:
wi
re
l
ess s
ig
na
l
, as p
i
ctures s
h
own
b
e
l
o
w:
should
overlap
or
parallel
to
NVR
WiFi
Correct Wrong
HDLCD SCREEN
screen
POWER HDD
HDLCD SCREEN
screen
POWER HDD

4
Installation method of an extension cord antenna
3.2 Use an extension cord antenna to extend the wireless distance
In
sta
lla
tio
nm
eth
od
of
an
ext
ens
ion
co
rd
ant
enn
a
3.2 Use an extension cord antenna to extend the wireless distanc
e
NVR
Antenna Extension Cord
Wall
Window
IP Camera
HD LCD SCREEN
screen
POWER HDD
3.3 Wireless WiFi Repeater to extend the wireless transmission distance
Step 1: Right click on NVR screen, Video Manage →Repeater

5
As picture shows below, click icon “ + ” after CH2 and choose CH3, that means CH2 can relay
CH3 and make CH3 a longer working distance.
Step 2: Add repeater
Step 3: Click “Apply” and then click “refresh” to check if the setting is successful.
4. Wired Connection
4.1 Use standard Network cables to connect the cameras to the Router
4.2 After connecting the camera to the router, please right click the mouse > Video
Manage > Refresh > Auto Add. The camera will be added to NVR, and the screen will display
the camera video.
If camera mounting spot is still out of WiFi range even after step 3.above, you need to connect
cameras to NVR with wired cables to get video.

6
02 View on Smartphone
2.1 Add Device to APP
Step 1: Connect the NVR to the Internet
Connect the NVR’s WAN port to LAN port of your router with a network cable. After the NVR is
connected to the Internet, click this icon on the right bottom and then you will see the picture
below. It will show the cloud ID of the NVR and the network status of it.
/
Tips:
If the status does not show “ONLINE”, please go to System Setup > Network Setup> enable the
DHCP or manually allocate IP for the NVR. If the setting still doesn't work, please ask your network
administrator for help. (Ex.: Port 80 needs to be opened on the router.)
Step 2: Download the App
Search "IP PRO" in App store or Google Play. Or Scan the QR Code to download the App for free.

7
Note: For IOS system, it requires IOS 8.0 or above. For android, it requires android 4.4 or above.
Step 3: Run the "IP PRO" App
A: Install the free "IP PRO" App.
B: Tap Register and input your User name, Password, Email to create a new account.
C: Login the App, Tap “+” icon on the right upper corner of the screen > Add>Choose the
“DVR/NVR”

8
D: Make your device profile
2. Device Name: Name the system you want to call it.
3. User Name: Enter the NVR’s User Name (Default: admin)
4. Password: Enter the NVR’s password (Default: No password required, just leave it blank)
5. Tap Complete.
Tips:
If you’ve set a password on your NVR system, please update your password on APP to view.
E: Tap the channel Number, then you shall see the live video of different channels.
1. Cloud ID: The Cloud ID can be found after you click icon on the right bottom corner of
the screen.

9
2.3 Video Talk on Mobiles
If your camera has both microphone and speaker, it supports the two way video talk. You can
click the and long press the to talk to people nearby the cameras or let them get out.
2019/08/31 14:36:26 SAT
CAM 1
2019/08/31 14:36:26 SAT
CAM 1
2.2 Playback on Mobiles
In the "IP PRO" APP, while viewing live video of the system, click Playback, you will enter the
remote playback menu. It will automatically play back video of camera 1, you can switch cameras
by choosing different channels.
Tips:
Videos in playback are HD and real time which requires very good network conditions. We suggest
to playback in LAN. Remote playback in WAN mainly depends on network conditions.

10
03 View on PC Client Software
Step 1:
Download EseeCloud.exe from CD or download it from http://techage.com/download.php
After opening the EseeCloud software, click on Login directly.
/
Step2.1: Choose add device by Cloud ID. Tap “+Add” on the right upper corner.
Cloud ID: Cloud ID
Username: admin
Password: Enter the NVR’s Password (default: No password required, just leave it blank)
Number of Channels: same as your NVR channels number

11
04 View on PC via IE from LAN and WAN
/
1. When your PC is in the same LAN as the NVR (normally it means they are connected to the
same router)
Step1. Find the IP address and Web port of your NVR (IP address can be found in System Setup
> Network Setup).
Step2. Enter the NVR’s IP address in your IE browser in format http://IP Address, for example:
http://192.168.1.188 (If the default web port 80 has been changed e.g. to 100, you will need to add
the new port number when you input the IP address in the browser, for example:
http://192.168.1.188:100).

12
User Name: Enter the NVR’s User Name (default: admin)
Password: Enter the NVR’s Password set (default: No password required, just leave blank.)
http://192.168.1.188
Step 3: If this is the first time you use the program, please download and run WebClient.exe.
control and follow the popup message.
①Click Tools > Internet Options > Security > Internet > Custom Level.
②Scroll down the mouse until you see ACTIVEX CONTROLS AND PLUG-INS.
2. When your PC is not in the same LAN as the NVR (For example, in the case of you remote view
your home camera in your office computer.)
Step1. Open your Internet Explorer (IE) browser and visit www.e-seenet.com
Step2. Input Cloud ID, Username and Password to login.
(If you have Internet Explorer version 9 or 11, change ALLOW ACTIVEX FILTERING to
DISABLE. Other versions of IE browser do not have this option.)
③Change the following ACTIVEX controls to PROMPT:
Download signed ACTIVEX controls
Download unsigned ACTIVEX controls
Initialize and script ACTIVEX controls not marked as safe for scripting

13
Step4: Please click OK, and exit the “Security Settings” menu when you complete the settings.
05 Add Camera by Matching Code
1. When you need to add by matching code
1.1 Add a new additional camera to your NVR system.
1.2 When a camera lost wireless connection with the NVR. You need to add it to the NVR
wirelessly again.
Tips:
IP cameras in the packed kits have already been paired to NVR. So cameras will auto connect to
NVR after they are plugged in power. You do not need to add it again.
2. How to add camera by matching code.
2.1 Power on the camera which has no video shown on the NVR. And plug off the
network cable from the NVR that connected to the router. Connect the NVR with the camera as
shown below.
/
WAN

14
2.2 Right-click mouse in the blank of main interface, select “Wireless Add”, it will search the new
wireless camera that connected to the NVR and add it into the NVR. You will see the video of the
new camera comes out. It means you add an additional camera to the NVR successfully. And now
plug off the network cable from the camera and connect it to the router again.
Right click the mouse > System setup > General setup > HDD Setup > Select the Hard Drive
(format) > Format > Yes > OK.
1. HDD Install
The system may not include HDD if you did not select the kit with HDD. The system can
work with 3.5” or 2.5” SATA Hard Drive.
Unplug your NVR from power, unscrew and remove the top cover.
②Connect the SATA power and data cables from the NVR to the corresponding ports on your HDD
③Holding the hard drive and the DVR , gently turn it over and line up the holes on the hard drive
with the holes on the NVR. Use a phillips screwdriver, screw the provided screws into the holes
and assemble the cover.
1
Tips:
New HDD has to be formatted before recording.
06 Record Video and Audio
/

15
If you want to do different record settings for different channels. Choose the Channel NO. and
then change the record setting according to your preference and apply the changes.
2. Record video
Right click the mouse > System Setup > Record Setup > Choose the channel number > then
you can choose the video record types: time, motion or alarm and then choose the hours of days
for it to record > Copy to > All > Ok.
To get better wireless signal, it is better to place the NVR in open area and high position.

16
07/ Playback Video and Audio
Right click the mouse > Video Playback> Choose the date > Search > double click which video
clip you want to playback. It will playback both audio and video. Please ensure your NVR is
connected to a speaker for audio playing. (For most HDMI monitors, they have speakers inside.
If the monitor does not have a speaker inside, please plug in one speaker into the audio out port.)
08 Video Detection
/
Step1: Right click the mouse > System setup > Channel Setup > Video Detection (on the left)
You can set Motion Detection Sensitivity Level, Alarm Duration Time and how to notify you when
motion detected, like Buzzer, Email Notice or App Alarm.

17
1. Prepare a USB flash disk for backup.
2. Right click the mouse > Video backup > Choose the channel, Record
mode and Search time > Search > Select the video you want to backup >
Click Backup.
Tips:
After the video detection settings, please do the Record Plan for motion in the Record Setup.
Click and choose the second time line of the Day for motion detection record.
Motion
09 Backup Videos to USB Storage
/
Find the email setup. Right Click the mouse> System Setup>Network Setup> E-mail. Enable
and Click “More Parameter”. You can search online and find the SMTP setup details for the email
you want to use. Find Gmail setup for the system as below. Please ensure to activate the IMAP in
your Gmail setting.
10 Email Alert
/

NOTE
Table of contents
Other Techage DVR manuals
