manuals.online logo
Brands
  1. Home
  2. •
  3. Brands
  4. •
  5. Technics
  6. •
  7. Electronic Keyboard
  8. •
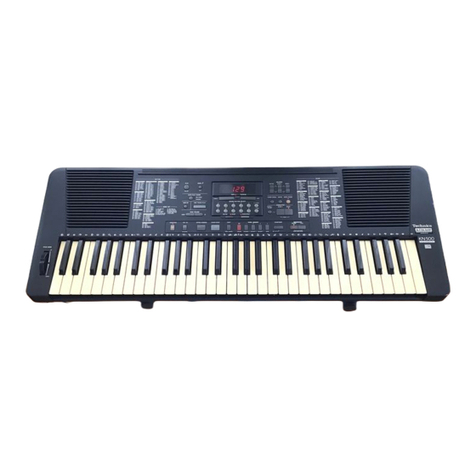
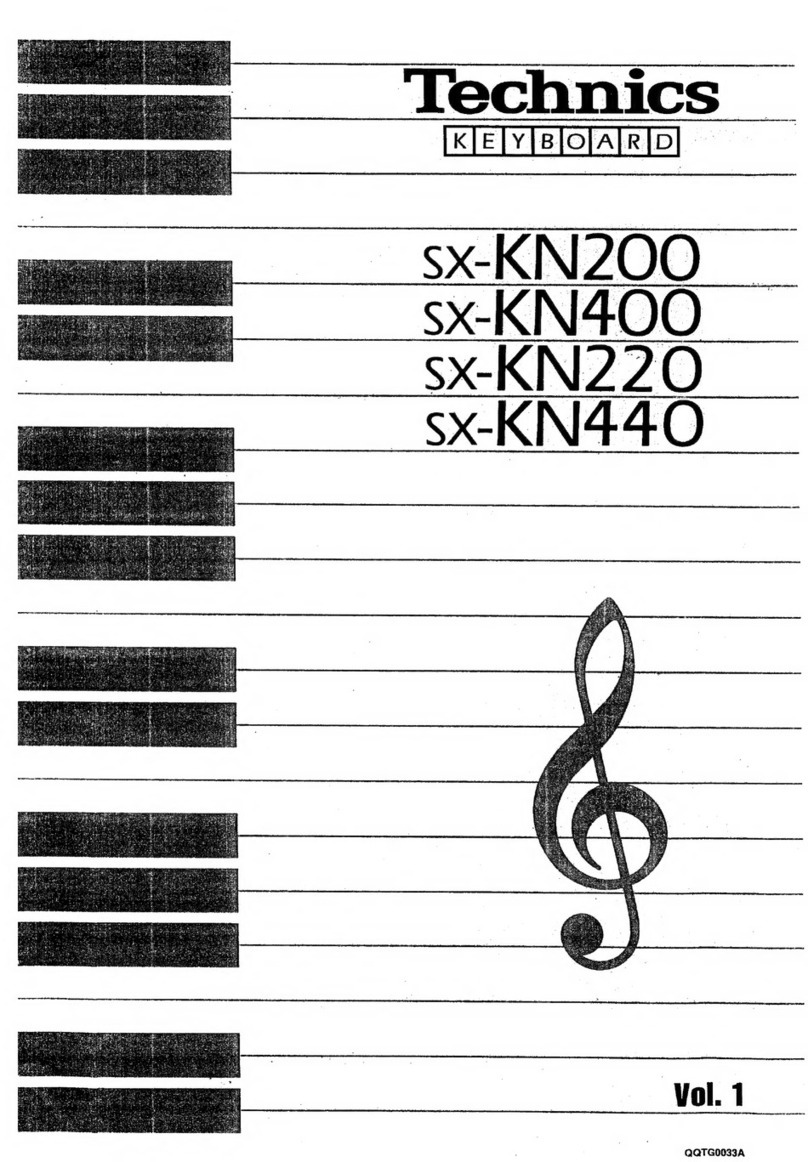
  9. Technics SX-KN200 User manual

Technics SX-KN200 User manual

-
--
- I
.'
---~
.'
~
'
-
-
,-
,-,
-,,
~
--
'i
r _ I
Technics
- -
---.-----=
---
~
I ·L I
~
___
-----.I
IKIElvlBlolAIRlol
"
sx-KN200
~
_____
~_rr_.
__
."-'-
,
~
;:...,,-
'
_
'
~
..
~--
sx-KN400
I .
, - - -
.
--~--.--~
,
---------
-
~
L .
--
Unl ,
VOL.!
PRACTICAL APPLICATIONS
This volume comprises a detailed explanation of
sound, effect and rhythm.
Read the part which are relevant to the functions
you wish to use.
APPLICATIONS PRATIQUES
Ce
tome comprend les explications detaillees sur
son, effet et rythme.
Lisez les articles concernant les fonctions que vous
souhaitez utiliser.
APLICACIONES PRACTICAS
Este tomo consta de una explicacion detallada del
sonido, efecto y ritmo.
Lea las partes relacionadas a las funciones que
desea utilizar.
tEV~L.
2
f.t~tf'@.,
~~*,
rn~1JnJ;H¥=*Hl8S~jtaAo
M~~.~M,
~~.~.fflm.~.o
Contents
Part I
Sounds
and
effects
. .
.....
.
.. ..
..
.
......
.
...
3
Selecting sounds: KN200
........................
3
Selecting sounds: KN400
........................
3
Balance
............
..
. .
.................
.
.....
5
Effect
.....
.
',
'
..........
..
...
..
~
........
..
. .
...
6
Pitch Bend (KN400)
.............................
6
Modulation (KN400)
..
. . .
.....
.
..
.
...............
7
Transpose
.............
. .
....
. . . .
...
. . .
........
7
Panel Memory (KN400)
...
.
.......
.
...
.
...
.
...
..
.8
Part II Playing the
rhythm
.........................
9
Rhythm Select
..........
.-
. . .
..
.. ..
. .
......
. .
..
.9
Keyboard Percussion
.........
.
..
...
.
...
.....
. 12
Manual Percussion (KN400) . . . . . . . . . . . . . . . . . .
..
13
Auto Play Chord . . . . .. . . . . . . . . . . . . . . . . . . . . . .
..
14
Techni-chord
..............
. . .
.......
. .
..
....
18
One Touch Play
.......
.
......................
19
Music Style Arranger . . . . . . . . . . . . . . . . . . . . . . . .
..
19
Part
I
Selecting
sounds:
KN200
The keyboard sounds are selected from the
48
sounds shown
in
the SOUND SELECT matrix.
Select a sound by pressing one vertical row but-
ton and one horizontal row button.
Sounds
and
effects
_
If
mil;
ffl'bfi
ifil
~
~
.........
~~
BOO
•
...::!--:I
o
00006000:8"
000001
~66C5
-0 6 6"
6"
-=-:J
1:5
I
OOIW«l
'I
= I
"'T.;,
I= I
.....
I
~
I
.zi'
I
.::'
I
YXlUN
IIlRASSI
'='
I
'gl!f
1
1lllOE
1
.:t'!.
1
""""
I
""""
00
PIAH02
E
fII.I.M)
l £ : BNUl
VIOlE
~I
ri:f.'l
mwc;s
TlUftl
=-
~
QNII£f
RUlE
WW,l9fQM.S
SOllO
FlOCK
S
n:E
l
POP
SYffTH
SYNT
H
SYh'TH
ALTO
HAA-
00
EGAN()
E
PWIl2
GlITAR
GUI
T
AR
CLAVI
KAL
Illl
BA
DR
UM
OAGAN
STR
ING
B
RASS
1
BRASS
2
SAX
MCN:A
WHSllE
SftCW.3
SPEWU
0
00
00
000
00 00
0000
..
.
0'00
d d d d d d d d d d d d d d
cr~
• Press the VARIATION button
on
to change the
nuance of the selected sound. (Refer to the
Reference Guide.)
Selecting
sounds:
KN400
The keyboard sounds are comprised of three
parts-POL
Y 1, POLY 2 and
BASS-for
each of
which respective sounds are selected with the
SOUND SELECT matrix. These parts are central-
ly controlled by the CONDUCTOR, which allows
you to assign the same sound to the entire key-
board or different sounds to the left and right sec-
tions of a split keyboard.
Select
a
sound
lor
each
part.
1. Select a part.
Press the CONDUCTOR button for the part you
wish to select a sound for first. Select POLY
1,
POLY 2 or BASS.
• To select the POLY 2 part, press the R (lower)
button.
--CONDUCTOR
'
--
KEYBOARD
PERCUSSION
BASS POLY 2 POLY 1
o 0
gegg
o o 0
• If the KEYBOARD PERCUSSION button is
pressed on, the keyboard keys produce the
sounds of percussion instruments. -(Refer to
page 12.)
•
Up
to
11
notes can be produced simultaneous-
ly.
The number of notes which can be produced
simultaneously may decrease depending
on
the selected sound.
2.
Select a sound.
POLY 1, POL
Y2:
The sound is selected by
pressing one of the 3 vertical row buttons and
one of the
16
horizontal row buttons
in
the
SOUND SELECT matrix.
IOUIIIOSELECT
O
~
RPSI
-
_
!WI
XYlO-
PIPE
PIPE
FRENGHACCOA-
PAH
0PIANDl
CHORD
GUlTAII
G
UITAR
Q.OCKBI
PHONE
OJIGANI
ORGAN
l VIO
LIN
(IRASS
HORN
DION
OBOE
fLUT
E
SPEaAll
SPEaAL4
O
OPIAN02E'IA/()IGt~iR
G
~R
BANJO
YllElUfO~~1~2STRINGSTRIJIftT
~-
~
aJIlO(T Fl
UTE
Sl'EQAL2SPEClAL5
OO
EGANt)
PlAtII
Z~.&~
CLAV1
1<.1LM!A
~
~NlJ
~I:=
1
="2
~
J,~WHlSfU
5PEO
H.3 SPEaAL
6
8A8II
.
O~/IOOIf'I:
I
~
I
~
I
~
I
~~
I
~
I
~D
l
ceu.o
l
TlJ8A
1
~
nll
~
H
I~~
I
S~T
HI
~TH
0 0 0 0 0 0
0000000000
_
Go d d d d d d d d d d d d d
C5
d
d
-
~
I
BASS: The sourid indicated
in
the BASS row
is selected by pressing one ofthe
16
horizontal
buttonS
in
the SOUND SELECT matrix.
I
• Preks the VARIATION button
on
to change the
nuance of the selected POLY sound. (Refer to
the Reference Guide.)
Papt
I
3.
Assign the part to the keyboard.
Press the CONDUCTOR buttons to turn on the
keyboard parts you wish to play. There are 8
possible ways to select parts as shown in the
chart.
Sounds
and
enects
(R) denotes the right section of a split keyboard. (L) denotes the left section of a split keyboard.
CONDUCTOR settings Parts which can be played on the Number of notes that can be
-COHPUCTOA-
keyboard produced simultaneously
KEY,""
PERCUSSOI
BASS POLY2 POLY1
0 0
IllII!!1
!llnlrHI
'It
I!
lin
I
I!
I
I!!
I
II
(When the AUTO
PLAY
gB'~Rg
CHORD is off)
0 0 0
POLY 1 POLY 1:
11
notes
0 0
POLY
1
gB'~R8
I I
o 0
-0-
/1'
POLY 2 R POLY 2:
11
notes
0 0 . POLY 2
8B'6~8
I I
/1'
POLY 1 + POLY 2 R POLY 1: 7 notes
0 0
POLY
1 + POLY 2 POLY 2: 4 notes
8B'6·9
I I
"I'
/1'
POLY
1 + POLY 2 L
POL
Y1:
7 notes
8B'~8
(L)
POLY
2 (R) POLY 1
POLY
2: 4 notes
I I I
Split. point
o 0
-0-
"I'
BASS
BASS: 1 note
88'8.8
BASS
I I
0 o . 0
POLY
1 +
BASS
(R) POLY 1:
11
notes
88'8.8
(L)
BASS
(R) POLY 1 (L)
BASS:
1 note
I I I
Split point
o 0
-0-
"I'
POLY 2 R +
BASS
(R) POLY 2:
11
notes
88'°.8
(L)
BASS
(R) POLY 2 (L) BASS: 1 note
I I I
~
Split point
o
-0-
0
/1'
POLY 1 + POLY 2 R +
BASS
(R) POLY 1: 7 notes
8
8
'a9
(L)
BASS
(R) POLY 1 + POLY 2 POLY·2: 4 notes
I I I (L)
BASS:
1 note
Split point
.....
,
/1'
• Press 2 or more buttons simultaneously when multiple parts are used.
• The number of notes which can be produced simultaneously may decrease depending on the selected
sound.
Part
I
Poly
2
Rand
L
For POLY 2 there are two types to select from,
right (R) and left (L). R is selected to produce
POLY 2 sounds alone
or
both POLY 1 and POLY
2 sounds simultaneously over the entire undi-
vided keyboard or on the right section of a divided
keyboard. L is used to assign POLY 2 sounds to
the left section of a divided keyboard.
Changing
the
split
point
.
The split point is shown by one of the indicators
at G2, C3 and G3. With each press of the KEY
SPLIT button, the indication moves to the next
split point in the following order: G2 --. C3 --. G3.
KEY SPLIT
o
Balance
The volumes for the DRUMS, BASS & ACCOMP
and POLY parts are adjusted with the respective
BALANCE
buttons.
• The volume will increase when a + button is
pressed and decrease
whena
-button is pres-
sed.
• Keep the button pressed to change the volume
continuously.
• There are 10 volume levels. The volume level
of each part is shown on the display
(0-9).
• A few seconds after you use the
BALANCE
buttons, the display returns to the tempo dis-
play.
• No sound is produced for a part if its volume
is set to
O.
• KN200: With the POLY button you can adjust
the volume of the sound selected
in
the
SOUND SELECT section.
Sounds
and
Ellects
• When the AUTO PLAY CHORD is used, the
keyboard will split automatically.
• Depending on the selected sound, the octave
may shift when the keyboard is split.
KN200
KN400
KN200
KN400
•
-BALANCE-
BASS
&
DRUMS
ACCOMP
POI.Y
+0
00+
-0
00-
BASS ACCOMP1 ACCOMP2&3
L.....-
S
UB------I
--BALANCE--
BASS
&
DRUMS N:,CQ,/f' POLY 2 POLY 1
+0000+
-0000-
Part
I
Ellect
Your keyboard is provided with DIGITAL CELE-
STE and SUSTAIN effects. Try using these ef-
fects to see how they add character to the
different sounds.
-EFFECT-
DIGITAL
CELESTE
SUSTAIN
o 0
00
• DIGITAL CELESTE
DIGITAL CELESTE gives the sound a thickness
and diffusion as when a large number of musical
instruments is being played.
• When this button is
on,
the number of notes
which can
be
produced simultaneously is re-
duced.
• The DIGITAL CELESTE effect does not work
for some sounds.
• KN400: The DIGITAL CELESTE effect does
not function for the BASS part.
• SUSTAIN
SUSTAIN is the gradual fading out of musical
tones after the key is released.
Pitch
Bend
(KN400)
The pitch of the instrument can
be
continuously
changed with the PITCH BEND wheel at the left
end of the keyboard. Using this control, you can
produce the effect of bending the strings
on
a
guitar.
While pressing a key
on
the keyboard, move the
wheel up and down to control the pitch.
• When you release your hand from the wheel,
it returns automatically to the center position
and the pitch bend effect is turned off.
• The pitch can
be
raised or lowered as much
as one whole note.
• The pitch bend effect does not function for the
AUTO PLAY CHORD accompaniment pattern.
How
to
set
ellects
• KN200
Sounds
and
Elleets
-a
(KN200)
Press to turn
on
the respective buttons for the
desired effects.
• KN400
1. Turn
on
the .CONDUCTOR button for the part
for which you wish to set the effect. (Effects
can
be
set for only one part at a time.)
• To select the POLY 2 part, press the R button.
2.
Press
to
turn
on
the respective buttons for the
desired effects.
PITCH BEND
AUF
..-DOWN
.....
MODULATION
..
ON
Part
I
Modulation
(KN400)
The MODULATION switch is located
in
the center
of the PITCH BEND wheel. While the switch
is
pressed to the left, the vibrato effect is applied to
the sounds. Vibrato
is
the effect of a slight waver
in
the pitch which can add a rich quality to the
sounds.
• Release the switch to return to the normal
sound.
• The vibrato depth can be set for each part
independently. (Refer to Vol.
3,
page 25.)
Transpose
The TRANSPOSE control is used to shift the
tuning (key) of the entire instrument
in
semitone
steps across
an
entire octave.
Suppose you learn to
playa
song-in
the key of
C,
for
example-and
decide you want to sing it,
only to find it's either too high or too low for your
voice. Your choice is to either learn the song all
over again,
in
a different key, or to use the
TRANSPOSE feature.
Sounds
and
Elleets
PITCH BEND
... MODULATION
..
ON
(KN200)
Each press of the DOWN button changes the key
of the instrument as follows: B ---t
B~
---t A ---t
A~
---t
G.
Each press of the
UP
button changes the
key as follows:
D~
---t 0 ---t
E~
---t E ---t F ---t
F#
.
• When a TRANSPOSE button is pressed, pres-
sing the C key will sound the note shown
on
the display.
• Pressing the two TRANSPOSE buttons at the
same time will return the keyboard to the nor-
mal
pitch.
• When transposed to a lower key, the sound of
the lowest keyboard range may shift to the next
higher octave.
Part
I
Panel
Memory
(KN400)
The PANEL MEMORY buttons
1-4
allow you to
store up to four different panel settings of the
keyboard. Then, simply
by
.pressing just one but-
ton, the settings for the sounds and effects of
each part are recalled instantly.
----:--PANEL
MEMORY
-
----
SET 2 . 3 4
00000
•
Settings
which
can be
st
ored are:
• Sounds, effects and volumes for each part
(POLY 1
,POLY
2,
ACCOMP 1,
2,
3 and BASS)
• CONDUCTOR settings
• Keyboard split position
• DIGITAL CELESTE status
• ACCOMP PART
1,
2,
3 status
• TECHNI-CHORD on/off status
• AUTO PLAY CHORD status
Sounds
and
Enects
7'7:."
•
.,.
~?
Jt"""~K;
~-
g O O 0
000
0 _
~~
_ 0 0 0
00
000
0 _
.- -
__
..:a_~
;
.;~
:eeoo
~:
:
.~-!!!!!!
...,..
"
'
~.-
'"
~"f"'r1I
''T'
- .
.
~
~
00666o
"'"~g
ii;:;
0'6
666'
66
660
OCD~~~C5~t1~-;-60
Oc)
66
~-6
•
Storing
in the PANEL MEMORY
1.
Set
up
the desired panel settings.
2.
With the SET button held down, press one of
the number buttons of the PANEL MEMORY.
• It is possible to expand the range of storable
panel settings. (Refer to Vol.
3,
page 23.)
Part
II
Playing
the
rhythm
The rhythm section enhances the capabilities of your keyboard with features such as automatic
performance of the preset rhythm patterns and accompaniment patterns.
Rhythm
Select
The rhythm section provides automatic perfor-
mance of rhythm patterns using realistic percus-
sive instrument sounds from a
PCM
digital sound
generator.
Select
a
rhythm
Press one of the vertical row buttons and one of
the horizontal row buttons
in
the RHYTHM SE-
LECT matrix for the desired rhythm.
• KN400: The COMP
1-4
buttons are for storing
your own original rhythm patterns. (Refer to
Vol. 3, page 15.) .
• When the VARIATION button
is
on, the rhythm
pattern changes.
KN200
RHYTHM SELECT
DIXIE
':'AALZ
TZZ
0 0
MARCH
1
MARCH
2
COUNTRY
WALTZ
SWING
1
SWING
2
'"
ROCK
'N'
ROCK
BOSS
A- 0 0
8
BEAT
1 8
BEAT2
ROLL
SHUFFLE
BALLAD
LATIN
1
LATIN
2
NOV
A
16BEATl16BEAT2
~~~~
FUNK
SR~~KG
DISCO
RLtJ~Nl
R~J
~N2
00
o 0 0 0 0 0 0 0
VARIATION
00000000
00
Start
the
rhythm
There are two ways to start the rhythm.
• Press the START/STOP button to start the
rhythm instantly.
STAR
T/S
TOP
o
( )
(KN200)
KN400
RHYTHM SELECT
MARCH
1
MARCH
2
COUNTRY
WALTZ
TANGO
LATIN
1
LATIN
2
COMP
1 0 0
JAZZ JAZZ JAZZ
BOSSA-
0
BIG
BAND
COMBO
1
COMBO
2
DIXIE
WALTZ
SAMBA
NOVA
COMP
20
ROCK'N'
ROCK
LATIN LATIN
0
8
BEAT
1 8
BEAT
2
ROLL
SHUFFLE
BALLAD
ROCK
1
ROCK
2
COMP
30
JAZZ
SWING
0
16BEATl16BEAT2
ROCK
FUNK
ROCK
DISCO
1
D1SC02
CaMP
40
o 0 0 0 0 0 0 0
VARIATION
0000000
000
Part
II
• When the SYNCHRO &
BREAK
button is on,
the rhythm is started by pressing any key to
the left
of
the indicated keyboard split point.
1.
Press the SYNCHRO &
BREAK
button to turn
it on. SYNCHRO &
BREAK
o
o
2.
Press a key to the left of the keyboard split
point. The rhythm starts to play.
KN400
,r-Split
point
",
e
-0-
0
• When the rhythm is playing, the beat is shown
by dots on the display.
KN200
Lights at the beginning
of each measure
Li~hts
for each beat
KN400
Respective indicator lights
on the corresponding beat
• If the SYNCHRO &
BREAK
button is pressed
on when the rhythm is stopped, the first-beat
indicator flashes with each beat, indicating the
synchro-start standby status.
Playing
the
rhythm
• KN400: Set the keyboard split point with the
KEY SPLIT button. (Even when the keyboard
is not divided into left and right sections, the
indicator at the split position will light when the
KEY SPLIT button is pressed.)
KEY SPLIT
o
• TEMPO adjusts how fast
or
slow the rhythm is
played. o
FAST
]TEMPO
O
(MIDI
PART)
SLOW
• Keep a button pressed to change the tempo
continuously. When both buttons are pressed
at the same time, the tempo is set at J=120.
• The tempo is shown on the display.
• The DRUMS buttons in the
BALANCE
section
allow you to adjust the loudness of the drums
to be
in
perfect balance with the other sounds.
KN200
-BALANCE-
BASS
&
DRUMS
ACCOMP
POLY
+000+
-000-
BASS ACCOMPl A.CCOMP2&3
L----SUB
-----I
KN400
--BALANCE--
BASS
&
DRUMS
ACCOMP
POLY2
POLY 1
+0000+
-0000-
B":8S
ACCOMP~u:CC0MP2
ACC~MP3
Part
II
Intro
•
ending
This feature lets you begin the rhythm with an
introduction or stop the rhythm with an ending
pattern.
•
This
is
how
to
start
a
song
with
INTRO.
1.
Select a rhythm on the RHYTHM SELECT
niatrix.
2
..
Press the INTRO & ENDING button to turn it
on. INTRO &
ENDING
o
( )
3.
Press the START/STOP button to start the
rhythm.
• When the intra is finished, the INTRO & EN-
DING indicator goes out.
• A rhythm with
an
intra can also be started with
the synchra-start function.
• An intra pattern can also be inserted
in
the
AUTO
PLAY
CHORD. (Refer to page 14.)
Rhythm start
,
IINTRO
Fill
In
Rhythm
------------~---
pattern
Insert a fill-in pattern during the rhythm perfor-
mance.
1.
Select a rhythm on the RHYTHM SELECT
matrix.
2.
Start the rhythm.
3.
Press the
FILL
IN button.
• When the
FILL
IN
button is pressed, a fill-in
pattern is heard immediately.
• A fill-in pattern can also be inserted
in
the
AUTO
PLAY
CHORD. (Refer to page 14.)
FILL
IN
(SEQUENCER
RESET)
( )
• ENDING
Playing
the
rhythm
....
- - I
s=-
1illI;
w=-w=ol'bfi
6666
;;
r!~.:::g
:ooa~~~-===
Li66616
'
·:6~
.
:i~66~6666666o_~6
~
Q
--
0 6 6 6
__
-S·
(KN200)
When the rhythm is
on
and the INTRO & ENDING
button is pressed (at the end of a song for ex-
ample), an ending pattern is produced, and then
the rhythm stops.
•
An
ending pattern can also be inserted
in
the
AUTO
PLAY
CHORD. (Refer to page 14.)
• If you accidentally press the INTRO & ENDING
button in the middle of the tune, you can press
the
FILL
IN button to continue the.rhythm per-
formance.
Rhythm
________
·_
.1
ENDING
1
pattern
Rhythm start
,Rhythm
pattern
FlLL
IN
(KN200)
Rhythm
_____
__
pattern
Part
II
Keyboard
Percussion
Press the KEYBOARD PERCUSSION button
on
to turn your keyboard into a whole band of per-
cussive instruments and other special sounds.
KN200
SOUND SELECT
o0
PIANO
1
~~R6~1i
GUITAR
o0
PIANO
2 E
PW«J
1
G~R
00
EGRAND
EPIAN01
~&f~R
000
VoNOOdd
ONE
TOUCH
KEYBOARD
PLAY
PERG.4!j.iION
oC5
KN400
-_
-CONDUCTOR--
KEYBOARD
PERCUSSION
BASS
POLY 2 POLY 1
o 0
8S'8<Q
-0-
0 0
/1'
Percussive instrument sounds are produced
by
the keyboard keys as shown here. (For further
explanation, refer to the Reference Guide.)
.m,
...
co
..
'
e·
g,
ey
gy
a.
o·
lit'
~
Q
<;>
...
,. !!I,'o-
,.
" "
,-
;--
r-,
r-
-
-,
;--
r-r-
r-
r-
• The KEYBOARD PERCUSSION volume is ad-
justed with the DRUMS BALANCE adjustment.
(Refer to page 5.)
•
Up
to
four
instruments can sound at the same
time.
• When the KEYBOARD PERCUSSION button
is
on,
the POLY, BASS and ACCOMP sounds
are not available.
• If the KEYBOARD PERCUSSION is used while
the automatic rhythm is playing, the rhythm
pattern changes to a hi-hat and bass drum
sound. To return to the normal rhythm sound,
press the KEYBOARD PERCUSSION button
to turn it off.
• KN400: The Touch Response feature also
functions for the KEYBOARD PERCUSSION
sounds.
Playing
the
rhythm
KN200
IS=-
m;
Bf"s=Jl"fi
~
~
~k~~~
ooa~tW~~
~662;
-
o~
'6
6.a.
0-
KN400
.''
••
Q.
II"
-''''P.
~'
...
..
'"
_ _
KClUlIOC"
__
l'
J
••
J
a::>
J
...
J
r--
;--
--
r- r-
--
;--
-r-
r- r-
r-
)
I
Part
II
Manual
Percussion
(KN400)
The sounds of percussive instruments are pro-
duced when the MANUAL PERCUSSION buttons
are pressed.
MANUAL PERCUSSION
Bass
drum9
~
li?Hand
clap
Clashing cymbals
A percussive sound from the KEYBOARD PER-
CUSSION can
be
.stored
in
each of the MANUAL
PERCUSSION buttons.
1.
Press the KEYBOARD PERCUSSION button
to turn it
on
. .
2.
While keeping one of the MANUAL PERCUS-
SION buttons pressed, select the desired per-
cussive sound
by
pressing the appropriate key
on
the keyboard for about 2 seconds.
• When you hear the percussive sound of the
pressed key, it means the sound has been
stored
in
the MANUAL PERCUSSION button.
• Two more percussive sounds can be stored
in
the remaining two MANUAL PERCUSSION
buttons.
• The MANUAL PERCUSSION button sounds
can be played whether the KEYBOARD PER-
CUSSION button is
on
or off.
• The MANUAL PERCUSSION volume is ad-
justed with the DRUMS BALANCE adjustment.
(Refer to page 5.)
Playing
the
rhythm
Part
II
Auto
Play
Chord
Simply by playing a chord
on
the keyboard, the
AUTO PLAY CHORD function automatically
plays
an
accompaniment pattern which matches
the selected rhythm.
When
an
AUTO PLAY CHORD mode is selected,
the keyboard automatically divides into left and
right sections. The left keyboard is used to specify
the chords, the right keyboard to-play the melody.
Playing
chords
Choose from two ways of playing
chords-the
one-finger mode and the fingered
mode-with
the
ONE-FINGER and FINGERED buttons.
• ONE-FINGER
mode
In
the one-finger mode, a chord
is
played by
specifying its root note.
1.
Press the ONE-FINGER button of the AUTO
PLAY CHORD to turn it on.
2.
KN400: Press the ACCOMP PART buttons to
turn them on.
3.
Select a rhythm with the buttons in the
RHYTHM SELECT matrix.
Keyboard
Playing
the
rhythm
(KN200)
Split point
(left part)
Specify chord •
AUTO PLAY
CHORD
ONE-FINGER
o
o
FINGERED
o
o
MEMORY
o
o
(right part)
Play melody
4.
Press the START/STOP button to start the
rhythm playing.
5. Press a key
on
the left keyboard to specify the
root note. The major chord (ACCOMP part)
and bass note corresponding to this root note
are automatically played
in
an
accompaniment
pattern.
,Minor, seventh and minor seventh chords are also easily produced.
minor chord seventh chord minor seventh chord
Play the root note plus a
black key to the left of it.
Example:
Cm
Play the root note plus a
wh
ite key to the left of it.
Example: C?
Play the root note plus a
black key and a white key
to the left of it.
Example: Cm?
• KN400:
In
the ONE-FINGER mode, the POLY 2 L button and the BASS button of the CONDUC-
TOR turn off automatically and cannot be selected.
Part
II
• FINGERED
mode
In
the fingered mode, the chord is specified by
playing it on the left part of the keyboard.
1. Press the FINGERED button of the AUTO
PLAY CHORD to turn it on.
2.
KN400: Press
an
ACCOMP PART button to
turn it on.
3.
Select a rhythm with the buttons in the
RHYTHM SELECT matrix.
• You may turn the VARIATION button on, if
desired. The accompaniment pattern may
change, depending on the selected rhythm
variation.
4.
Press the START/STOP button to start the
rhythm playing.
Notes:
• If the FINGERED or ONE-FINGER button of
the AUTO
PLAY
CHORD is on, the number of
sounds which are produced simultaneously by
the right keyboard decreases.
KN200:
POLy
........ 4 notes
KN400: POLY 1....
.4
notes or
POLY 2....
.4
notes
Memory
button
When
the
ONE-FINGER
or
FINGERED
button
Is
on
If the MEMORY button is on, even if you release
the keyboard keys, the chord is memorized and
is played repeatedly until you play another chord.
KN400:
When
the
ONE-FINGER and
FINGERED
buttons
are
off
If the POLY 2 L button
in
the CONDUCTOR sec-
tion is on and the rhythm
is
started when the
MEMORY button is on, a walking bass matching
the specified chord is produced.
Playing
the
rhythm
5. When you play a chord on the left keyboard,
the chord (ACCOMP part) and its correspond-
ing bass nete are automatically played in
an
accompaniment pattern.
• KN400: When the POLY 2 L is selected, the
POLY 2 is also heard.
• The keyboard can distinguish the following
played chords for each key:
C,
C?, CM?, Caug,
Cm, Cm?, Cdim?, Cm7'5, CmM?, C?sus4. If a
chord other than these is played, the chord
in
this group which
is
mostclosely related is used.
• When a chord is specified with the rhythm
stopped, the specified ACCOMP and BASS
sounds are produced, but no rhythm pattern is
produced.
• KN400: When the ACCOMP PART 2 and/or
ACCOMP PART 3 button
is
on, POLY 1 and
POLY 2 cannot be selected at the same time.
(See "ACCOMP PART on/off"
on
page
1?)
• KN400: If BASS only was selected in the
CONDUCTOR section, when the keyboard
automatically splits the right keyboard
produces POLY 1 sounds.
AUTO PLAY
CHORD
ONE-FINGER
o
o
FINGERED
o
o
MEMORY
o
o
Part
II
Adjusting
the
volume
• Total
volume
Adjust the total accompaniment volume with the
BASS
& ACCOMP buttons in the
BALANCE
sec-
tion.
•
Setting
the
volume
of
each
part
The accompaniment pattern of the AUTO
PLAY
CHORD is composed of four parts: ACCOMP 1,
2,
3 and BASS.
1.
Press the SUB BALANCE/MIDI button one
time. Its indicator lights.
SUB
BALANCE
/
MIDI
o
o
2. Adjust the volume of each part with the cor-
responding
BALANCE
buttons. The volume for
each part can be set independently to one of
ten levels.
KN200
-BALANCE-
BASS
&
DRUMS
ACCDMP
POLY
+000+
-000-
BASS
ACC:OMP1
ACCOMP2&3
l..--S
UB
------I
KN400
--BALANCE--
BASS
&
DRUMS
ACCDMP
POLY2
POLY 1
+0000+
-0000-
BASS
ACCOt.4P
1
ACCOMP
2
ACCOMP
3
t SUB '
• KN200: The ACCOMP 2 and ACCOMP 3
volumes are set together.
• Keep the button pressed to change the volume
continuously.
• No sound is produced for a part if its volume
is set to
O.
3. Press the SUB BALANCE/MIDI button two
times to turn it off.
Playing
the
rhythm
••
i
.
ParI
II
ACCUMP
PART
onloll
(KN400)
-ACCOMP
PART-
1 2 3
000
000
Use the 1, 2 and 3 buttons
in
the ACCOMP
PART
section to turn each part on or off independently.
• The accompaniment pattern is not produced if
all the ACCOMP
PART
buttons are off.
• The ACCOMP
PART
sounds cannot be
selected.
• If the ACCOMP
PART
2 and 3 buttons are both
off, the numberof notes which can be produced
on the right keyboard increases.
POLY
1 POLY 2
7 -
-7
4 3
Break
function
With the break function, the rhythm starts when
the left keyboard is played and stops when the
fingers are removed from the keys. When the keys
are pressed again, the rhythm starts from the first
beat.
1.
Press the ONE-FINGER
or
FINGERED button
to turn it on.
AUTO PLAY
CHORD
ONE-FINGER
o
o
FINGERED
o
o
• At this time, the MEMORY button should be
off.
2. Press the SYNCHRO &
BREAK
button to turn
it on. SYNCHRO &
BREAK
o
o
Playing
the
rhythm
o
~
~--------------------~
,.....
11
-
..
..
-
..
- . - .
~
0 "
",
..
~
Rhythm start
.e
.....
e'
..
- ••
""
. -
..
...
.II!
..
~
Rhythm stop
Part
II
Techni-chord
The TECHNI-CHORD feature expands the sound
of your performance so that for each single note
played, a chord is formed when the AUTO
PLAY
CHORD or SEQUENCER function is used (refer
to page
14
and Vol. 3, page 3).
TECHNI-CHORD
o
o
Set up your keyboard to play the example below.
C F
,
e J F F F IF J F
1. Press the ONE-FINGER or FINGERED button
of the AUTO PLAY CHORD to turn it on.
AUTO PLAY
CHORD
ONE-FINGER
o
o
FINGERED
o
o
MEMORY
o
o
2.
Press the TECHNI-CHORD button to turn it on.
TECHNI-CHORD
o
o
3.
KN400: Turn on the POLY 1 button
in
the
CONDUCTOR.
4.
Select the ACCORDION sound
in
the SOUND
SELECT matrix.
I
Playing
the
rhythm
G C
F F J F Ir
II
5. On the left part of the keyboard, play the note
for the chord.
6. On the right part of the keyboard, play the
melody. The melody is automatically played in
block chords.
• If the chords for the ACCOMP part have been
stored
in
the SEQUENCER, the melody can
be played on the entire keyboard. (Refer to
Vol. 3, page 3.)
• TECHNI-CHORD functions only for the POLY
sounds.
• KN400: Either the
POLY
1 or POLY 2
in
the
CONDUCTOR can be used for the TECHNI-
CHORD.
• KN400: The TECHNI-CHORD functions if the
POLY 1 is selected for the right part and the
POLY 2 L is selected for the left part in the
CONDUCTOR even if the AUTO PLAY
CHORD is off.
Part
II
One
Touch
Play
With the ONE TOUCH
PLAY
feature, the sounds
and effects, etc. matching the selected rhythm
are easily set
in
seconds and you are ready to
play immediately.
1. Select the rhythm pattern with the buttons of
the RHYTHM SELECT matrix.
• KN400:
Do
not select a rhythm with the COMP
1-4
buttons, or else the ONE TOUCH PLAY
function will not work properly.
2. Press the ONE TOUCH PLAY button until the
panel settings change.
ONE TOUCH
PLAY
o
Music
Style
Arranger
The MUSIC STYLE ARRANGER is a new feature
from Technics which allows you to change
registrations very quickly justby pushing the
FILL
IN button. In a normal piece of music at least
three . registration changes are desirable. The
original registration will come back after the
FILL
IN button is pressed three times. This means that
you have three registration possibilities every
rhythm
in
your keyboard. The change of registra-
tion will. take place immediately after the fill-in
(one measure).
Additionally you
can
store registrations
in
the
PANEL
MEMORY buttons
(1-4).
Combining the
MUSIC STYLE ARRANGER + PANEL MEMORY
gives you seven instant registrations use while
playing.
Playing
the
rhythm
3.
The AUTO PLAY CHORD and SYNCHRO &
BREAK
functions are automatically turned on.
The automatic rhythm begins to play immedi-
ately when a key on the left keyboard is
pressed.
1. Select a rhythm from the RHYTHM SELECT
matrix.
2. Press the MUSIC STYLE ARRANGER button
to turn it on.
MUSIC STYLE
ARRANGER
o
o
• The indicator lights.
• The AUTO
PLAY
CHORD and SYNCHRO &
BREAK
functions are automatically turned on.
3.
Press a key on the left keyboard to start the
rhythm.
4.
Each time the
FILL
IN button is pressed, the
sounds and effects change.
V'
_.
--
I -
.,
-.
I •
f
I
I ,
.1
Printed
In
Japan
UDi""lth
l
~
j;:
JIlI"
~
l'k-
in
rl
m
~tr
Ull
en
1M
lmnrime a!l.Janon

Other manuals for SX-KN200

11

This manual suits for next models

1

Other Technics Electronic Keyboard manuals

Technics SX-KN200 User manual

Technics

Technics SX-KN200 User manual

Technics SX-KN720 User manual

Technics

Technics SX-KN720 User manual

Technics KN3000 - User manual

Technics

Technics KN3000 - User manual

Technics SX-KN5000 User manual

Technics

Technics SX-KN5000 User manual

Technics SX-KN7000P User manual

Technics

Technics SX-KN7000P User manual

Technics SX-PR900B Operating User manual

Technics

Technics SX-PR900B Operating User manual

Technics SX-KN200 User manual

Technics

Technics SX-KN200 User manual

Technics SX-K300 User manual

Technics

Technics SX-K300 User manual

Technics SK-KN500 User manual

Technics

Technics SK-KN500 User manual

Technics SX-AX3 User manual

Technics

Technics SX-AX3 User manual

Technics SX-PR603/M User manual

Technics

Technics SX-PR603/M User manual

Technics SX-PR305 K User manual

Technics

Technics SX-PR305 K User manual

Technics sx-KN500 User manual

Technics

Technics sx-KN500 User manual

Technics SX-KN200 User manual

Technics

Technics SX-KN200 User manual

Technics SX-KN1000 User manual

Technics

Technics SX-KN1000 User manual

Technics SX-KN200 User manual

Technics

Technics SX-KN200 User manual

Technics SX-KN901 User manual

Technics

Technics SX-KN901 User manual

Technics SX-EX60 User manual

Technics

Technics SX-EX60 User manual

Technics SX-KN7000 User manual

Technics

Technics SX-KN7000 User manual

Technics SX-KN2000 User manual

Technics

Technics SX-KN2000 User manual

Technics sx-KN500 User manual

Technics

Technics sx-KN500 User manual

Technics SX-KN2400 User manual

Technics

Technics SX-KN2400 User manual

Technics SX-KN200 User manual

Technics

Technics SX-KN200 User manual

Technics SX-KN6000 User manual

Technics

Technics SX-KN6000 User manual

Popular Electronic Keyboard manuals by other brands

Yamaha PortaTone PSR-1000 Data list

Yamaha

Yamaha PortaTone PSR-1000 Data list

Yamaha PortaTone PSR-2 owner's guide

Yamaha

Yamaha PortaTone PSR-2 owner's guide

M-Audio Oxygen 49 user guide

M-Audio

M-Audio Oxygen 49 user guide

Yamaha CE20 Service manual

Yamaha

Yamaha CE20 Service manual

Yamaha Electone C-405 user guide

Yamaha

Yamaha Electone C-405 user guide

Casio Magical Light ML-1 Service manual

Casio

Casio Magical Light ML-1 Service manual

ARP OMNI-2 2471 Service manual

ARP

ARP OMNI-2 2471 Service manual

Yamaha Electone Stagea ELS-01C New features

Yamaha

Yamaha Electone Stagea ELS-01C New features

Yamaha PortaTone PSR-64 owner's guide

Yamaha

Yamaha PortaTone PSR-64 owner's guide

Yamaha PortaTone PSR-510 owner's manual

Yamaha

Yamaha PortaTone PSR-510 owner's manual

Casio LK-65 user guide

Casio

Casio LK-65 user guide

Yamaha Portatone PSR-S700 Specifications

Yamaha

Yamaha Portatone PSR-S700 Specifications

M-Audio Keystation 49 user guide

M-Audio

M-Audio Keystation 49 user guide

Yamaha PortaTone PSR-80 owner's guide

Yamaha

Yamaha PortaTone PSR-80 owner's guide

Edirol PCR-M50 Turbostart

Edirol

Edirol PCR-M50 Turbostart

Roland Classic Keyboard C-230 owner's manual

Roland

Roland Classic Keyboard C-230 owner's manual

Yamaha PortaTone PSR-21 owner's manual

Yamaha

Yamaha PortaTone PSR-21 owner's manual

Casio CTK-671 user guide

Casio

Casio CTK-671 user guide

manuals.online logo
manuals.online logoBrands
  • About & Mission
  • Contact us
  • Privacy Policy
  • Terms and Conditions

Copyright 2025 Manuals.Online. All Rights Reserved.