Technobake Roastrunner User manual
Unit 11 / 18 Hinkler Court, Brendale Qld 4500 Ph 061 7 3205 9066
Twin Oven Single oven
Installation manual Support Ph 0402 021 190
Your will need the correct PPE and White card to enter building sites.
• Safety glasses must be worn
• Sturdy footwear must be worn
• Gloves must be worn
• Hair must be contained
• No Rings and Jewelry
DO NOT use this machine unless you have been instructed in its safe
use and operation and have been given permission
NOTE; This manual is prepared for the use of trained Service Technicians.
This manual is intended as a guide. You will need to have the necessary tools/ instruments required.
Reproduction of this Manual, without the express written consent of Technobake Pty Ltd is prohibited.
ACN136 118 253, 11/18 Hinkler Court Brendale QLD 4500Australia Phone/Fax 61 07 3205 9066
General Technical Information
Always use never seize/copper slip on
all bolts and screws.
Warning: All electrical connections
must comply with local codes.
Water requirements: COLD WATER
ONLY
Warning: all plumbing connections
must comply with local sanitary, safety
and plumbing codes.
Unit 11 / 18 Hinkler Court, Brendale Qld 4500 Ph 061 7 3205 9066
Introduction to Roastrunner
• Twin chamber, sharing electronics, plumbing and fat separator. Operates like two separate ovens. If one
chamber has a fault the other chamber will still bake.
• ON/OFF switch in the middle, at the bottom of touch screen. Screen is split screen controlling either side
of the oven.
• When unit switched on, it carries out a system check, this can take a couple of minutes, checks proximity
switches, valves and rotation. Doors must be closed with gantries in the oven.
• Flooded floor generates steam for a gentle boil, fat etc. dripping from cooking, falls into water reducing
fire risk. Has as high-pressure spray of water which pushes all debris off the grate into the Catch Basket.
• Fluids on the floor of the oven is drained into the fat separator every 70 mins or so (configurable). Note:
there are two types of separator in the field. Old one works with probes that read the currents in water, air and fat
giving different probe readings and a float that activate a valve. New one works on specific gravity with no inter-
nal parts using weir system. Instructions on p.12
• Has a two hour wash which is very similar to a dishwasher. Wash is once only at end of day, the whole
oven – both chambers together. DOES REQUIRE STAFF to attend to cleaning tasks. Note: once wash cycle
has started you cannot cancel.
• Requires no toxic chemicals, uses off the shelf dishwasher tablets. Finish Brand tablets have been ap-
proved by Woolworths, the stores are to take them off the shelf and IDT them.
• Water Tank at rear ensures reliable water pressure.
• There are 2 racking styles, Chicken only – this is the wishbone style that holds thirty birds (30). And a tray
rack that holds 6 trays to cook all hot food products and has Add on Racks to cook 24 chickens (24). Ov-
ens are either; a double 30/30, double 24/30, 30 single or 24 single.
Tools required for installation
• Drill Impact drive screw driver • Adjustable spanner by 2 (150mm and 200mm)
• Crow bar, multi grips, vice grips • Anti-seize Lubricant, Allen keys full set, Knife.
Points to remember: -
Use tine holes for moving the oven.
You will need to ask for help you lift the oven with the forklift.
Ask manager where they would like steel frame disposed of.
Compact the cardboard after de-crating.
Use a container or small box to contain all nuts bolts and screws.

Unit 11 / 18 Hinkler Court, Brendale Qld 4500 Ph 061 7 3205 9066
Unpacking the unit
• Get the forklift in position for lifting (ask storeman or manager for assistance)
• Use tine holes in steel frame. There are two wooden or steel skids under the steel base either side of the
crate - remove those by removing screws, use a forklift to raise the oven so the timber/steel skids can be
removed. When moving the oven make sure forklift tines are all the way into the crate.
• Lower on to floor and remove forklift. Oven is now on its wheels.
• Remove cardboard from roof.
• Undo screws at bottom of cardboard and remove all cardboard – dispose. Might need to cut cardboard
down for compacting.
• Undo 19mm bolts into
caster.
• Undo 8mm tech screws
from frame support and remove.
• Undo all remaining 17mm nuts and bolts from base frame and dis-
mantle.
• Check equipment and parts for damage. Report any damage immediately to builder or store manager
and distributor. Note: take photos of any damage and send them with a report on the condition of the
• Remove all packing, cable ties and packing materials, including Fan Packer inside chamber. NOTE: If the
gantry does not move freely there could be cable tie holding it in place (one on the inside of the charmer
up top and one outside by the catch tray).
• Remove any parts and put them in a safe and easy to access place - they will be needed to complete in-
stall. Note: once all packing is removed parts can be stored in the chamber until needed.
• Once oven is ready to move check the path to the deli is clear and free of any obstructions.
• When moving the oven DO NOT PUSH USE THE GLASS. You can use the gantry handles, door handles or
the body of the oven to maneuver. Move the oven slowly be aware the plumbing at the rear and the
glass doors for clearance.
• Position oven in its allocated place in deli.
• Always leave your area clean and tidy take all rubbish and dispose of properly.
• Dispose of create in Woolworths bins or contraction site bins.

Unit 11 / 18 Hinkler Court, Brendale Qld 4500 Ph 061 7 3205 9066
Installing the unit
• When the oven has been positioned do a final check and make sure doors when opened clear any sur-
faces bench, wall or any other obstruction.
• Roastrunner oven is to be connected to a AC3 Phase + Earth power supply. Oven supplied with 2M lead
and a 5 pin plug. Double oven 50A IP56 - Single 32A. Where more than one outlet is available for the
oven, always check rotation is unchanged should socket be changed.
• An all-pole electrical isolation switch should be mounted on the wall and be fully accessible to the opera-
tor. It should be mounted 1.5m above the floor as a recommended height.
• Oven to drain to a Tundish in floor. Connect drainage piping - must have fall so the water runs downhill
to the drain. If plumbing does not have fall the fat separator cannot function properly. Contact Tech-
nobake if no Tundish.
• Connect water to the oven. Cold water only and tap fully open to allow maximum water flow. Tie or coil
all water hoses ensuring they are off the ground using cable ties.
Unit 11 / 18 Hinkler Court, Brendale Qld 4500 Ph 061 7 3205 9066
• Fit Foot Jack locate lock pin and level oven. Make sure water is level in each chamber with 10mm of wa-
ter in the oven floor. Note: the water level is very important as it effect the oven fat separation and
drainage. See below Levelling (if the floor is uneven we can use packers to level the oven)
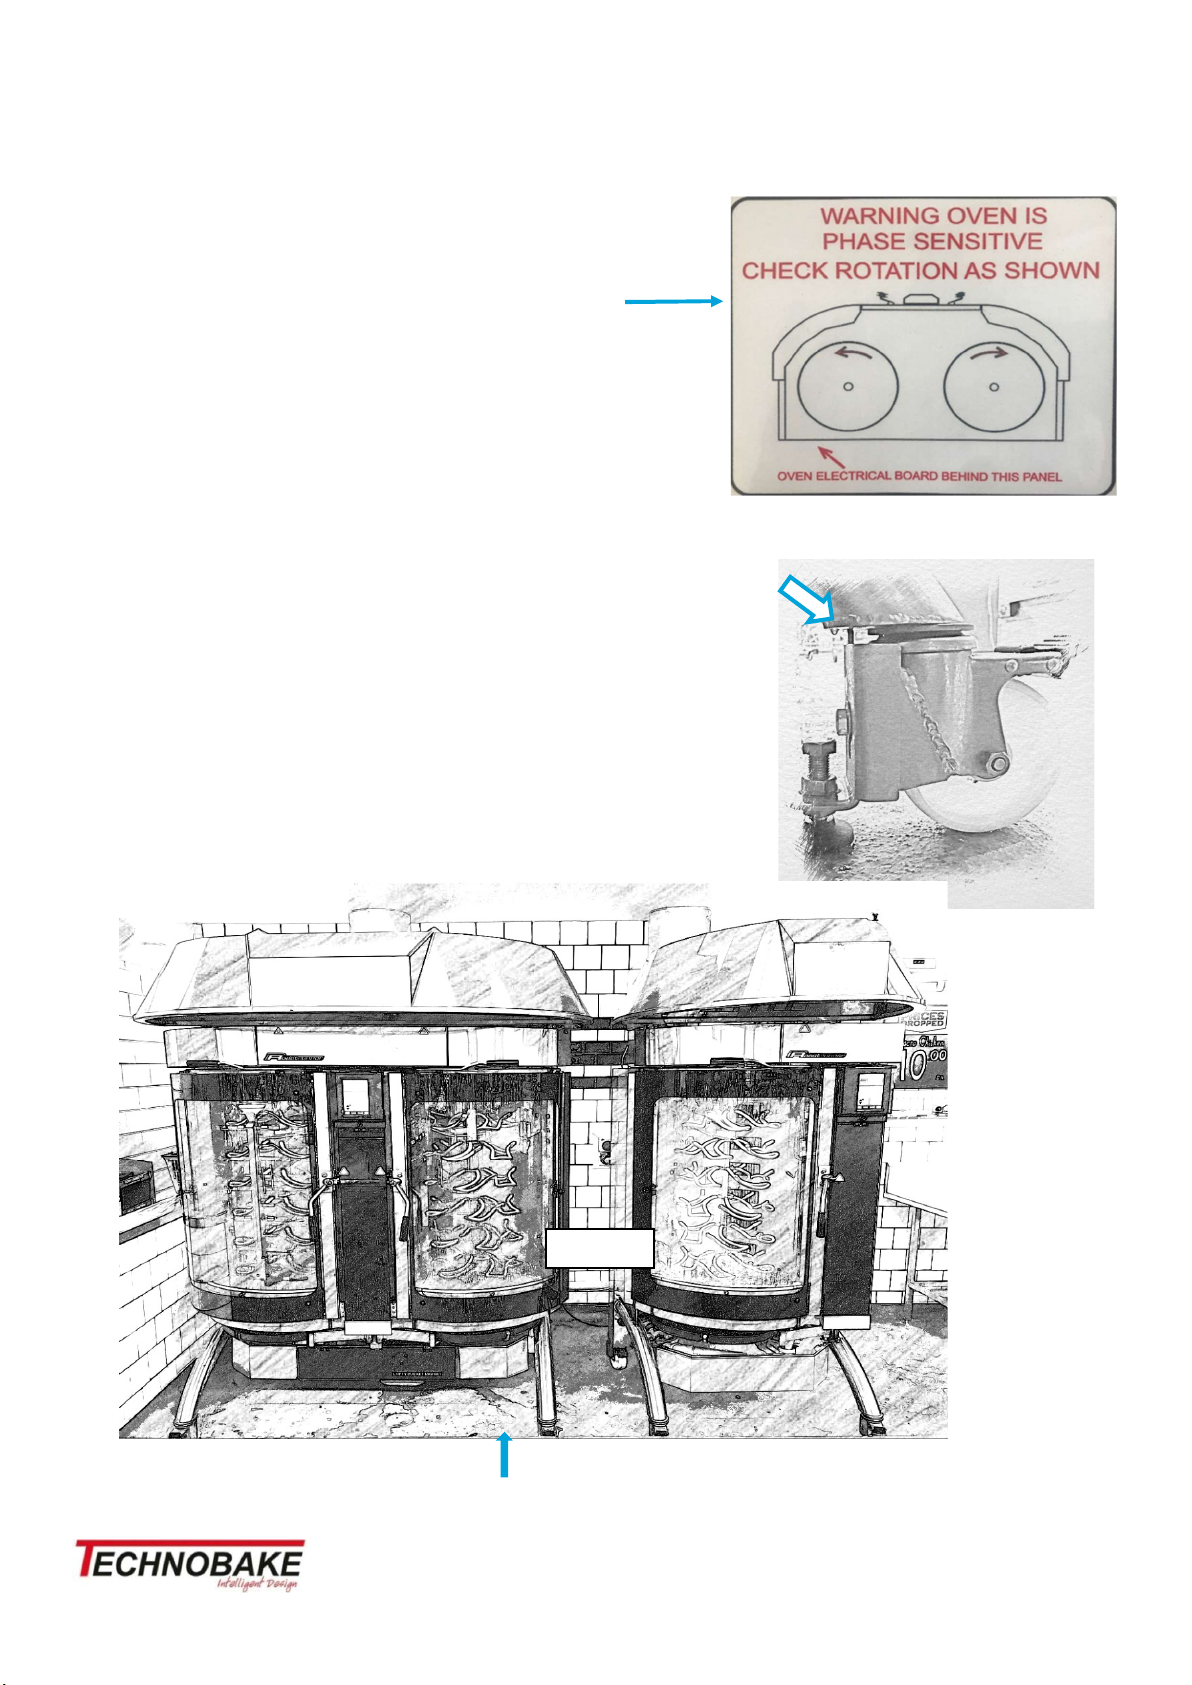
• Complete check lists as attached. Turn oven on at mains
Touchscreen will illuminate after 10 seconds. Ensure the motor
turns in the correct direction. Single oven rotates clockwise.
• Check termination at oven power box for correct voltage on all
phases.
How to level the oven
• Levelling can be difficult depending on the fall of the floor, if the
floor is uneven we can use packers that are in the install kit.
• Firstly use the foot lock/level in position ensuring the Pin is in position
and bracket is hard against the leg.
• Once both locks are in place the oven can be checked for level,
with 10mm of water in both chambers water in the chamber
floor should be pretty even.
Double and Single Combined
The Double and Single oven combination share the one fat separator.
Plumping and wiring is connected.
Fat separato
Fixing
bolt
Packers
<
300
>
Locating
pin

Unit 11 / 18 Hinkler Court, Brendale Qld 4500 Ph 061 7 3205 9066
Connection wires Double and Single
To install a combination oven, follow the below format.
Two cables -1) 8 core cable (of that only 5 cables are used)
2) Solenoid cable
One end of all the needed core cables will be pre-connected to the single oven with
labels on them
Connect the other end to the double oven following the labels on to wago clips/
terminals And so on with the 5 cables
Connect the black and white wires of the Solenoid cable to the 6T3 and 14NO termi-
nals on the ‘HT pump Single’ Contactor.
Connect the green wire of the Solenoid cable to the earth terminal.
1
1
2
2
Unit 11 / 18 Hinkler Court, Brendale Qld 4500 Ph 061 7 3205 9066
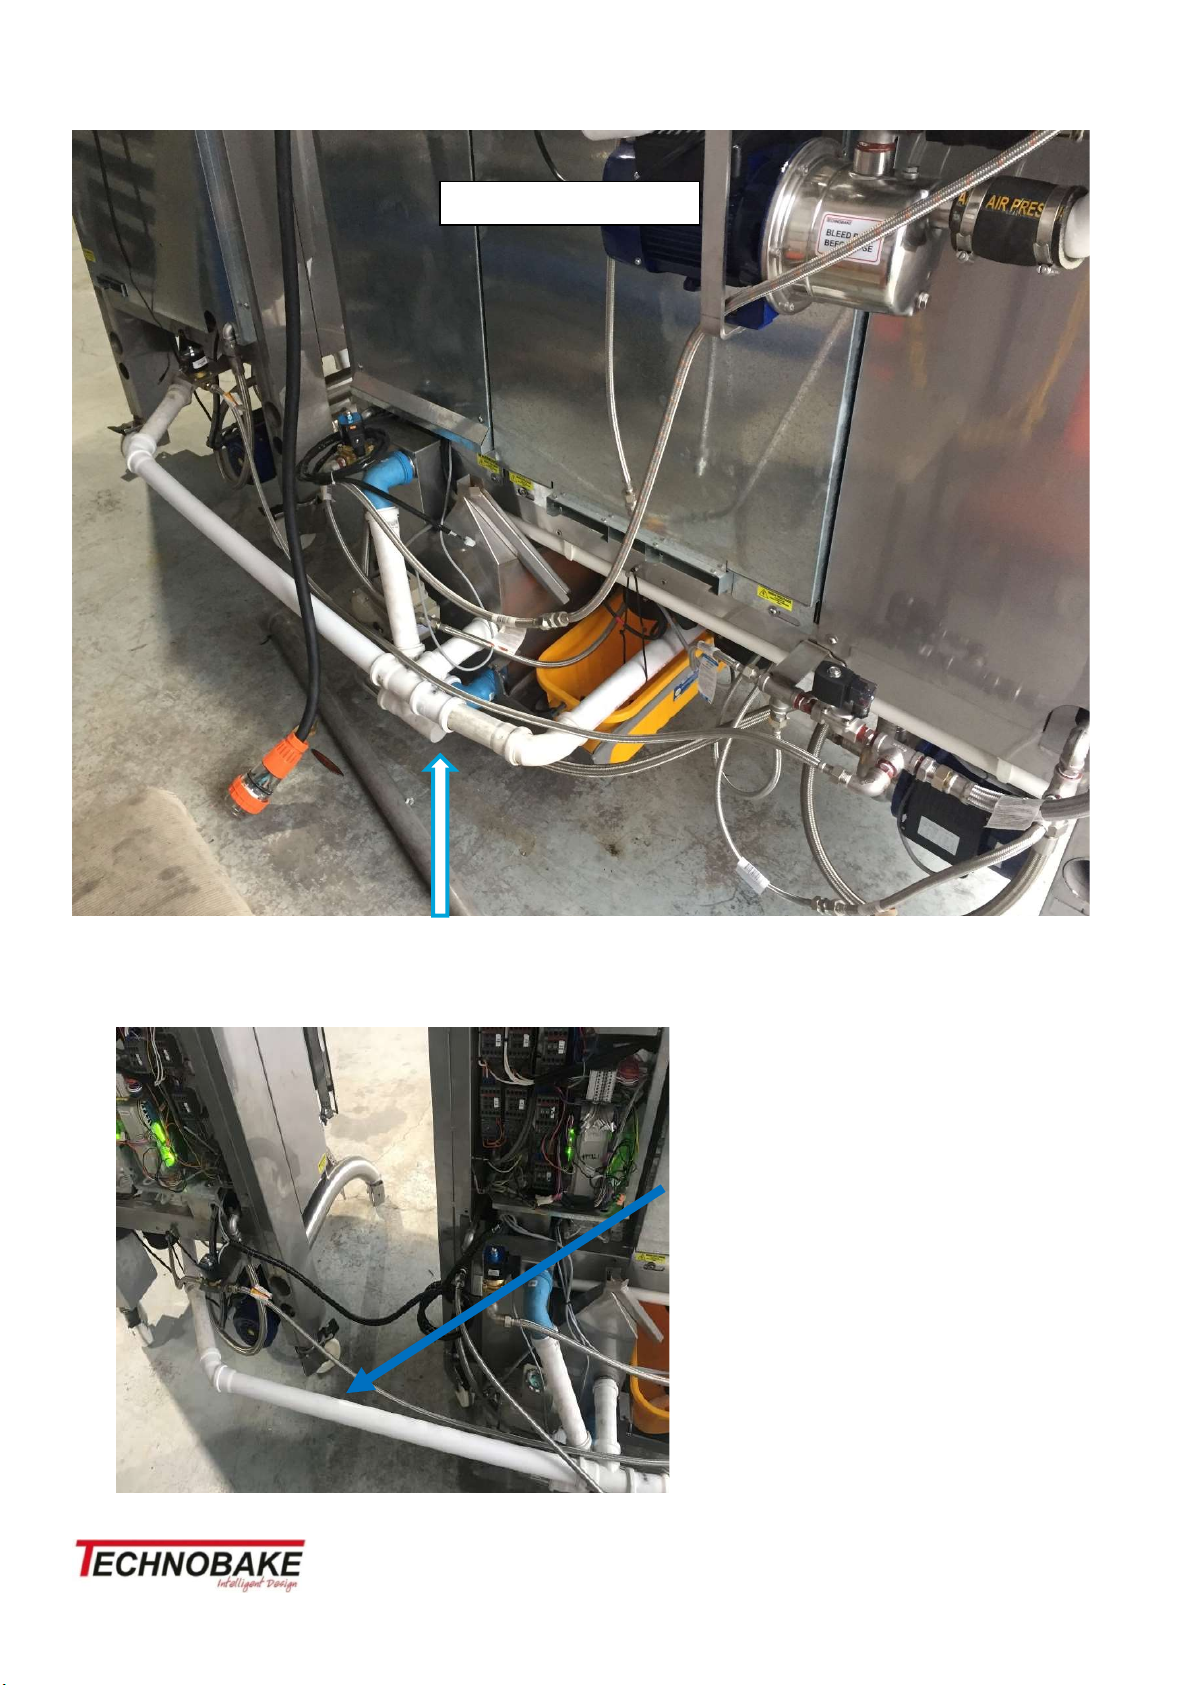
Plumping connections
Connect to waste – Tundish
Maintain a 300mm gap between the two ovens and follow the plumbing above
Add the black heat shrink tube
over the extension pipe, use any
source of heat and make the tube
shrink to make the installation look
neat and tidy. Black pipe visually
disapears from front veiw.
Overflow
stops
here
–

Unit 11 / 18 Hinkler Court, Brendale Qld 4500 Ph 061 7 3205 9066
Fitting the separator valve and plumbing
Connect the 3 way valve
and its plumbing to the
fat separator by pre as-
sembling the valve and
its plumping as shown in
photo. Push the plastic
elbow on as far a it will
go.
Then fit the Tri Clover fit-
ting and its gasket (right).
If the waste tundish is too the right of the oven turn the stainless steel elbow 180 degree so
it faces the tundish.
Fit the drain from the
top weir to the plas-
tic T as shown left.
Slide the T onto the
stainless steel pipe as
far as it will go.

Unit 11 / 18 Hinkler Court, Brendale Qld 4500 Ph 061 7 3205 9066
Fit the Entry pipe to the
separator and slide on
as far as it will go.
Fit the feed pipe from the floor valve to the separator as shown below.
Note the feedpipe from the single chamber oven is fitted enters from the left as
shown - if not single oven fitted replace the T with a plastic elbow.
Unit 11 / 18 Hinkler Court, Brendale Qld 4500 Ph 061 7 3205 9066
Fat separator operation
Method of operation
The 3 way valve can be driven by its motor to 3 positions. These are Separator Dump, Drain, and Closed.
‘Separator dump’ will permit the water In the separator tank to remain approximately 2/3 full. This is its
normal working position for collecting water throughout the day. Separator Valve will read ‘from weir’ in
this position.
‘Drain’ will drain the separator of water after the fat has been drained away each night.
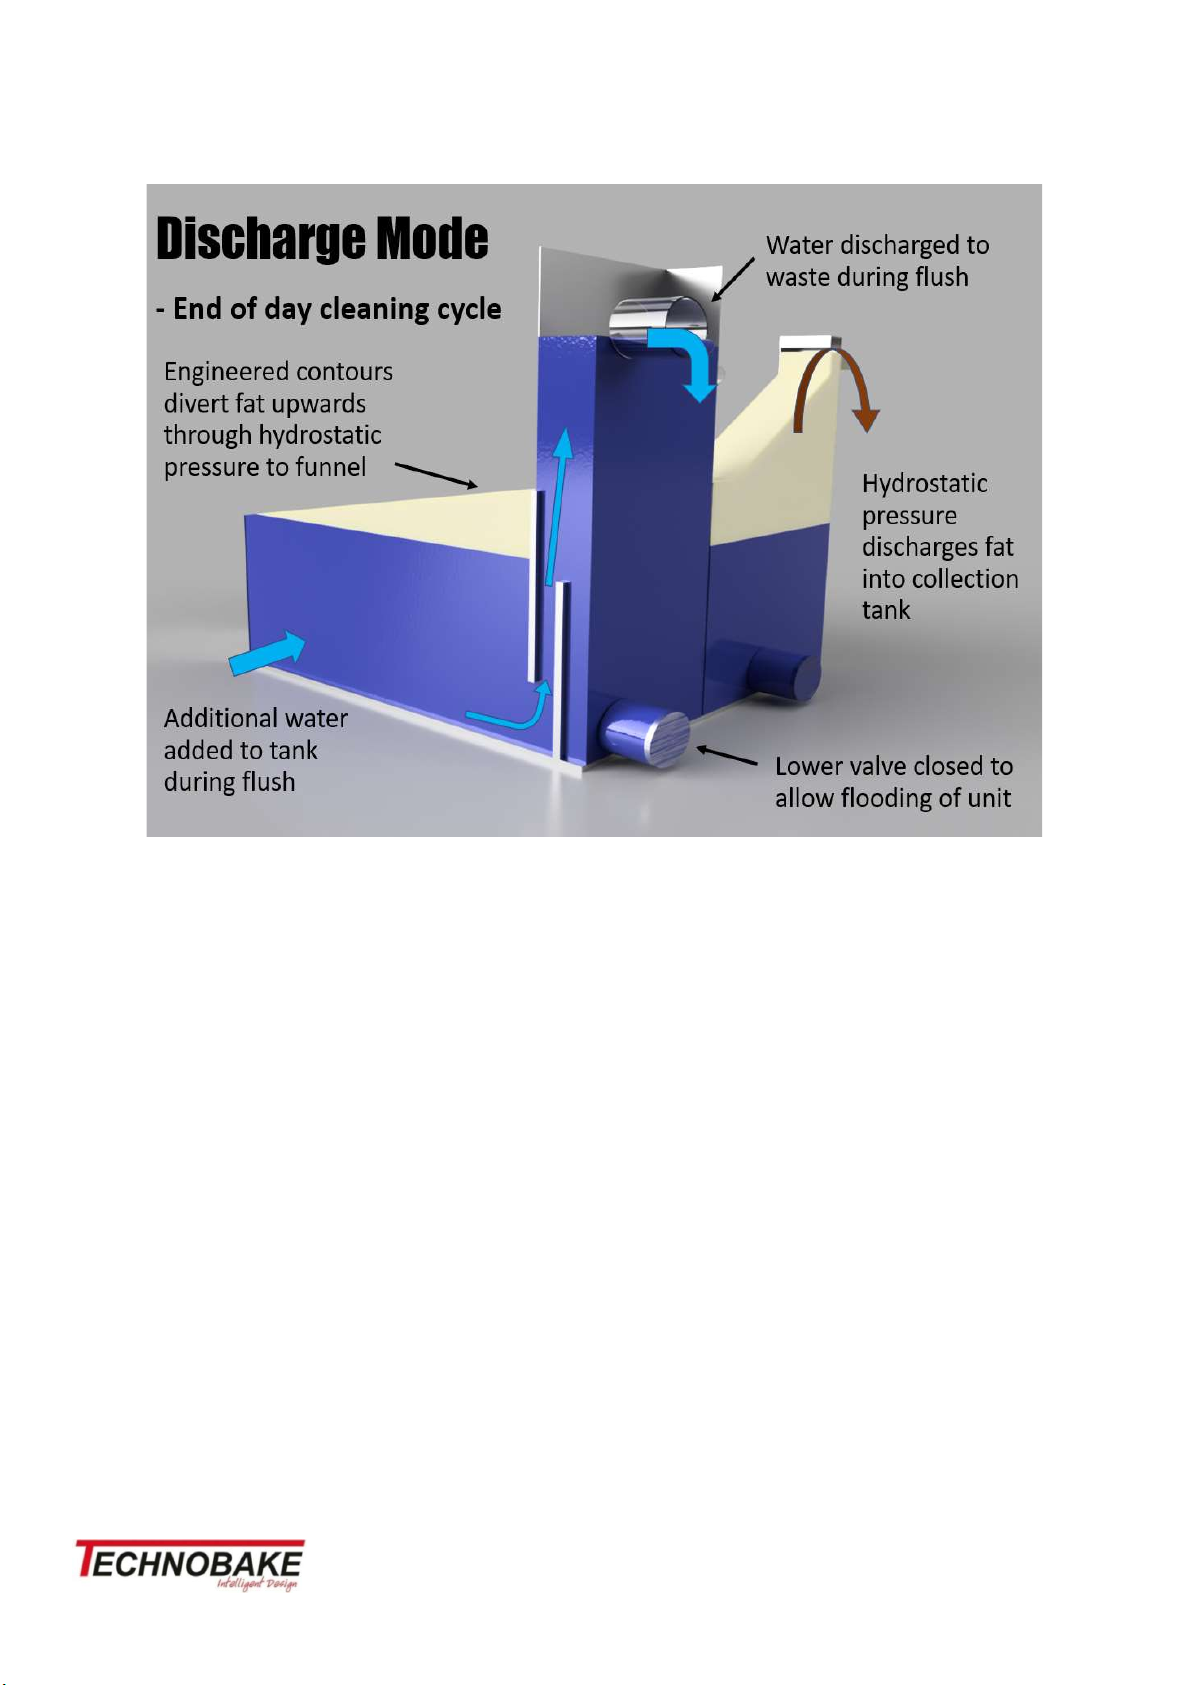
‘Closed’ position will cause both the separator dump and drain outlets to be closed off, so water intro-
duced through the flood solenoid will cause the water level in the tank to reach the top weir The fat will
run out the fat outlet for a preset period ( typically 300 seconds) The fat will stop flowing once it has
drained from the tank, even though the water will continue flowing through the top weir. Once the fat
Transfer has completed the flood solenoid will be off, the 3 way valve will open to drain. This empties the
tank of water and allows it to drain until use the next day.
Other manuals for Roastrunner
1
Table of contents


