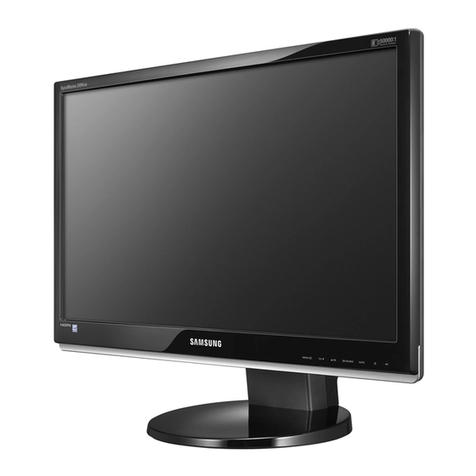
Technovision TOV-271M User manual

Physical screen split monitor for two PCs
TOV-271M
Monitor User Manual
(Please read carefully before using the product.)
This product is a split-screen monitor that can use two PCs on one monitor at the
same time, and is particularly suitable for physical network separation environments.
It is a product that eliminates harmful electromagnetic waves while providing
high-definition image quality and power saving functions along with simple design.
In addition, this product is designed to be safe, easy to use, saves installation space,
and provides clear picture quality.
Techonvision Co., Ltd.

Chapter. 1
1 Page
caution
Failure to read the safety precautions may result in serious
injury or material damage.
Please read it carefully and use it properly to protect your
safety and prevent damage to property.
◆
Do not install in a place with poor ventilation, such as a bookcase or closet.
◆
Do not use or store flammable sprays, flammable materials, etc. in close proximity.
◆
Do not insert metal objects such as chopsticks, wire, and drill into the monitor vent or
A / V jack.
◆
Unplug the power plug when you are not using the monitor for a long time.
◆
If there is dust or water coming in contact with the pins of the power plug, wipe it off
well.
◆
Never disassemble, repair or modify the product yourself
◆
Do not use a damaged power cord, plug, or loose outlet.
◆
Do not pull on the cord or touch the power plug with wet hands
◆
Connect the power plug to a properly grounded outlet.
◆
Please insert the power plug correctly to the inside end so that it does not shake.
◆
Do not bend the power cord excessively or stretch it over heavy objects.
◆
Do not use multiple outlets or power plugs in one outlet.
◆
Place the monitor at a distance from the wall to ensure proper ventilation.
◆
If the monitor emits smoke or a strange smell, turn off the power immediately and
turn off the plug
Please contact the service center after removing it.
◆
Place the product on a monitor or near a hot air balloon.
Make sure the power cord is not in close proximity.
◆
Do not install the product in water, rain, splashes, oil, humid places, or vehicles.
◆
When cleaning, do not spray water or detergent directly on each part of the product.
◆
Continuous use of the product in too close proximity may cause poor vision.
◆
Place the monitor on a flat, stable surface and let it slide when you place the product.
◆
When cleaning the monitor, unplug the power cord and wipe it with a soft dry cloth.
◆
Do not polish by industrial polish, wax, benzene, alcohol, thinner, mosquito repellent,
fragrance, lubricant, chemical such as detergent and water.
◆
When using a fixed screen for a long time, there may be afterimage or smearing.
◆
If you do not use the monitor for a long time, set the power saving mode or the
screen saver to the moving movie mode.
[ S a f e t y P r e c a u t i o n s ]

1-1 Components
Please make sure that the following components are included when opening the
box. If any components are missing, contact your dealer immediately to receive
the parts. Please use monitor. Depending on the product, additional accessories
(DVI cable, remote controller, HDMI cable) may be enclosed.
1-2 Driver and recommended resolution
This monitor is PLUG & PLAY type and does not need special driver. The
required drivers are provided by the video card manufacturer within the
computer and may be on the CD that comes with the computer. Please
refer to the table below for recommended resolutions. For normal monitor
operation, the video card must be set to the recommended resolution on
Windows. For a detailed description of the video card, refer to the video
card owner's manual or the Windows Readme file.
2 Page
Chapter. 2
[ Monitor ]
[ Adapter ]
[ Power Cable ]
[ DVI Cable ]
[ HDMI Cable ]
[ User Manual ]
The above images may look different from the real one.
Product
Size
Recommended
Resolution
Split
resolution
Product
Size
Recommended
Resolution
Split
resolution
23inch(16:9)
1920x1080
960x1080
24inch(16:9)
1920x1080
960x1080
27inch(16:9)
1920x1080
960x1080
32inch(16:9)
1920x1080
960x1080
[ Installation 1 ]

3 Page
Chapter. 2
1-3 Cable Connection
Power
Terminal
PC-1
Terminal
PC-2
Terminal
K/M
Terminal
HDMI
Terminal
DVI
Terminal
Monitor Configuration/Connection - REAR
1.
Connect the 220V power outlet to the power input terminal of the
adapter with the power cord.
Plug the DC output jack of the adapter into the power input terminal
on the back of the monitor.
caution
Failure to use the adapter included with this product may result in fire
or malfunction.
caution
Do not connect the monitor with the power-on plug and adapter
connected. Connecting the power-on adapter to the monitor may cause
malfunction.
Please connect the adapter and monitor first, then plug the power plug
into an outlet.
2.
Please connect each cables to the monitor terminal and PC or external
device.
After turning on the monitor, press the menu(M) or SELECT button
located on the front panel and select the input signal that matches the
terminal.
caution
If the connection cable and input signal of the monitor are not set the
same, It does not come out.
3.
Connect the PC 1 cable to the PC-1 terminal, PC 2 cable to the PC-2
terminal, keyboard/mouse cable to K/M terminal.
4.
Connect the DVI cable to the DVI terminal, HDMI cable to the HDMI
terminal. at the same time
TIP
HDMI to DVI or DVI to HDMI cables can be connected according to the
situation.
[ Installation 2 ]

Problems
Solutions
Did you connect the monitor for
the first time?
Please execute initialization in the product menu after purchasing.
Because the graphics cards are all different, it is recommended to
make the initial settings.
The color is strange.
It appears in black and white.
Please connect the computer connection cable again.
Insert the video card of the computer firmly again.
Please reboot your computer.
Refer to the video card user's guide and set the correct one.
In RGB mode, the screen position
It changes or shifts to one side.
Refer to Adjusting the screen to perform horizontal or vertical
positioning.
Please adjust the resolution or frequency on the video card.
Sometimes the screen position may change due to the signal cycle
difference of the video card.
After replacing the video card,
It's different from the color.
For Windows Me / XP / 2000, go to Control Panel-> Display->
Please try again.
Please reconfigure it to match the driver of your video card.
The screen is off and the power
indicator It blinks.
The monitor is in Sleep mode.
Press any button on the keyboard or move the mouse.
I see spots on the screen.
During use, you may see several pixel spots (red, yellow, white,
black) on the screen. This is a phenomenon that can be seen in the
nature of the LCD panel.
This is independent of the performance of the monitor and is not a
malfunction.
Looks like the screen is falling.
Check the signal cable of the monitor and the computer and
connect them again. Try auto-tuning.
The screen is not clear.
Make sure the resolution is set to the recommended resolution.
The screen is unstable and
trembling.
There is a shadow trace on the
screen.
Make sure that the resolution frequency of your computer or video
card is within the available range on the monitor, and then reset
the resolution on your monitor.
(See 2Page recommended resolution.)
The screen is too bright. / It's
dark.
Try adjusting the brightness or contrast of the screen.
There is a line on the screen and
it shakes.
Stop using cordless phones, hair dryers, electric drills, and more.
The touch OSD button does not
work.
Turn off the multitap (wall outlet) connected to the adapter, and
after 10 to 15 seconds,(Outlet).
I'm curious about our zero-defect
policy.
In case of non-defective product, it can be exchanged when one
pixel spot occurs.
Can be exchanged when four pixel spots occur when non-defect
product is not available
Please apply for exchange within 10 days after purchase.
The resolution of the split screen
is abnormal.
The resolution of the split screen is automatically determined by the
monitor. Press the split button on the front of the monitor once to
change the resolution.
The full screen resolution is
strange.
When changing from split screen to full screen, it may happen that
the signal from computer's video card is not transmitted well. In
this case, please divide the screen by dividing screen and then
switch to full screen mode again.
TIP
If the problem is not resolved, please contact the manufacturer to
solve the problem.
Chapter. 3
4 Page
[ Trouble Shooting ]

Chapter. 4
5 Page
order
part
explanation
1
Check the
contents
Check the monitor parts in the product box, take out the monitor,
first insert the monitor base and fix it with screws.
2
Connect the
DVI cable
Connect the DVI cable to the monitor’s “DVI” terminal.
3
Connect the
HDMI cable
Connect the HDMI cable to the monitor “HDMI” terminal.
4
Connect the
USB cable
Connect the “DVI PC” to the “PC1” port on the back of the
monitor and the “HDMI PC” to the “PC2” port. If the USB
connection is reversed, the mouse may operate in the opposite
direction.
5
Keyboard,
Mouse
Connections
Connect the keyboard and mouse to the USB ports marked “Key,
Mouse” on the upper right of the monitor. After connecting, check
whether the “Num Lock” light on the keyboard is lit. (Check the
connection)
6
Connect the
Power Cable
Check the supplied power adapter and connect the 12V adapter to
the monitor first, and then connect the 220V power cable to the
adapter before connecting 220V to protect the monitor circuit.
7
Power input
When the connection is made as above, you can use the monitor
by pressing the power switch “P” on the front of the monitor.
♣ How to Use the Buttons
P
Monitor Power switch.
M
Monitor MENU Button. (Menu / Exit)
S
Monitor MENU Select Button. (Select / Enter)
▲
Button to raise the selection bar up in the menu. (Up / Right)
▼
Button to raise the selection bar down in the menu. (Down / Left)
SWAP
This is a button to switch the entire screen. Split screen ratio selection (split
mode)/Input selection (full screen mode)
A
B
This is the monitor screen split button. Split key (full screen <--> split screen):
Split mode ON/OFF
♣ Configuration of split screen ratio
Key input
Ratio
Descriptions
A
B
50:50
If you press the A/B split button while using the full screen,
the screen will be split, and the screen size can be adjusted
with the Swap button after splitting. At this time, if you press
the split button again, the split will be canceled and the
screen will come out to the full screen. If you press the split
button again, the split screen will appear in the proportion of
the split screen just before.
Swap ↓
60:40
Swap ↓
70:30
Swap ↓
50:50
[TOV-270, 271M Monitor Installation]

Chapter. 4
6 Page
♣ How to move the Keyboard & Mouse
When using the full screen, the mouse can be moved according to the output screen and
used immediately. In the split screen mode, the DVI-connected computer is recognized as
1 and the HDMI-connected computer is recognized as number 2. Press the Scroll Lock 2
times on the top of the keyboard and then press the numeric keypad “1” to move the
mouse and keyboard to the No. 1 computer.
● Additional measures
When you purchase a Divisio monitor and start operating for the first time, the product
is manufactured by setting the division and variable division. However, sometimes the
screen decreases and the black margins up and down may occur when the screen is
divided. This is the case when the first communication is required for the computer and
the monitor to communicate at the resolution, especianlly in the early versions of the OS.
Change the resolution once in each split screen as described below and click the OK
button. After that, the monitor automatically recognizes and changes the resolution.
1. If the screen on the left has a black top and
bottom margin on the split screen, right-click on the
desktop and click Display Settings.
2. Click the Display Resolution button and click the
resolution marked (recommended) at the back of the
resolution number. Please refer to the table below for
the optimal resolution of the split screen.
3. Recommended resolution for split screen ratio
Screen division
ratio
5:5 Split
6:4 Split
7:3 Split
Split screen
Resolution
Left
960*1080
(recommend)
1280*1080
(recommend)
1440*1080
(recommend)
Right
960*1080
(recommend)
640*1080
(recommend)
480*1080
(recommend)
[ How to use Keyboard & Mouse ]

7 Page
Chapter. 5
Press the M button to display the OSD menu window and use the ▲,▼ button
to go to the desired mode.
Press the S button to select the submenu to adjust using the ▲,▼ buttons.
(Items may be disabled depending on the input signal.)
6-1 Screen
Brightness, Contrast
Description
HDMI Resolution : 1920x100@60Hz
Brightness/Contrast
Brightness
75
Color Format Settings
Contrast
75
Color Settings
Dynamic Contrast
Off
Picture Quality Settings
Display Settings
Audio Settings
Other Settings
1)
Brightness
Adjust the brightness of the screen. (Default : 75)
2)
Contrast
Adjust the contrast of the screen. (Default : 75)
3)
Dynamic Contrast
Adjust the Contrast Ratio by adjusting the dimming control.
(Default : Off)
[ Screen adjustment ]

8 Page
Chapter. 5
6-2 Screen
Color Format Settings
Description
HDMI Resolution : 1920x100@60Hz
Brightness/Contrast
Input Color Format
Auto Select
Color Format Settings
Color Domain
YUV Domain
Color Settings
Picture Quality Settings
Display Settings
Audio Settings
Other Settings
1)
Input Color Format
Select the color format for the screen. (Default : Auto Select)
2)
Color Domain
Adjust the color of the screen. (Default : YUV Domain)
6-3 Screen
Color Settings
Description
HDMI Resolution : 1920x100@60Hz
Brightness/Contrast
Gamma
2.2
Color Format Settings
Color Temperature
Color Settings
Picture Quality Settings
Display Settings
Audio Settings
Other Settings
1)
Gamma
Select Use Gamma on the screen. (Default : 2.2)
2)
Color Temperature
Adjust the Low Blue Light. (Default : 5700K)
[ Screen adjustment ]

9 Page
Chapter. 5
6-4 Screen
Picture Quality Settings
Description
HDMI Resolution : 1920x100@60Hz
Brightness/Contrast
Sharpness
40
Color Format Settings
Color Settings
Picture Quality Settings
Display Settings
Audio Settings
Other Settings
1)
Sharpness
Adjust the sharpness of the screen. (Default : 50)
6-5 Screen
Display Settings
Description
HDMI Resolution : 1920x100@60Hz
Brightness/Contrast
Aspect Ratio
Full Screen
Color Format Settings
Auto
Color Settings
4 : 3
Picture Quality Settings
5 : 4
Display Settings
16 : 9
Audio Settings
1 : 1
Other Settings
1)
Aspect Ratio
Adjust the aspect ratio of the screen. (Default : Full Screen)
[ Screen adjustment ]

Chapter. 5
10 Page
6-6 Screen
Audio Settings(Not for using this product.)
Description
HDMI Resolution : 1920x100@60Hz
Brightness/Contrast
Power Save Audio
Off
Color Format Settings
Volume
100
Color Settings
Picture Quality Settings
Display Settings
Audio Settings
Other Settings
1)
Power Save Audio
Audio Sleep Mode (Default : Off)
Volume
Adjust the Audio Volume.
6-7 Screen
Other Setting
Description
HDMI Resolution : 1920x100@60Hz
Brightness/Contrast
Language
English
Color Format Settings
Menu Transparency
0
Color Settings
Menu Rotation
Picture Quality Settings
Factory Reset
Display Settings
Audio Settings
Other Settings
FW 181121.14
1)
Language
Displays the OSD-enabled language. (Default : English)
2)
Menu Transparency
Adjust the Menu transparency. (Default: 20)
3)
Menu Rotation
You can rotate the Menu screen.
4)
Factory Reset
Reset OSD Setup to the factory state.
5)
FW 181121.14
Displays the Version of Firmware for the product.
[ Screen adjustment ]

ToV - 270M/271M
LCD Panel
68.6cm(27type) Wide
Pixel size
0.3111mm x 0.3111mm
Optimal resolution
1920 x 1080 (Full HD)
Viewing angle
Right and left : 178, Upper and Lower : 178
Contrast
1,000 : 1 ( infinite : 1 DCR)
brightness
300cd/m2
Response speed
5ms (GTG)
Maximum display
color number
16.7M color
power
DC 12V 5A / 50~60Hz
Speaker output
Not for use this product.
Signal input /
output
DVI, HDMI
Size (W x H x D)
637mm x 440mm x 190mm
With stand
Vertical 454mm, width 170mm
Weight (Kg)
Unpacked : 4.5kg, Packed : 5kg
Operation
temperature
0-40 °C
11 Page
-
Product specifications are subject to change without prior notice for
performance improvement.
-
This monitor adjusts the size and position of the screen for commonly
used timing modes and stores them in advance to the maker's
internal microcomputer.
-
The panel may have several pixel spots on the screen due to the
characteristics of the product.
This is not related to monitor performance and is not a malfunction.
Chapter. 6
[ Product Specification ]

This product has passed thorough quality control and inspection.
If any malfunction occurs during normal use, we will warrant it in accordance with
this warranty.
When you want a guarantee
1.
Please check the warranty first.
2.
Please recheck the fault and contact the service center.
- Compensation standards for repair, exchange and refund of goods are subject to the
Economic Planning Board Notice of Consumer Damage Compensation Regulations.
- The repair part retention period is the same as the product warranty period.
Warranty contents
For failures occurring under normal operating conditions within the warranty
period (one year from date of purchase) We will repair it free of charge according
to the contents of the guarantee.
If the repairs are repaired within 3 months after repair by our company and
repairer
designated by us, we will process it free of charge from the repair date.
** We recommend keeping receipts. **
In the following cases, the parts and service charge will be charged
during the warranty period.
1.
When a malfunction occurs due to careless handling of the consumer
2.
In case of malfunction due to incorrect use of electric capacity, abnormal
use of power supply or defective connection device
3.
In case of failure or damage due to dropping when moving after installation
4.
When a problem occurs due to unexpected use of consumables or options
5.
In case of malfunction due to foreign matter (water, beverage, coffee)
6.
In case of malfunction due to user's internal modification
7.
When a malfunction occurs due to natural disasters (fire, salt, gas,
earthquake, wind, etc.)
8.
In case of replacement due to wear of consumable parts
9.
In case of a malfunction due to repair by a person other than our service
center or our service engineer
10.
UPC (Bar code) and serial number are lost
In case of any failure after the warranty period, you will be charged a certain
parts and service charge.
Chapter. 7
12 Page
[ Warranty Guide ]

Product Name
Model Name
Warranty
After purchase
1 year
Product Serial No.
Date of purchase
Purchase Agent
Phone No
Description of Troubles
Repair
Within Warranty Period
After warranty period
In case of
performance
failure or
malfunction
in normal
use
If you require critical repairs within 10 days of
purchase
Product Exchange and
Purchase Refund
If critical repair is required within one month of
purchase
Product exchange and
free repair
If the replaced product requires major repairs
within one month
Product exchange and
free repair
Repairable
If the same fault occurs up
to 3 times
Free repair
Paid repair
If the same fault occurs up
to 4 times
Free exchange of
products
Paid repair
Unrepairable
If you have repair parts but
can not repair them
Free exchange of
products
If it can not be repaired
because it does not have
parts to repair
Product Exchange
Performance
due to
intentional
negligence of
the
consumer,
functional
malfunction
Repairable
Paid repair
Paid repair
Unable to repair (except when it is impossible to
repair due to poor appearance, not performance or
functional failure)
After collecting the
amount corresponding to
the paid repair, exchange
the product
According to our
standard that is set
separately
If the customer has lost the product requested by the customer
(within the period of holding the parts)
Free replacement or
purchase refund
20% refund of the
amount depreciated
Compensation standards for product repairs, exchanges and refunds are subject to the "Consumer Damage Rewards
Regulations" issued by the Ministry of Finance and Economy.
♣ Customer Support Contact :
export@techonvision.com
In case of malfunction due to user's intention or carelessness
In case of malfunction due to incorrect use of the operating voltage (eg when using a 110V power supply)
If our service center or a person other than our service technician repairs and fails.
Failure due to natural disasters(fire, salt, flood, etc.)
Failure or damage due to falling(consumer error) when moving after installation
In case of malfunction caused by user's internal modification
●
●
●
●
●
●
Product Warranty
1. This product is made by our technicians through strict quality control and process.
2. If any trouble occurs within the warranty period (1 year after purchasing), you can
get free repair service from our service center. (Even if it is within warranty period, if
it corresponds to the paid service guide in this warranty, we will repair it by receiving
the service charge.)
3. If the product malfunctions, please contact the service center.
4. Be sure to present a warranty when repair is required.
5. Please note that the warranty will not be reissued.
Free and paid service
◆ Even within the warranty period, if the service falls under the following services, the service charge(repair cost +
parts cost + travel cost, etc.) will be received and repaired.
Table of contents
