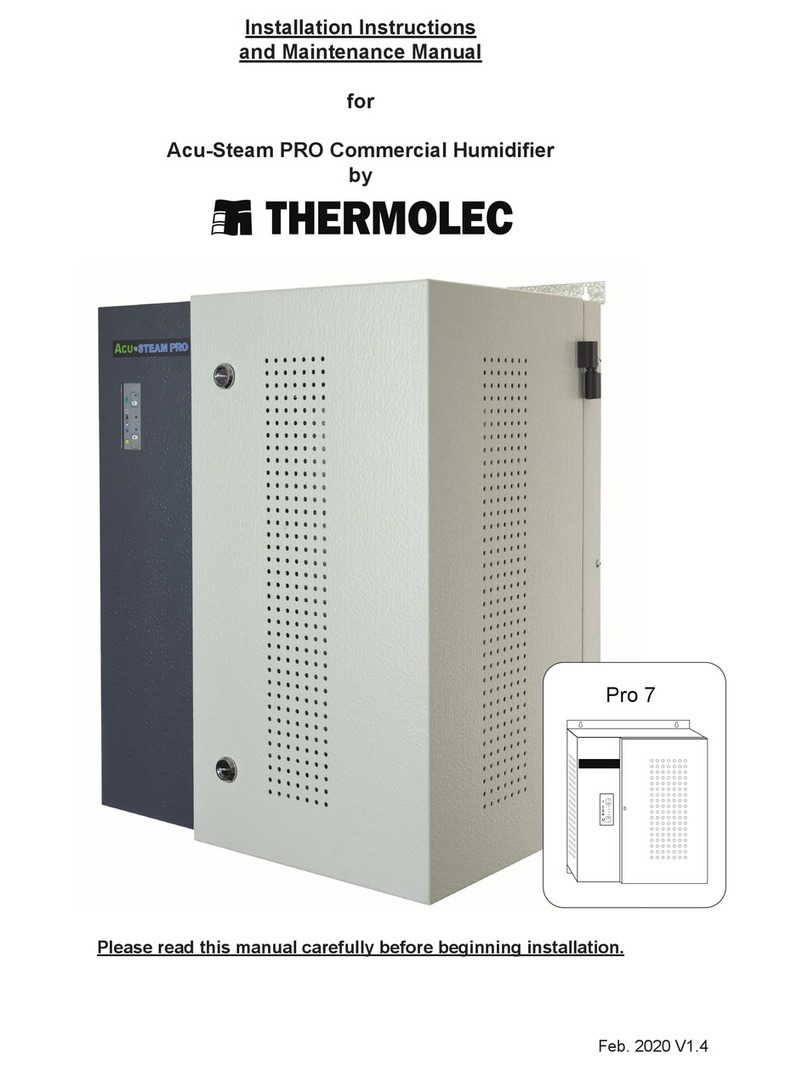
Teleflex ConchaTherm Neptune User manual

ConchaTherm®Neptune™Heated Humidifier
REF 425-00
User’s Manual
88924-07 03/07

Table of Contents
1. Introduction
a. Intended Use
b. Product Features
c. Setup Diagrams
2. Symbols
3. General Warnings and Cautions
4. Principles of Operations
a. ConchaTherm Basics
b. Concha-Column Descriptions
5. Specifications
a. ConchaTherm Neptune Performance Characteristics
b. Concha-Column Performance Characteristics
c. General System Characteristics
6. Controls and Indicators
a. Front Panel Indicators
b. Status Indicators
c. Front Panel Controls
7. Directions for Use
a. System Setup
b. Automatic Operation
c. User Adjustable Operation
d. Other Operating Features
8. Applications
9. Troubleshooting and Maintenance
a. Alarms
b. Symptoms and Corrective Actions
c. Routine Checks
d. Cleaning
e. Routine Maintenance
f. Service and Repairs
10. Limited Warranty Statement
11. Appendix
a. Electromagnetic Emissions Table
1

1. Introduction
Intended Use
The ConchaTherm® Neptune™ (also referred to herein as ‘humidifier’) is a respiratory humidifier
designed to heat and humidify respiratory gases delivered via endotracheal tubes, nasal cannula or
face masks to adult, pediatric and infant/neonatal patients. This system may be used with either
conventional (non-heated wire) breathing circuits or compatible (21-volt) Hudson RCI heated-wire
circuits.
The ConchaTherm Neptune can be used with ventilators, continuous flow systems, oxygen diluters
and blenders, adjustable nebulizer adapters for aerosol therapy, or non-flammable anesthesia gases
to help maintain patient body temperature.
Product Features
• Automatic operation with factory defaults or previous use selections for mode, proximal
airway temperature, temperature gradient and pause time, or fully adjustable, if desired.
• User selectable Supra- and Sub-Glottic airway modes
• May be used with heated-wire or non-heated wire circuits
• Automatic detection of adult, pediatric and infant heated-wire circuits
• Digital temperature display
• Heater-to-patient temperature gradient for control of condensation
• Enhanced temperature gradient to accommodate higher inlet gas temperatures
• Responsive membrane front panel
• Internationally accepted Graphic Icon Front Panel
• LED prompts and audio-visual alarms permit rapid detection and correction of problems
• Temperature tracking alarms at 2°C above or below the selected airway temperature.
• Low Airway tracking alarm not activated until system reaches Airway Set-Point (within 2°C)
• Fixed high-temperature alarm at 41.0°C
• Disconnected/dislodged probe indicators
• Heated-wire disconnect alarm when using heated-wire circuits
• User adjustable pause time from 5 to 60 minutes.
• Continuous self-diagnostic evaluation of hardware and software
• Low Humidity Advisory
Setup Diagrams
2
Figure 1: The CochaTherm Neptune Using a
Conventional Circuit
Figure 2: The CochaTherm Neptune Using a
Heated-Wire Circuit
FROM VENTILATOR
PLACE COLUMN
PROBE HERE
CONCHA COLUMN
CONCHA HEATED
HUMIDIFIER
HEATED WIRE
CABLES
(NOT USED)
DUAL TEMPERATURE
PROBE
TO PATIENT
TO VENTILATOR
CONVENTIONAL
BREATHING CIRCUIT
CONCHA 1650ml
RESERVOIR BOTTLE
PLACE PATIENT
AIRWAY TEMPERATURE
PROBE HERE
FROM VENTILATOR
PLACE COLUMN
PROBE HERE
CONCHA COLUMN
CONCHA HEATED
HUMIDIFIER
DUAL TEMPERATURE PROBE
TO PATIENT
TO VENTILATOR
CONCHA 1650ml
RESERVOIR BOTTLE
PLACE PATIENT
AIRWAY TEMPERATURE
PROBE HERE
HEATED WIRE
CABLE (BLUE)
HEATED WIRE (BLUE)
INSPIRATORY
HEATED WIRE CABLE
(YELLOW)
HEATED WIRE EXPIRATORY
(YELLOW) (IF USED)
HEATED WIRE
BREATHING CIRCUIT

3
2. Symbols
The following symbols are noted on the device labeling. (See Controls and Indicators section of this
manual for descriptions of Front Panel and other Icons used in this manual)
Manfacturer Name and Address
Do Not Dispose in Landfill, Return to Manufacturer for Recycling
DRIP-PROOF, a higher than ORDINARY level of protection from
drips, leaks, and spills for Medical Devices.
Type BF Device per IEC 60601-1 Patient current Leakage not to
exceed 0.01mA for Applied Parts
Caution, Hot Surfaces
Refer to User’s Manual
Amperes
Hertz
Voltage, Alternating Current
A
V~
HZ
Symbol Description

4
3. General Warnings and Cautions
Warning: For safe operation, only use Hudson RCI Branded Concha Columns, Water Reservoirs,
Temperature Probes and 21-Volt Heated Wire Circuits, as listed in the Hudson RCI Product Catalog.
Warning: Fire Hazard. Do not use the humidifier in the presence of flammable anesthetic gases.
Warning: Burn Hazard. The heating element of the humidifier is hot (as high as 140°C). Allow the
humidifier to cool before handling.
Warning: Burn Hazard. The Concha-Column is hot (as high as 140°C) and may contain liquid at
temperatures up to 80°C. Allow the column to cool before handling.
Warning: Electrical Shock Hazard. Refer all servicing to qualified, trained personnel only.
Warning: This humidifier requires 100-120V ~, (nominal) 60 Hz sine wave output. If used in a
transport vehicle requiring an inverter, do not use square or pulse width modulated sine wave output.
To do so may result in overheating.
Warning: The temperature probes must be properly placed in the breathing circuit before operating
the humidifier. Failure to properly connect the temperature probes will cause the unit to alarm and
shut down.
Warning: Always verify gas flow and airway temperature before connecting the humidifier to the
patient.
Warning: Maintain adequate gas flow through the column and breathing circuit. This will prevent
overheating the column and breathing circuit.
Warning: When using Hudson RCI Heated-Wire Circuits:
• Observe the minimum minute volumes recommended in this manual.
• Do not cover the circuit with sheets, blankets, towels, clothing or other materials.
• Do not apply excessive tension to the heated-wire harness - DO NOT "MILK" TUBING.
• Do not allow the circuit to rest on the patient's bare skin.
Warning: Always monitor tidal volume, minute volume, respiratory rate and all pressures and ensure
that all monitoring alarms are appropriately set and functioning before connecting patient to the gas
delivery system (ventilator, humidifier and circuit).
Warning: Do not leave the humidifier ON, do not turn the humidifier ON and do not exit the pause
mode until there is regulated gas flow through the system. To do so may result in heat buildup,
causing a bolus of hot air to be delivered to the patient. Circuit tubing may significantly soften under
these conditions. Turn the humidifier OFF or place the unit in pause and allow the system to cool
before stopping gas flow.
Warning: The probe alarm is not intended to replace routine physical inspection of the temperature
probe placement. Be sure both probes are in place during operation of heater.
Warning: Do not use a Low-Compliance Concha-Column in continuous flow CPAP applications with
gas flows greater than 50 LPM. There is potential for flooding of the breathing circuit and airway.
Warning: Only use the Comfort-Flo Concha-Column in continuous High Flow Oxygen applications.
Do not exceed 40 LPM in this mode. There is potential for flooding of the breathing circuit and
airway.
Warning: Sudden changes in circuit pressure may cause the water in the column to rise temporarily
and may affect compressible volume.

Warning: Use of the RS-232 service connector by anyone other than qualified, factory-trained per-
sonnel may damage the instrument and result in harm to the patient. No connection to this port is to
be made when device is operational and connected to a patient. Patient injury may occur.
Warning: The humidifier has been designed and tested for use with Hudson RCI Branded acces-
sories and breathing circuits. Use of non-approved circuits or accessories with this unit may cause
an unsafe condition. See the current issue of the Hudson RCI Catalog or go to the Hudson RCI
Website at www.hudsonrci.com for compatible circuits and accessories validated for use with the
CONCHATHERM Heated Humidifiers.
Warning: Electrical Short Hazard: Do not immerse this device in water or other fluids for cleaning.
Do not autoclave, gas sterilize or pasteurize. Severe damage will result.
Warning: Only connect this device to a Hospital Grade Grounded 120 V ~ outlet, with the power
cord supplied in the original packaging. This device has been developed to operate over the voltage
ranges noted on the name plate label for use in foreign countries. If device is used in areas outside
the United States, ensure a Hospital Grade, grounded compatible power cord is utilized. Please call
Teleflex Medical’s customer service to obtain Foreign Country power cord specification for your appli-
cation.
Caution: Federal law (USA) restricts this device to sale by or on the order of a physician.
Caution: Always operate the humidifier in a vertical position with the water reservoir properly
mounted.
Caution: Temperature patterns within the system associated with normal operation will be disrupted
if there is insufficient water to pass through the system, causing a high temperature alarm.
Caution: Do not operate the humidifier with a dry or disconnected reservoir or without a column
installed. Severe damage may result.
Caution: Hudson RCI Branded circuits and accessories are Single Patient Use only. With the
exception of the Temperature Probes, they are not cleanable or re-useable. Accessories should be
changed after a maximum of 14 days of use, or when noticeably contaminated by the patient or
excessive leakage is observed.
Caution: Replace the power fuse only with one of the same rating.
Caution: Monitor the Inspiratory and Expiratory Circuits periodically for excessive condensation
(rainout).
Caution: In the Invasive, or Sub-glottic Mode, the humidifier is designed to deliver a minimum fluid
output of 30 mg H2O/L at 30º C, for the proximal airway temperatures at zero gradient and with the
recommended Flow Rates listed in the Specification Section of this manual.
• Use of Positive or "Sun" gradient settings in some conditions can result in humidity outputs
at the patient of less than 30mg H2O/L at 30º C.
• Visually inspect for condensation droplets in the inspiratory circuit after one hour of
operation, and periodically thereafter.
Caution: Some Ventilators produce elevated gas temperatures at the patient inhalation port which
can reduce the amount of relative humidity in the circuit. Visually inspect for condensation droplets
in the inspiratory circuit after one hour of operation, and periodically thereafter.
Caution: Monitor the Inspiratory and Expiratory Circuits periodically for excessive condensation
(rainout). Use water traps to collect rainout when using non-heated wire breathing circuits.
5

4. Principles of Operation
ConchaTherm Basics
The Concha®heated humidification system consists of:
• ConchaTherm Neptune heated humidifier
• Concha-Column®humidifier cartridge (also referred to as ‘column’)
• Concha sterile water reservoir
• ConchaTherm Neptune dual thermistor probe
• Hudson RCI Breathing circuit (non-heated wire breathing circuit or 21-volt heated-wire
breathing circuit.)
The servo-controlled heated humidifier continuously monitors the proximal airway temperature and
regulates the heat supplied to the column by the heating element, and if used, the heated-wire
circuit.
The Concha-Column humidification cartridge is inserted into the heater where it is surrounded by a
heating element. Sterile water flows via a gravity-feed system from the reservoir into the
Concha-Column, wetting an internal absorbent wick. The heating element conducts heat through the
column's metal wall, heating the wick and vaporizing the sterile water. Ventilatory gas passes
through the column where it picks up the moisture in molecular form. The heated, humidified gas is
delivered to the patient through a breathing circuit attached to the top of the column.
Concha-Columns are available in four configurations: Standard, Low-Compliance, Minimal
Compliance and Comfort-Flo. All columns are labeled for easy identification and operate on a
reliable, gravity-feed system for uninterrupted water flow.
Concha-Column Description
The Standard Concha-Column (see Figure 1) is designed for use with ventilatory parameters most
commonly used with adults. The water in the column will be at the same level as that in the
reservoir. The water level in both the reservoir and the column drops as water is consumed. As the
water level in the column drops, the compressible volume of the system increases and the system
compliance changes.
6
Figure 1: Standard CONCHA-COLUMN Flow Diagram
Dry oxygen/air mixture
from flow source
Heated, humidified
oxygen/air mixture to patient
Saturated Wick
CONCHA
Prefilled. Disposable
Sterile Water Reservoir

The Low-Compliance Concha-Column is recommended for applications requiring a more constant
compressible volume and compliance, (see Figure 2). The Low-Compliance Concha-Column
maintains a constant water level in the column resulting in a more stable compressible volume. The
system's compliance equals the column’s compliance plus the amount of fluid transferred to the
reservoir during each inspiratory phase. Some fluid, in the form of either water vapor or water,
always transfers during each cycle. In addition, because of the smaller mass of water contained
inside the column, the Low-Compliance Column will heat and cool faster as compared to the
Standard Concha-Column.
The Minimal-Compliance Concha-Column is recommended for applications requiring a low
constant compressible volume and compliance,. This column maintains a constant compressible
volume at 109 ml with compliance at 0.2 ml/cm H2O. The Minimal-Compliance Concha-Column has
an internal baffle and maintains a constant water level in the column resulting in a stable
compressible volume. As with the Low-Compliance column, the system's compliance equals the
Concha-Column’s compliance plus the amount of fluid transferred to the reservoir during each
inspiratory phase. Some fluid, in the form of either water vapor or water, always transfers during
each cycle. This column will heat and cool slightly faster as compared to the Low-Compliance
Concha-Column.
The Comfort Flo Concha-Column is for use with continuous high flow oxygen applications. This
column is specially designed to maintain a constant water level in the column under high flow oxygen
applications.
Caution: The Comfort-Flo Column should be used exclusively with continuous high flow
oxygen applications. Use of any other column during high flow oxygen applications may
cause flooding of the circuit.
Note: The amount of fluid transferred to the reservoir varies slightly depending on venti-
lator settings. Several factors increase the amount of fluid transfer: high peak pressure,
lower breath rates, reduced water volume in reservoir, I/E ratios approaching 1:1.4, and
square pressure waveforms.
Note: The ConchaTherm Neptune requires the use of a dual temperature probe at
all times.
7
Figure 2: Low-Compliance CONCHA-COLUMN Flow Diagram
Dry oxygen/air mixture
from flow source
Heated, humidified
oxygen/air mixture to patient
Saturated Wick
CONCHA
Prefilled. Disposable
Sterile Water Reservoir

5. Specifications
ConchaTherm Neptune Performance Characteristics:
Patient Airway Temperature Ranges (Adjustable):
Invasive Mode Heated-Wire Circuit: 32-39 ºC
Non-heated Wire Circuit: 30-37 ºC
Non-Invasive Mode Heated-Wire Circuit: 30-37 ºC
Non-Heated-Wire Circuit: 30-37 ºC
Temperature Display: Three-digit, seven-segment LED
High-Temperature Alarm Limit: 41.0°C typical
Tracking Alarm: ± 2.0°C of the selected airway temperature, after the set temperature has been
reached.
Warm-up time: (Warm up is defined as patient temperature within 2°C of set point)
Heated-Wire 10 minutes
Non-Heated Wire 35 minutes
Recommended Flow Rates*:
Adult (22mm Circuits) Heated-Wire Circuit 3 to 40 LPM
Adult (22mm Circuits) Non-heated Wire Circuit 6 to 20 LPM
Pediatric (15mm Circuits) Heated-Wire Circuit 1 to 40 LPM
Pediatric (15mm Circuits) Non-heated-Wire Circuit 5 to 20 LPM
Infant/Neonatal (10mm Circuits) Heated-Wire Circuit 1 to 20 LPM
Infant/Neonatal (10mm Circuits) Non-heated Wire Circuit 3 to 20 LPM
Continuous Flow Oxygen: Comfort-Flo System 1 to 40 LPM
*The Invasive Mode of the Concha Neptune was designed to provide 100% RH , as evidenced by moisture con-
densation, or “rainout” in the circuit at the recommended flow rates over the settable proximal airway tempera-
ture settings at zero gradient. In some cases, the use of positive gradient settings “ ” or flow rates outside
the recommended ranges may result in increased warm-up times or lower than recommended humidity outputs.
Additionally, some environmental conditions, such as warm ventilator outlet gas temperatures and/or high ambi-
ent temperatures, may require the use of the negative gradient setting ” ” to reach 100% RH, or visible
moisture droplets in the circuit.
Humidity Output:
Invasive Mode > 33 mg H2O/L at 32º C proximal airway temperatures when set at zero
gradient at the recommended Flow Rates listed above.
• Use of Positive or "Sun" gradient settings in some conditions can result in
humidity outputs at the patient of less than 33mg H2O/L at 32º C. Visually
inspect for condensation droplets in the inspiratory circuit after one hour of
operation, and periodically thereafter.
Non-Invasive Mode > 10 mg/L at 32º C proximal airway temperatures when set at zero
gradient at the recommended Flow Rates listed above.
• This mode should only be used when the patient airways ARE NOT
bypassed.
8

Concha-Column Performance Characteristics
Water Capacity:
Standard 193 ± 10 ml with full reservoir
Low Compliance 40 ± 5 ml
Comfort-Flo Low-Compliance: 40 ± 5 ml
Minimal Compliance column: 40 ± 5 ml
Column Compliance:
Standard: 1.12 ml/cm H2O with full reservoir
2.51 ml/cm H2O with reservoir at “replace” mark
Low-Compliance: 0.25 ml/cm H2O
Comfort-Flo Low-Compliance: 0.25 ml/cm H2O
Minimal Compliance: 0.2 ml/cm H2O
Column Compressible Volume:
Standard: 103 ml with full reservoir
268 ml with reservoir at “replace” mark
Low-Compliance: 248 ml ± 12 ml
Comfort-Flo Low-Compliance: 248 ml ± 12 ml
Minimal Compliance: 109 ml
Note: The amount of water in a Standard Concha-Column decreases as water is used,
increasing the compressible volume as water is consumed.
General System Characteristics
Pressure Drop or Resistance to Flow:
System Circuits, Concha Column and Water Reservoir shall be in compliance to ISO 8835-2 for
Pressure Drop (Resistance to Flow). See individual circuit “Instructions For Use” for Resistance
to Flow data.
System Pressures:
The ConchaTherm circuits are designed to exceed the ISO/CD 5367 standard of 60 cm/H2O
(6 +/- 0.3 kPa), and are tested to perform at 90 cm/H2O.
System Leakage:
System leakage (Circuit, Concha-Column and Water Reservoir) will have a combined leakage of
less than 25 ml/minute at 60 cm/H2O (6 +/- 0.3 kPa) per ISO 5367, Annex D.
Noise Levels:
The humidifier noise level under normal operation conditions shall be less than 50 dB measured
1 meter from the device, except while audible alarms are active.
Electrical Characteristics:
Input Voltage and Power: 100-120 V ~, 50-60 Hz, 2.6 A (MAX)
200-240 V ~, 50-60 Hz, 1.9 A (MAX)
Leakage Current: Less than 100 micro-amps
Dielectric Withstand: 1,250 volts minimum for one (1) minute
Temperature Control: Dual thermistor
Power Fuses: Two 4 amp, 5 x 20mm time delayed, 250 V ~
Thermal Fuse: 152 °C non-re-settable
140 °C re-settable
Operating Environment Temperature:
Operating Temperature: 18 to 29 °C (68 to 85°C)
Note: Operating the humidifier at the extremes of the operating temperature may affect the
temperature output of the device and/or cause nuisance alarms. The humidifier works ideally
at a room temperature of 22 to 26 °C (72 to 79 °F).
9

Physical Characteristics:
Size: 17.3 cm (H*) x 14.0 cm (W) x 20.6 cm (D)
6.8” (H*) x 5.5” (W) x 8.1” (D)
Weight: 2.8 pounds/1.3 Kg (approximate)
Note: Allow 33 cm (13”) total height allowance for column installation
Transportation and Storage:
Temperature: -20 to +50 °C (-4 to +122 °F)
Relative Humidity: 95% max (non-condensing, Transportation)
85% max (non-condensing, Storage)
Electromagnetic Compatibility (EMC):
This device meets the requirements of IEC and UL 60601-1 Standards for Medical Electrical
Devices with respect to Electromagnetic Emissions and Compatibility. This device can be placed
in close proximity to other Medical Devices approved to the same standards. Communication
devices or other equipment emitting RF signals may cause erratic operation of this device.
(See Tables, Appendix I)
Standards:
The ConchaTherm Neptune Heated Humidifier will be tested to and will comply with the following
standards:
UL 60601-1, Medical Electrical Equipment, Part 1: General Requirements for Safety
IEC 60601-1 Medical Electrical Equipment
ISO 8185 2nd Edition; Humidifiers for Medical Use – General Requirements
or Humidification Systems
IEC 60601-1 Clause 5 Classifications:
• Class I
• Type BF
• IPX1
• Rated of Continuous Operations
10

6. Controls and Indicators
Front Panel Indicators
1. Non-Invasive Mode - Icon illuminates when the humidifier is in the SUPRA-GLOTTIC or
Non-Invasive Ventilation mode.
2. Invasive Mode - Icon illuminates when the humidifier is in the SUB-GLOTTIC or Invasive
or Intubated mode.
3. LED Display - Displays the temperature within tenths of a degree centigrade
resolution. During normal operation, the LED displays actual proximal patient airway
temperature. To display the column temperature, press and hold the column button. The
column temperature will be displayed as long as the key is pressed.
4. Airway Temperature - Icon illuminates green during normal operation. This indicator
flashes red when there is a temperature probe problem or an over temperature condition at
the patient airway.
5. Column Temperature - Icon illuminates green when the column button is pressed and the
column temperature is displayed on the temperature display LED. This indicator flashes red
when there is a temperature probe problem or high temperature condition at the column.
6. Inspiratory Wire Indicator - Arrow icon illuminates green when the inspiratory wire of a
heated-wire circuit is connected to the humidifier. This arrow will flash red when the
inspiratory wire status has changed (connected or disconnected) during operation. This
arrow will flash green if the status (connected/disconnected) is changed during “Confirmation
of Settings or Set-up”.
11
Figure 3: CONCHATHERM NEPTUNE Front Panel Indicators
1
3
8
9
5674
10
2

7. Expiratory Wire Indicator - Arrow icon illuminates green when the expiratory wire of a
heated-wire circuit is connected to the heater. This arrow will flash red when the expiratory
wire status has changed (connected or disconnected) during operation. This arrow will flash
green if the status (connected/disconnected) is changed during “Confirmation of Settings
or Set-up”.
8. Pause Indicator - When the humidifier has been placed in pause mode, the icon will
illuminate and the LED display will count down the remaining pause time.
9. Service Indicator - If the heater detects an internal problem during operation, the icon
and the Emergency Alarm Indicator will flash and an audible alarm will sound. If this hap-
pens, turn the heater off and let it cool. If the condition persists, take the unit out of service
and return to Teleflex Medical for servicing.
10. Temperature Gradient Indicator - Indicates the temperature gradient set point. Indicator is
active when using a heated wire circuit and will be illuminated during “Set-up” and
“Check Settings” modes.
STATUS INDICATORS
1. GREEN - Green icons indicate the device is functioning normally.
2. YELLOW - A Yellow flashing icon in conjunction with a low volume, 3-tone audio signal
indicates a cautionary alarm condition (also see “Alarm Conditions” in the “Troubleshooting”
section of this manual).
3. RED - A red flashing icon in conjunction with a high volume, 5-tone audio signal indicates
an emergency alarm condition requiring immediate action by the clinician (see “Alarm
Conditions” in the “Troubleshooting” section of this manual).
12

Front Panel Controls
a. Power ON/OFF - The button controls power to the humidifier. Press and hold to turn
unit ON. Press and hold to turn unit OFF.
b. Mode Selector - This key selects the operating mode (Invasive or Non-Invasive).
c. Temperature and Pause Time Control - The Increase and Decrease Buttons allow
the user to adjust the proximal patient airway temperature and pause time settings.
d. Temperature Gradient - Sun and Raindrop - These keys increase or decrease the
temperature gradient between the column and the patient end of the heated-wire circuit.
e. Gradient Display - Blue LED between the Sun and Raindrop indicates the actual
temperature gradient setting. The example below shows a setting of one degree towards
the raindrop. This setting would increase humidity in the circuit.
f. Accept Button - Used to check settings, access adjustable settings and accept the
displayed parameters and store settings into memory.
g. Pause Button - Used to enter the Pause Mode for a user adjustable period of 5-60
minutes.
h. Alarm Mute Button - Used to silence a Cautionary Alarm for two minutes.
i. Column Button - When pressed, the LED displays the temperature of the gas at the outlet
of the column. The column temperature will remain displayed as long as the key is pressed.
13
Figure 4: CONCHATHERM NEPTUNE Front Panel Controls
g
b
h
a
i
c
d
e
f
Example:

7. Directions for Use
Read this entire section, including all warnings and cautions, before operating the ConchaTherm
Neptune. See the “Applications” section for tips on using the ConchaTherm Neptune in specific clini-
cal situations.
System Setup
1. Installation:
Mount the humidifier to a pole, ventilator or rail system using the appropriate mounting
bracket. Contact your Teleflex Medical representative for available mounting brackets.
Mounting instructions are supplied with the bracket.
Warning: Fire Hazard: Do not use humidifier in the presence of flammable anesthetic
gases.
2. Connect the humidifier to power.
• Connect the supplied hospital grade power cord to the rear of the unit.
• Plug the humidifier into an appropriate 120 V ~ three-prong, grounded
electrical outlet. Verify power at the outlet.
Warning: This unit requires 120 V ~ (nominal) 60 Hz sine wave output. If used in a
transport vehicle requiring an inverter, do not use square wave or pulse width modulated
sine wave output. To do so may result in overheating.
3. Install the Concha-Column and Concha Water Reservoir.
• Insert the column into the humidifier. Be sure that the tubing clamp(s) are
closed.
• Place the water reservoir into the reservoir holder.
4. Connect the ventilator circuit to the Concha-Column.
• Remove the yellow cap from the top of the column.
• Connect the humidifier line from the ventilator to one of the ports on the
column.
• Connect the inspiratory tubing elbow to the remaining port on the column.
• Connect the expiratory tubing elbow to the expiratory port on the ventilator.
5. Connect the dual thermistor probe.
• Insert the temperature probe plug into the jack at the lower front of the
humidifier.
• Place the short-cabled probe at the column outlet and the long-cabled probe
into the inspiratory side of the patient wye.
Warning: The temperature probes must be properly placed in the breathing circuit
before operating the humidifier. Failure to properly connect the temperature probes may
cause the unit to alarm and shut down.
6. Connect the heated-wire pigtails (not applicable when using conventional circuits).
• Connect the inspiratory limb heated-wire (blue) pigtail to the blue
heated-wire connector on the humidifier cable. Connect the expiratory limb
heated-wire (yellow) pigtail to the yellow heated-wire connector on the
humidifier cable.
• Verify heated-wires are connected to the humidifier before turning the
unit on.
Note: The humidifier will automatically enter heated-wire operation when it senses the
inspiratory heated-wire from a Hudson RCI circuit.
Warning: If using a heated-wire circuit with this humidifier, use only Hudson RCI 21-volt-
circuits.
14

Warning: When using Hudson RCI Heated-Wire Circuits:
• Observe the minimum minute volumes recommended in this manual.
• Do not cover the circuit with sheets, blankets, towels, clothing or other materials.
• Do not apply excessive tension to the heated-wire harness — DO NOT "MILK"
TUBING.
• Do not allow the circuit to rest on the patient's bare skin.
7. Connect the water reservoir to the column.
• Remove the cap from the column’s bottom puncture pin. Push and twist the
pin through the puncture site at the bottom of the reservoir. Insert the pin all
the way. Repeat this procedure for the top puncture pin and puncture site.
• Open the tubing clamp(s) and gently squeeze the reservoir bottle.
8. For next steps proceed to the Automatic Operation and/or User Adjustable Operation
sections of this manual.
15
Figure 5: The COCHATHERM NEPTUNE System using a
Non-Heated Wire (Conventional) Circuit
FROM VENTILATOR
PLACE COLUMN
PROBE HERE
CONCHA COLUMN
CONCHA HEATED
HUMIDIFIER
HEATED WIRE
CABLES
(NOT USED)
DUAL TEMPERATURE
PROBE
TO PATIENT
TO VENTILATOR
CONVENTIONAL
BREATHING CIRCUIT
CONCHA 1650ml
RESERVOIR
BOTTLE
PLACE PATIENT
AIRWAY TEMPERATURE
PROBE HERE

Automatic Operation
1. Set up and turn ON the ventilator or gas source (see the Ventilator Manufacturer Instructions
for Use to determine ventilator operation and monitoring requirements).
Warning: Always monitor tidal volume, minute volume, respiratory rate and all pres-
sures and ensure that all monitoring alarms are appropriately set and functioning before
connecting patient to the gas delivery system (ventilator, humidifier and circuit).
2. Turn the humidifier’s power ON .
Once activated, the humidifier will perform a self-check (a scrolling dash will be seen on the
LED display). When the self-check is complete, the unit will issue an audible alert. This
indicates the humidifier is ready for operation. At this point the user can choose to confirm
or change the settings.
Warning: If the heater detects a fault during the self-check, the icon will flash and
an audible alarm will sound. If this happens, take the unit out of service and return to
Teleflex Medical for servicing.
Warning: Do not leave the humidifier on, do not turn the humidifier on and do not exit
the pause mode until there is regulated gas flow through the system. To do so may
result in heat buildup, causing a bolus of hot air to be delivered to the patient. Circuit
tubing may significantly soften under these conditions. Turn the humidifier power switch
OFF, or place the unit in pause and allow the system to cool before stopping gas flow.
Warning: Always verify gas flow and airway temperature before connecting the humidifer
to the patient.
Note: The humidifier will not begin to heat until the settings have been confirmed.
Note: The humidifier will automatically detect Hudson RCI adult, pediatric and neonatal
heated-wire circuits.
Note: Confirm the heated-wire icons illuminate green when the appropriate heated-wires
are connected to the unit.
16
Figure 6: The CONCHATHERM NEPTUNE System Using a Heated-wire Circuit
FROM VENTILATOR
PLACE COLUMN
PROBE HERE
CONCHA COLUMN
CONCHA HEATED
HUMIDIFIER
DUAL TEMPERATURE PROBE
TO PATIENT
TO VENTILATOR
CONCHA 1650ml
RESERVOIR
BOTTLE
PLACE PATIENT
AIRWAY TEMPERATURE
PROBE HERE
HEATED WIRE
CABLE (BLUE)
HEATED WIRE
(BLUE)
INSPIRATORY
HEATED WIRE
CABLE (YELLOW)
HEATED WIRE EXPIRATORY
(YELLOW)
(IF USED)
HEATED WIRE BREATHING
CIRCUIT

3. Confirm Settings.
The accept button will flash and the humidifier will automatically display the stored
settings for mode (invasive or non-invasive) and patient airway temperature. When using a
heated-wire circuit, the heated-wire and temperature gradient indicators will illuminate.
Patient airway temperature and temperature gradient will default to the last used values for
the present configuration (mode and breathing circuit type). If the configuration has not
been used previously, factory default settings will apply.
To begin operation using the displayed settings, press and release the accept
button. The heater will begin warm-up and then normal operation.
Note: To adjust the displayed settings, see User Adjustable Operation.
Note: Power is not applied to the heater or heated-wires until the settings have been
confirmed.
Note: If the user does not press the accept button to confirm these settings or press
and hold the accept button to enter the User Adjustable Operation within 5 minutes, the
unit will alarm. To clear this alarm, press the accept button .
4. Warm-Up.
During warm-up, the °C will flash and the LED display will show the actual proximal patient
airway temperature. Warm-Up ends when the patient airway temperature reaches within
2°C of the set airway temperature. Once warm-up is complete the °C will stop flashing.
Note: During warm-up, the low temperature alarm is deactivated.
Warm-up Time: 10 minutes (heated-wire circuits)
35 minutes (conventional circuits)
Note: Warm-up times consider that warm-up is achieved when the patient airway tem-
perature is within 2°C of the patient airway set temperature.
17
Figure 7: The CONCHATHERM NEPTUNE System for the Comfort-Flo Cannula
PLACE COLUMN
PROBE HERE
CONCHA COLUMN
CONCHA
HEATED HUMIDIFIER
TEMPERATURE PROBE
CONCHA 1650ml
RESERVOIR BOTTLE
PLACE PATIENT
AIRWAY TEMPERATURE
PROBE HERE HEATED WIRE
INSPIRATORY (BLUE)
HEATED WIRE
EXPIRATORY (YELLOW)
(NOT USED)
FROM REGULATED
OXYGEN SOURCE

5. Normal Operation.
After warm-up, the humidifier will convert to normal operation. Figure 8 shows a typical
display for the ConchaTherm Neptune during normal operation.
Warning: Maintain adequate gas flow through the column and breathing circuit. This will
prevent overheating the column and circuit.
Warning: Do not leave the humidifier on, do not turn the humidifier on and do not exit
the pause mode until there is regulated gas flow through the system. To do so may
result in heat buildup, causing a bolus of hot air to be delivered to the patient. Circuit
tubing may significantly soften under these conditions.
6. Pause Mode
To facilitate activities such as circuit changes and nebulizer treatments, the ConchaTherm
Neptune features a pause mode. During this period, humidifier settings are maintained and
automatically re-activated when the designated pause time ends.
To activate the PAUSE Mode, press and hold the pause button . The timer icon will
illuminate and the LED display will count down the remaining time in pause. The factory
default pause time is 30 minutes.
During pause mode:
• Power to the heater is reduced and the power to heated-wires is turned off.
• The humidifier will not allow adjustment of the mode, airway temperature,
temperature gradient or pause interval.
To exit PAUSE, press the flashing pause button or allow the pause time to expire. Both
exit methods will return the humidifier to warm-up and normal operation.
Warning: Do not exit the pause mode until there is regulated gas flow through the system.
To do so may result in heat buildup, causing a bolus of hot air to be delivered to the patient.
Circuit tubing may significantly soften under these conditions.
18
Figure 8: CONCHATHERM NEPTUNE - Normal Operation Using a
Dual Heated-Wire Circuit

7. Changing the breathing circuit.
When replacing the breathing circuit with the same type of breathing circuit (heated-wire
being replaced with heated-wire), place the heater in pause mode before changing the
circuit. If replacing the breathing circuit with a different type of breathing circuit (Infant/Adult
or Heated-wire/Non-Heated wire), turn the humidifier OFF before changing the circuit. This
will allow the heater to auto-detect the new circuit without alarming.
Note: The humidifier will give a heated-wire change alarm if PAUSE is exited and the
heated-wire configuration has been changed.
Note: If the circuit type is changed the humidifier will revert to the remembered settings
the last time that circuit was used.
Warning: Do not leave the humidifier ON, do not turn the humidifier ON and do not exit
the pause mode until there is regulated gas flow through the system. To do so may
result in heat buildup, causing a bolus of hot air to be delivered to the patient. Circuit
tubing may significantly soften under these conditions. Turn the humidifier power switch
OFF, or place the unit in pause and allow the system to cool before stopping gas flow.
8. Removing From Service.
To turn the humidifier OFF, press and hold the button until the display goes blank.
Allow the unit to cool before stopping gas flow.
Warning: If the humidifier detects an internal problem during operation, the service icon
and the Priority Alarm Indicator will flash and an audible alarm will sound. If this hap-
pens, turn the humidifier OFF and let it cool. If the condition persists, take the unit out of
service and return to Teleflex Medical for servicing.
19
This manual suits for next models
1
Table of contents
