Telemax TXGCDIG User manual

1
User Manual
TXGCDIG
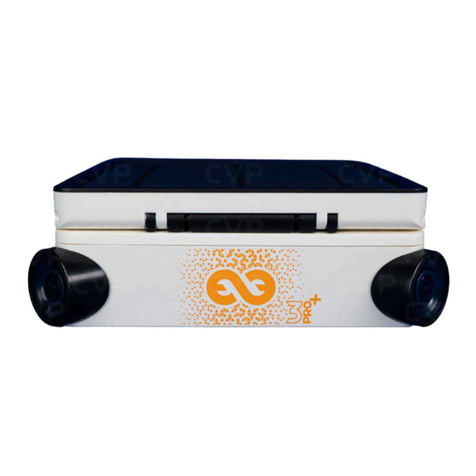
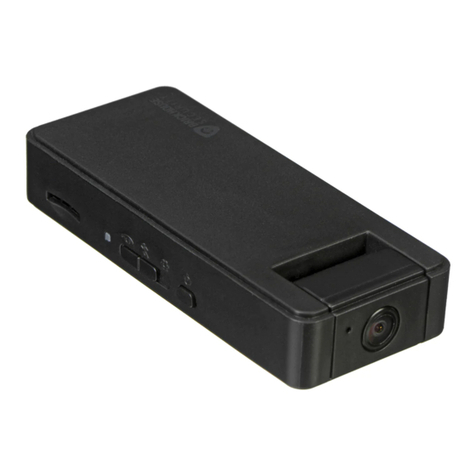
4-in-1 Digital Carabiner Camera

Thank you for purchasing the 4-in-1 Carabiner Digital Camera. This
camera takes still photos, video, and can be used as a PC web-cam.
This camera is equipped with a 2Mb built-in SDRAM. Through the
USB cable provided, you can download the captured images to your
computer, or use the camera as a web-cam.
SYSTEM REQUIREMENT
• Microsoftwin98/2000/NT/ME/XPoperationsystem
• 125MBorabovefreeharddiskspace,32MBormoreROM
• UsableUSBinterfaceandCD-ROM
• ColorMonitorwithatleast800x60024bitresolutionorabove
GETTING STARTED
This camera is equipped with standard accessories including
installationCDandUSBcable.Thefollowingsectionsexplainhowto
use all of the features of your new camera.
POWER SUPPLY
1xAAAAlkalinebattery
Precautions
1. Always download your images from the camera before the battery
isdischarged.Otherwise,theimageswillbedeletedautomatically.
2. When using the PC Camera function it is not necessary to use the
battery, as the computer will provide the required power through
the USB cable. Before using this function, download the images
from the camera before you discharge the battery or the images
will be deleted automatically.
Note:Donotmixoldandnewbatteriesorofdierenttypeand
brand.
AUTOMATIC SHUT OFF FEATURE
Tosavebatterypower,thecamerawillautomaticallyshutowhen
notusedafter30seconds.
2

INSTALLATION OF DRIVER
1. Make sure the camera is not connected to your computer. Load the
software CD to your PC
2. Click <Install Camera Driver> and follow the step-by-step
instructions to complete installation. After successful installation
of driver, restart your computer. A “Dual Mode Camera” folder will
appear on your desktop.
TAKING PHOTOGRAPHS
Install one AAA Alkaline Battery.
1. To turn on the camera, press the mode button on the back. The
LCD data screen will appear.
2. Center your subject in the viewnder
3. Holdthecamerasteady,andpresstheshutterbuttontotake
photos
4. When you hear the camera beep once, this indicates you have
taken a photo
5. Whenthemaximumnumberofphotoshasbeentaken,thecamera
will beep twice indicating no additional images can be shot.
Notes
1. When taking photos, the louder sound indicates a successful shot.
A faint beep will indicate a failed shot.
2. Thedigitalcameraiscapableofstoringover99*images,however,
theLCDcanonlydisplayuptothe#99.
*InQVGALowResolutionMode
TURNING OFF CAMERA
1. PressMODEbuttonuntilthedataLCDdisplays“o.
2. Pressthe“Shutter”buttonwithin5secondstoturnothecamera
swiftly.
3

SELF-PORTRAIT FEATURE
1. Onthefrontofthecameraadjacenttothelensisasmallaiming
mirror.
2. Holdcameraatarmslengthandusemirrortocenteryourportrait.
3. Pressthe“Shutter”buttontotakeimage.
SELF-TIMER MODE
1. PressMODEbuttonuntilthedataLCDdisplays
2. Press“Shutter”buttonwithin5secondstoenterthe10-second
time set. The digital camera will beep for every second.
3. After10seconds,thecamerawilltakethepicture.
VIDEO MODE
1. Press the mode button until the data LCD displays
2. Pressandholdthe“Shutter”buttonwithin5seconds,for
continuous video capture.
3. Tostopthevideocapture,releasetheshutterbutton.
Note: When the memory is full, the operation will stop and the “FL”
symbol will appear.
CONTINUOUS CAPTURE
1. PressMODEbuttonuntilthedataLCDdisplays
2. Pressthe“Shutter”buttonwithin5secondstotakethreephotos
continuously.
DELETE ALL PHOTOS
1. PressMODEbuttonuntilthedataLCDdisplays
2. Press “Shutter” button twice to delete all images.
4

DELETE LAST PHOTO
1. PressMODEbuttonuntilthedataLCDdisplays
2. Pressthe“Shutter”buttonwithin5secondstodeletethelast
photo.
HI RESOLUTION/LO RESOLUTION
The resolution governs how much detail is captured in each picture.
The default resolution is Hi.
1. To select the “Lo” resolution setting,
pressMODEbuttonuntilthedataLCDdisplays
2. Pressthe“Shutter”buttonwithin5secondstochangeresolution.
IMAGE COMPRESSION
In order to better utilize the built-in memory, the 4-in-1 Carabiner
Digital Camcorder carries a File Compression function. When the
digital camera is set to compress the les, more images or increased
length of video can be stored. The default non-compression mode is
“Hd”(HighCompression).
1. PresstheMODEbuttonuntilthedataLCD
displays the following default compression mode
2. Pressthe“Shutter”buttonwithin5secondstochangeto“Lo”
(LowCompression).
FREQUENCY SELECTION
In most American and Asian countries, the electric frequency is
generally60Hz;UK,Japan,andEuropeancountriesgenerallyuse
50Hz.Thecorrectfrequencyshouldbeselectedinconformitytothe
local AC power supply to avoid image or color distortion. Please check
withthelocalElectricalPowerSuppliertoverifythecorrectpower
supplyforyourcountry/area
1. PressMODEbuttonuntiltheLCDdisplays
2. Pressthe“Shutter”buttonwithin5secondstoshiftto50Hz
power supply.
5

DOWNLOAD, SAVING, TRANSFERRING
& ADJUSTING IMAGES
When the photo memory is full, the operation will stop and the “FL”
symbol will appear. To save your images, you’ll need to download or
transmit them to your computer.
1. Use the provided USB cable to connect the computer with the
digital camera. You will hear a “beep” sound indicating a successful
connection.
2. Select the folder “Dual Mode
Camera” on your computer
desktop or under the Program
Menu. Click on the “MYDSC” icon
to open program.
3. Clicktheiconofapinkcamera
on the bottom left to download
your images.
Note:Afterdownloadingthelesfromyourcamera,thumbnailsof
theimageswillbeshownonthetwelveboxesoftheprogramscreen.
Videoimageswillbemarkedwithan“AVI”logoontheupperleft-
hand corner of the thumbnails.
6

USING THE DIGITAL CAMERA AS PC CAMERA
1. Click on the “Dual Mode Camera” folder on your computer
desktop or under the Program Menu. Click on the “PC Cam” icon
to open program. If the Digital Camera does not start preview
automatically,goto“Options”onthemenubarandchoose
“Preview” to activate.
2. Goto“File”onthemenubarandchoose“SetCaptureFile”to
select the default location for saving. Select the desired location
andnamethele(besuretoinclude“avi”afterthelename)then
click“Open”.Thevideorecordedwillbesavedtothislocation
automatically.
3. Apop-upmenuwillappearrequestingforthedesireddiskspace
tobesetasideforcapturedle.Thedefaultissetat1MB.ClickOK.
(There is no need to enlarge the disk space set aside because the
program will automatically adjust when insucient.
7

4. Goto“Options”onthemenubarandchoose“VideoCapture
Filter” for image setting. Choose the desired level of “Brightness”,
“Contrast”, “Saturation”, “Sharpness”, and “White Balance”. Click to
exit.Toreturntodefaultimagesetting,click“Default”andthen
“OK”or“Apply”.
5. Goto“Options”onthemenubarandchoose“VideoCapture
Pin” to choose the resolution of the video that will be captured.
Choosethedesired“FrameRate”andthedesired“ColorSpace/
Compression”and“OutputSize”.Click“OK”or“Apply”toconrm
setting.Otherwise,click“Cancel”toexit.
6. Goto“Capture”onthemenubarandchoose“SetFrameRate”
to set the desired “Frame per Second” for the video that will be
captured.Makesurethecheckboxforthe“UseFrameRate”is
checkedandenterdesiredFrameRatepersecond.Click“OK”to
conrm, click “Cancel” to discontinue the setting.
8

7. Goto“Capture”onthemenubarandchoose“SetTimeLimit”
to set time limit for the video that will be captured. Make sure
thecheckboxforthe“UseTimeLimit”ischeckedandenter
thedesiredTimeLimit.Click“OK”toconrm,click“Cancel”to
discontinue the setting.
8. Goto“Capture”onthemenubarandchoose“StartCapture”(the
defaultsavinglocationmustbeset).Apop-upwindowwillappear
requesting conrmation to proceed while showing the default
savinglocation.Click“OK”tobeginvideocapturing.
9. TheDigitalCamerawillbegincapturingvideowiththetimeron
the bottom of the program screen. When nished, go to “Capture”
and choose “Stop Capture” to stop video capturing.
9

10.Tosavetheleinlocationotherthanthedefaultlocation,goto
“File”onthemenubarandchoose“SaveCapturedVideoAs”.
Choose the desired location and rename if necessary (be sure to
include“.avi”afterthelename),thenclick“Open”.
USING THE DIGITAL CAMERA AS A WEB-CAM
The digital camera supports most Webcam software applications
such as Microsoft® or Yahoo® Messenger. Used with these software
applications, the digital camera functions as a web-cam. Below are
thedetailedinstructionstoobtainMicrosoft®Netmeeting™program:
a. For Windows XP
Click on the “Start” button on the computer desktop.
Click “Run”.
When the “Run” window appears, type “conf” and click “Conrm”.
TheMicrosoft®Netmeeting®Programinstallationwillstart
automatically.
Follow the on-screen instruction to complete the installation.
Oncetheinstallationiscompleted,opentheprogram.Whenyour
digital camera is connected to your computer, click the “play” icon
to activate the digital camera as web-cam.
b. For Windows 98, Me & 2000
GototheMicrosoft®ocialNetmeeting®websitetodownload
thelatestNetmeeting®program.
http://www.microsoft.com/windows/netmeeting/default.asp
Oncetheprogramisinstalled,opentheprogram.Whenyour
digital camera is connected to your computer, click the “Play” icon
to activate the digital camera as Web-cam.
10

CAMERA SPECIFICATIONS
ImageSensor: 300KPixelCMOSsensor
Internal Memory: 2Mb built-in SDRAM
Modes: Digitalvideorecording(nosound)
Still photos
PCCamera(web-cam)
Resolution: 640x480(VGA)
320x240(QVGA)
FileFormats: 24-bitJPEG,AVl
StorageCapacity: VGA:26images,50compressed
QVGA:79images,302compressed
AVI:~20seconds
Statusdisplay: MonochromeLCDDisplay(dataonly)
Interface: USB 1.1
VideoFrameRate: 12fps(VGA),10-12fps(QVGA)
Lens: Fixed;f=6.00mm
Focus: settings40cm~innity(Normal)
Aperture: F2.8
Powersource: 1xAAAbattery(Notincluded)
Self-timer: 10seconds
Viewnder: Built-in
Autoosystemtime: 30seconds
Low voltage alarm: Auto
Dimensions: 91x54x26mm
(3.58x2.12x1.02)inches
Weight: 4grams(0.14oz)withoutbattery
11

WARRANTY
LEI ELECTRONICS INC. LIMITED WARRANTY
These products are warranted against defects for one (1) year from
the date of purchase. Within this period, LEI Electronics Inc. agrees
to remedy such defects by repairing or replacing, at it’s option, any
productsprovidedtheyaresentPREPAIDtotheaddresslistedbelow
within the warranty period and includes a copy of the original sales
receipt as proof of purchase.
EXCEPT AS PROVIDED HEREIN, LEI ELECTRONICS INC. MAKES NO
WARRANTIES, EXPRESS OR IMPLIED, INCLUDING WARRANTIES OF
MERCHANTABILITYANDFITNESSFORAPARTICULARPURPOSE.
This warranty gives you specic legal rights and you may have other
rights which will vary from province to province.
For product support please contact
www.leiproducts.comor1-800-449-3315.
12
Custom Manufactured in China for/
Fabriqué en Chine spécialement pour
LEI Electronics Inc.,
18 Mollard Court, Unit 4
Barrie, Ontario, Canada L4N 8Y1
www.leiproducts.com
*TelemaxCommunicationsisaregisteredtrademarkofLEIElectronicsInc.
Table of contents
