Ten-Haaft Oyster User manual

www.ten-haaft.com
OPERATING INSTRUCTIONS
Oyster® Smart TV

2 3
TABLE OF CONTENTS
1. General
1.1 Introduction 04
1.2 Scope of delivery 04
1.3 Intended use 04
1.4 Safety Instructions 04
2. Control elements
2.1 Remote control 05
2.2 Interfaces / operation at the device (19,5“, 21,5“, 24“) 08
2.3 Interfaces / operation at the device (27“, 39“) 10
3. Operation of the Oyster® Smart TV
3.1 Start-up 14
3.2 Connecting the TV to the Internet 15
Setting up a WLAN connection 15
Wired (LAN) network connection 19
3.3 Main menu 22
Channel 22
Channel settings and search run (DVB-S2) 23
Channel settings and search run (DVB-T2) 28
Picture 29
Sound 31
Time 32
Lock 33
Set-up 35
Media 38
Connect 38
3.4 Other functions 41
4. Technical specification Oyster® Smart-TV
4.1 Technical specification Oyster Smart TV 44
5. Appendix
5.1 Information on environmental protection 46

4 5
1. GENERAL
1.1 Introduction
These instructions describe the function and the operation of the Oyster® Smart TV.
1.2 Scope of delivery
Oyster® Smart TV with remote control and on-board voltage connection cable.
1.3 Intended use
The intended use of this product is the use as TV or monitor in motorhomes or caravans. Please observe the specifica-
tions of the respective vehicle manufacturer for wall installation. Use only mounting elements that comply with the
VESA standard.
The voltage supply must be provided by a standard vehicle electric system with a rated voltage of 12V / 24V DC.
No switching regulator may be used for the power supply when the product is installed in caravans.
Any use other than specified is not permitted.
1.4 Safety Instructions
To prevent deep discharge of the battery systems, the TV has a mechanical circuit breaker (mains switch) for
complete disconnection from the mains. If this switch is not used, suitable measures must be taken on- board to
prevent deep discharge of the battery systems.
The manufacturer accepts no liability whatsoever for direct or indirect damage or consequential damage to the
equipment itself, battery systems, motor vehicles or other goods resulting from the connection of unsuitable
battery systems or from installation errors or wiring faults.
2. CONTROL ELEMENTS
2.1 Remote control
But-
ton Function
Power ON/OFF
Direct call of the app selection
0 - 9
Direct input of the programme number, for example
EPG
Electronic TV guide
Quit menu/OSD
(Re-)extend antenna*
Selection of the current location*
Retract antenna*
Stop antenna*
Call up list of favourite programmes
Without function
Starts channel search (only DVB-T mode)
Without function
Skip back to previous programme
Confirm selection
Call up main menu
Select source (DVB-S/DVB-T/HDMI, etc.)
EXIT
SWAP
STOP
START
PARK
COUNTRY
FAV
AQT
SETUP
TIME
SHIFT
SOURCE
OK
APPS

6 7
2. CONTROL ELEMENTS
Button Function
+ Increase / - decrease volume
Move up one programme
Move down one programme
Muting of sound on/off
Go back one step in the menu
Display recordings from USB data carriers
Display the programme list
Stop playback
Reversing
Fast forwarding
Play/Pause
Changing meaning, see respective menu
Call up video text
Call up subtitle drop-down menu
Scroll up page
Scroll down page
Show EPG info bar again
Call up audio track drop-down menu
Call up battery display
2. CONTROL ELEMENTS
Button Function
Switch between TV and radio mode
Display of signal strength/quality of reception
Change picture play back mode
Change audio play back mode
*only when used as control unit for satellite systems.
SOUND
CH
BATT
S/Q
PICTURE
CH
VOL
AUDIO
TV/
PAGE-
PAGE+
INFO
SUBT
TEXT
RED
GREEN
YELLOW
BLUE
CHANNEL
FILE
BACK

8 9
2. CONTROL ELEMENTS
2.2 Interfaces / operation at the device (19.5“, 21.5“, 24“)
2. CONTROL ELEMENTS
Connections and control elements (19.5“, 21.5“, 24“)
01) CI/CI+ module slot
02) USB 1 connection
03) USB 2 connection
04) Headphones Connection 3.5 mm stereo jack bush
05) AV input by means of adapter
06) 12V/24V DC Electrical connection
07) LAN connection
08) HDMI1 ARC /HDMI2
09) Digital optical audio
output (TOS)
10) DVB-S/S2, F socket
11) Aerial connection DVB-T/
T2, IEC socket
12) On / off switch Circuit breaker, mains switch
13) Setup Open or quit the setup menu. Keep the button pressed for more than 3
seconds to start the automatic search in DTV
14) VOL+ / VOL- Increase or decrease the volume
15) Source To select the signal source
16) CH+ / CH- Channel change up / down
17) Infrared sensor
18) Operating mode display red standby, blue operation
Operating device on the reverse side
12V/24V
(ARC)
HDMI1
RJ45 HDMI2 OPTICAL SAT RF
PCMCIA USB2 USB1 AV
12346
7
89
10
12V/24V (ARC)
HDMI1
RJ45 HDMI2 OPTICAL SAT RF
PCMCIA USB2 USB1 AV
511
1 PCMCIA Card- CI/CI+ Moduschacht
2 USB2 Anschluss
3 USB1 Anschluss
4 Kopfhörer Anschluss 3,5 mm Klinkenbuchse Stereo
5 AV Eingan
6 12V/24V DC input Gleichstrom Eingang
7 LAN Anschluss
8 HDMI1 ARC /HDMI2
9 Digitaler Audio Ausgang optisch (TOS)
10 DVB-S/S2, F-Buchse
11 Antennenanschluss DVB-T/T2, IEC-Buchse
10
16
12 13
14
15
18 17
→
12

10 11
2. CONTROL ELEMENTS
2.3 Interfaces / operation at the device (27“, 39“)
2. CONTROL ELEMENTS
Connections and control elements (27“, 39“)
01) CI/CI+ module slot
02) USB 1 + 2 connection
03. Headphones connection, 3.5 mm jack bush
04) AV input by means of adapter
05) 12V / 24V DC electrical connection
06) LAN connection
07) HDMI 1 ARC / HDMI 2
08) Digital optical audio output (TOS)
09) SAT DVB-S/S2, F socket
10) RF antenna connection DVB-T/T2, IEC-socket
11) 12) 13) 14) Navigation button to select the function and press OK to
confirm
15) Press to quit the control panel
16) Source button. To select the signal source
17) Back
18) To go to the main menu, press the button and confirm with OK
19) Decrease volume
20) Increase volume
21) POWER switch (ON / standby)
22) Mains switch (in a different position for 39”)
Display on screen
Operating device on the reverse side
13
14
11
12
Power on/OK
OK 13
14
11
12
15
17
19
16
21
18
20
10
123568 9
1
2 USB 1 und 2 Anschluss
3 Kopfhörer Anschluss 3,5 mm Klinkenbuchse Stereo
4 AV Eingang
5 12V/24V DC input Gleichstrom Eingang
6 LAN Anschluss
7 HDMI 1 ARC /HDMI 2
8 Digitaler Audio Ausgang optisch (TOS)
9 SAT DVB-S/S2, F-Buchse
10 RF Antennenanschluss DVB-T/T2, IEC-Buchse
PCMCIA card - CI/CI+ Modulschacht
12V/24V (ARC)
HDMI1
RJ45 HDMI2 OPTICAL SAT RF
PCMCIA USB2 USB1 AV
410
7
13
14
11
12
Power on/OK
OK 13
14
11
12
15
17
19
16
21
18
20
22

12 13
2. CONTROL ELEMENTS
COMMON INTERFACE SLOT
The common interface (CI+) slot can hold a conditional access module (CAM) with SmartCard that allows you to
use pay-tv programmes and offers. Contact your television provider to obtain further information on contracts
and on the modules.
Note: Conditional access module and SmartCards are available separately from the respective provider.
Caution! Switch off your TV before introducing a module into the CI+ module slot.
The CI+ module slot is located on the reverse side of your device. Push the CA module correctly into the slot and
then introduce the SmartCard into the CA module.
• Select the channel to be enabled with your SmartCard.
• Wait for a few minutes for the SmartCard to be activated.
• Details on the SmartCard you use are displayed.
• Press
OK
to call up the SmartCard menu. Follow the instructions on your CI+ module when making manual
settings.
• When the module is removed, the following message appears: “CI module removed”
2. CONTROL ELEMENTS
SIGNAL INPUTS
HDMI / AV setup
The menus for HDMI or AV connections are comparable to those of normal TV reception, except that you cannot
make any channel settings.
If there is no signal when HDMI is selected as input source, the following screen is displayed:
If no signal can be detected within 30 minutes, the device will automatically switch to standby mode.
AUDIO INPUT
Select AV as input, for example, if you wish to use an MP3 player. The screen will switch off after 30 minutes,
but the speakers will remain active.

14 15
3. OPERATION OF THE OYSTER®SMART TV
3.1 Start-up
POWER ON
Note: Unless otherwise indicated, all references are to buttons on the remote control.
1. Switch on the TV at the television set’s circuit breaker (mains switch).
2. Press the button on the remote control. The operating mode display changes to blue.
POWER ON
To switch the television set back to standby mode, press the button on the remote control again. The
operating mode display changes to red. In order to save energy, do not leave the television set in standby mode
for longer periods of time, for example over night. Switch off the TV. Use the mains switch of the television set
to do so.
SIGNAL SOURCE
Please select the desired signal source. The option “satellite” must be selected to control a ten Haaft satellite
system.
Press the to display the signal source selection.
Use the buttons left / right to select the source,
OK
to confirm. If you do not select any source with the
button
OK
, you will automatically be returned to the current signal source.
Press EXIT to quit the menu. The following signal inputs can be selected. Press the appropriate buttons on the
remote control:
• DVB-T Satellite
• AV HDMI 1
• HDMI 2
3.2 Connecting the TV to the Internet
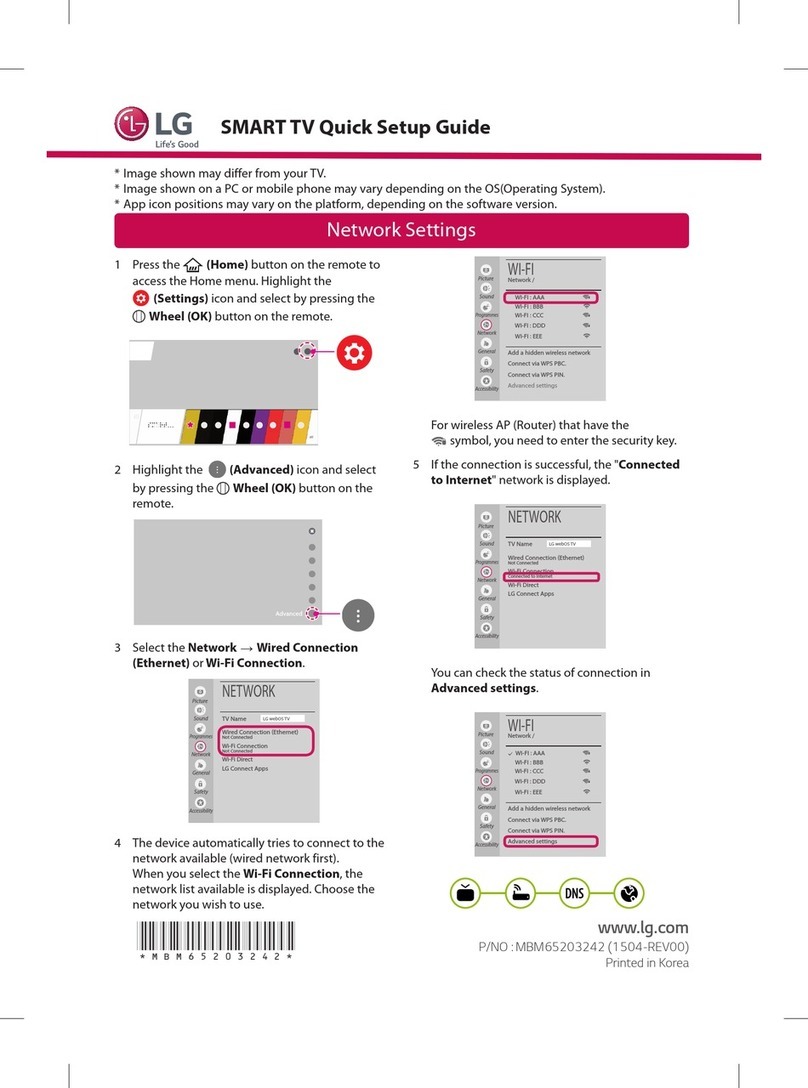
SETTING UP A WLAN CONNECTION
The network connection can be made either via a wired LAN connection or a wireless connection via the TV's
integrated WLAN.
To go to the main menu, press the button SETUP .
In the main menu, go to Set up…
3. OPERATION OF THE OYSTER®SMART TV
SOURCE

16 17
3. OPERATION OF THE OYSTER®SMART TV
… then select the network configuration DHCP
For a wireless connection via the integrated WLAN of the television set, please select WiFi network.
Use the buttons left / right to switch on the WLAN network.
3. OPERATION OF THE OYSTER®SMART TV
Select the base station with the cursor keys and press
OK
.
The internal WLAN of the television set will search for all available 2.4GHz networks and will display them in a
list.
Select the desired WLAN and press
OK
.

18 19
3. OPERATION OF THE OYSTER®SMART TV
Select the option Password and press
OK
.
At this point, you need to enter the network password. This can normally be found on the reverse side of your
router / connected device or in the operating instructions of the device provided. Use the cursor keys and the
button
OK
for the input.
The television set will establish a connection to the network and inform you when this operation is completed.
When the connection was successful, press
OK
.
Once the TV is connected, a blue WLAN symbol appears in the top right corner of the main menu.
WIRED (LAN) NETWORK CONNECTION
It is also possible to establish a network connection with an appropriate LAN cable, which is to be inserted into
the RJ45 socket of the television set and into your base station (router).
Select the wired network on the first network selection screen.
Select Configuration.
3. OPERATION OF THE OYSTER®SMART TV

20 21
3. OPERATION OF THE OYSTER®SMART TV
Make sure that IPv4 is highlighted and press
OK
.
The television set will establish a connection to the network and inform you when this operation is completed.
3. OPERATION OF THE OYSTER®SMART TV
When the connection was successful, press
OK
. A symbolic network socket is shown on the top right corner of
the screen.

22 23
3. OPERATION OF THE OYSTER®SMART TV
Channel settings and search run (DVB-S2)
Automatic search
Select “Auto Search”
Under the “Search mode” item, you can select between:
Auto Scan (automatic scan of all known transponders) Fast Scan (download of a predefined of various providers)
Blind Scan (thorough search for unknown transponders) Pre-set (reloading of the German factory-set list) Canal
Digital (Norwegian fast scan) Joyne Scan (Belgian fast scan).
For German speaking areas, Auto Scan is the only meaningful choice.
3. OPERATION OF THE OYSTER®SMART TV
3.3 Main menu
The main menu allows you to set up your television.
• Press
SETUP
to select the main menu.
• You can navigate in the menus with the arrow keys .
• You can quit the settings menu with EXIT or
SETUP
• Press
SETUP
to go back one step
CHANNEL
Select SOURCE and then change to Satellite. Press the button SETUP and select “Channel”. Confirm with
OK
.
Here you can now carry out an automatic channel search (Auto Search), a manual channel search (DVB-S man-
ual search), make special settings with regard to reception (LNB setting), sort the programme list (Edit DVB-S
programme) or have the signal strength and quality displayed (signal information). In addition there is an option
to load a software update from a USB flash drive with “Software update (USB)”.
With “CI information” you can access the settings of a possibly plugged-in CI module.

24 25
3. OPERATION OF THE OYSTER®SMART TV
Please note: If a programme list has already been compiled, for example using the setting “Free”, and another
search with the setting “Scrambled” is carried out, the previously found free channels will be removed from the
list.
Service type
In the “Service type” line you can select between:
DTV (TV programmes only)
DTV + radio (TV programmes and radio stations) Radio (radio stations only) The desired type of programme will
be searched for according to your selection.
Network search
In the “Network search” line you can determine whether or not the television will consider any cross references
to other transponders. Normally, this setting can remain on OFF.
Search
In the “Search” line, you can initiate the search by pressing the button
OK
.
Manual search run (DVB-S manual search)
This function is used to search for individual transponders of a satellite in a targeted manner.
The search results are automatically appended to the existing list of channels.
Satellite
In the “Satellite” line, you can select on which satellite the desired transponder can be found. For more detailed
information, see under Automatic search.
Transponder
In the “Transponder” line, you can use the button
OK
to open a drop down menu in which all known transpond-
ers of this satellite are listed.
If the desired transponder is not yet included in the list, you can add it yourself with the yellow button.
When you have selected the desired transponder, you can quit the drop-down menu by pressing the button SETUP .
This will adopt your selection.
Note: the bars on the display for quality and strength show whether the transponder is actually available and
whether a search is meaningful at all.
If no green bar is visible for quality, then either reception is poor/disturbed or the data for this transponder is
no longer up to date.
3. OPERATION OF THE OYSTER®SMART TV
Auto Scan
When you have selected this item, you can determine in the “Satellite” line which satellite is to be searched. To
do so, press
OK
, select the desired satellite and quit the satellite selection menu with the button
SETUP
. This will
adopt your selection.
(In conjunction with a ten Haaft premium satellite system, the satellite antenna will now be aligned with the
selected satellite. Please wait until the antenna has found the satellite and has come to rest before starting the
search run.)
FastScan
FastScan is only relevant for some countries outside the German-speaking area. During this process, pre-set pro-
gramme lists of the respective provider are downloaded via satellite. Caution: Previously compiled programme
lists will be overwritten by this!
Transponder
Unless otherwise indicated, it is recommended to leave all values at their standard settings.
ScanType
The “ScanType” line allows you to set whether you want the search to be carried out for free-to-air channels
(Free), scrambled channels (Scrambled) or both (Free+Scrambled).

26 27
3. OPERATION OF THE OYSTER®SMART TV
Editing the DVB-S programme
Here you can change the programme sequence within the list of channels, compile a list of favourites, delete
individual programmes from the list or highlight them so they are automatically skipped.
CHANGING THE SEQUENCE:
Move the blue bar to the channel you wish to move. Press the button YELLOW to highlight the channel. You can
now move the channel to its new position with the arrow keys. Alternatively, you can enter the new programme
position directly via the keyboard. By pressing the button YELLOW again, the channel is placed in the new position.
COMPILING A LIST OF FAVOURITES:
A list of favourites is a separate list which you can use to summarise your favourite programmes without having
to edit the actual list of channels. Navigate to the programme in the programme list that you would like to
include in your list of favourites. Press the button
FAV
. This marks the programme with a heart-shaped symbol.
Pressing
FAV
again on an already marked programme will remove the marker.
Continue to the next channel of your choice and press the button FAV again to include it in your list of favour-
ites. The channels will be visible in the list of favourites where they will also retain their original number. This
means that the displayed channel numbers are not necessarily in sequence. The sequence of channels in the list
of favourites cannot be changed.
To call up the list of favourites for daily use, simply press the button FAV . The list can be hidden with the button
EXIT .
SKIPPING PROGRAMMES:
You can mark a programme for skipping by pressing the button BLUE . Example: Programme 4 is marked; when
switching through the programmes by means of the CH rocker switch the sequence will then be 1 - 2 - 3 - 5......
However, the programme can still be called up via the list of channels or with button 4.
Pressing BLUE again on an already marked programme will remove the marker.
DELETING PROGRAMMES:
Select the programme to be deleted with the arrow keys and then press the button RED . A dialogue window with
the query “Are you sure?” will appear. If you are sure, confirm the deletion with the arrow key . If you do not
wish to delete the channel, you can abort the operation with the arrow key .
Deleting a programme cannot be reversed. A deleted programme must be searched for either via an automatic
or a manual channel search.
3. OPERATION OF THE OYSTER®SMART TV
Network search
With the “Network search” item, you can determine whether the search run will consider any cross references to
other transponders. However, for a manual search it is more reasonable to select the option “Off”.
Search mode
In the “Search mode” line you can set whether you want the search to be carried out for free-to-air channels
(Free), scrambled channels (Scrambled) or both (Free+Scrambled).
Please note: If a programme list has already been compiled, for example using the setting “Free”, and another
search with the setting “Scrambled” is carried out, the previously found free channels will be removed from the
list.
Service type
In the “Service type” line you can select between:
DTV (TV programmes only)
DTV + radio (TV programmes and radio stations)
Radio (radio stations only)
Only the desired type of programme will be searched for according to your selection.
Search
In the “Search” line, you can initiate the search process with the previously made settings by pressing the button
OK
.

28 29
3. OPERATION OF THE OYSTER®SMART TV
Automatic search: Press
OK
to execute a new terrestrial channel scan. All services found during the scan are
shown in the list.
Manual DVB-T search: Allows you to carry out a manual search. You can search an individual frequency for a
channel in a targeted manner.
5V Antenna supply: Switch the 5V power supply on and off.
Editing the DVB-T programme: Enables you to delete, skip and add channels to the list of channels. The button
RED deletes the selected channel, BLUE skips the selected channel. Press the button FAV to compile a list of
favourites. For more detailed information see page 27, under “Satellite”.
Signal information: Indicates the strength and quality of the channel signal.
Software update (USB): Allows you to update the software via USB. Only use software that originates directly
from ten Haaft.
PICTURE
In this menu you can change different settings for the picture of the Oyster® Smart TV. Here you can make the
following settings:
3. OPERATION OF THE OYSTER®SMART TV
Signal information
Shows strength and quality of reception.
Software update (USB): Allows you to update the software via USB. Only use software that originates directly
from ten Haaft.
Channel settings and search run (DVB-T2)
(First, the TV must be set to DVB-T by means of SOURCE )
Press
SETUP
to navigate to the main menu, then select channel.
Note: Satellite has the same frequency all over Europe; the frequencies for DVB-T differ depending on region.

30 31
3. OPERATION OF THE OYSTER®SMART TV
SOUND
In this menu you can make different SOUND settings. The following options are available:
SOUND MODE:
Offers different, pre-set settings.
Standard, music, movie, sport, personal
After you have selected the desired mode, you can quit the drop-down menu with the button SETUP .
BALANCE:
Shifts the volume distribution between left and right speaker.
AUTOMATIC VOLUME: OFF, ON
Reduces the difference in volume between loud and quiet passages.
Surround sound: OFF, surround
Makes available a virtual surround sound
AD selection (AD = audio description): Off, on, volume
For various broadcasts, a spoken description of the picture content is output to a speaker. This is a service for
people with visual impairments.
3. OPERATION OF THE OYSTER®SMART TV
PICTURE MODE:
Standard (delivery condition)
Movie (softer picture, optimised for the best movies look)
Personal (here you can define all parameters according to your own liking)
Dynamic (setting with increased contrast. This makes the picture “harder”)
You can quit the drop-down menu with the button
SETUP
.
COLOUR TEMPERATURE:
Cold (white tones are rendered rather with a bluish hue)
Normal (delivery condition, neutral effect)
Warm (white tones are rendered rather with a reddish hue)
ATMOSPHERIC NOISE REDUCTION:
Off, low, medium, high, auto
The higher atmospheric noise reduction is set, the “smoother” the picture looks. However, this also means that
fine details will be lost. It is recommended to use the factory setting “Low”.
MPEG NOISE SUPPRESSION:
Similar effect as the above-mentioned atmospheric noise suppression. Standard setting is “Low”.
DCR “Dynamic Contrast Ratio”:
When activated, increases the contrast ratio, depending on the picture content. Standard setting is “Off”.

32 33
3. OPERATION OF THE OYSTER®SMART TV
SWITCH-ON TIME
Enables you to programme a certain time when the device will automatically switch on. In addition, you
can specify on which source (e.g. DVB-S) and on which channel (e.g. 3) the device is to be switched on. The
volume at which the device starts can also be set. This can apply once only, daily, Mo-Fr, Mo-Sa, Sa-So, only on
Sundays or OFF. Application example: You would like the device to switch on automatically every Saturday and
Sunday on channel 37 and volume 35 at 09:00.
SLEEP TIMER
Allows you to select a time interval after the expiry of which the device is to switch off automatically. Range
from 10 to 240 minutes.
TIME ZONE
Allows you to adapt the internal clock of the television if you are staying in a country with a different local
time. If this is set incorrectly, the EPG and the time in the info bar are not displayed correctly.
AUTO STANDBY
Off, 4 hours, 6 hours, 8 hours
Depending on setting, the device will automatically switch off 4, 6 or 8 hours after it has received the last
command from the remote control. With the setting “Off”, the device will not be automatically switched off.
OSD TIMER
Defines the interval after which displayed menus are automatically hidden. With the setting “Off” (delivery
condition) the displayed menus remain visible until revoked.
LOCK
This menu enables you to protect various settings with a password. It is also possible to protect individual chan-
nels with the same four-digit password. In delivery condition, the password is “0000” (four times zero). You can
change the password at any time as you wish.
3. OPERATION OF THE OYSTER®SMART TV
SPDIF mode: Standard setting PCM
Changes the digital output format of the SPDIF connection.
To operate an Oyster soundbar, it is compulsory that PCM remains set.
FIXED SPEAKER:
Switches the headphone output on or off
TIME
Here you can make all settings with regard to time:
AUTOMATIC SYNCHRONISATION (On/off)
Specifies whether the system time of the device is automatically updated. Standard setting: ON
SWITCH-OFF TIME
Enables you to programme a certain time when the device will automatically switch off.
This can apply once only, daily, Mo-Fr, Mo-Sa, Sa-So, only on Sundays or OFF.

34 35
3. OPERATION OF THE OYSTER®SMART TV
SET-UP
Enables you to access a multitude of settings to customise the device.
OSD LANGUAGE
Changes the language in which the menu is displayed. 12 languages are available to choose from.
FIRST / SECOND AUDIO CHANNEL
For broadcasts with dual channel audio, you can define the language individually for the left and right speaker.
This function is only supported by few broadcasts.
FIRST / SECOND SUBTITLE LANGUAGE
For broadcasts offering multilingual subtitles, you can set your favourite languages here. This function is only
supported by few broadcasts.
HBBTV OFF / ON (Factory setting “On”)
Enables you to deactivate the HBBTV function if desired. Displays with reference to HBBTV will no longer be
shown.
3. OPERATION OF THE OYSTER®SMART TV
To do so, it is sufficient to simply set the setting “Lock system” to “On”.
The standard password “0000” must be used for the first log-in; afterwards the password can be defined individ-
ually under the “Change password” item.

36 37
3. OPERATION OF THE OYSTER®SMART TV
NETWORK UPGRADE (software update via the Internet)
Only available when the device is connected to the Internet. This function enables you to download a new
software via the Internet. Please ensure that you are making use of a very stable connection for this! Discon-
nections during the download can lead to major problems. The update requires roughly 100 megabyte of data.
Performing a software update may require the device to be set up again. Any programme lists and settings you
have made yourself will be deleted in the process.
SYSTEM INFORMATION
Provides you with all the information about software and hardware versions, the individual MAC address of
your device and the current IP settings in the network.
WIFI/MIRACAST
You can use this to call up the device’s Miracast function. The screen must display “Ready for connection” for
the function to be useable.
3. OPERATION OF THE OYSTER®SMART TV
HEARING IMPAIRED ON/OFF (Factory setting “Off”)
With the setting “On”, subtitles are always displayed automatically, if available. When you first activate this
function, it may be additionally necessary to select the desired subtitle language by means of the button
“SUBT” on the remote control.
FACTORY SETTINGS
Only reasonable if problems have occurred that cannot be solved in another manner.
Resets all settings to the status with which the device was manufactured.
Please note: This will also delete individual programme lists and other settings!
When you activate this function, all settings will have to be made from scratch. Use of this function is only
recommended for experienced users!
NETWORK CONFIGURATION
Enables you to select and configure wired network (LAN) or WiFi network (WLAN). See also item 3.2 on page
15 of these instructions.
HDMI CEC
Enables you to make settings and adjustments that control the interaction between the television and devices
connected via HDMI. To operate an Oyster soundbar on the television, it is compulsory that HDMI CEC and ARC
stay on.
Auto standby and Auto power control whether the television can be switched off or on from connected HDMI
devices.

38 39
3. OPERATION OF THE OYSTER®SMART TV
Important:
All functions in this menu can only be used while the device is connected to the Internet. Streaming of videos
can cause an extremely high data consumption, which when used with limited data volumes (for example, with
mobile phone contracts or commercial hotspots) results in a rapid exhaustion of the volume.
When using external WLAN networks, use of the smart functions may be restricted by firewalls or similar
filters. In addition, it is possible that not all apps can be used in every country.
APP STORE
With this function the device accesses a virtual app store via the Internet, which offers you a multitude of apps
to choose from. Favourite apps can be stored there in “My Apps” so that they can be found more quickly.
For this purpose, the apps must be selected via the “Search” function. They can then subsequently be added to
APPS with the pushbutton GREEN . However, no apps will be downloaded to your television set.
Different apps are offered for different countries.
By default, the set country is always based on the language your Smart TV was set to during the initial setup.
However, it is possible to add further countries under the “Settings” item.
3. OPERATION OF THE OYSTER®SMART TV
CONFIGURATION
This function is only relevant for service technicians.
MEDIA
The television is equipped with a built-in media player. Media can be played back both from locally plugged in
USB data carriers and from other DLNA devices located in the same network.
First of all, you must select the file category. Movie, music or photo are available as options. Then you navigate
to the correct source (USB or DLNA) and there to the correct folder with the desired files.
CONNECT
Smart TV operation
Basic operation
The button Connect in the main menu takes you to smart operation. This menu item has the same function as
pressing the button APPS at the top right of your remote control.
Other manuals for Oyster
7
Table of contents


