Tenor Audio Mirror User manual

Music In Every Room Ltd
Tenor Audio Mirror
Bluetooth
FM/DAB Radio
Switching on for the rst time
Use the Remote Control for all set-up functions
Remove the battery cover and remove the battery protector’s plastic strip.
Press power to turn on the unit. The mirror will turn on in DAB mode.
DAB Stations
The DAB radio may run an auto-scan. Do not interrupt while scan is in progress.
At the end of the scan, the LCD will display the number of DAB stations detected.
Stations are found alphabetically (eg Absolute to XFM). If scan does not start
automatically, then press on the remote control.
You can fast click to scroll through DAB stations. When you reach the
required station press .
If no DAB stations are received, check your aerial connection. If the aerial
connection is good you may be in an area with poor, or no, DAB signal. Check
station availability at www.ukdigitalradio.com.
If you wish to rescan, press on the Remote Control.
Favourite DAB stations can be saved to presets, see User Instructions.
FM Stations
Press to scroll to FM
Press tuner will scan to the next FM station
or hold for 2 seconds to scan to next FM station
Favourite FM stations can be saved to presets, see User Instructions.
Mode
Repeat press of scrolls through DAB, FM, Bluetooth™, Aux.
Bluetooth™
Press to scroll to Bluetooth™ (displayed as “BT mode”)
Initiate Bluetooth™ on your device (iPhone/iPad etc). This is usually done in “Settings”. Turn Bluetooth™ on, ensuring
the device is in discoverable mode. The mirror will appear as “Radio Mirror”. No access code is required.
You can now stream from your Bluetooth™-enabled device.
To disconnect your Bluetooth™-enabled device and link another, rst press to disconnect the rst device. Initiate
Bluetooth™ on the second device and link as above.
EQ Set
Press Repeat press to scroll through the EQ settings to select your favourite tone.
Classic, Rock, Jazz, Pop, Flat or set your own levels with “My EQ” (bass, treble).
This completes the installer check.
See Detailed Set-Up and Operating Instructions for other functions and preferences.

1 2 53 4 6 7
1 On/O
2 Mode Repeat press to select DAB, FM, Bluetooth™ (BT) and auxiliary input (Aux)
3 Back arrow Scroll backwards through radio stations or music album
4 Forward arrow Scroll forwards through radio stations or music album
5 Presets Repeat press to scroll through presets (10 DAB and 10 FM)
6 Volume down
7 Volume up
Using the touch-sensitive buttons to operate the mirror
The buttons are capacitive touch sensitive. The larger area of your thumb is more eective than a nger, pressing
harder will have no more eect.
Detailed Set-Up and Operating Instructions
Use the Remote Control for all set-up functions
Setting radio presets
Set DAB stations (10 DAB presets are available)
ON
Repeat press to DAB
Scans all DAB stations (at end shows number received)
NOTE: DAB stations store alphabetically (eg Absolute to XFM)
to scroll through stations and nd the rst you wish to preset
NOTE: press to play the station
Oers preset 1. Press if you require a dierent preset number
Stores requested preset
Alternatively, hold down the preset number required (1, 2, 3 etc)
Repeat for next preset. NOTE: If you store in a preset which is already in use it will overwrite this station.
Retune New DAB stations are frequently added, so an intermittent rescan is worthwhile
Set FM stations (10 FM presets are available)
ON
Repeat press to FM
Scans to next FM station
Oers preset 1. Press if you require a dierent preset number
Stores requested preset
Repeat for next preset
To recall a preset
Press the number of the preset (1, 2, 3 etc) or press recall and to scroll through presets 1 to 10.
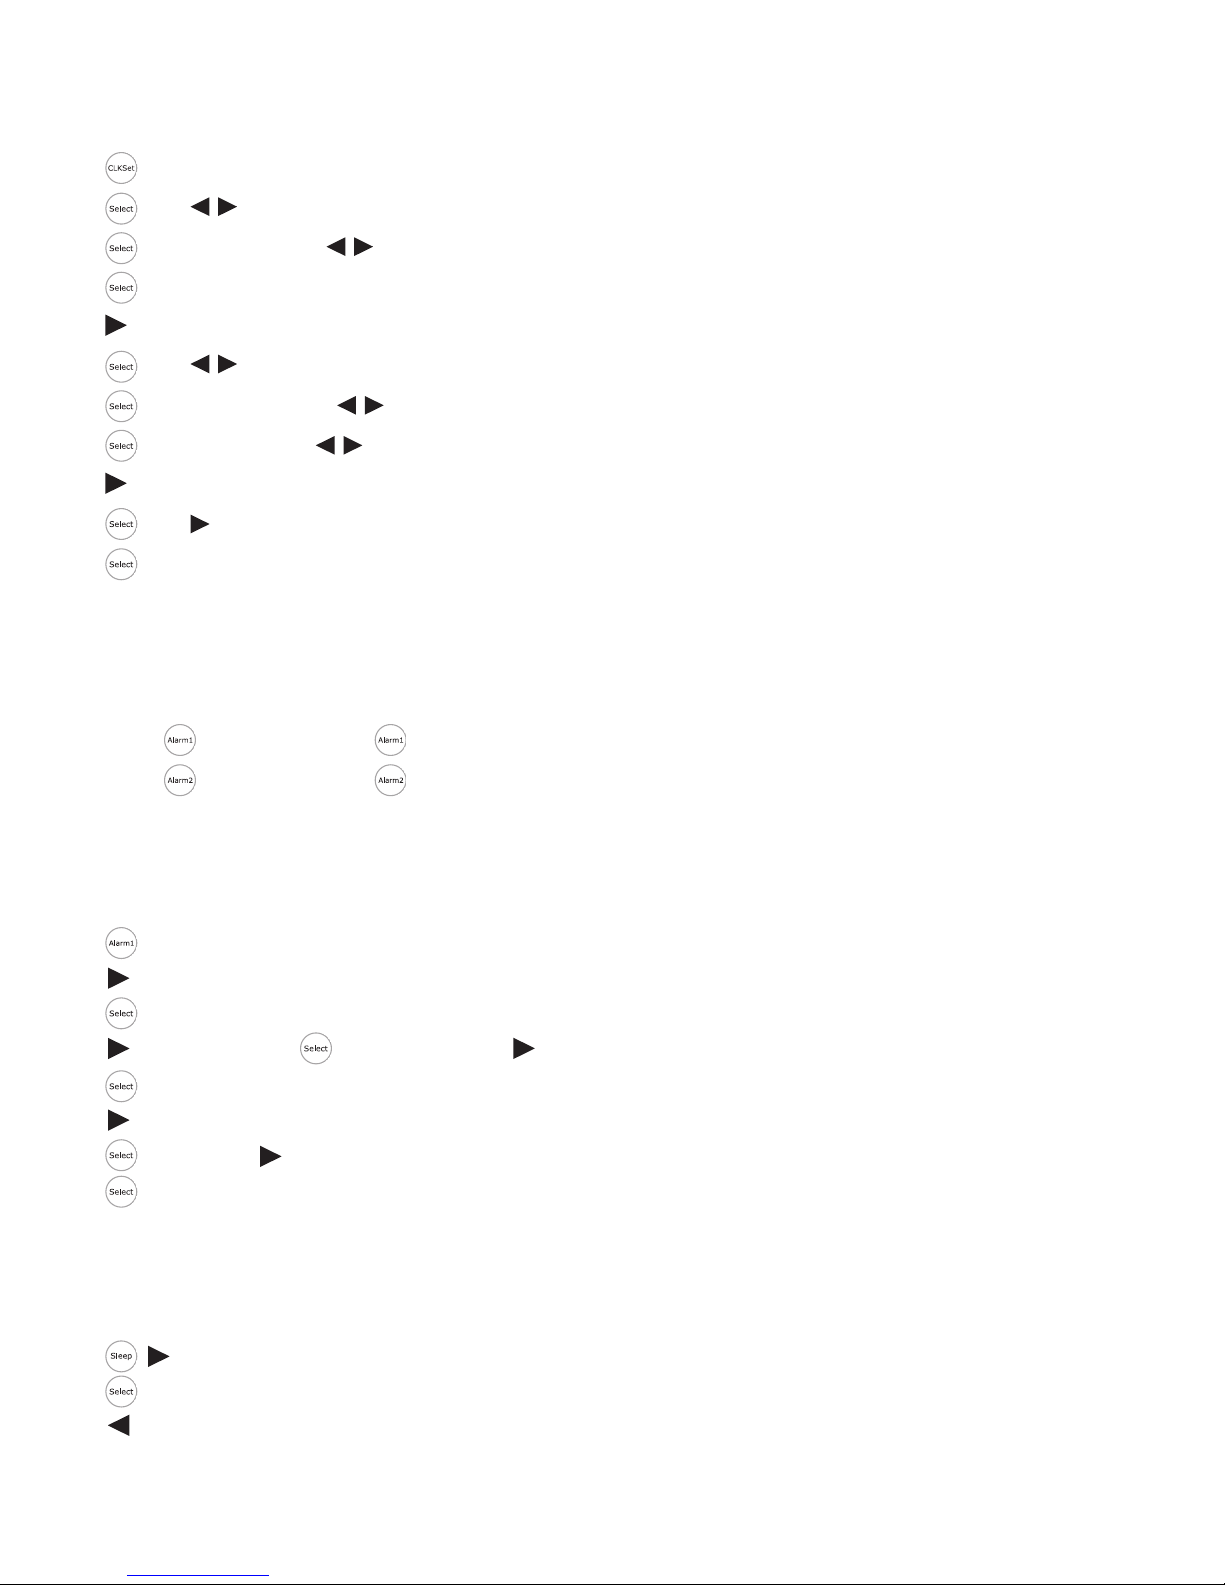
Set clock
The clock will set automatically when tuned to DAB. Manual setting is only required if no DAB signal is received.
The clock can only be set manually when the Tenor Audio Mirror is turned o.
Shows set clock
Use to set hours
Moves to mins. Use to set mins
Saves the time and shows “clock set”
Moves to Date
Use to set year
Moves to Month. Use to set month
Moves to Day. Use to set day
Moves to 24 hour clock
Use to set 12/24 hour clock
Saves
To turn the alarm on/o
Press to turn on - press again to turn o
Press to turn on - press again to turn o
When an alarm is set an icon shows in the left of the LCD window
To set Alarm1
Setting the alarm can be done when the mirror is either on or o (easier when turned o).
(hold down for 2 - 3 seconds) puts into Alarm1 set mode
Scroll to DAB, FM, BUZZER
Selects the mode and moves to TIME
Set hours, press to move to minutes set minutes
Moves to day/week/weekend
Scroll and select All Week or Sat - Sun or Mon - Fri
Set volume
Saves - set up is now complete
As above to set Alarm 2
Set sleep
The Sleep function turns the mirror o after a set period of time. Sleep can only be set with the mirror turned on.
Scroll to minutes required
Sets sleep
Scroll to zero to turn o

Menu functions
Mirror must be turned on to be able to access options.
Menu functions available when in FM mode
Select FM mode then press
Scan setting
allows the search of strong stations (default) or all stations. to change the setting. to store.
Audio setting
allows selection of stereo or mono. to change the setting. to store
System
Language English / German / Italian / French to move to store
Factory Reset to reset default values to factory settings
Software Version displays the installed rmware version. Press to exit.
Menu functions available when in DAB mode
Select DAB mode then press
Scan DAB stations
to rescan all DAB stations (same function as button)
Manual Tuning
Manual Tune allows manual tuning of DAB stations - not used.
DRC
DRC (Dynamic range control)
The broadcaster sets the DRC for each program which can vary depending on the content such as pop, classical or
chat. Using DRC you can expand or compress the range, setting the dierence between loudest and quietest sounds
ie in a loud environment where quiet sounds are swamped, setting the DRC to maximum will boost the quiet sounds.
There are 3 DRC levels ( to choose setting, to store):
O default
High max compression
Low medium compression
Prune
Cancels reception of weak DAB stations. No (default) or Yes to move, to store
Other buttons
Dimmer
Press to decrease the LCD backlight illumination.
Info
When listening to a radio station you can change the information that will appear on the second line of the display.
Press the Info button to move through the display options.
Back
Return to the previous screen.
For help and advice on installing, set-up and operation please see:
Table of contents


