Copyright Tes Drying Systems, 2014
•This hea er is ho when in use. To avoid burns, do no le bare skin ouch ho surfaces. Use handles when
moving his hea er. Keep combus ible ma erials, such as furni ure, pillows, bedding, papers, clo hes, and
cur ains a leas 3 fee (0.9 m) from he fron of he hea er and keep hem away from he sides and rear.
•Do no opera e his hea er unless all panels and guards are in place and properly secured.
•Ex reme cau ion is necessary when any hea er is used by or near children or invalids and whenever he
hea er is lef opera ing and una ended.
•Always unplug he hea er when no in use. To unplug he hea er, urn E-TES SD swi ch o off, hen
remove plugs from ou le s.
•Unplug machine power cords from ou le s & hen disconnec cords from he E-TES SD before performing
any repair on he hea er.
•This hea er is no in ended for use in ba hrooms, laundry areas and similar indoor loca ions. Never loca e
hea er where i may fall in o a ba h ub or o her wa er con ainer.
•Do no inser or allow foreign objec s o en er any ven ila ion or exhaus opening as his may cause an
elec ric shock or fire, or damage he hea er.
•To preven a possible fire, do no block air in akes or exhaus in any manner. Do no use on sof surfaces,
like a bed, where openings may become blocked.
•A hea er has ho and arcing or sparking par s inside. Do no use i in areas where gasoline, pain , or
flammable liquids are used or s ored.
•
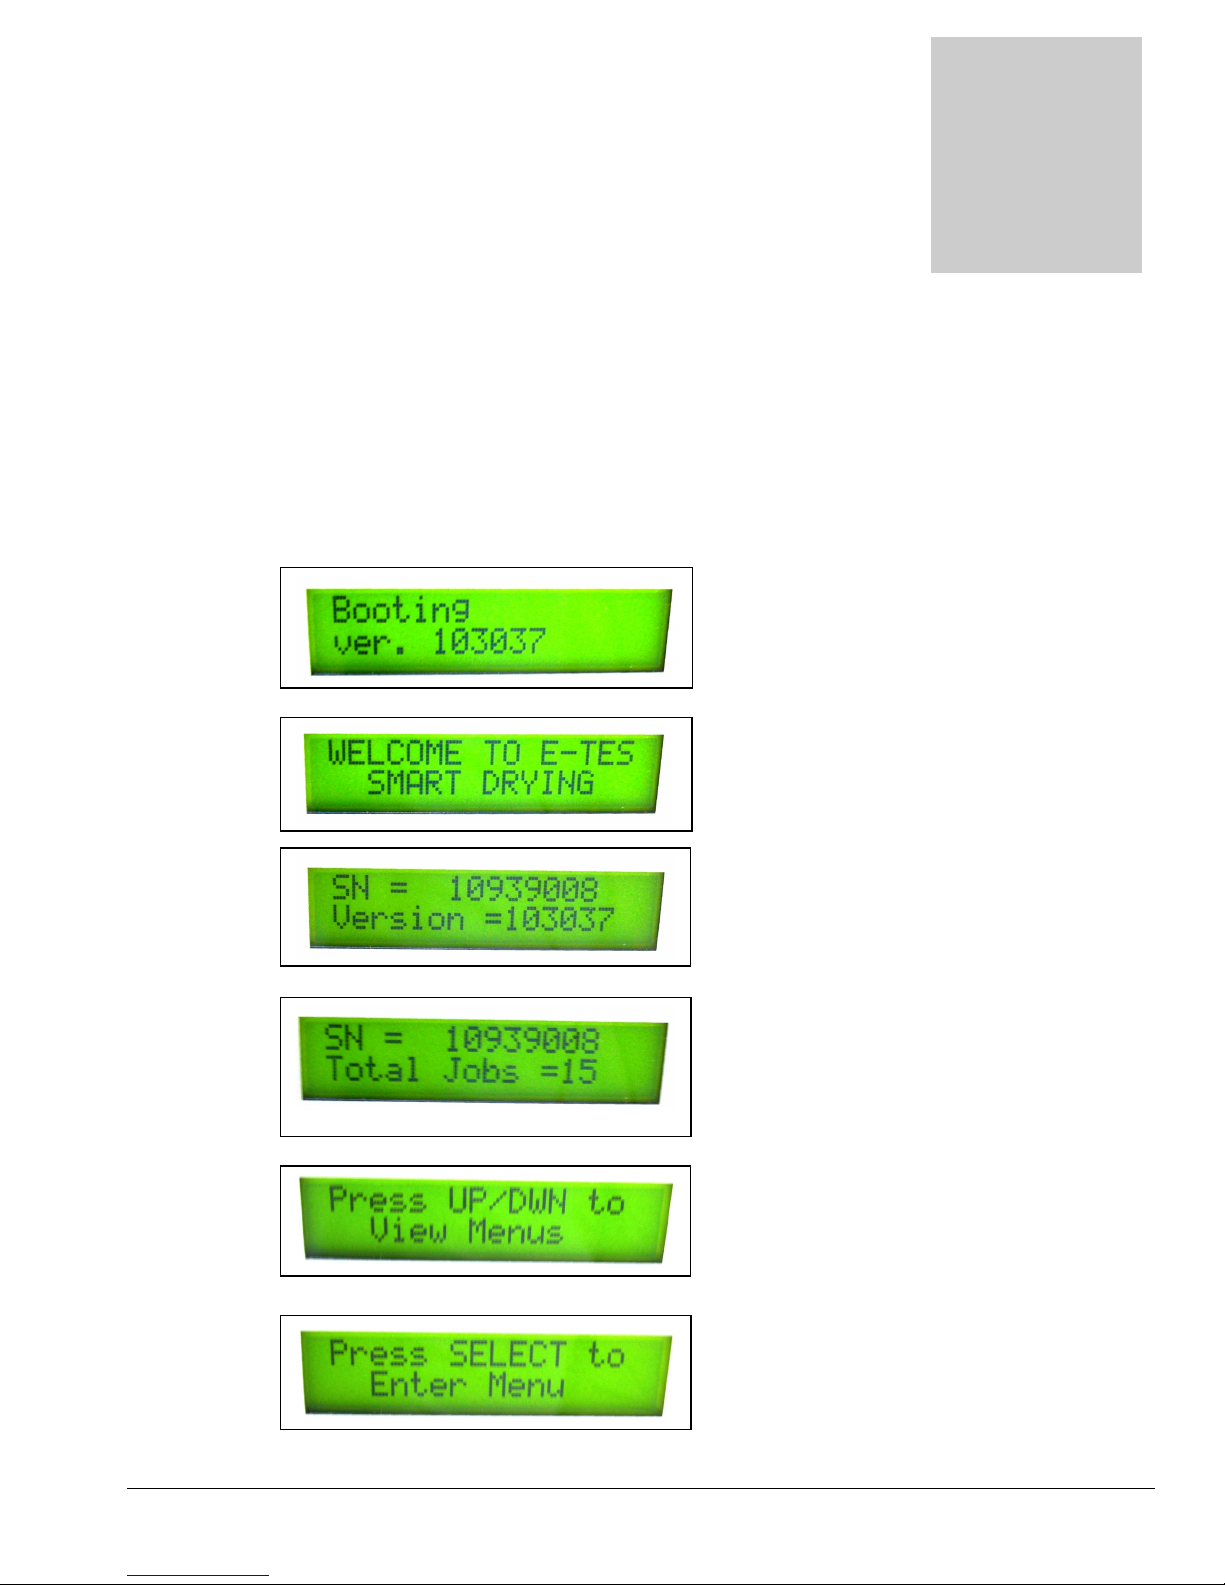
Always turn Heater OFF and keep air mover runnin for 5 minutes to
cool heater before turnin air mover OFF. If air flow is urned off and he uni is no cooled properly he
hea er box and fron grill may ge very ho , crea ing a burn hazard or damaging he uni .
•Res ric ion of he air flow from he hea er snou may cause E-TES SD o overhea and shu off.
•Adequa e air flow mus be main ained across hea ing elemen s for proper, safe opera ion. Do no disable
airflow sensor or o her safe y swi ches, doing so may resul in damage o hea er and will void warran y.
•Do no direc he ou le air flow owards objec s which may be damaged by hea .
•Remove Fee or carpe clamps from snou of air mover before placing air mover in o E-TES SD Elec ric
Thermal Exchanger o preven damage o air seal gaske .
•
Always use Remote Temperature Sensors, Remote Power
Controllers or other form of temperature control to keep room temperature below 105ºF
durin the dryin process.
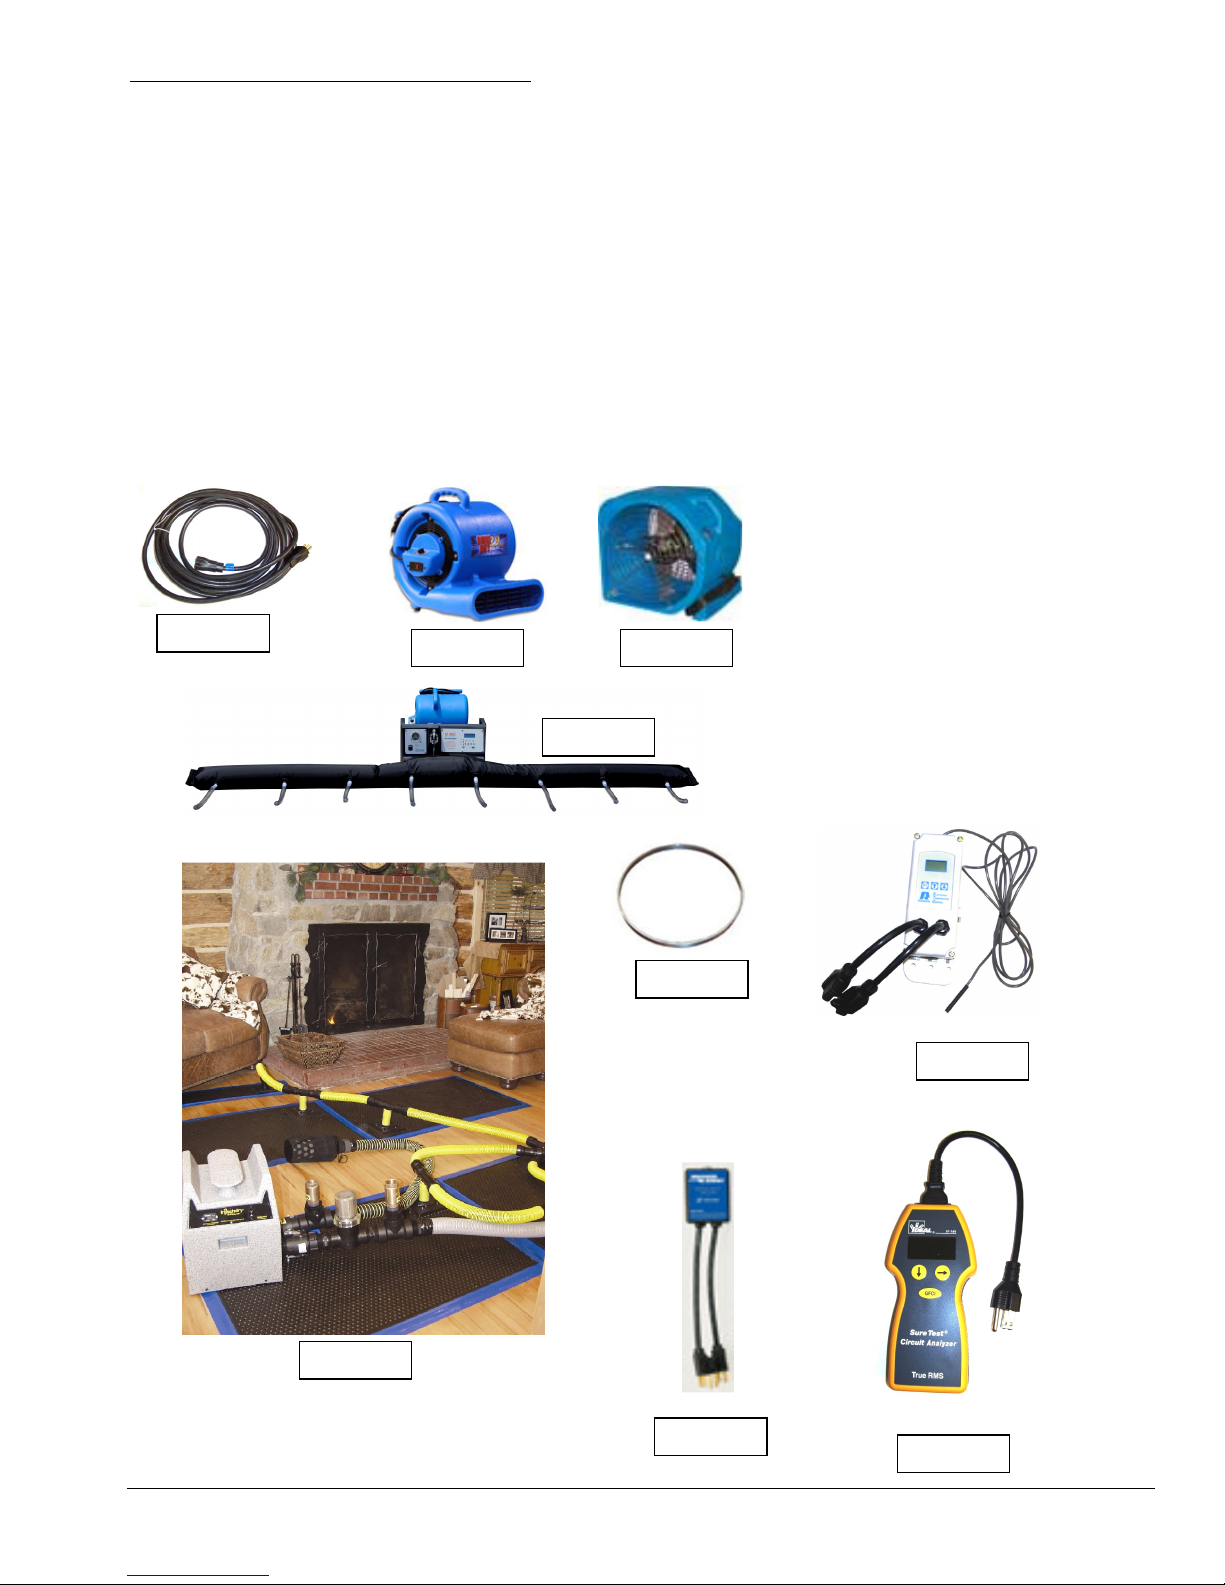
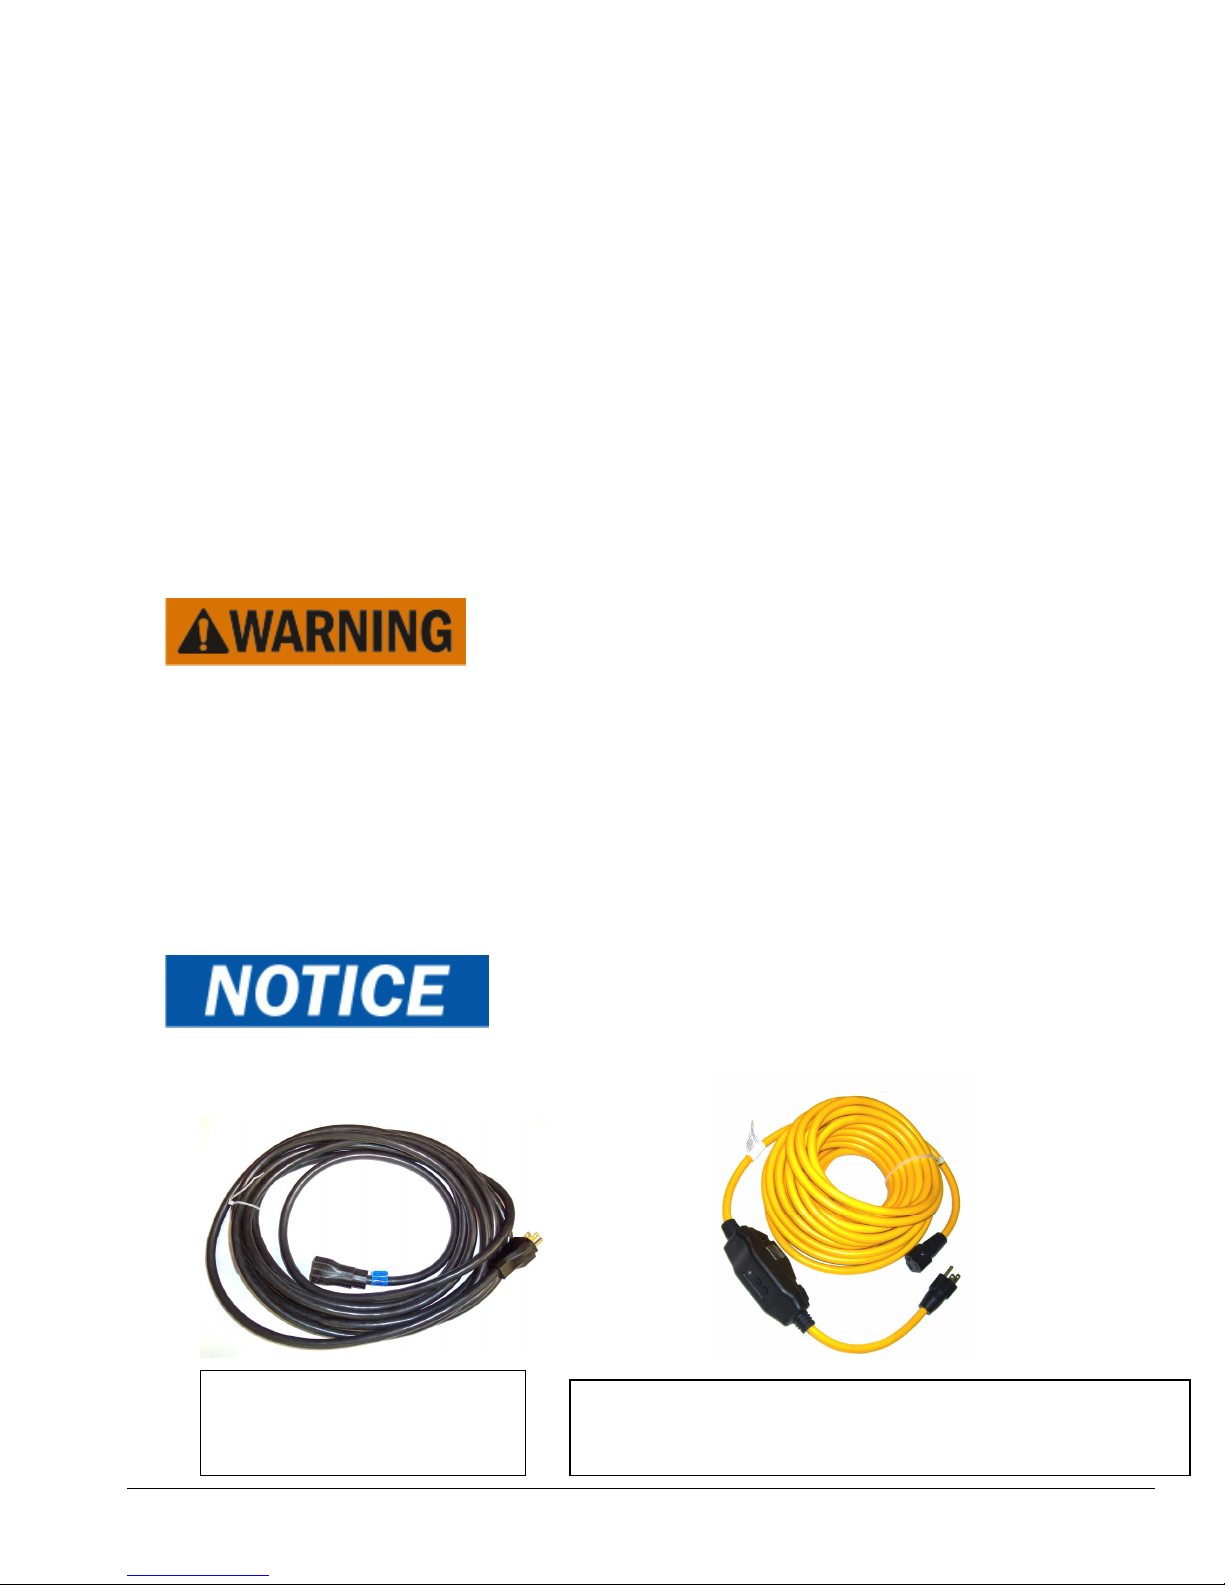
AX33
12/3 X 50’ Ex ension Cord
NEMA 5-15P & 5-15R ends
NM4407A
12/3 X 50’ GFCI Pro ec ed Ex ension Cord – Au o Re-se