Thames & Kosmos TK1 User manual
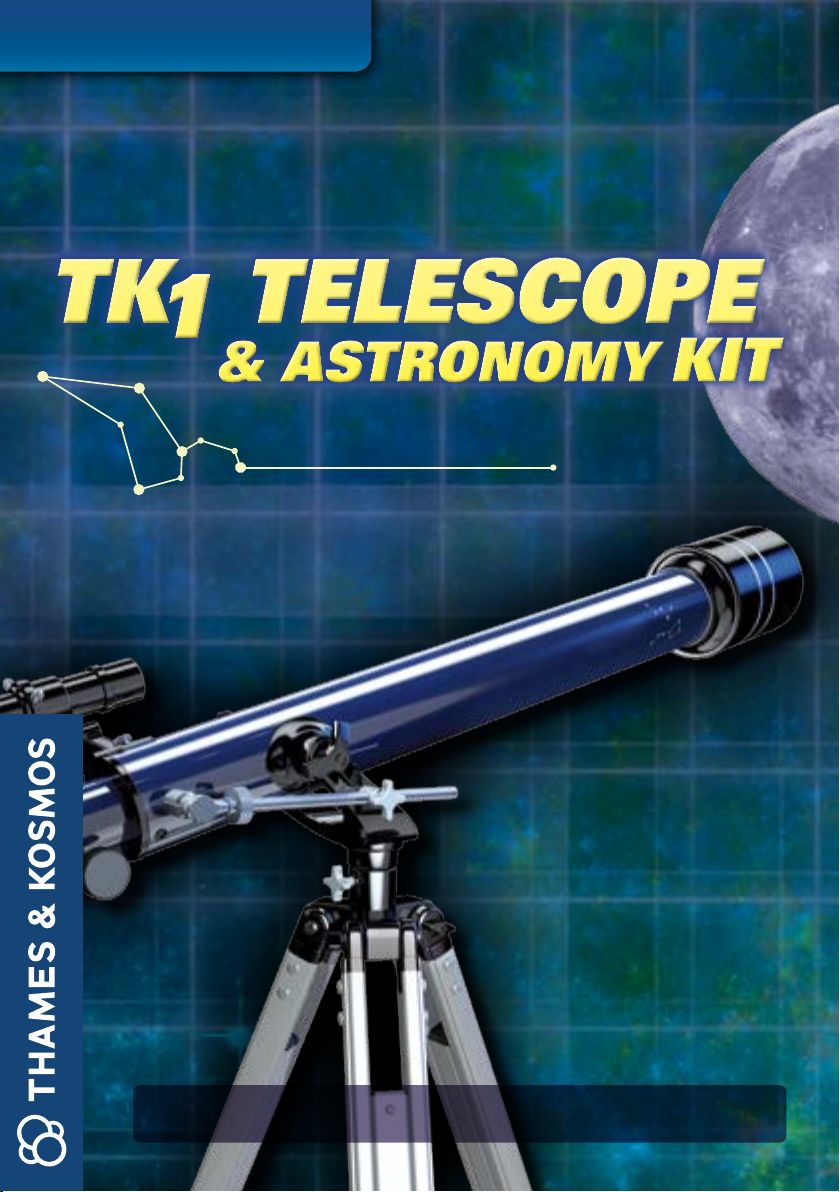
REFRACTOR 60/700
EXPERIMENT MANUAL
TK
1 TELESCOPE
& ASTRONOMY KIT
TK
1 TELESCOPE
& ASTRONOMY KIT
677015-02-260115
Franckh-Kosmos Verlags-GmbH & Co. KG, Pfizerstr. 5-7, 70184 Stuttgart, Germany | +49 (0) 711 2191-0 | www.kosmos.de
Thames & Kosmos, 301 Friendship St., Providence, RI, 02903, USA | 1-800-587-2872 | www.thamesandkosmos.com
Thames & Kosmos UK Ltd, Goudhurst, Kent, TN17 2QZ, United Kingdom | 01580 212000 | www.thamesandkosmos.co.uk

IMPORTANT INFORMATION
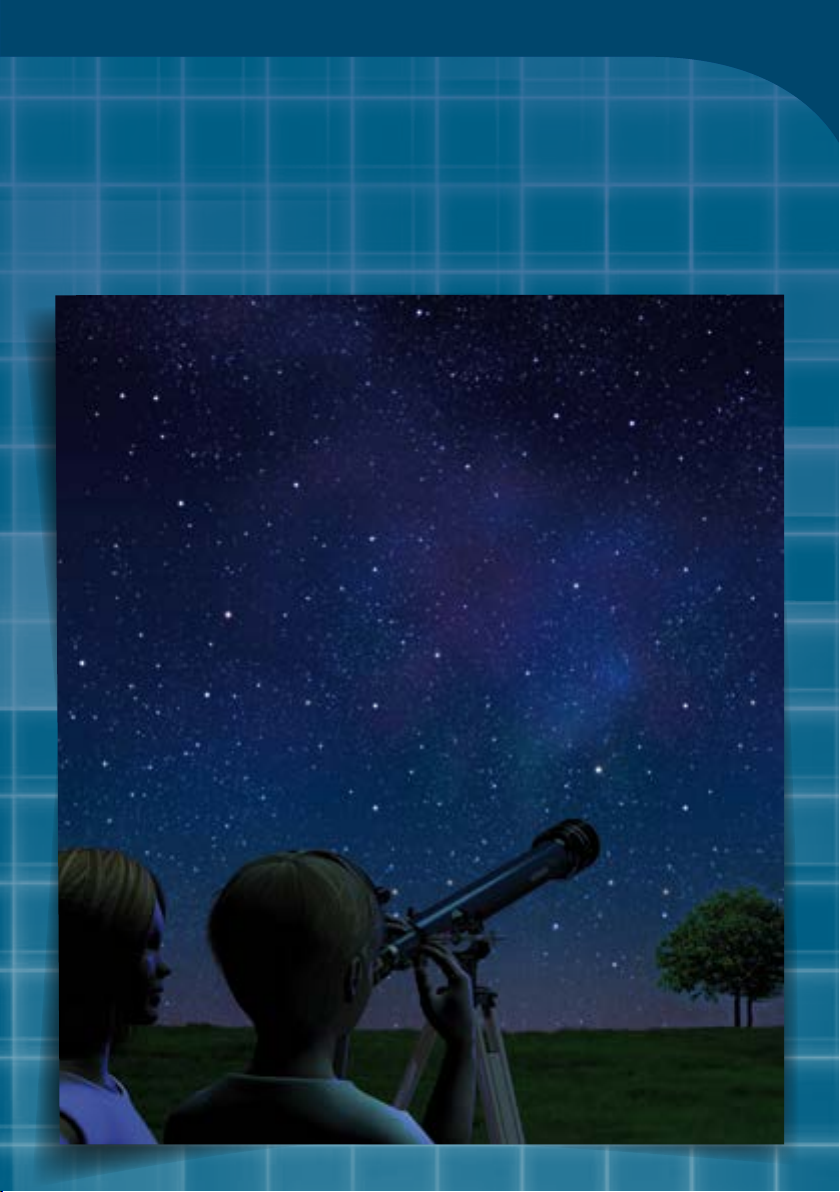
A Word to Parents!
Dear Parents,
With this telescope, your child will be able to
explore the stars in the night sky, or study
natural objects all around us right here on
Earth with the help of the image reversal lens.
To be sure that this optical instrument is
handled correctly, it is essential to pay careful
attention to the instructions and tips provided
in this manual. Please stand by your child’s side
when he or she is learning the relevant skills,
and be ready to offer help when it is needed. In
particular, please note the adjacent safety
information and discuss these points with your
child.
To view the night sky, your child may
sometimes need to work at a time or in a place
requiring you to accompany him or her or at
least to help plan evening outings.
Safety Information
WARNING! Never look directly into the sun
— whether with your naked eye, or with the
telescope or its viewfinder! You could blind
yourself!
Never inadvertently leave the telescope and
its viewfinder in the sun — it could start a
fire!
Keep the packaging and instructions as they
contain important information.
1st Edition 2014
© 2014 Franckh-Kosmos Verlags-GmbH & Co. KG, Pfizerstrasse 5 –7, 70184 Stuttgart, Germany. Tel. +49 (0)711 2191-343
This work, including all its parts, is copyright protected. Any use outside the specific limits of the copyright law without the consent of the publisher is prohibited and
punishable by law. This applies specifically to reproductions, translations, microfilming, and storage and processing in electronic systems and networks. We do not
guarantee that all material in this work is free from copyright or other protection.
Text: Michael Vogel, with specific portions of text by Justina Engelmann and Hermann-Michael Hahn
Project management: Dr. Mark Bachofer
Technical product development: Dr. Petra Müller
Manual design: Atelier Bea Klenk, Berlin
Layout and typesetting: werthdesign, F. Werth, Horb a.N.
Illustrations and graphics: Gunther Schulz, p. 2 bottom right, 16, 25, 27, 28, 29, 30, 31; Gerhard Weiland, back page, 26; Sven Melchert, p. 17, 18, 19; all others Friedrich Werth
Photos: Martin Gertz, Stuttgart Planetarium/ Welzheim Obervatory, p. 32 bottom left; Library of Congress, p. 2 second from top, 23; Klaus Schittenhelm, p. 16 top right;
Stefan Seip/www.astromeeting.de, p. 26 bottom left, 32 top right; CreativCollection, p. 8, 10, 21 center+bottom left+top right; MEV, p. 21 bottom right
Packaging layout: werthdesign, F. Werth, Horb a.N.
Basic design concept, packaging: Peter Schmidt Group GmbH, Hamburg
The publisher has made every effort to locate the holders of image rights for all of the photos used. If in any individual cases any holders of image rights have not been
acknowledged, they are asked to provide evidence to the publisher of their image rights so that they may be paid an image fee in line with the industry standard.
1st English Edition © 2015 Thames & Kosmos, LLC, Providence, RI, USA
Thames & Kosmos® is a registered trademark of Thames & Kosmos, LLC.
Editing: Ted McGuire; Additional Graphics and Layout: Dan Freitas, Ashley Greenleaf
Distributed in North America by Thames & Kosmos, LLC. Providence, RI 02903
Phone: 800-587-2872; Email: support@thamesandkosmos.com
We reserve the right to make technical changes.
Printed in China/ Imprimé en Chine
When observing the stars outside, appropriate
tools and equipment are advisable (depending
on the weather and season, this could mean
warm clothing, a Thermos with some hot cocoa,
a red-light flashlight (see page 16), this
instruction manual, and maybe a separately-
purchased star wheel or star map app). Please
help your child with these things.
We wish you and your child lots of fun with the
telescope!

What’s inside your experiment kit:
Checklist: Find – Inspect – Check off
You will also need:
Homemade red-light
flashlight
Possibly: warm clothing
for outside
Optional: rotating star
map (planisphere), star
finder app
2
1
3
4
5
6
789
10
11
12
TIP!
Any parts that are not
included with the kit
are indicated in italic
letters in the “You
will need” sections.
No. Description Count
1 Aluminum stand with telescope cradle 1
2 Shelf for accessories 1
3 Telescope tube with dew shield and
pitch arm for height adjustment 1
4 Viewfinder 1
5 Star diagonal (mirror diagonal) 1
6 Eyepiece (10 mm) 1
7 Eyepiece (20 mm) 1
8 Barlow lens 1
9 Image reversal lens (erecting lens) 1
10 Star-knob tighteners for securing
the telescope in the cradle 2
11 Attachment screws for securing
the legs of the stand 3
12 Moon filter 1
› › › KIT CONTENTS
1
TK1 Telescope
1
677015-02-260115
A Word to Parents ................................... Inside front cover
Safety Information ................................. Inside front cover
What’s Inside Your Experiment Kit ..................................... 1
Assembling Your Telescope.................................................. 3
Check It Out: How Your Telescope Works ......................... 9
How to Use Your Telescope ................................................ 11
Check It Out: Preparing for
Nighttime Viewing ............................................... 16
Check It Out: Ten Observations to
Get You Started ..................................................... 17
Not Just Stars and Planets.................................. 21
Identifying Constellations in the Sky............... 23
Check It Out: Stars and Constellations ........................... 26
Star Charts for Different Seasons..................................... 27
Check It Out: Moon, Planets, Satellites, and More ....... 31
The 20 Prettiest Constellations ........................ Back cover
› › › CONTENTS
2
Assembling Your
Telescope
In this chapter, you will learn about all the parts that make up
your telescope and how to assemble them. The stand holds the
telescope for you and helps you keep it pointed at the exact part of
the sky you want to look at. The telescope itself is the long tube
with a glass lens at the front. The rear, narrower end, which is the
end into which you look, is where you will insert various other
glass lenses and other accessories.
3
3

NOTE! This applies to both assembly and
subsequent use of the telescope: Tighten all the
screws carefully and only by hand (not using
tools!). Only tighten them as much as they need to
be tightened, not as much as you can tighten them.
1
2
3
Assembling the
telescope
YOU WILL NEED
› Stand
› Three attachment screws
› Shelf with three wingnuts
› Telescope
› Two star-knob tighteners
› Eyepiece
HERE’S HOW:
1. Extend the three legs of the stand to their full
length. Insert the three attachment screws
into the threads in the center of the legs. The
legs should not collapse when you set up the
stand with its legs spread apart.
2. Screw the shelf to the stand’s attachment
bars with its rimmed side oriented upward. To
do that, first unscrew the three wingnuts
from the shelf and then screw them back in
through the holes in the stand’s attachment
bars. Keep screwing until the shelf stops
jiggling.
3. Insert the shiny height adjustment rod, which
is mounted on the side of the telescope, into
the opening in the telescope cradle.
BEFORE YOU START
4

6
5
4
4. Attach the telescope securely to its cradle by
screwing in the two star-knob tighteners
equally on both sides. The telescope should
then swivel without much force, but it also
shouldn’t be so loose that it moves on its
own.
5. Now, gently tighten the height adjustment
screw.
6. Slide an eyepiece into the eyepiece extension
until it hits the stop and secure it in place
with at least one of the eyepiece extension’s
knurled screws. It is best to start with the
eyepiece with the largest millimeter readings.
TIP!
All of your telescope’s
optical elements have covers
to protect them from dust. If
you remove the cover only
while you are using the
telescope for your
observations and then place
it back on afterwards, the
glass lens will stay clean
longer. Try to avoid touching
the sensitive glass surfaces
with your fingers.
5
Assembling Your Telescope
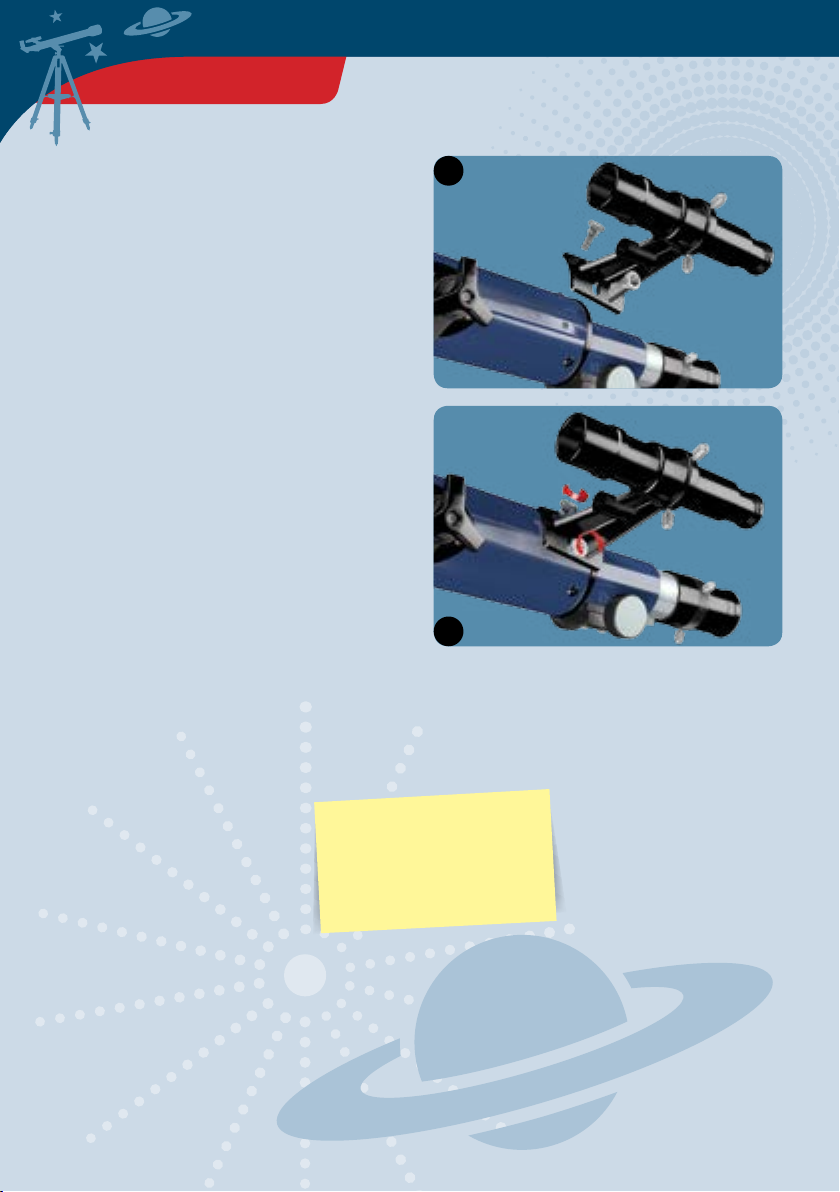
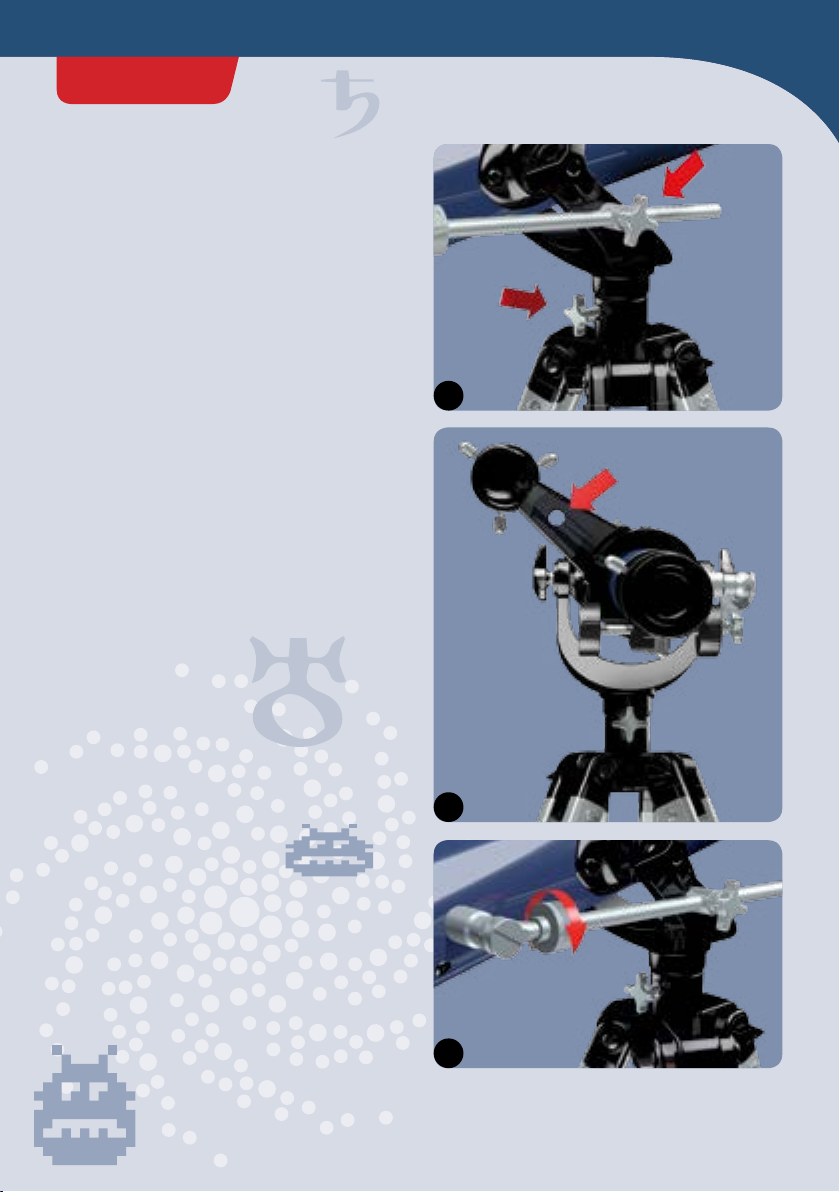
1
2
Mounting and
adjusting the
viewfinder
YOU WILL NEED
› Assembled telescope
› Viewfinder
HERE’S HOW:
1. The viewfinder must have its larger opening
(the objective) pointing away from the
viewer.
2. Loosen the two knurled screws at the end of
the telescope, insert them into the two holes
in the viewfinder bracket, and tighten them
again. The holes in the bracket are elongated.
Make sure that the viewfinder sits parallel to
the telescope.
3. Outside during the day, point the telescope at
a target on the horizon at least 500 meters
away (such as a tower, tree, or building).
TIP!
You should adjust the
viewfinder during the
daytime.
6
BEFORE YOU START

5
4
4. Focus the telescope by turning the eyepiece
extension and move the observation target
right into the middle of the field of view.
5. Look through the viewfinder and focus it by
turning its eyepiece.
TIP!
When looking through the viewfinder or
the telescope, you will notice that
everything is turned upside-down. It’s
supposed to look that way (see page 10).
For observation targets on the ground,
your telescope comes equipped with an
image reversal lens (see page 21), which
will display images in their usual
orientation.
7
Assembling Your Telescope
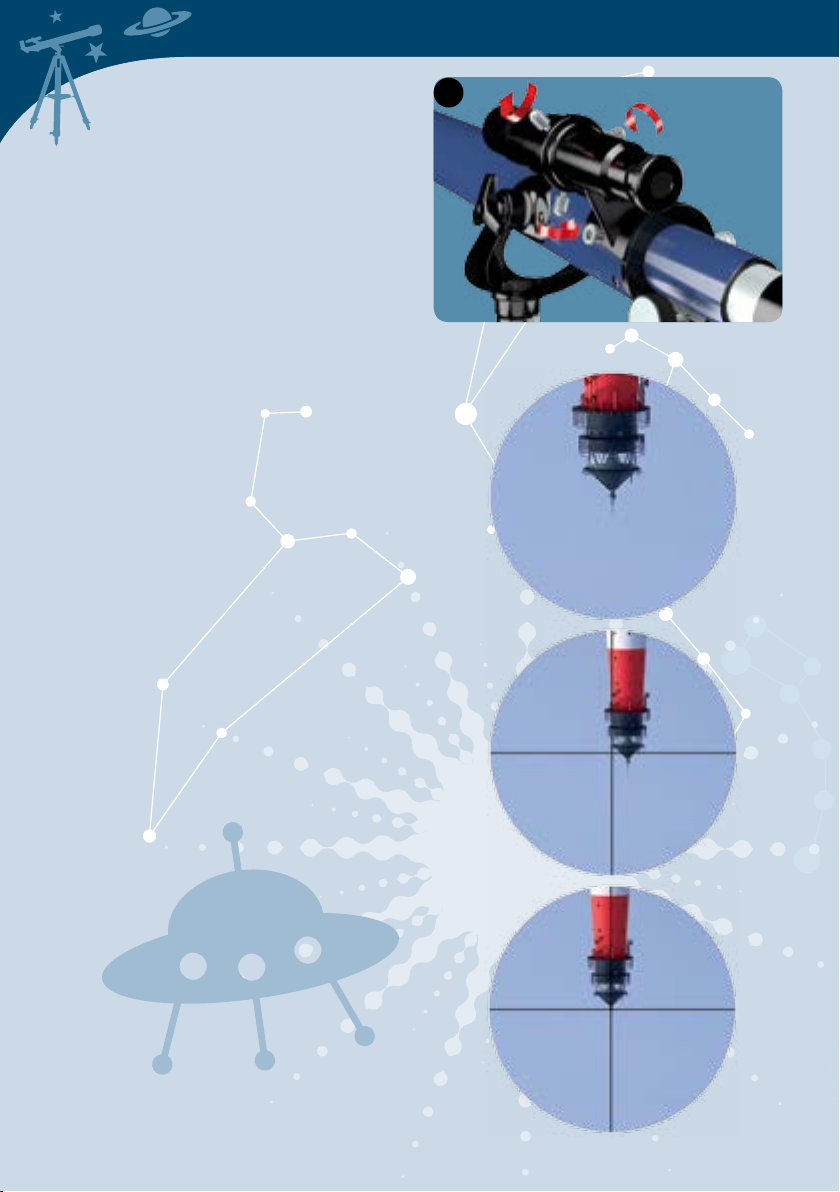
View through the telescope (top); view through the
viewfinder: misaligned (center) and aligned (bottom).
6
6. When you look through the viewfinder, you
will notice that the observation target is not
in the center of its field of view, but shifted
off to the side instead. Use the three knurled
screws to adjust the viewfinder until the
center of its field of view matches that of the
telescope. To do this, keep loosening one or
two of the screws while you tighten the
other(s). You will probably have to repeat this
several times. Keep looking into the
viewfinder to verify that the observation
target is moving toward the center of the
field of view.
7. If adjustment of the three knurled screws is
not enough, you will have to loosen the two
knurled screws again on the viewfinder
bracket and correct the viewfinder’s
orientation before returning to the viewfinder
alignment instructions described in step 6.
8. After orienting the viewfinder, all three
knurled screws should be gently tightened
again so that the viewfinder doesn’t
inadvertently shift in its bracket. Finally,
check one last time to make sure that the
viewfinder and the telescope show the same
observation target in the center of their fields
of view.
8

Objective Focal point
Eyepiece
Objective focal length Eyepiece focal
length
When we are in the dark, our pupils grow larger in order to take in (or
gather) as much light as possible. That’s exactly what a telescope does
— it gathers light — with the main differences being that its “pupil” (the
objective) is a lot larger than our pupils and the objective’s diameter
always remains the same. The light of an observation target enters the
objective and is concentrated at the focal point. With the use of a second
lens (the eyepiece) that functions like a magnifying lens, you can view
the observation target’s image created at the focal point.
How Your
Telescope Works
The Visual Field
When you look through the eyepiece,
you can only see a very small portion of
the sky. The greater the magnification,
the smaller that portion will be. With
the viewfinder, on the other hand, you
can survey a relatively large area. That
is why it’s easier to orient toward the
observation target with the viewfinder
than with the telescope.
Magnification
If you divide the objective focal
length by the eyepiece focal
length, it gives you the
telescope’s magnification. Bright
observation targets, such as the
Moon or planets, can handle
greater magnification than
fainter ones.
CHECK IT OUT
9
Assembling Your Telescope

EVERYTHING’S UPSIDE DOWN
If you look through the telescope,
everything will look upside down and left-
right reversed. The reason for that is
because it has optical advantages in
astronomical telescopes. But that means
that if you look through your telescope in,
say, a southerly direction, south will be at
the top of the visual field, north will be at
the bottom, east to the right and west to the
left — in other words, exactly the opposite
of when you look at the sky with your
naked eye.
FACT SHEET
Your Telescope’s Specifications
Objective:
Diameter: 60 mm
Focal length: 700 mm
Eyepieces:
20 mm focal length: 35x magnification
10 mm focal length: 70x magnification
10
S
S
N
N
E
View through the
telescope
N
S
W E
E
W
W
Star through telescope
S
N
W E
View through
telescope with
star diagonal
CHECK IT OUT

Your telescope is now ready for viewing. Find a location
where you won’t be too bothered by the light from
houses or street lights. If your backyard or the balcony
of your own home doesn’t work, take a parent or older
brother or sister with you to find someplace darker.
How to Use Your
Telescope
11

2
3
4
Viewing through the
telescope
YOU WILL NEED
› Telescope
› Optional: red-light flashlight (see p. 16)
› Possibly: a warm jacket
SETTING IT UP:
1. Make sure that you aren’t blinded by light
(from nearby buildings, street lights, and
cars) at the location that you have selected.
2. Set up the stand with its legs fully spread out
and select a height that is comfortable for
you by extending the stand’s legs as far as
you want. You can view in a standing or
sitting position. Take any accessories that
you won’t be needing right away and place
them on the shelf.
3. The stand should be stable. If the ground is
soft, you can press the tips of the legs into the
soil a little. That will help stabilize the
telescope.
4. Be sure that the shelf remains more or less
horizontal.
Like this ... ... not like
this!
SETUP
12
2
1
Tilt adjustment
knob
Sighting aid
Height
adjust-
ment
knob
VIEWING:
1. Loosen the cradle’s height and tilt adjustment
knobs and swing the telescope toward your
observation target.
2. Use the viewfinder to check whether the
telescope is pointed at the right part of the
sky. Your observation target must be right in
the cross-hairs of the viewfinder. If you have
a bright target, such as the Moon, use the
viewfinder bracket’s sighting aid.
3. Re-tighten the height and tilt adjustment
knobs.
4. Insert the 20-mm eyepiece into the eyepiece
extension, secure it in place with at least one
of the two knurled screws, and turn the
eyepiece extension until the image is sharp.
5. Always place your observation target in the
center of the visual field. For the cradle tilt,
you can leave the knob fairly loose so you
can swing the telescope without having to
adjust the knob every time. Pivot the
telescope in the height direction by turning
the fine adjustment ring.
SETUP
How to Use Your Telescope
13
5
6. If the fine height adjustment ring can’t be
turned anymore in a given direction, you will
have to turn it back to the middle and
readjust to your target by loosening the
height knob. Then you can use the fine
adjustment ring again.
7. For optimal viewing, do not touch your
telescope when looking through it.
8. Start viewing any given target at the lowest
possible magnification (the eyepiece with the
greatest focal length) and increase it to the
extent that your target permits. You will have
to refocus every time you change the
eyepiece.
9. If you watch an astronomical target for a
long time, you will notice that it gradually
moves out of the field of view. Turn the fine
height adjustment ring and loosen the tilt
knob to swivel the telescope horizontally
until your target is once again in the middle
of your visual field.
10. You will notice that you will see more and
more details in the target the longer you
practice.
DID YOU KNOW?
When you look through the telescope,
you will see how the brighter stars will
flicker and change color. This is a result
of Earth’s atmosphere. You probably
already know the same effect from hot
summer days when the air shimmers
above a hot road’s surface. With the
Moon and the planets, too, you can see
this kind of shimmering. The image in
the telescope may get sharper, and
then become blurrier again.
Sometimes, Earth’s atmosphere is very
calm for a few seconds or minutes.
When that happens, you will see the
target very clearly and sharply.
SETUP
14
6
TIP!
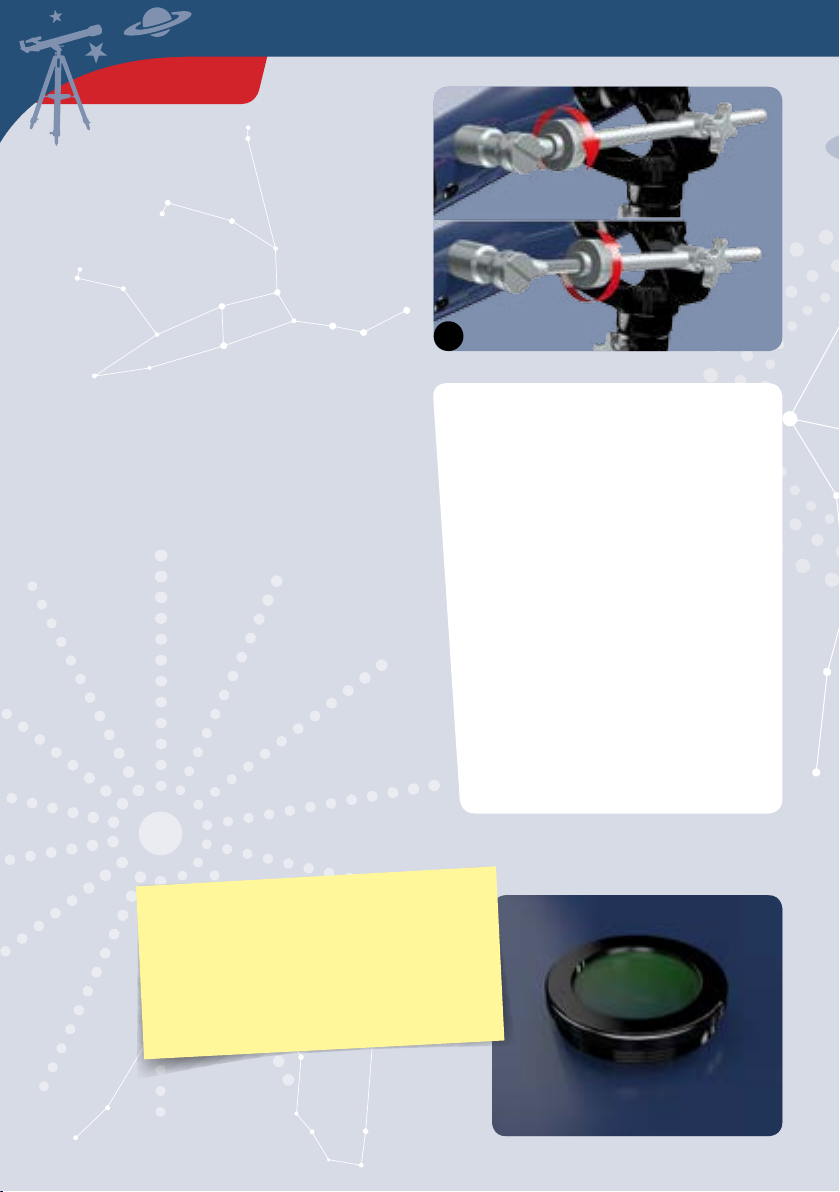
If the Moon looks too bright when you look
through the telescope, which may happen if
it’s close to full, screw the Moon filter into
the front opening of the eyepiece. It will
soften the light.
Moon filter

CARE
On some nights, it can be so damp
outside that your telescope, the
objective, or the eyepiece can become
wet with dew. With an eyepiece, you
can pretty much avoid that by keeping
it in its cover and putting it in your
pants or jacket pocket. The objective
can also get condensation on it when
you bring your telescope back into the
warm house from the cold. If that
happens, be sure to let everything dry
thoroughly — especially the lenses,
before you put their dust covers back
on them. Don’t wipe the glass lenses
when they are dry, because you might
scratch them. Feel free to wipe the
stand and telescope tube off with a
rag, if you like.
TIP!
You can use the Barlow lens to double the
magnification of any eyepiece. It will only
work well, though, if the air is calm and
you’re watching a bright object, such as the
Moon. Insert the Barlow lens into the
eyepiece extension until it hits the stop and
clamp it in place with the two knurled
screws. Then insert the eyepiece into the
Barlow lens. Don’t forget to screw it on tight!
How to Use Your Telescope
15
NOTE: If your telescope is coming from
the warm house, it will cool off a lot in
the first half hour. While it cools, your
observation targets may look unstable
and washed-out. They will look better
once it has cooled down to the
surrounding temperature.
TIP!
If you want to look at something high in the sky, your
telescope may point almost straight up. That can make it
pretty uncomfortable to peer through the eyepiece. It will
be more comfortable if you first insert the star diagonal and
then mount the eyepiece on the eyepiece extension. It will
deflect the light at a right angle. If you do use the star
diagonal, you will need to readjust the eyepiece extension
to get a clear image. Don’t forget to tighten the knurled
screws on the eyepiece extension and the star diagonal!
Barlow lens
Star diagonal

TIP!
You can use the Big Dipper to figure out what
direction you’re facing even if you have no
compass or GPS. Just extend the line between
the two stars at the front edge of the ladle
about five times, away and up from the
bottom front star. You will come to a single
brighter star known as Polaris, or the North
Star. Turn your face to the North Star and
look down to the horizon. You will be looking
exactly north. South is behind you, east to the
right and west to the left.
For good stargazing, you need a clear,
cloudless night sky. If you want to view
from a terrace or balcony, turn off the
inside lights and stay as far away from
streetlights as possible, because the light
will interfere with your viewing. Of course,
you can always see lots more stars if you go
with your parents on an outing away from
any towns or cities, and find a pitch-black
location with an unobstructed view of the
sky all around.
To help you see in the dark to look at what’s
on your star wheel, for example, take a
flashlight with you. But first wrap a red
Preparing
for Nighttime
Viewing
balloon around the
light. That will create a
red-light flashlight, which
won’t cause your pupils to dilate and
reduce your night vision. Before viewing,
give your eyes a few minutes to get used to
the darkness. After 15 minutes in the dark,
you will start seeing things that you hadn’t
noticed before.
Spring
North star
Autumn
North
Summer
Winter
CHECK IT OUT
16
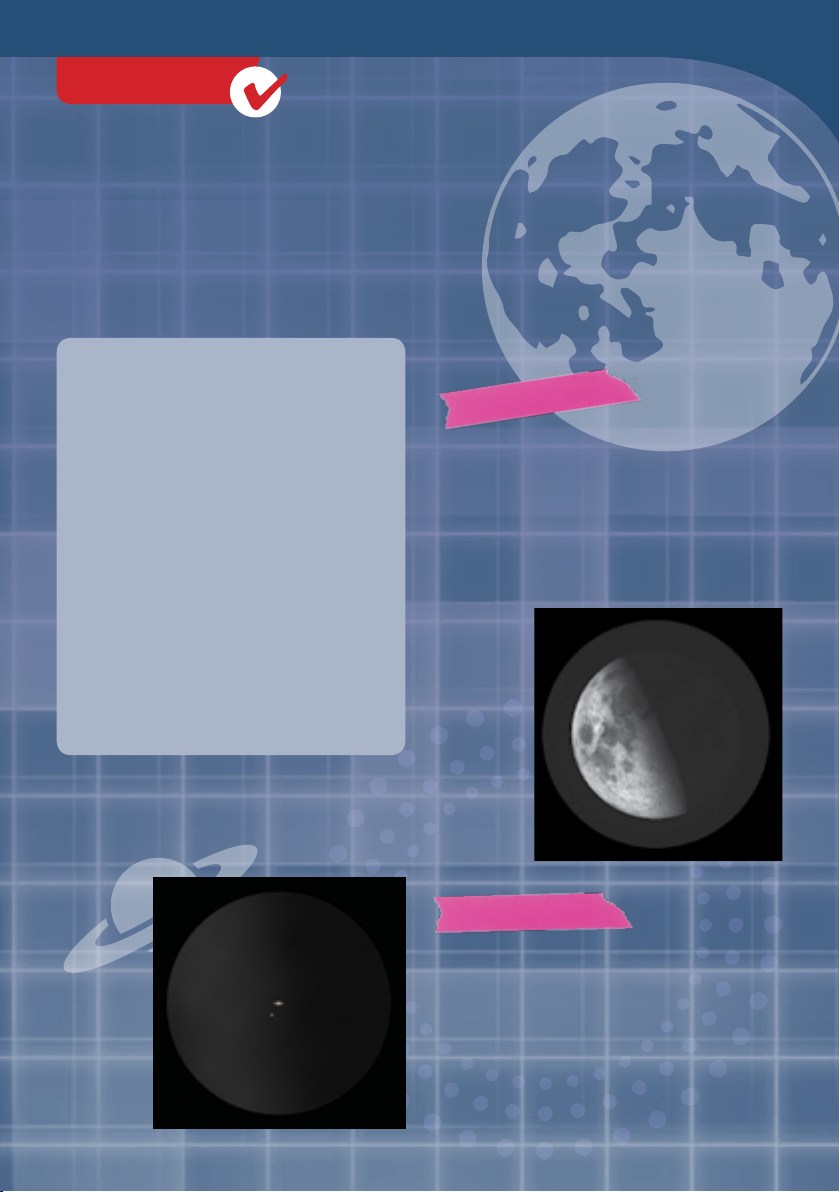
You can see craters, mountains, and lava-filled
plains. It will astound you how many details
you can make out. When the moon is full, you
won’t be able to see its features so well because
they will only cast short shadows. The waxing
or waning moon is better for watching through
the telescope. Try a variety of magnifications.
THE MOON
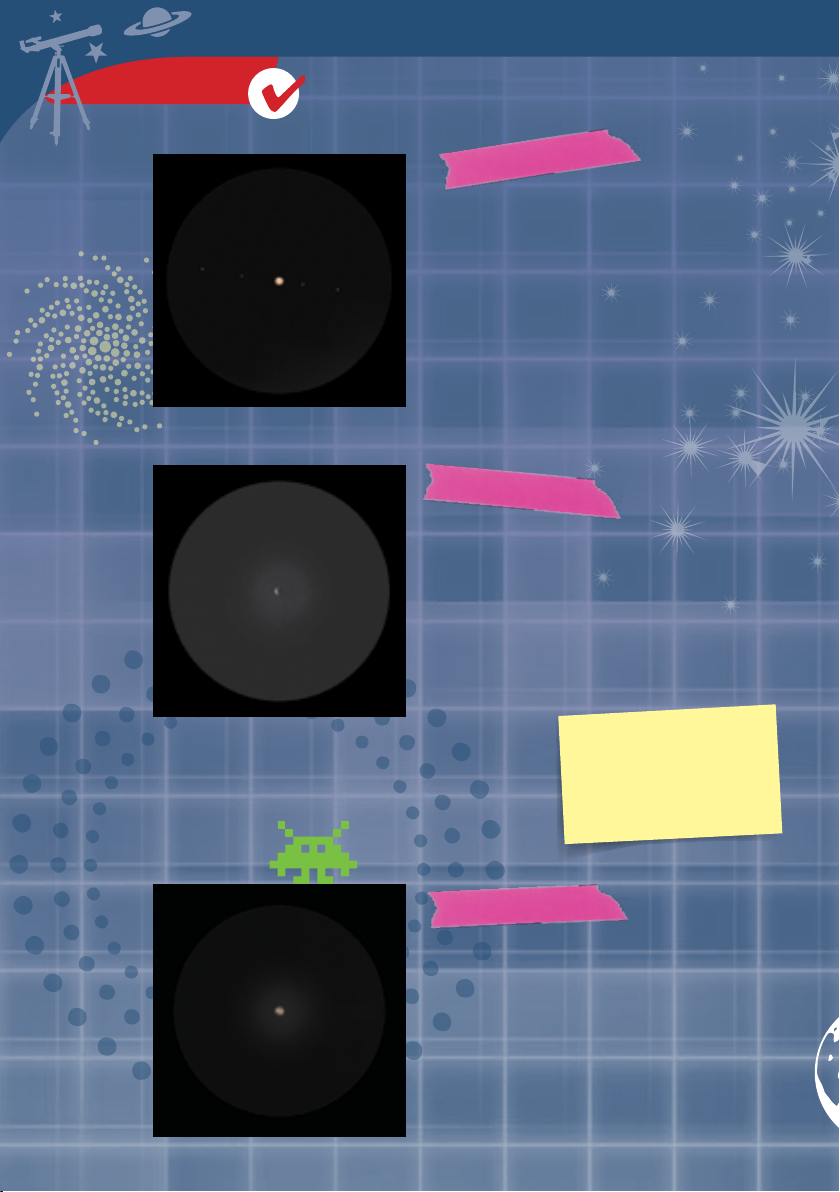
SATURN
You will see a yellowing-white disk surrounded
by a ring. You might also notice Saturn’s
brightest moon, Titan, which stands well off
from the planet’s disk and almost looks like a
weak star. It changes its position from one night
to the next. Use a high magnification. For more,
see page 31.
Ten Observations
to Get You Started
Stars will always be points of
light, no matter what kind of
telescope or magnification you
use. They are just too far away.
But there are also the Moon,
planets, binary stars, star
clusters, galaxies, and nebulae
— all highly worthwhile
targets. Start by selecting an
easy one like the Moon or a
planet. The following ten
suggestions are ideal choices for
your first astronomical
observations.
17
CHECK IT OUT
How to Use Your Telescope
Titan
CHECK IT OUT
18
On the clearly oval disk of this planet, you will
see two parallel bands of clouds and four
moons. The moons change their positions from
one night to the next. Use high magnification.
Of all the planets, this one shows the most
obvious color. Its orange disk can look
significantly larger or smaller at different times
of the year, depending on its distance from
Earth. When it’s large, you will also be able to
see dark and light structures on its surface. Use
high magnification.
This planet displays patterns of light similar to
those of our Moon. Sometimes, you can see it as
a sickle, other times as an almost-full disk.
Unlike our Moon, Venus won’t show all these
shapes within a single month. Instead, they will
only appear over a period of several months.
Use high magnification.
JUPITER
MARS
VENUS
Callisto Europa Io Ganymede
TIP!
See page 31 for how to
identify the positions of
the planets.
Table of contents
Other Thames & Kosmos Telescope manuals

Popular Telescope manuals by other brands

Bresser
Bresser DOB-150 Quick start instructions

Unistellar
Unistellar eVscope quick start guide

Meade
Meade MAX-ACF instruction manual

Winegard
Winegard TPLE-15 quick start guide

ORION TELESCOPES & BINOCULARS
ORION TELESCOPES & BINOCULARS SkyQuest XT10 9810 instruction manual

Apertura
Apertura DT Series Assembly instructions and user guide


ORION TELESCOPES & BINOCULARS
ORION TELESCOPES & BINOCULARS GiantView BT-70mm instruction manual

Levenhuk
Levenhuk Labzz T1 user manual

SVBONY
SVBONY MK105 user manual

Bushnell
Bushnell Northstar 78-7846 instruction manual

NATURE & DECOUVERTES
NATURE & DECOUVERTES MIZAR manual

Celestron
Celestron SPC-80 instructions