The Black Tank Brickblaster PRO User manual

Brickblaster PRO
GUIDE


BRICKBLASTER PRO GUIDE:
created with the purpose of releasing innovative, robust and useful
products and solutions. Since you are reading this manual you have
acquired one of our products and care enough to concern yourself
with its functionality.
interface, to the functionality, to the quality of its manufacture, to have
been scrutinized prior to your purchase to ensure that you are holding
your product and let us know your thoughts and ideas regarding your
needs, wants and other products and innovations that you can use.
01

FCC WARNING:
This equipment has been tested and found to comply with the
regulations for a Class A digital device, pursuant to Part 15 of
the FCC Rules. These limits are designed to provide reasonable
protection against harmful interference when the equipment is
operated in a commercial environment. This equipment
generates, uses, and can radiate radio frequency energy and, if
not installed and used in accordance with this user’s guide, may
cause harmful interference to radio communications. Operation
of this equipment in a residential area is likely to cause harmful
interference, in which case the user will be required to correct
the interference at his own expense.
GENERAL PRECAUTIONS:
2. Before use, make sure all screws and safety points are secured.
3. Make sure the light is unplugged before removing rods, the
enclosure or screws.
front or rear panel.
02
BRICKBLA S TER PRO
T H E BLACKTANK.COM
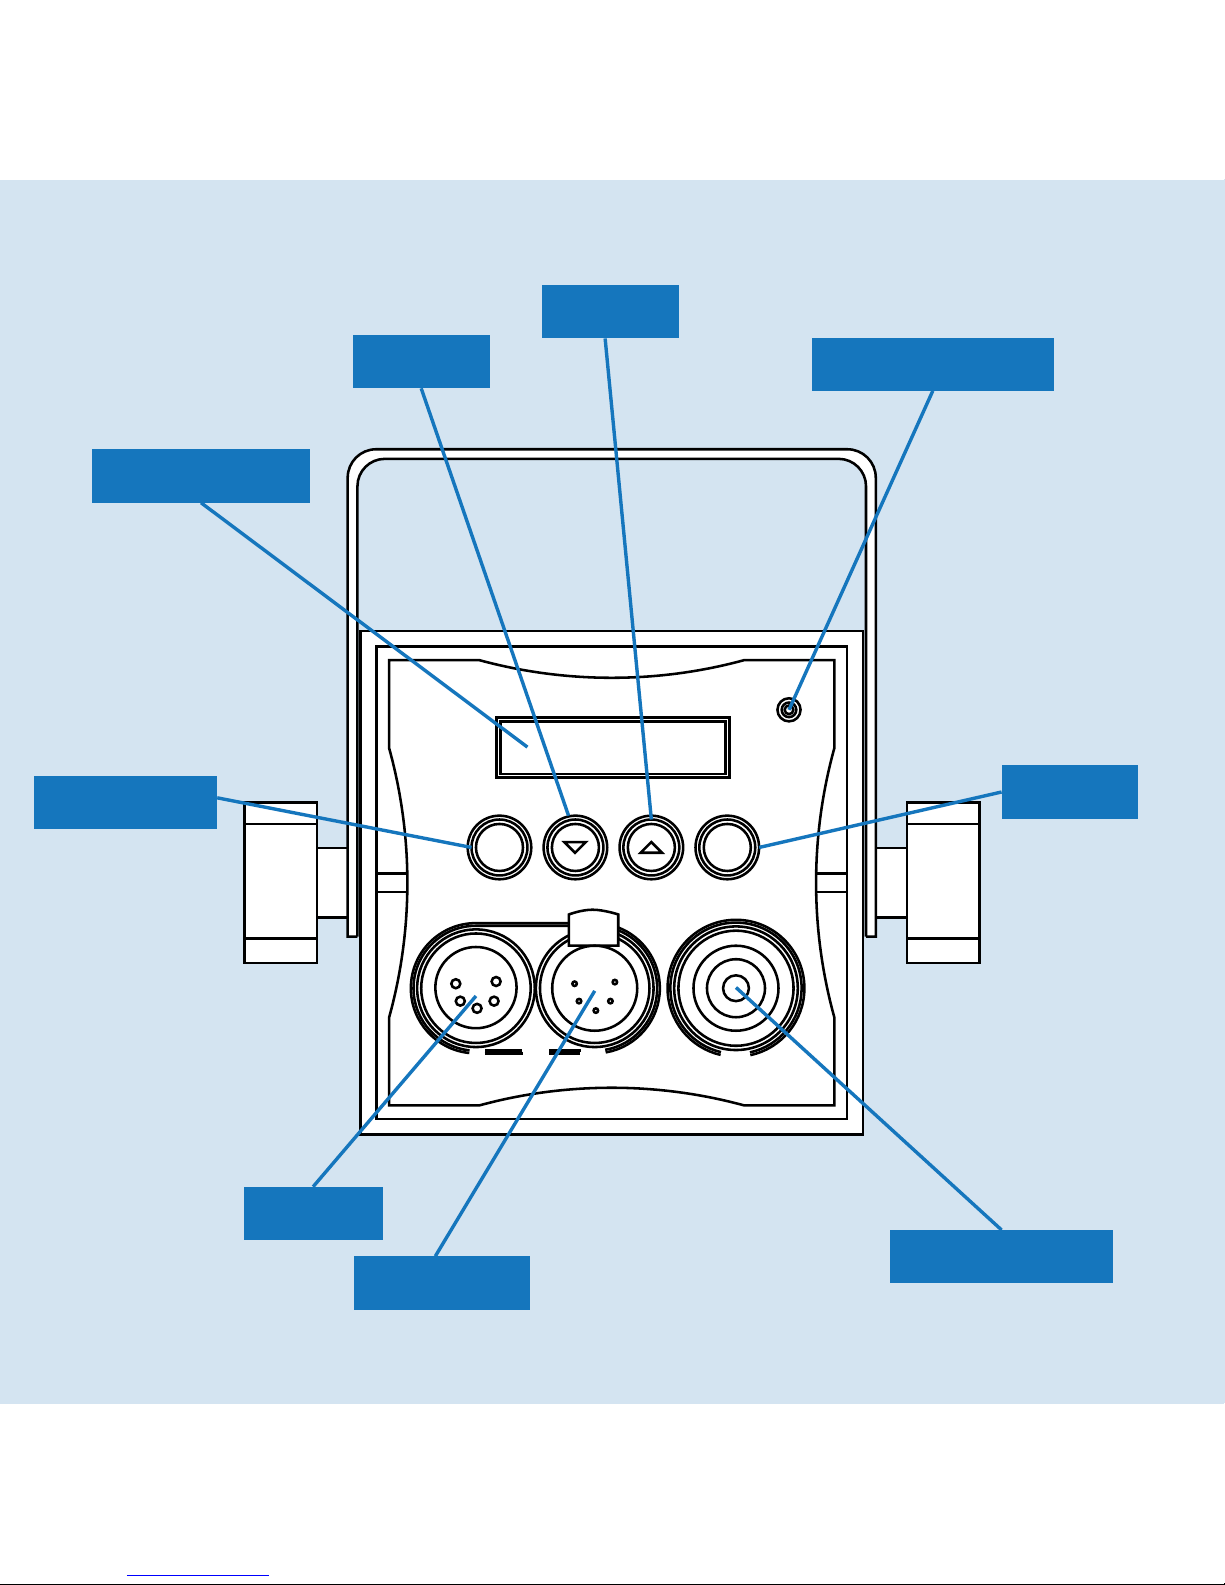
MEN U O K
PWR
PWR
I N D M X OUT
POWER LIGHT
LCD DISPLAY
MENU KEY
DMX IN
DMX OUT POWER PLUG
KEY
KEY
OK KEY
Table of contents


