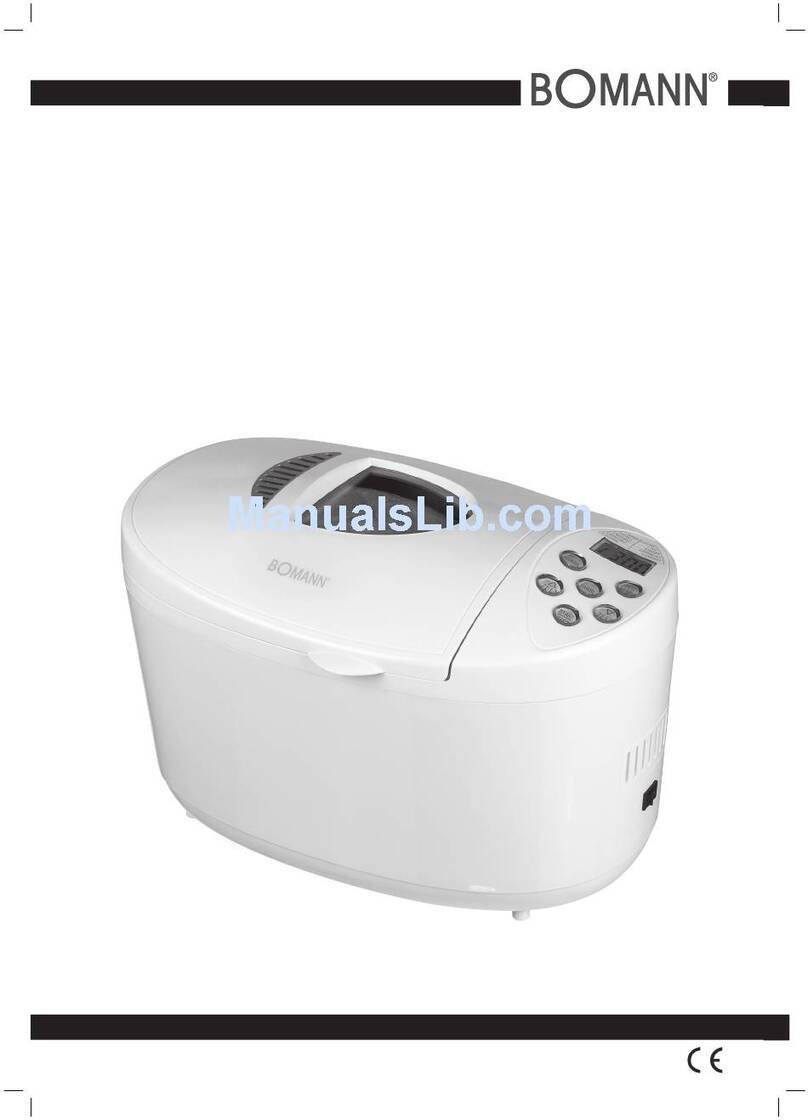
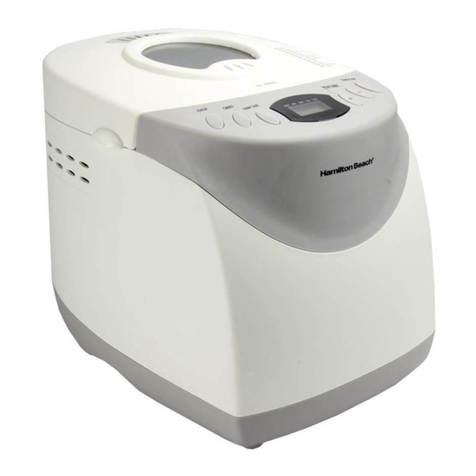
The Hairy Bikers SDA1075 User manual


IMPORTANT SAFEGUARDS
When using electrical appliances, basic safety precautions should
always be followed. These instructions should be saved for future
reference:
• Read and familiarise yourself with all operating instructions before using
this Bread Maker.
• Before plugging your unit into the mains, visually check that it is intact
and has not suffered any transit damage.
• Check that the voltage indicated on the data plate corresponds with that
of the local network before connecting the appliance to the mains power
supply.
• Do not use this product with a programmer, timer, separate remote-
control system or any other such device.
• Do not immerse this appliance in water or any other liquids.
• Cooking appliances should be positioned in a stable situation with the
handles (if any) positioned to avoid spillage of liquids.
• DO NOT touch hot surfaces. Accessible surfaces are liable to get
hot during use. Always use the handle.
• Oven gloves should be used whilst using the bread maker.
• Close supervision is required when using this appliance near children.
• Never leave this appliance within reach of children.
• This appliance shall not be used by children from 0 to 8 years.
• This appliance can be used by children aged from 8 years and above
and persons with reduced physical, sensory or mental capabilities or
lack of experience and knowledge if they have been given supervision
or instruction concerning use of the appliance in a safe way and
understand the hazards involved.
• Children shall not play with the appliance.
• Keep the appliance and its cord out of reach of children less than 8
years.
• Cleaning and user maintenance shall not be made by children.
• Do not leave the appliance unattended during use.
• Do not leave the appliance unattended whilst connected to the mains
supply.
• Always use this appliance on a solid, level, non-flammable surface.
• Do not use this appliance outdoors.
• It is imperative to unplug the power cord after the appliance has been

used, before it is cleaned and whilst being repaired.
• Regular, periodic checks should be carried out on the supply cord to
ensure no damage is evident. Should there be any signs of damage the
appliance should not be used.
• If the supply cord is damaged it is to be replaced by a qualified person
in order to avoid a hazard.
• Do not operate this appliance with a damaged plug or cord, after a
malfunction or after being dropped or damaged in any way.
• Do not allow the mains cable to hang over sharp edges or come in
contact with hot surfaces.
• Allow the unit to cool before storage.
• Never place the appliance near to flammable material or high pressure
containers.
• This appliance is intended for household use only and should not be
used for industrial purposes.
• Do not use any accessories or attachments with this appliance other
than those supplied or recommended by supplier.
• Do not use this appliance for anything other than its intended use.
• Do not push objects into any openings as damage to the appliance
and/or electric shock may occur.
• Ensure appliance is situated in an open area, do not allow it to come in
contact with cupboards, curtains, wall coverings, clothing or other
flammable materials.
• Unplug after each use. Grasp the plug, not the cord.
• Do not cover this appliance.
• Never place this appliance on an electric, gas, or any other type of hob.
• Ensure adequate ventilation whilst cooking foods that are prone to
giving off smoke.
• WARNING do not attempt to move the bread maker whilst it
is hot.
• WARNING this appliance must be earthed.
• Clean the bread maker and bread pan with clean damp soft cloth – do
not use harsh abrasives or chemicals.

Introduction
With your new Hairy Bikers Bread maker you will now be able to cook
delicious homemade bread.
Description of parts*
*Also included measuring cup and spoon
Description of Control Panel
A. LCD (displays MENU, COLOUR, SIZE, working time and
working mode)
B. Menu Button
C. Loaf Size/Weight Button
D. Colour Button
E. Stop/Start Button
Hinged Lid
Control Panel
Bread pan
Kneader Paddle

F. Time + Button
G. Time - Button
Button Functions Descriptions
Menu: Press the Menu button, a beep will be heard with each press, select
from the following menu options:
NB Whilst the bread maker is running through the selected program, it will
13
GF
A
B
C
D
E
F
G
450g 750g 1000g
Timer Rise
Preheat Bake
Knead Warm
Rest End
Light Medium Dark Quick
Display icon detail
1. Basic bread 2. French bread 3. Whole Wheat
4.
Sweet bread 5. Ultra fast 750g (1.5lb) 6. Ultra fast 1kg (2lb)
7. Quick bake 8. European bread 9. Dough
10. Bagel dough 11. Jam 12. Bake
13. Gluten Free

run through the following processes:
TIMER – PREHEAT – KNEAD – REST – RISE – BAKE – WARM – END
Loaf: Press the Loaf button, the beeper will beep with each press,
select from the following loaf size options:
450g (1.0LB), 750g (1.5LB) or 1000g (2.0LB)
NB the three loaf size options are available on menu options 1, 2, 3
and 4.
Colour: Press to select the following different colours:
Light, Medium, Dark or Quick.
NB the three loaf colour options are only available on menu options
1, 2 and 3.
Start/Stop is used to start and stop the machine.
Time + Press to advance cooking time, the beeper will beep once for
each button press.
Time - Press to reduce cooking time, the beeper will beep once for
each button press.
Before the first time you use your Bread maker
Please read these operating instructions thoroughly and keep them in a
safe place for future reference.
Remove all packing materials including the accessories inside the
bread maker.
Before using the bread maker for the first time, open the lid and wipe
over the bread pan using a soft, clean damp cloth.
Instructions for use
• Place the bread maker on a solid, level, non - flammable surface.
• Raise the lid of the bread maker and fit the kneader paddle onto the
spindle in the centre of the bread pan.
• Add the ingredients to the bread pan in the following sequence: water,
flour, eggs and others according to the recipe (below). Add the yeast to
the centre of the mixture if using a program with the delay function,
otherwise if no delay function is selected then place the yeast on the top

of the mixture in order not to mix the yeast with water, salt and sugar, it
is important that the yeast does not come into contact with the wet
ingredients; otherwise the dough will not rise well enough.
• Close the lid on the bread maker.
• Insert the mains plug (with dry hands) into the mains socket, the unit will
beep to confirm it has powered up. The LCD display will show “MENU 1
TIMER 3:25”.
• Select the menu option desired (1–12) by pressing the Menu button, the
display will show the menu option selected on the centre left of the
display.
• Select the loaf size (1-3) that is to be made by pressing the Loaf button.
NB the three loaf size options are only available on menu options 1, 2,
3 and 4.
• Select the loaf colour (1-4) that is required by pressing the Colour
button. NB the four loaf colour options are only available on menu
options 1, 2, and 3.
• If desired the running time of each menu option can be increased or
decreased using the Time + or Time – buttons.
• Once the desired Menu, Loaf size, Loaf colour and running times have
been set press the start/stop button to start the machine and the bread
making process. To cancel the program, press the start/stop button
again.
NB Refer to the cooking chart below for further guidance.
• Once the baking is complete, the display will show 0:00 and the bread
maker will beep several times and go into keep warm mode for one
hour. The symbol “:” will continue to flash. After keeping warm for 1
hour, the appliance will beep again and the symbol “:” will stop flashing
and the program will return to its initial standby state. To cancel the
keep warm mode, press the start stop button for 1 second.
• After the program has finished, unplug from the mains socket before
taking out the bread. Using oven gloves or similar, pull the bread pan
straight out of the machine.
Dough function
Dough function operation is the same as the bread making function,
except that this program does not bake the bread.
Baking function
This function can be used to bake bread or other baked goods.
Follow this procedure:

• Insert the bread pan into the bread maker.
• Place the ingredients into the bread pan and close the lid.
• Press the Menu Select button and select the Baking function.
• Press the Start/Stop button to activate the baking function.
• When the time display shows “0:00”, the machine will beep a warning,
and then revert to the initial standby state.
• If the baked product is finished before the baking process finishes (1
hour), press the Start/Stop button to stop the baking function. The
machine will revert to the initial standby state.
Cleaning your Bread Maker
• Always unplug the bread maker from the mains power supply before
cleaning.
• Allow the unit to cool before cleaning.
• Do not clean any part of your bread maker in a dishwasher.
• Do not submerge any part of the main body or mains cable in water or
any other liquids.
• Wipe clean the outside of the main body with a soft damp cloth.
• Remove the bread pan from the bread maker by pulling it upwards by
the handle. Wash the bread pan in warm soapy water and dry
thoroughly afterwards.
• Never clean any part of the bread maker with harsh or abrasive
cleaners.
Electrical Connections
This appliance is fitted with a fused three-pin plug to BS 1363. If the
plug has to be removed, it should be cut off and carefully disposed of
immediately. To avoid a possible shock hazard, do not insert the
discarded plug into a mains socket.
Fitting a new plug
If for any reason you need to fit a new plug, the flexible mains lead must
be connected as shown below. The wires in the mains lead fitted to this
appliance are coloured in accordance with the following code:
Brown wire = Live (L)
Blue wire = Neutral (N)
Green & Yellow = Earth (E)
Connect Green
& Yellow to
Earth (E)
Connect
Brown to
Live (L)

If colours of the wires in the mains lead of this appliance do not
correspond with the coloured marking identifying the terminals in your
plug, proceed as follows:The wire which is coloured Blue must be
connected to the terminal which is marked with the letter N or coloured
Black. The wire which is coloured Brown must be connected to the
terminal which is marked with the letter L or coloured Red. The wire
which is coloured Green & Yellow must be connected to the terminal
which is marked with the letter E or coloured Green.Before refitting the
plug cover check that there are no cut or stray strands of wire inside the
plug. Use a 13 Amp BS 1362 fuse, only BSI or ASTA approved fuses
should be used. If you are in any way unsure which plug or fuse to use,
always refer to a qualified electrician.
Note: After replacing or changing a fuse on a moulded plug which has a
fuse cover, the cover must be refitted to the plug, the appliance must
not be used without a fuse cover.
Technical Data
Voltage : 220 - 240V AC 50Hz
Rated power : 650 W
Model : SDA1075
Waste electrical products should not be disposed of with household
waste. Please recycle where facilities exist. Check with your Local
Authority or retailer for recycling advice.
!
!
Hairy Bikers® is a Registered Trade mark.
Produced and imported by Europasonic
(UK) Ltd.
Manchester M3 1JS
www.europasonic.com
Connect
Blue to
Neutral (N)
Ensure the outer sheath
is securely held by the
cord clamp

Cooking Guide
Menu
Option
1 – Basic Bread & 13 ‒ Gluten Free Bread
Color
Light
Medium
Dark
Quick
Weight
450g
750g
1000g
450g
750g
1000g
450g
750g
1000g
450g
750g
1000g
Delay
3:13-
13:00
3:18-
13:00
3:25-
13:00
3:13-
13:00
3:18-
13:00
3:25-
13:00
3:13-
13:00
3:18-
13:00
3:25-
13:00
2:12-
13:00
2:17-
13:00
2:24-
13:00
Preheat
Knead 1
5 m
5 m
5 m
5 m
5 m
5 m
5 m
5 m
5 m
5 m
5 m
5 m
Rest
5 m
5 m
5 m
5 m
5 m
5 m
5 m
5 m
5 m
5 m
5 m
5 m
Knead 2
20 m
20 m
20 m
20 m
20 m
20 m
20 m
20 m
20 m
20 m
20 m
20 m
Rise 1
39 m
39 m
39 m
39 m
39 m
39 m
39 m
39 m
39 m
15 m
15 m
15 m
Punch
10s
10s
10s
10s
10s
10s
10s
10s
10s
10s
10s
10s
Rise 2
25m50
s
25m50
s
25m5
0s
25m50s
25m50
s
25m50s
25m50
s
25m50
s
25m50
s
8m50
s
8m50s
8m50s
Shape
15s
15s
15s
15s
15s
15s
15s
15s
15s
10s
10s
10s
Rise 3
49m45
s
49m45
s
49m4
5s
49m45s
49m45
s
49m45s
49m45
s
49m45
s
49m45
s
29m5
0s
29m50
s
29m50
s
Bake
48 m
53 m
60 m
48 m
53 m
60 m
48 m
53 m
60 m
48 m
53 m
60 m
Keep
Warm
1hour
1hour
1hour
1hour
1hour
1hour
1hour
1hour
1hour
1hour
1hour
1hour
Tot al
Time
3:13
3:18
3:25
3:13
3:18
3:25
3:13
3:18
3:25
2:12
2:17
2:24
Fruit and
Nut
2:51
2:56
3:03
2:51
2:56
3:03
2:51
2:56
3:03
1:50
1:55
2:02
Menu
Option
2 - French Bread
Color
Light
Medium
Dark
Quick
Weight
450g
750g
1000g
450g
750g
1000g
450g
750g
1000g
450g
750g
1000g
Delay
3:30-
13:00
3:32-
13:00
3:35-
13:00
3:30-
13:00
3:32-
13:00
3:35-
13:00
3:30-
13:00
3:32-
13:00
3:35-
13:00
2:30-
13:00
2:32-
13:00
2:35-
13:00
Preheat
Knead 1
5 m
5 m
5 m
5 m
5 m
5 m
5 m
5 m
5 m
5 m
5 m
5 m
Rest
5 m
5 m
5 m
5 m
5 m
5 m
5 m
5 m
5 m
5 m
5 m
5 m
Knead 2
20 m
20 m
20 m
20 m
20 m
20 m
20 m
20 m
20 m
20 m
20 m
20 m
Rise 1
39 m
39 m
39 m
39 m
39 m
39 m
39 m
39 m
39 m
15 m
15 m
15 m
Punch
10s
10s
10s
10s
10s
10s
10s
10s
10s
10s
10s
10s
Rise 2
30m5
0s
30m50
s
30m50
s
30m50s
30m50
s
30m50
s
30m50
s
30m50
s
30m50
s
15m50
s
15m50
s
15m50
s
Shape
10s
10s
10s
10s
10s
10s
10s
10s
10s
10s
10s
10s
Rise 3
59m5
0s
59m50
s
59m50
s
59m50s
59m50
s
59m50
s
59m50
s
59m50
s
59m50
s
38m50
s
38m50
s
38m50
s
Bake
50 m
52 m
55 m
50 m
52 m
55 m
50 m
52 m
55 m
50 m
52 m
55 m
Keep
Warm
1hour
1hour
1hour
1hour
1hour
1hour
1hour
1hour
1hour
1hour
1hour
1hour

Menu
Option
3 - Whole Wheat
Color
Light
Medium
Dark
Quick
Weight
450g
750g
1000g
450g
750g
1000g
450g
750g
1000g
450g
750g
1000g
Delay
3:43-
13:00
3:45-
13:00
3:48-
13:00
3:43-
13:00
3:45-
13:00
3:48-
13:00
3:43-
13:00
3:45-
13:00
3:48-
13:00
2:28-
13:00
2:30-
13:00
2:33-
13:00
Preheat
30 m
30 m
30 m
30 m
30 m
30 m
30 m
30 m
30 m
5 m
5 m
5 m
Knead
1
5 m
5 m
5 m
5 m
5 m
5 m
5 m
5 m
5 m
5 m
5 m
5 m
Rest
5 m
5 m
5 m
5 m
5 m
5 m
5 m
5 m
5 m
5 m
5 m
5 m
Knead
2
15 m
15 m
15 m
15 m
15 m
15 m
15 m
15 m
15 m
15 m
15 m
15 m
Rise 1
49 m
49 m
49 m
49 m
49 m
49 m
49 m
49 m
49 m
24 m
24 m
24 m
Punch
10s
10s
10s
10s
10s
10s
10s
10s
10s
10s
10s
10s
Rise 2
25m50s
25m50s
25m50s
25m50s
25m50s
25m50s
25m50s
25m50s
25m50s
10m50s
10m50s
10m50s
Shape
10s
10s
10s
10s
10s
10s
10s
10s
10s
10s
10s
10s
Rise 3
44m50s
44m50s
44m50s
44m50s
44m50s
44m50s
44m50s
44m50s
44m50s
34m50s
34m50s
34m50s
Bake
48 m
50 m
53 m
48 m
50 m
53 m
48 m
50 m
53 m
48 m
50 m
53 m
Keep
Warm
1hour
1hour
1hour
1hour
1hour
1hour
1hour
1hour
1hour
1hour
1hour
1hour
Tot al
Time
3:43
3:45
3:48
3:43
3:45
3:48
3:43
3:45
3:48
2:28
2:30
2:33
Fruit
and Nut
2:56
2:58
3:01
2:56
2:58
3:01
2:56
2:58
3:01
2:06
2:08
2:11
Menu
Option
4
5
6
7
8
9
10
11
12
Sweet Bread
Ultra
Fast
(1.5LB)
Ultra
Fast
(2.0LB)
Quick
European
Dough
Bagel
Dough
Jam
Bake
Weight
450g
750g
1000g
750g
1000g
N/A
750g
N/A
N/A
N/A
N/A
Delay
3:17-
13:00
3:22-
13:00
3:27-
13:00
N/A
N/A
N/A
3:55-13:00
1:30-13:00
2:00-13:00
N/A
N/A
Preheat
30m.
Knead
1
5m
5m
5m
15m
15m
3m
5m
5m
20m
15m
Rest
5m
5m
5m
5m
10m
5m
Knead
2
20m
20m
20m
5m
20m
20m
10m
Rise 1
39m
39m
39m
39m
60m
Punch
10s
10s
10s
10s
Rise 2
25m50s
25m50s
25m50s
25m50s
Shape
5s
5s
5s
10s
Rise 3
51m55s
51m55s
51m55s
8m
8m
44m50s
90m
Bake
50m
55m
60m
35m
35m
90m
60m
50m
60’
Keep
Warm
1hour
1hour
1hour
1hour
1hour
1hour
1hour
N/A
N/A
60’
Tot al
Time
3:17
3:22
3:27
0:58
0:58
1:43
3:55
1:30
2:00
1:05
60’
Fruit
and Nut
2:55
3:00
3:05
N/A
N/A
N/A
2:58
N/A
1:38
N/A
N/A
Tot al
Time
3:30
3:32
3:35
3:30
3:32
3:35
3:30
3:32
3:35
2:30
2:32
2:35
Fruit and
Nut
N/A
N/A
N/A
N/A
N/A
N/A
N/A
N/A
N/A
N/A
N/A
N/A

STANDARD BREAD RECIPES
Basic Bread
Ingredients: Large (1000g) Regular (750g) Small (450g)
Water 330ml 280ml 190ml
Oil 2 tbsp 2 tbsp. 1-1½ tbsp
Salt 1 tsp ¾ tsp ½ tsp
Sugar 3 tbsp 1-1½ tbsp 1 tbsp
Milk Powder 2 tbsp 1 tbsp 1 tbsp
Flour 4 Cup 3-3¼ Cup 2-2¼ Cup
Yeast 1 tsp 1 tsp 1 tsp
French
Ingredients: Large (1000g) Regular (750g) Small (450g)
Lemon Juice 1 tsp 1 tsp 1 tsp
Water 320ml 280ml 150ml
Oil 2 tbsp 1-1½ tbsp. 1 tbsp
Salt 2 tsp 1-1¼ tsp 1 tsp
Sugar 2 tbsp 1-1½ tbsp 1 tbsp
Flour 4 Cup 3-3¼ Cup 2-2¼ Cup
Yeast 1 tsp 1 tsp 1 tsp
Whole Wheat
Ingredients Large (1000g) Regular (750g) Small (450g)
Water 320ml 270ml 210ml
Oil 3 tbsp 2 tbsp 1-1½ tbsp
Salt 2 tsp 1 tsp 1 tsp
Sugar 3 tbsp 3 tbsp 3 tbsp
Milk Powder 3 tbsp 2-2½ tbsp 2 tbsp
Flour 3 Cup 3 Cup 2 Cup
Whole meal Flour 1 Cup ¾ Cup ¼ Cup
Yeast 1½ tsp 1 tsp 1 tsp
Sweet Bread
Ingredients Large (1000g) Regular (750g) Small (450g)
Water 320ml 220ml 160ml
Oil 2 tbsp 1 tbsp. 1 tbsp
Salt 1-1½ tsp 1 tsp ½ tsp
Sugar ½ Cup 1 1/3 Cup ¼ Cup
Milk Powder 2 tbsp 1-1½ tbsp 1 tbsp
Flour 4-4¼ Cup 3-3 1/3 Cup 2-2½ Cup
Yeast 1 tsp 1 tsp 1 tsp
Ultra Fast (750g) Note: Water temperature 45
℃
- 50
℃
"
Ingredients Regular (750g)
Water + Egg 280ml
Oil 2 tbsp.

Salt 1 tsp
Sugar 3 tbsp
Milk Powder 3 tbsp
Flour 3 Cup
Yeast 4 tsp
Ultra Fast (1000g) Note :Water temperature 45°C – 50°C
Ingredients Regular (1000g)
Water + Egg 370ml
Oil 2 tbsp.
Salt 1 tsp
Sugar 3 tbsp
Milk Powder 3 tbsp
Flour 4 Cup
Yeast 4 tsp
Quick Bread
Ingredients Regular (1000g)
Water 330ml
Egg 1
Oil 3 tbsp.
Salt 1 tsp
Sugar ¾ Cup
Milk Powder 2 tbsp
Flour 3-3½ Cups
Yeast 3 tsp
European Bread
Ingredients Regular (1000g)
Water 310ml
Butter 2 tbsp.
Salt 1-1½ tsp
Sugar 4 tbsp.
Milk Powder 3 tbsp
Gluten Free Brown Bread
Ingredients Regular
Eggs 2
Oil 6 tbsp
Vinegar 1 tbsp
Sugar 2 tbsp
Milk or Vegan Milk 320g
Gluten Free Brown Bread Flour 450g
Quick Yeast 2 tbsp
Gluten Free White Bread
Ingredients Regular
Eggs 2
Oil 6 tbsp
Vinegar 1 tbsp
Sugar 2 tbsp
Milk or Vegan Milk 320g

Gluten Free White Bread Flour 450g
Quick Yeast 2 tbsp
Gluten Free Sandwich Bread
Ingredients Regular
Eggs 3
Cider Vinegar 1 tsp
Canola Oil ¼ Cup
Water 1-1½ Cups
White Rice Flour 2 Cups
Potato Starch ½ Cup
Tapioca Flour ½ Cup
Corn-starch 1/3 Cup
Xanthan Gum 1 tbsp
Sugar 3 tbsp
Salt 1- 1½
Milk Powder (non-fat, dry) 2/3 Cup
Yeast 1¼ tsp
Gluten Free Basic Bread
!
Ingredients Large
Eggs 3
Cider Vinegar 1 tbsp
Olive Oil 60ml
Honey 60ml
Buttermilk (room temperature) 350ml
Salt 1 tsp
Xanthan Gum 1 tbsp
Cornflour 5 tbsp
Potato Flour 8 tbsp
Soy Flour 8 tbsp
White Rice Flour 320g
Yeast 1 tbsp
!
!
!
JAM RECIPES
Orange Jam
Ingredients
Oranges 3
Lemon 1
Sugar 2 tbsp
Pectin 1¼ Cups
Strawberry Jam
Ingredients
Strawberries 1 ½ Cups
Lemon Juice 2 tsp
Sugar 1 Cup

Pectin 1 tbsp

Table of contents
