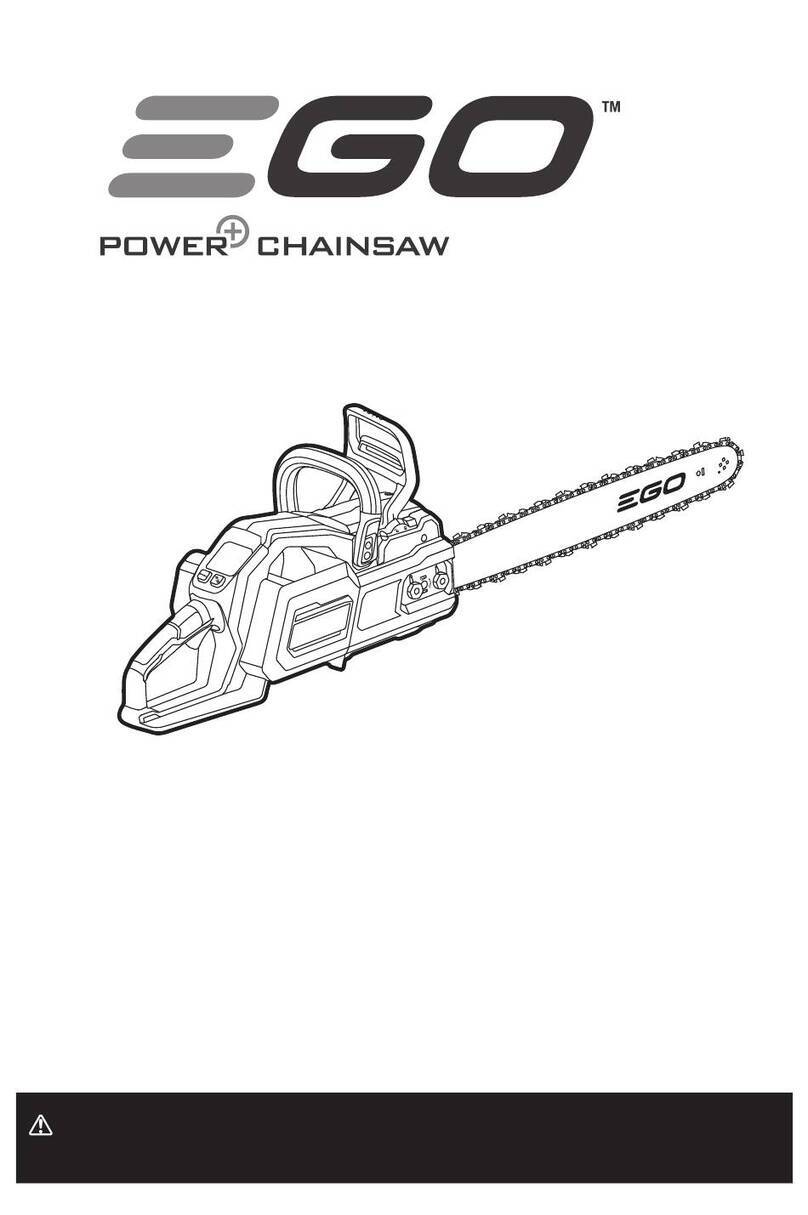
The Handy THECS40 User manual

OPERATOR’S MANUAL & PARTSLIST
MODEL –THECS40
40CM 2200W ELECTRIC CHAINSAW
Spares & Support: 01793 333212
Please read & understand this manual, paying particular attention to the safety
instructions, before use.
The manufacturer reserves the right to change the product specification and
livery according to continued product improvements.
19388500111/02/2016


CONTENTS
SPECIFICATIONS
GENERAL SAFETY INSTRUCTIONS
ELECTRICAL CONNECTION
MAINTENANCE & STORAGE
ASSEMBLY
OPERATION
TROUBLE SHOOTING
PARTS DIAGRAM & LIST
WARRANTY
DECLARATION OF CONFORMITY

SPECIFICATIONS
Model
THECS40
Product Number
193885001
Motor Power
2200 watt
Motor Voltage
230-240V/50HZ
Chain Speed
13.5m/s
Guide Bar Length
406mm
Chain Pitch
3/8”
Chain Drive Links
57
Chain Gauge
0.050”
Oil Tank Capacity
240ml
Cable Length
3m
Typical Weighted Vibration
5.0m/s², k=1.5m/s²
Measured Power Pressure
104 dB(A)
The manufacturer reserves the right to change the product specification and livery according to continued
product improvements.
This symbol on the product or on its packaging indicates that this product may not be treated as household
waste. Instead it shall be handed over to the applicable collection point for the recycling of electrical and
electronic equipment.
For more detailed information about recycling of this product, please contact your local council office, your
household waste disposal service or shop where you purchased the product.

GENERAL SAFETY INSTRUCTIONS
Read and understand the owner’s manual and labels affixed to the machine. Learn its application and
limitations as well as the specific potential hazards. Retain these instructions for future reference. The
operator is responsible for following the warnings & instructions in this manual and on the product.
WARNING LABELS/SYMBOLS
Read & understand operator’s manual
before using the machine. Failure to
follow instructions could result in
death or serious injury.
Do not smoke which using this machine
Wear gloves to protect your hands
Do not use near a flame, or sparks
Whenever the machine is in use, safety
glasses/goggles must be worn to
safeguard against flying objects.
Hearing protection must also be used
to protect the operators hearing.
If the operator is working in an area
where there is a risk of falling objects,
a safety helmet must also be worn.
Wear boots with saw protection, steel-toe
cap and non- slip sole
Moving Parts
Rotating parts can contact or entangle
hands, feet, hair, clothing or
accessories.
Traumatic amputation or severe
laceration can result
15m
Keep all bystanders & animals at least 15
metres away from the machine during
operation.
If approached, stop the machine
immediately.
Double insulated or class 2 electrical
appliances are products that have been
designed in a way so as not to require a
safety connection to electrical earth
(These products must NOT have a
safety connection to Earth).
Acoustic power level LWA accordance
with directive 2000/14/EC + 2005/88/EC
(Please see machine for actual reading)
The Pruner is supplied with a low
KICKBACK chain, however sometimes
kick back can occur, so always hold the
unit firmly in two hands. The Kickback
danger zone on your Pruner is the
upper part of the nose of the guide
bar. Never saw using this part of the
guide bar, which poses a significant risk
for kickback.
Correct direction of cutting teeth
To reduce the risk of electric shock,
always unplug tool after use. Always
unplug tool before changing parts or
servicing. Failure to do so could result
in serious injury or death
Do not expose to rain or direct sunlight.
- Safety alert symbol. Used to alert you to potential personal injury hazards. Obey all safety messages
that follow this symbol to avoid possible injury.
DANGER -Indicates an imminently hazardous situation which, if not avoided, will result in serious
injury.
WARNING - Indicates a potentially hazardous situation which, if not avoided, could result in serious
injury
CAUTION - Indicates a potentially hazardous situation which, if not avoided, may result in minor or
moderate injury.
CAUTION - Used without the safety alert symbol indicates a potentially hazardous situation which, if not
avoided, may result in property damage.

SAFETY INSTRUCTIONS
STAY ALERT
Do not operate the machine while under the influence of drugs, alcohol, or any medication that could affect
your ability to use it properly. Do not use this machine when you are tired or distracted from the job at hand.
Be aware of what you are doing at all times. Use common sense.
AVOID DANGEROUS CONDITIONS
Make sure there is adequate surrounding workspace. Cluttered areas invite injuries.
Keep your work area clean with sufficient light. Keep the area around the machine clear of obstructions,
grease, oil, rubbish and other debris which could cause persons to fall onto moving parts.
Do not use it in areas where fumes from paint, solvents or flammable liquids pose a potential hazard.
Do not operate the appliance on a slope that is too steep for safe operation. When on slopes, slow down and
make sure you have good footing.
INSPECT YOUR MACHINE
Check all bolts, nuts, and screws for tightness before each use, especially those securing guards and drive
mechanisms. Vibration during use may cause these to loosen.
Form a habit of checking to see that all other tools/equipment are removed from the machines area before
turning it on.
Replace damaged, missing or failed parts before using it. Warning labels carry important information. Replace
any missing or damaged warning labels.
DRESS PROPERLY
Do not wear loose clothing, gloves, scarfs, neckties or jewelry (rings, wrist watches), which can be caught in
moving parts. Protective electrically non-conductive gloves and safety, steel toe, non-skid footwear are highly
recommended when working. Wear a face or dust mask if the operation is dusty. Always wear safety
glasses/goggles and/or face shields. Everyday eyeglasses have only impact resistant lenses; they are not safety
glasses/goggles. Wear protective hair covering to contain long hair, preventing it from getting caught in
machinery. We also advise that hearing protection is also used at all times, and if the operator is working in an
area where there is a risk of falling objects, a safety helmet must also be worn.
DO NOT ABUSE THE CABLE
Never carry the machine by the electrical cable or yank it to disconnect the plug from the mains supply.
Keep the cable from heat, oil and sharp edges.
AVOID ELECTRICAL SHOCK
The use of a Residual Current Device (“RCD”), on 230V electrics is recommended.
Check the electric circuit is adequately protected and that it corresponds with the power, voltage and
frequency of the machines motor. Do not plug or unplug the motor while standing in or around damp or wet
ground. Do not use the machine in wet or damp areas or expose it to rain. Prevent body contact with
grounded surfaces: pipes, radiators, ranges, and refrigerator enclosures.
Make sure your fingers do not touch the plug’s metal prongs when plugging or unplugging the machine.
EXTENSION CABLES
Extension cables must be no longer than 50 metres in length. The cable section must be 1.5 mm2for cable
lengths up to 25 metres & 2.5 mm2for cable lengths over 25 metres & 230V to allow sufficient current flow to
the motor.
Improper use of extension cables may cause inefficient operation of the machine, which can result in
overheating and motor damage.
Only extension cords to H07RN-F specification intended for outdoor purpose may be used. Avoid use of free
and inadequately insulated connections. Connections must be made with protected material suitable for
outdoor use. Make sure that any extension cable connections are dry and safe. Ensure that the extension cable
is carefully laid out avoiding liquids, sharp edges and places where vehicles might run over it. Avoid allowing
the extension cable to come into contact with the tiller tines. Ensure your extension cable is fully extended to
prevent overheating or the risk of fire.
KEEP BYSTANDERS AND CHILDREN AWAY
Keep unauthorised persons a minimum distance of 15 metres away from the machine. Do not allow children to
handle, climb on the machine.

DO NOT OVERREACH
Keep proper footing and balance at all times when using the machine. Never stand on the machine. Serious
injury could occur if the moving parts are unintentionally contacted. Do not store anything above or near the
machine where anyone might stand on the machine to reach them.
AVOID INJURY FROM UNEXPECTED ACCIDENT
Keep hands out of the way of all moving parts. Do not place any part of your body or any tool during
operation.
DO NOT FORCE TOOL
This chain saw is only designed for cutting of brushes, trunks or timber beams up to a diameter according the
guide bar length. It is only allowed to cut wood. Every other use of the machine is a not intended use.
Furthermore a professional use for tree services is strictly forbidden.
NEVER LEAVE MACHINE RUNNING UNATTENDED
Do not leave the machine unattended until it has come to a complete stop.
MAINTAIN YOUR MACHINE WITH CARE
Clean the machine immediately after use. Keep the machine clean to ensure it operates to its full and safest
performance. When maintaining this machine, only the manufacturer’s original replacement parts should be
used. The use of non-original manufacturer parts may invalidate your warranty.
PROTECT THE ENVIRONMENT
Take left over materials to an authorised collection point or follow the stipulations in the country where the
mixer is used. Do not discharge into drains, soil or water.
STORE IDLE EQUIPMENT
When not in use, the machine should be stored in a dry location. Keep the machine away from children and
others not qualified to use it.
ONLY USE APPROVED REPLACEMENT PARTS
Only use approved replacement parts. Unauthorised replacement parts can cause damage to the machine and
invalidate your warranty.
RESIDUAL RISK
Even with the intended use of the appliance there is always a residual risk, which cannot be prevented.
ELECTRICAL CONNECTION
Do not connect either core to the earth pin
The insulation on the grounded three metre electrical cord will only remain effectiveif the original insulating
parts are used for repairs and the spaces between the original insulation are maintained.
The use of a Residual Current Device (“RCD”), on 230V electrics is recommended. If using an extension cable,
plug it directly into the RCD.

MAINTENANCE & STORAGE
WARNING
Before any maintenance or cleaning operation is undertaken, ensure the mains plug is removed from the
wall socket.
Improper maintenance & storage of the machine may void your warranty.
Keep the machine clean for better and safer performance.
MAINTENANCE
Before each use, check all nuts & bolts to be sure they are sufficiently tightened.
Regularly check for obvious defects such as loose, dislodged or damaged chain and guide bar, loose fixings
and worn or damaged components.
Check that covers and guards are undamaged and correctly fitted. Carry out necessary maintenance or
repairs before using the chainsaw.
Ensure the breather openings on the motor casing are open and clean from debris. If they are blocked, the
motor could overheat and shut the machine down.
We recommend only manufacturer original parts are used when maintaining this machine. Failure to do so
could invalidate your manufacturer’s warranty.
REPLACING/CHANGING CHAIN & GUIDE BAR
Fit the chain and guide bar as described in “Assembly and Tensioning Chain”.
The circular groove of the guide bar will wear particularly on the lower edge with time. When replacing the
chain, turn the chain bar 180° to allow even wear, thus extending chain bar life.
Check the drive sprocket. If it is worn out or damaged due to strain, have it exchanged by an authorised service
dealer.
If the chain bar is worn out or damaged, take the chain tensioning catch off the bar by losing the screw anti-
clockwise. Then fit the tensioning catch onto the new bar by tightening the screw clockwise. The catch
protrudes (a) must be fitted into the bar hole.
CHAIN SHARPENING
Have your chain professionally sharpened at your local approved service dealer. Alternatively, sharpen the
chain yourself using a 3/8” Chainsaw file & guide (We recommend Handy Part HP-106).
CAUTION
Any maintenance and repairs carried out, to any electronic component must be undertaken by a qualified
technician.

CLEANING
Keep your machine clean.
Clean the molded plastic housing of the chainsaw using a soft brush and clean cloth.
Do not use water, solvents or polishes. Remove all debris, especially from the motor cooling vents.
Remove and brush clean the cover plate, chain and chain bar after 1 to 3 hours of use.
Clean the area under the cover plate, the drive sprocket and chain bar assembly using a soft brush.
Clean the oil outlet with a clean cloth.
If the chainsaw is to be stored for a longer period of time, clean the chain and chain bar.
Store in a secure, dry place out of the reach of children.
Do not place other objects on the chain saw.
To prevent leakage, ensure the machine is left in a horizontal position (oil filler cap uppermost).
When storing the machine in the original packaging, the oil tank must be completely emptied.
CAUTION
Clean the tool after each use. Failure to carry out proper cleaning can result in damage to the appliance or
cause it to malfunction.
WARNING
Injury may occur when working on the chain. Wear protective gloves.
STORAGE
For years of trouble free service, make sure the machine is clean and dry beforestoring.
Before storing, clean the machine thoroughly as indicated above.
Store indoors or in a protected area during severe weather and winter months. Always fit the blade guard.

ASSEMBLY
Remove the machine and contents from the carton. Be sure the carton is empty before discarding.
If you require any assistance with regards to the contents of the product, please contact us:
Tel: 01793 333212 - Mon –Fri 8.30am –5.30pm (excl. Bank Holidays)
WARNING
Do not connect the chainsaw to the mains before it is assembled completely.
Always use gloves when handling the chain.
CHAIN & BAR ASSEMBLY
1. Place the chainsaw on a flat, solid surface.
2. Slide the chain in the groove of the guide bar.
3. Ensure the chain is in the correct running direction.
4. Ensure the chain tensioning catch on the guide bar is facing outwards.
5. Fit the chain onto the drive sprocket and guide bar, so the fastening bolt and two guide fins fit into the
keyway of the guide bar.
1. Rear Handle
2. Throttle Trigger
3. Lock Button
4. Oil Cap
5. Front Handle
6. Chain Brake
7. Guide Bar
8. Chain
9. Spike
10. Blade Guard
11. Locking Knob & Chain
Tensioner
12. Side Cover
13. Drive Sprocket
14. Guide
15. Cutting Direction
Symbol
16. Oil Lever Gauge
13
14
15
16
Chain Direction
Chain Tensioning Catch

6. Ensure all parts are seated correctly & hold the chain and guide bar in a level position.
7. Pull the guide bar away from the machine, ensuring the chain is tight and positioned in the guide bar
groove.
8. Fit the cover plate; ensure the chain catcher fits into the groove of the cover plate.
9. Press the cover plate firmly onto the machine and screw on the cover plate, with the locking knob.
CAUTION
The chain is not yet tensioned; do not attempt to use the machine, until the assembly instructions are
completed thoroughly.
CHAIN TENSION
Always check the chain tension before use, after the first cuts and regularly during use, approx. every 10
minutes. Upon initial operation, new chains can lengthen considerably.
WARNING
Unplug the chainsaw from the power source before adjusting the chain tension
WARNING
Cutting edges on the chain are extremely sharp. Always use protective gloves when handling the chain.
WARNING
Always maintain proper chain tension.
A loose chain will increase the risk of kickback.
A loose chain, may jump out of the guide bar groove, which may injure the operator and damage the chain,
chain bar and drive sprocket, beyond repair.
CAUTION
The life of a saw chain will rely on sufficient lubrication and correct tensioning.
Avoid tensioning the chain if it is hot. This will cause the chain to be over tensioned, when it cools down.
1. Place the chainsaw on a flat, solid surface.
2. Rotate the locking knob/chain tensioning knob clockwise, until the locking knob is screwed tightly. The
correct chain tension will be reached automatically. The ratchet mechanism prevents the chain tension
from loosening.
3. The correct chain tension is reached when the chain can be raised 3-6mm from the centre of the chain
bar. This should be done, by using one hand to raise the chain against the weight of the machine.
4. If the chain loses tension, unscrew the locking knob/chain tensioning knob completely. Then screw on the
cover plate with the locking knob tightly again.

LUBRICATION
Chain life and cutting capacity depend on optimum lubrication. Therefore, the chain is automatically oiled
during operation via the oil outlet.
CAUTION
The Chainsaw IS NOT supplied filled with chain oil.
It is essential to fill the oil canister with chain oil before use.
Never operate the chainsaw without chain oil or at an empty oil tank level, as this will result in extensive
damage to the product, not covered by the manufacturer’s warranty.
FILLING THE OIL TANK
1. Place the chainsaw on a flat, solid surface with the oil filler cap facing upwards.
2. Clean the area around the oil filler cap with a suitable cloth.
3. Unscrew the oil filler cap.
4. Add chainsaw oil, until the reservoir is full.
5. Avoid dirt or debris from entering the oil tank.
6. Refit the oil filler cap and tighten sufficiently.
CAUTION
To allow venting of the oil reservoir, small breather channels are provided between the oil filler cap and the
strainer. To prevent leakage, ensure the machine is left in a horizontal position (oil filler cap uppermost)
when not in use.
It is important you only use recommended oil to avoid damage to the chainsaw.
Never use recycled or old chain oil.
Use of non-approved oil will invalidate the manufacturer’s warranty.
OPERATION
STARTING THE MACHINE
1. Using your right hand, press the lock-off button (3) with your thumb.
2. Then fully press the throttle trigger (2) with your index finger
3. The lock-off button (3) can now be released.
STOPPING THE MACHINE
1. To stop the machine, release the throttle trigger.
2. Do not stop the chainsaw, by activating the front hand guard (chain brake).
CHAIN BRAKE
The chain brake is a safety mechanism activated through the front hand guard, when kickback occurs. The
chain stops immediately.
The following function check should be carried out at regular intervals.
1. Push the front hand guard forwards and start the chainsaw.
2. The chain MUST NOT rotate.
3. To deactivate the kickback brake, pull the hand guard backwards and release the throttle trigger.

CUTTING
PRIOR TO CUTTING, IS THE OIL RESERVOIR FILLED?
Check the oil level gauge prior to starting & regularly during operation.
Refill the oil tank when the level is low.
A full oil tank, will last approximately 16 minutes, depending on sawing intensity and stops.
IS THE CHAIN LUBRICATED SUFFICIENTLY?
A correct operation of the automatic oiler can be checked by running the chainsaw and pointing the tip of the
chain bar, towards a piece of cardboard or paper positioned on the ground
CAUTION: Do not touch the ground with the chain. Ensure safety clearance of 20cm.
If an increasing oil pattern appears, the automatic oiler is operating correctly.
If there is no oil pattern, despite a full oil reservoir, see the Troubleshooting section of this manual.
IS THE CHAIN TENSION IN ORDER AND THE CHAIN SHARP?
Check a new chain’s tension, every 10 minutes during initial operation. During the first uses, a new chain can
lengthen considerably.
The condition of the chain influences the cutting performance of the machine.
Only a sharp chain protects the chainsaw from overload.
ARE YOU WEARING THE SUITABLE & NECESSARY PROTECTIVE EQUIPMENT?
Whenever the machine is in use, safety glasses/goggles must be worn to safeguard against flying objects.
Hearing protection must also be used to protect the operators hearing.
If the operator is working in an area where there is a risk of falling objects, a safety helmet must also be worn.
Wear boots with saw protection, steel-toe cap and non- slip sole.
Suitable chainsaw protection gloves are also recommended.
Adequate protective clothing will reduce personal injury from flying debris or accidental contact with the saw
chain.
KICKBACK
Kickback is the sudden backward/upward motion of the chainsaw, occurring when the chain (at the tip of the
chain bar) comes into contact with a log or wood, or when the chain becomes jammed.
When Kickback occurs, the chainsaw reacts unpredictably and can cause severe injuries to the operator or
bystanders.
To avoid Kickback:
-Saw with the guide bar at a flat angle
-Never work with a loose, widely stretched or heavily worn out chain.
-Ensure the chain is sharpened correctly.
-Never saw above shoulder height.
-Never work with the tip of the guide bar.
-Always hold the chainsaw firmly with two hands.
-Always use a low kickback chain.
-Apply the metal spike for leverage.
-Ensure correct chain tension.

GENERAL BEHAVIOR
Always hold the chainsaw firmly with both hands. Front grip with the left hand and the rear grip with the right
hand.
Ensure the electrical power cord is located to the rear, away from the chain and the wood being cut,
positioned so that it will be caught on branches or the like during cutting.
Use the chainsaw only with secure footing.
Hold the chainsaw on the right-side of your body, during use.
The chain must be running at full speed before it makes contact with the wood.
Use the metal spike on the front of the chainsaw, to secure the machine onto the wood before starting to cut.
Reset the gripping spike at a low point when sawing thicker logs, by pulling the chainsaw, slightly backwards,
until the gripping spike release and reposition at a lower level to continue sawing. Do not remove the chainsaw
completely from the wood.
Do not force the chain whilst cutting, let the chain do the work, using the gripping spike to apply minimal
leverage pressure.
Do not operate the chainsaw with arms fully extended or attempt to saw areas which are difficult to reach, or
on a ladder. Never use the chainsaw above shoulder height.
Sawing is optimized when the chain speed remains steady during cutting. Beware when reaching the end of
the cut. The weight of the saw may change unexpectedly, as it cuts free from the wood. Accidents can occur to
the legs and feet. Always remove the saw from a wood cut while the saw is running.

CUTTING LOGS
Observe the following safety instructions:
Support logs so that the face sides at the cut do not close in against each other, which
would result in the chain being jammed or pinched.
Position and set short logs safely prior to sawing. Saw only wood or wooden objects.
When sawing, always take care to avoid hitting stones, nails etc, as these could be thrown up, cause damage to
the chain or serious injury to the operator or bystanders.
Keep a running saw clear of wire fencing or the ground.
Use of the saw to thin out branches or bushes is not approved. Length cuts must be carried out with care, as
leverage with the gripping spike is not possible. Saw at a flat angle to avoid kickback.
When working on a slope, operate above or to the side of the trunk or laying tree.
Be careful not to trip over tree stumps, branches, roots, etc.
CUTTING WOOD UNDER TENSION
There is a high risk of accidents when sawing wood, branches or trees under tension. Be extremely careful.
Leave saw jobs like these to professionals.
When sawing logs supported on both ends, start the cut from above (Y) about 1/3 of the diameter into the log
and then finish the cut (Z) from below, in order to avoid contact of the chainsaw with the ground. When
sawing logs supported on only one end, start the cut from below (Y) about 1/3 of the diameter into the log and
finish the cut from above (Z) in order to avoid splitting or jamming of the chainsaw.
FELLING TREES
Always wear a hard hat to protect your head against falling branches.
The chainsaw can only be used to fell trees smaller in diameter than the length of the guide bar.
1. Secure work area. Ensure no persons or animals are in the vicinity of the falling tree. Never attempt to
free a jammed saw with the motor running. Use wooden wedges to free the chain and guide bar. When
cutting and felling operations are being performed by two or more persons, at the same time, the felling
operations should be separated from the cutting operation by a distance of at least twice the height of the
tree being felled. Trees should not be felled in a manner that would endanger any person, strike any utility
line or cause any property damage. If the tree does make contact with any utility line, the relevant utility
owner/company should be notified immediately. The chainsaw operator should keep on the uphill side of
the terrain as the tree is likely to roll or slide downhill after it is felled.
2. An escape path should be planned and cleared as necessary before cuts are started. The escape path
should extend back and diagonally to the rear of the expected line of fall.
3. Before felling is started, consider the natural lean of the tree, the location of larger branches and the wind
direction to judge which way the tree will fall. Remove dirt, stones, loose bark, nails staples, and wire from
the tree.

Notching undercut: Make the notch (X-W) 1/3 the diameter of the tree, perpendicular to the direction of falls
as make the lower horizontal notching cut first. This will help to avoid pinching either the saw chain or the
guide bar when the second notch is being made.
Felling back cut: Make the felling back cut (Y) at least 50 mm higher than the horizontal notching cut. Keep the
felling back cut parallel to the horizontal notching cut. Make the felling back cut so enough wood is left to act
as a hinge. The hinge wood keeps the tree from twisting and falling in the wrong direction. Do not cut through
the hinge. As the felling gets close to the hinge the tree should begin to fall. If there is any chance that the tree
may not fall in desired direction or it may rock back and bind the saw chain, stop cutting before the felling back
cut is complete and use wedges of wood, plastic, or aluminum to open the cut and drop the tree along the
desired line of fall. When the tree begins to fall remove the chain saw from the cutting, stop the motor, put
the chain saw down, and then use the retreat path planned. Be alert for overhead limbs falling and watch your
footing. To complete the felling operation, drive a wedge (Z) into the horizontal cut. Beware of falling branches
when the tree starts to move.
LIMBING A TREE
Limbing is removing the branches from a fallen tree. When limbing, use larger lower limbs to support the log
off the ground. Remove the small limbs in one cut as illustrated. Branches under tension should be cut from
the bottom up to avoid binding the chainsaw.
BUCKING A LOG
Bucking is cutting a log into lengths. It is important to make sure your footing is firm and your weight is evenly
distributed on both feet. When possible, the log should be raised and supported by the use of limbs, logs or
chocks. Follow the simple directions for easy cutting.
When the log is supported along its entire length as illustrated, it is cut from the top (overbuck).
When the log is supported on one end, as illustrated below, cut 1/3 the diameter from the underside
(underbuck). Then make the finished cut by overbucking to meet the first cut.
When the log is supported on both ends, as illustrated, cut 1/3 the diameter from the top overbuck. Then
make the finished cut by underbucking the lower 2/3 to meet the first cut.

When bucking on a slope always stand on the uphill side of the log, as illustrated. When “cutting through”, to
maintain complete control, release the cutting pressure near the end of the cut without relaxing your grip on
the chainsaw handles. Don’t let the chain contact the ground. After completing the cut, wait for the saw chain
to stop, before you move the chainsaw. Always stop the motor before moving from tree to tree
TROUBLE SHOOTING
PROBLEM
POSSIBLE CAUSES
RESOLUTION
Chain saw fails to
operate
1. Chain brake is activated
2. No power
3. Mains socket faulty
4. Extension cable damaged
or does not meet
manufacturer
requirements
5. Fuse faulty
1. Pull chain brake back to position
2. Check power
3. Use another socket
4. Check cable & replace
5. Replace fuse
Chain saw operates
intermittently
1. Extension cord damaged
2. Loose connection
3. Internal wiring defective
4. On/Off trigger defective
1. Check cord, replace
2. Contact service agent
3. Contact service agent
4. Contact service agent
Dry chain
1. No oil in reservoir
2. Vent in oil filler cap
clogged
3. Oil passage clogged
1. Refill oil
2. Clean cap
3. Clean oil passage outlet
Kickback Brake/Run
Down Brake
1. Brake does not stop chain
1. Contact service agent
Chain/chain bar
overheats
1. No oil in reservoir
2. Vent in oil filler cap
clogged
3. Oil passage clogged
4. Chain is over tensioned
5. Dull chain
1. Refill oil
2. Clean cap
3. Clean oil passage outlet
4. Adjust locking knob
5. Sharpen chain or replace
Chain saw rips,
vibrates,
does not saw
properly
1. Chain tension too loose
2. Dull chain
3. Chain worn out
4. Chain teeth are facing in
the wrong direction
1. Adjust locking knob
2. Sharpen chain or replace
3. Replace chain
4. Reassemble with chain in correct
5. direction
NEVER USE TOOLS WITH A DEFECTIVE ON/OFF THROTTLE TRIGGER or CHAIN BRAKE (HAND GUARD)

PARTS DIAGRAM

PARTS LIST
Item No Part No Description Qty Item No Part No Description Qty Item No Part No Description Qty
1
TH1800-0-1 Blade Guard 1 21 TH1800-0-13 Start Plate 1 41 TH1800-0-9 Motor Cover End Cap 1
2 HP-111
Chain 1 22 Flat Washer 1 42 TH1800-0-8 Motor Cover 1
3 TH1800-0-37
Bar 1 23 Brake Rod Spring 1 43 TH2200-0-27A BS Plug & Power Cord 1
4
TH1800-0-17 Adjusting Plate 1 TH1800-0-05 Brake Rod 1 44 Cable Sleeve 1
5
Screw ST4.2x10 3 TH1800-0-05-1 Brake Rod Insert 1 45 Cord Clamp 1
6
TH1800-0-18 Adjusting Block 1 25 Screw ST4.2*15 B 20 46 Terminal 1
7
TH1800-0-19 Sprocket Cover 1 TH1800-0-01 Gearbox Cover 1 47 TH1800-0-26 Cable Assembly 1
8
TH1800-0-20 Adjusting Knob 1 Stop Pin 1 48 TH1800-0-25 Cable 2 1
9 C-ring 1
TH1800-0-01-1 Hex Bolt M8x25 1 49 TH1800-0-24 Cable 1 1
TH1800-0-04 Locking Knob 1 27 Bearing 6000Z 2RS 1 50 TH1800-0-46 Trigger Spring 1
TH1800-0-04-1 Locking Knob Insert 1 28 TH1800-0-3 Output Shaft 1 51 TH1800-0-23 Trigger 1
11 Screw M5x6 1 29
TH1800-0-4 Torsion Spring 1 52 TH1800-0-22 Locking Button 1
12
Split Washer 1 30 TH1800-0-5 Big Gear Ring Gasket 1 53 TH1800-0-45 Locking Button Spring 1
13 TH1800-0-39
Sprocket 1 31 TH1800-0-21 Brake Lever 1 54 TH1800-OIL TUBE Oil Tube 1
14 TH1800-0-38
Sprocket Spring 1 TH1800-0-02 Large Gear Wheel 1 55 TH1800- OIL PUMP Oil Pump Assembly 1
15
Screw ST4.8x19 12 TH1800-0-02-1 Large Gear Wheel Insert 1 56 Oil Tube C-Clip 2
16
TH1800-0-15 Right Housing 1 33 Bearing 628 2RS 1 57 TH1800-0-32 Spring 1
17
TH1800-0-16 Spike 1 34 Lock Nut M8 1 58 TH1800-0-31 Oil Tank 1
18
TH1800-0-2 Oil Seal 1 35 TH1800-MOTOR Motor Assembly 1 59 TH1800-0-30 Oil Cap Washer 1
19
Screw ST4.2x12 B 4 36 TH1800-0-14 Leaf Spring 1 60 TH1800-0-29 Oil Cap Check Valve 1
20
Flat Washer 2 37 TH1800-0-42 Micro-Switch 2 61 TH1800-0-28 Oil Cap 1
38
TH1800-0-12 Left Housing 1
TH1800-0-11 Chain Brake 1
TH1800-0-41 Chain Brake Insert 1
40
TH1800-0-10 Front Handle 1
32
39
10
24
26

GJ HANDY & CO LTD USER WARRANTY POLICY
1. Users Statement of Warranty
Each new machine is warranted against defective material or assembly of material under normal
usage. The warranty applies to the original purchaser and covers faulty parts and the labour involved
in replacing and repairing those parts, which are of original manufacture.
2. Period of Warranty
All Webb, Handy Pro (Brushcutter & Long Handle Hedgecutter only) and Sanli domestic products
2 years from the original date of sale to the first domestic user.
90 days from the original date of sale to the professional/commercial user.
90 days from the original date of sale when used for hire.
Engines as per the manufacturer’s warranty statement which will be supplied with the machine.
1 year from the original date of purchase for Replacement Spare Parts (unless normal wear & tear
component, which are covered for 90 days).
All machines’ must be serviced within the first 12 months from the original date of purchase to
comply with the warranty, failure to do so will invalidate the 2nd year of the warranty.
A reduced warranty period of ninety days applies to those items which are subject to normal wear
and tear (e.g. wheels, tyres, cutter bars, cylinders, bottom blades, belts, cables, grass bags, spark
plugs).
All Handy, Handy Pro (All others), Mowerland and Q-Garden domestic products
1 year from the original date of sale to the first domestic user.
90 days from the original date of sale to the professional/commercial user.
90 days from the original date of sale when used for hire.
Engines as per the manufacturer’s warranty statement which will be supplied with the machine.
1 year from the original date of purchase for Replacement Spare Parts (unless normal wear & tear
component, which are covered for 90 days).
A reduced warranty period of ninety days applies to those items which are subject to normal wear
and tear (e.g. wheels, tyres, cutter bars, cylinders, bottom blades, belts, cables, collection bags,
spark plugs).
All warranty repairs must be undertaken by an authorised service dealer.
These dealers have been accredited by GJ Handy & Co Ltd and agree to only use genuine parts and
follow our repair procedures.
Version 2 06-15
Other manuals for THECS40
1
Table of contents
Other The Handy Chainsaw manuals
