The Shade Store V2 APP Manual

THE SHADE STORE V2 APP (APPLE DEVICES)
SETUP INSTRUCTIONS
THE SHADE STORE APP & WIRELESS LINK
SETUP INSTRUCTIONS INCLUDED:
The Shade Store app allows you to control
your motorized window treatments with
your smartphone or tablet.
•Control individual and
multiple window treatments
•Control scenes
•Timer functionality
To control your motorized window treatments
with The Shade Store app, you must:
ABOUT THE APP:
GETTING STARTED:
•Download the free app from the Apple App Store.
•Purchase one or more Wireless Links
depending on size of your space.

For assistance, email us at help@theshadestore.com or call 800.754.1455.2
THE SHADE STORE V2 APP (APPLE DEVICES)
UNPACKING & SETUP INSTRUCTIONS
UNPACKING THE WIRELESS LINK HUB:
2. Insert the larger USB end of
the power cord into the outlet
power plug.
3. Insert the smaller micro USB
end of the power cord into the
Wireless Link hub.
4. Place the hub in a central
location in your home and
plug it into an outlet.
PLEASE NOTE: You may need
to try different locations for
it to be within range of your
desired window treatments.
123
TECHNICAL
SPECIFICATIONS:
BEST PRACTICES: CAPABILITIES:
•Radio Frequency Range:
~100 feet (no obstructions)
•Radio Frequency: 433 MHz
•WiFi: 2.4 GHz or Ethernet
Connectivity (CAT 5)
•Power: 5V DC
•For Indoor Use Only
•Bridge must be within signal
range of motorized window
treatments and WiFi router.
•WiFi network must be visible.
•In environments with multiple
WAPs (wireless access points),
all but one may need to be
temporarily disabled.
•Security settings may need
to be temporarily disabled.
•Do not connect Ethernet Cable to
router until after the connection
to Wi-Fi has been made.
•Motors per Hub: 30
•Locations per Account: 5
•Hubs per Location: 5
•Rooms per Location: 20
•Scenes per Location: 20
•Timers per Location: 20
•1x Wireless Link Hub
•1x 31” Power Cord
•1x 39” Ethernet Cble
•1x Power Adpter
WHAT'S IN THE BOX:
A
B
D
C
AB
C
D
1. Unbox the Wireless Link hub.

For assistance, email us at help@theshadestore.com or call 800.754.1455.3
THE SHADE STORE V2 APP (APPLE DEVICES)
SETTING UP THE APP
Open the
The Shade Store V2 app.
Select CONTINUE to
proceed to the Sign Up screen.
Create a new account by
selecting SIGN UP.
If you already have an account,
simply enter your information
and select LOG IN.
ALREADY HAVE
AN ACCOUNT?
Enter an email address and
password for the new account.
Select SIGN UP to proceed.
PLEASE NOTE:
You will receive an email to
verify your email address.
STEP 1 STEP 2 STEP 3 STEP 4
SETUP COMPLETE

For assistance, email us at help@theshadestore.com or call 800.754.1455.4
THE SHADE STORE V2 APP (APPLE DEVICES)
PAIRING THE APP & WIRELESS LINK HUB – QUICK START
Select “Done” at
top right of screen.
STEP 5
To allow Apple HomeKit
functionality, scan the QR Code
on the bottom of the hub.
STEP 6 STEP 7 STEP 8
Select ADD NEW HUB.
STEP 1 STEP 2 STEP 3 STEP 4
Select the hub you would like
to pair to and select NEXT.
Select the appropriate
time zone and daylight
savings setting based on
your hub's location.
Select NEXT to continue.
Select NEXT to finalize setup. The hub has been set up and
is ready to be used. Select
DONE to go to the Location
Settings screen.
SETUP COMPLETE

For assistance, email us at help@theshadestore.com or call 800.754.1455.5
THE SHADE STORE V2 APP (APPLE DEVICES)
PAIRING THE APP & WIRELESS LINK HUB – ADDITIONAL HUBS
Select the hub you would like
to pair to and select NEXT.
STEP 4
Select ALLOW to give the hub
access to your WiFi network.
To allow Apple HomeKit
functionality, scan the QR Code
on the bottom of the hub.
You will receive confirmation
that Apple HomeKit
functionality has been enabled.
Select “Done” at
top right of screen.
STEP 5 STEP 6 STEP 7 STEP 8
Select ADD NEW HUB. Select
CONNECT TO NEW HUB.
PLEASE NOTE: Do not select
CONNECT TO SHARED HUB.
Select the three-bar menu
button (__) at the top
left of the Home screen.
STEP 1 STEP 2 STEP 3

For assistance, email us at help@theshadestore.com or call 800.754.1455.6
THE SHADE STORE V2 APP (APPLE DEVICES)
PAIRING THE APP & WIRELESS LINK HUB – ADDITIONAL HUBS
Select the appropriate
time zone and daylight
savings setting based on
your hub's location.
Select NEXT to continue.
STEP 9
Select desired location access.
PLEASE NOTE: 'Always Allow'
will allow for the most accurate
sunrise and sunset times
at your hub's location.
STEP 10
Select NEXT to finalize setup.
STEP 11
Select DONE at the top right
corner of the screen to com-
plete pairing process and go to
the Home screen.
FOR TROUBLESHOOTING ASSISTANCE, PLEASE SEE LAST PAGES OF INSTRUCTIONS
STEP 13
SETUP COMPLETE

For assistance, email us at help@theshadestore.com or call 800.754.1455.7
THE SHADE STORE V2 APP (APPLE DEVICES)
PAIRING MOTORS
Choose your
preferred pairing method.
PLEASE NOTE: We recommend
'Pair with REMOTE' because it's
the most convenient.
STEP 5
To pair a motor with your remote, select the
desired channel for the motor (not channel 0).
Remove the battery cover on the back of the remote
and press the upper left P2 button once. The motor
will respond by jogging up and down. Press the
button a second time and the motor will jog again,
indicating it is now paired.
Make sure both the hub and
the motors are turned on
and select NEXT.
STEP 6A
PAIR WITH REMOTE
To pair with hub, press and
hold the programming button
on the motor head until the
motor responds,
then select NEXT.
STEP 6B
PAIR WITH HUB
To add a motor, select
DEVICES on the Home screen,
then select the ( ) icon.
From the list of available hubs,
select the hub you would like
to pair the motor to.
In the Device Type list,
select the device you
would like to pair.
STEP 1 STEP 2 STEP 3 STEP 4

For assistance, email us at help@theshadestore.com or call 800.754.1455.8
THE SHADE STORE V2 APP (APPLE DEVICES)
PAIRING MOTORS
Select DEVICE NAME to name
your device. Select DONE to
complete setup.
The information will take a
moment to save. Once saved,
it will show on the Home
screen under Devices.
If the pairing process was
successful, select NEXT.
If pairing fails, please move
the hub closer to the product
and try pairing again.
STEP 8 STEP 9 STEP 10
SETUP COMPLETE
Wait for the app to connect.
STEP 7

For assistance, email us at help@theshadestore.com or call 800.754.1455.9
THE SHADE STORE V2 APP (APPLE DEVICES)
CREATING A LOCATION
Select the default location and
update the location name if
desired (default name is My
Home). Select OK, then DONE
at the top right of the screen.
To toggle between multiple
programmed locations, select
the location icon (_) in the
upper right corner.
Select ADD NEW LOCATION.Select the three-bar menu
button (__) at the top left
of the Home screen.
STEP 1 STEP 2 STEP 3 STEP 4
SETUP COMPLETE
Choose to either
Select Image from Library
or to just clear the current
image being used.
Select OK to allow
the app to access
your photos.
Select the desired photo.
Select
CHANGE NEW IMAGE.
Select the Location that
you would like to
change the image for.
STEP 1 STEP 2 STEP 3 STEP 4
"The Shade Store v2" Would
Like to Access Your Photos
To import a picture of your location
CHANGE LOCATION IMAGE (OPTIONAL)

For assistance, email us at help@theshadestore.com or call 800.754.1455.10
THE SHADE STORE V2 APP (APPLE DEVICES)
OPERATING SHADES
Select the device that you
would like to operate.
To move the shade to a
custom height, drag the shade
illustration to the desired
point in the window.
To close the shade, select the
down button ( ) at the lower
left of the screen or drag the
shade illustration to the
bottom of the window.
To open the shade, select the
up button ( ) at the lower
right of the screen or drag the
shade illustration to the
top of the window.
STEP 1 STEP 2 STEP 3 STEP 4
SETUP COMPLETE

For assistance, email us at help@theshadestore.com or call 800.754.1455.11
THE SHADE STORE V2 APP (APPLE DEVICES)
CREATING & OPERATING ROOMS
Select an appropriate icon
to represent the room
you are creating.
Select ROOM NAME.
Select ROOM DEVICES.
Enter a name for your room
and select OK.
Select devices to be
added to room.
Select ROOM PICTURE.
Select DONE to
complete setup.
To create a room, on the Home
screen select ROOMS, then
select the ( ) icon.
STEP 5 STEP 6 STEP 7 STEP 8
STEP 1 STEP 2 STEP 3 STEP 4

For assistance, email us at help@theshadestore.com or call 800.754.1455.12
THE SHADE STORE V2 APP (APPLE DEVICES)
CREATING & OPERATING ROOMS
The app will take a moment to
finalize setup.
STEP 9
Select the Room
you would like to operate.
Choose whether you want all
shades to open, close, or move
to their halfway point (50%).
STEP 1 STEP 2
OPERATING A ROOM
SETUP COMPLETE
SETUP COMPLETE

For assistance, email us at help@theshadestore.com or call 800.754.1455.13
THE SHADE STORE V2 APP (APPLE DEVICES)
CREATING SCENES
Select SCENE NAME. Enter your desired scene name
and select OK. Make sure
scene names are easy to
remember and pronounce if
you plan to use voice-con-
trolled integrations.
Select an appropriate icon
to represent the scene
you are creating.
Select UPDATE SCENE
DEVICES to add devices
to the scene.
Select what you would like
the selected devices to do
in the scene. (Open, Close,
set to a custom height,
or set to Current Position).
Select SCENE PICTURE.
Select DONE.
STEP 5 STEP 6 STEP 7 STEP 8
On the Home screen select
SCENES, then select
ADD NEW SCENE.
STEP 1 STEP 2 STEP 3 STEP 4

For assistance, email us at help@theshadestore.com or call 800.754.1455.14
THE SHADE STORE V2 APP (APPLE DEVICES)
CREATING SCENES
The app will take a moment
to finalize setup.
STEP 9
Select DONE again to
complete setup.
Simply select GO.
STEP 10 HOW TO ACTIVATE YOUR SCENE
SETUP COMPLETE

For assistance, email us at help@theshadestore.com or call 800.754.1455.15
THE SHADE STORE V2 APP (APPLE DEVICES)
PROGRAMMING TIMERS
To create a timer, select
TIMERS on the Home screen,
then select ADD NEW TIMER.
Select an appropriate icon
to represent the timer
you are creating.
STEP 5
Select TIMER NAME.
Select TIMER SCENE.
Enter your desired timer name
and select OK.
Select the scene you would like
to associate with the timer.
Select TIMER ICON.
Set the time you would like
the timer to activate.
STEP 6 STEP 7 STEP 8
STEP 1 STEP 2 STEP 3 STEP 4

For assistance, email us at help@theshadestore.com or call 800.754.1455.16
THE SHADE STORE V2 APP (APPLE DEVICES)
PROGRAMMING TIMERS
To set a timer to your local
sunrise/sunset instead of a
specific time, select the sun
icon (insert here). Next, select
how many minutes before or
after you would like the
timer to activate.
STEP 9
Select the days you would
like the timer to activate, then
select DONE to finalize setup.
To activate a timer, toggle
the switch to green.
To pause all timers, tap
PAUSE TIMERS.
To reactivate all timers, tap
RESUME TIMERS.
STEP 10 HOW TO ACTIVATE A TIMER HOW TO PAUSE ALL TIMERS
SETUP COMPLETE

For assistance, email us at help@theshadestore.com or call 800.754.1455.17
THE SHADE STORE V2 APP (APPLE DEVICES)
CREATING FAVORITES
Select your desired device or
scene from the list, then select
DONE to complete setup.
Your favorites will show on the
Favorites screen under
Device or Scene.
To create a Favorite, select
FAVORITES on the Home
screen. Next, select either
DEVICE or SCENE,
then select the ( ).
STEP 1 STEP 2 STEP 3
SETUP COMPLETE

For assistance, email us at help@theshadestore.com or call 800.754.1455.18
THE SHADE STORE V2 APP (APPLE DEVICES)
ADJUSTING LIMITS
On the Home screen, select
DEVICES, then select the
device you would like
to adjust limits on.
Select EDIT.
The app will take a moment
to configure.
Select TOP POSITION or
BOTTOM POSITION.
Select DONE.
Select OK to confirm that
you would like to adjust the
selected position.
The app will take a moment to
finalize setup.
STEP 5 STEP 6 STEP 7 STEP 8
Adjust your shade to the
desired position by
tapping the single up
( ) and down ( ) buttons or
by scrolling with the middle
button ( ). Once the desired
position is reached, select SET
TOP/BOTTOM POSITION.
STEP 1 STEP 2 STEP 3 STEP 4

WIRELESS LINK
FACTORY RESET
For assistance, email us at help@theshadestore.com or call 800.754.1455.
COLOR RESPONSE STATUS
RED LED - CONTINUOUS LONG BLINKS No Wifi or active Network connection
RED LED - SOLID / NO BLINKING Paired to Wifi but no internet service Timers will still run
1. Press the reset button labeled “R” with the end of a paper clip
for 10 seconds. The LED light will display a series of long red blinks.
2. After 10 seconds, release the reset button. The LED will
display a solid red light, then blink blue to notify it is in
pairing mode.
19

LED INDICATION
WIRELESS LINK
LED INDICATION & TROUBLESHOOTING
For assistance, email us at help@theshadestore.com or call 800.754.1455.
COLOR RESPONSE STATUS
BLUE LED - CONTINUOUS BLINKS Ready to be paired (not paired to the internet)
Default or after factory reset
BLUE LED - CONTINUOUS SHORT BLINKS Hub is Communicating with App Servers
PURPLE LED - STEADY BLINKS Receiving Firmware Update
BLUE LED - SOLID / NO BLINKING App Connected to Wireless Link
RED LED - CONTINUOUS SHORT BLINKS Wi-Fi Connection Has Been Lost
(Router May Have Been Turned O or Service Interrupted)
ORANGE LED - LONG BLINKS Reset Button Pressed
BLUE LED - SOLID 2 SECONDS/NO BLINKING Factory Reset Has Started
(User Can Release Reset Button at Any Time)
GREEN LED - 5 SECOND BLINK Apple Home is Currently Pairing With App/Hub
LED IS OFF Oine
20
Table of contents
Popular Switch manuals by other brands
Lutron Electronics
Lutron Electronics Qoto Q-1PS Easy-to-follow Instructions
TRENDnet
TRENDnet TK-207K Quick installation guide

Keysight
Keysight VXI 75000 C Series user manual

Panasonic
Panasonic EVQPU datasheet
moon
moon HDS-8 owner's manual
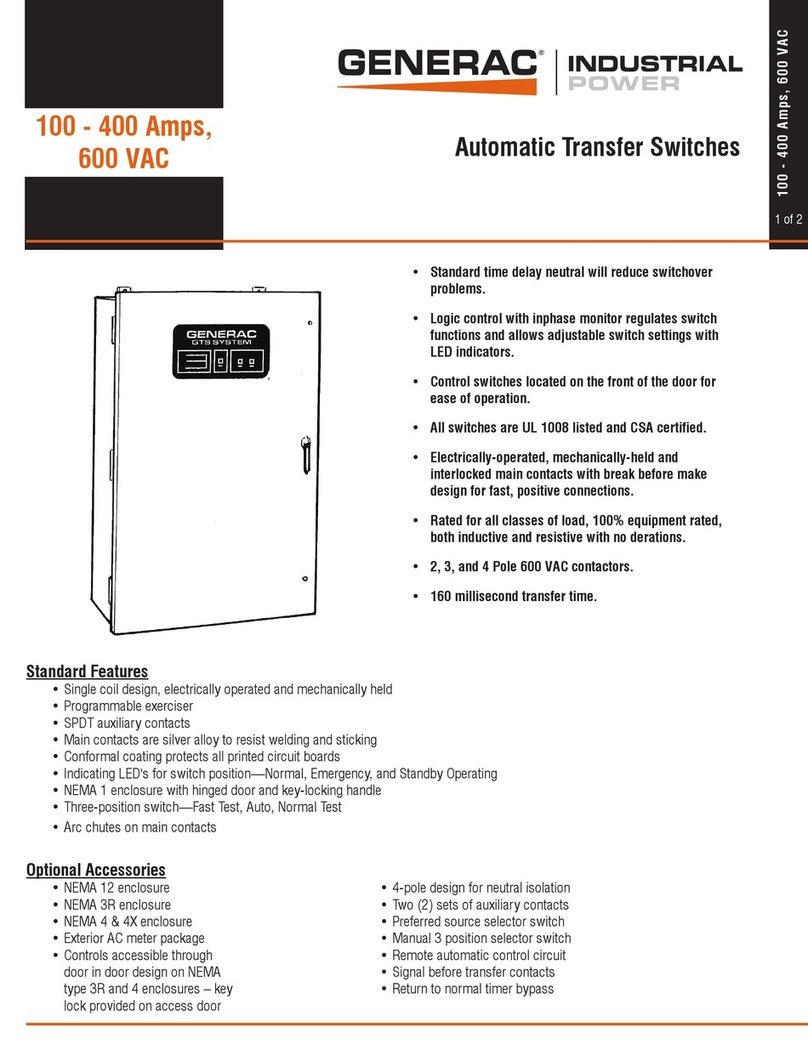
Generac Power Systems
Generac Power Systems GTS Series specification
Cisco
Cisco Nexus 5600 Series Configuration guide
Magnum
Magnum M9-ILS2 Product installation guide
HP
HP HPE FlexFabric 5930 installation guide
Westermo
Westermo Lynx DSS L108-F2G-S2 EX user guide
Honeywell
Honeywell PLS550A user guide
Rockwell Automation
Rockwell Automation Allen-Bradley 194E installation instructions
