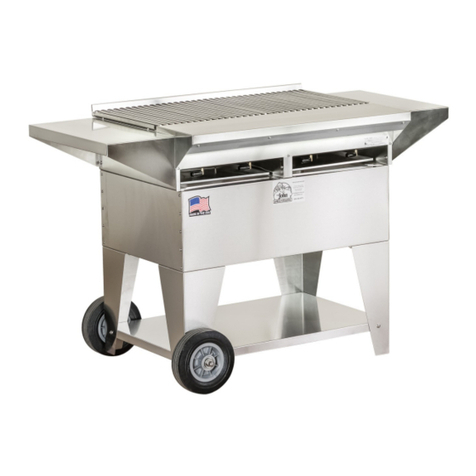
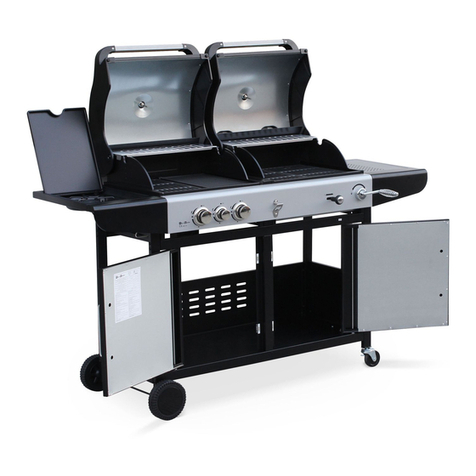
The Source SOURCE04BLP User manual

P80157002A-Rev:2004/02/02
NotetoInstaller: LeavethisOwner'sManual
withtheconsumerafterdeliveryand/orinstallation.
NotetoConsumer: LeavethisOwner'sManual
inaconvenientplaceforfuturereference.
WARNING:
ReadthisOwner'sManual carefullyandbe sure
yourgasgrill isproperlyassembled,installed and
maintained.Failuretofollowtheseinstructions
couldresultinseriousbodilyinjuryand/orproperty
damage.Thisgasgrill isintendedforoutdooruse
onlyandisnotintended tobe installed inoron
recreationalvehiclesorboats.
GrillInformationCenter:Ifyouhavequestionsaboutassemblyorgrilloperation,oriftherearedamaged
ormissingpartswhenyou unpackthisunitfromtheshipping box,callus8:00am-4:30pmCST,
MondaythroughFridayat:1-877-934-7455
Liquid Propane GasGrill
ModelSOURCE04BLP
Owner'sManual
NaturalGasGrill
ModelSOURCE04BNG
!
Manufacturer:
Grand Hall EnterpriseCo., Ltd.
9thFl., No.298,Rueiguang Rd.,Neihu,
Taipei,Taiwan(114)

2
Warranty.....................................................2
SafetyInstructions.....................................2
Hardware....................................................6
Parts Diagramand Lists........................8
Assembly Instructions..............................13
Lighting Instructions................................25
BackBurner,Rotisserie Instructions.......27
Cleaningand MaintenanceInstructions....31
FrequentlyAsked Questions..................33
Grill Warranty
Tableof Contents ReadThese SafetyInstructions
Combustionbyproductsproducedwhenusing
thisproductcontainchemicalsknowntothe
StateofCaliforniatocause cancer,birth
defects,orother reproductiveharm.
!WARNING
Grill Installation Codes
Theinstallationmustconformwithlocalcodesor,in
theabsenceoflocalcodes,witheithertheNational
FuelGasCode,ANSIZ223.1/NFPA54,orCAN/
CGA-B149.1,Natural GasandPropaneInstallation
Code.
IMPORTANT: YourLPGasGrill cannotbe con-
verted touseNaturalGas.Attempting todo sois
extremelyhazardousand will alsovoidthe grill
warranty.
LPGasSafetyInstructions
FOR YOUR SAFETY
Ifyousmell gas:
Shutoffgastotheappliance.
Extinguishanyopenflamesuchascandle,
cigarette,lighter,etc., thatcouldcausegasto
ignite.
OpentheGrill Lid.
Ifodorcontinues,immediatelycallyourgas
supplieroryourfiredepartment.
1.
2.
3.
4.
FOR YOUR SAFETY
Donotstoreorusegasolineorotherflam-
mable material andliquidsin thevicinityofthis
oranyotherappliance.
ALPcylindernotconnectedforusemustnot
bestored in thevicinityofthisoranyother
appliance.
1.
2.
Yourgrill will getvery hot. Neverlean over
the cooking area whileusing yourgrill.Do not
touchcooking surfaces,grill housing,Lidorany
othergrill partswhilethe grill isinoperation,or
until the grill hascooled downafteruse.
Failure tocomplywiththese instructions
may resultin seriousbodilyinjury.
!WARNING
(a)Donotstore aspare LP-gas cylinder
under ornearthisappliance;
(b)Neverfillthecylinderbeyond 80percent
full;and
(c)Iftheinformationin "(a)"and "(b)"isnot
followedexactly,afirecausing deathor
seriousinjurymayoccur.
Failure tocomplywiththese instructions
could resultin afire orexplosion that
could cause seriousbodilyinjury,death, or
propertydamage.
!WARNING
!WARNING
Full 1-Year Warrantyon Grill
Forone yearfromthe dateofpurchasewewill
repairorreplace,atouroption,anygrill part
(exceptforpaintloss,rusting and ignitorbattery)
thatisdefectiveinmaterialorworkmanship.
LimitedWarrantyon SelectedGrill Parts
Fromone year afterthe dateofpurchaseforthe
designated timeperiodslisted below,wewill replace
the following grill partsiftheyaredefectivein
materialorworkmanship.You will be charged for
labor.
1Year:CastIron Burners
2Years:All OtherGrill Parts(exceptflametamers,
cooking gridsand ignitorbattery)
WarrantyService
Call ourGrill Information Center8am-4:30pmCST,
Mondaythrough Fridayat1-877-934-7455
WarrantyRestrictions
Thiswarrantyisvoidifgrill isused forcom-
mercialorrentalpurposes.
Thiswarrantyappliesonlywhen the grill is
used inthe United States.
Thiswarrantygivesyou specificlegalrights,
and you mayalsohaveotherrightswhichvary
fromstatetostate.

3
LPgastanksmustbe stored outdoorsina
well-ventilated area and outofthe reachof
children.Disconnected LPgastanksmustnot
be stored inabuilding,garage oranyother
enclosed area.
When yourgasgrill isnotinusethe gas
mustbe turned off atthe LPgastank.
The regulatorand hoseassemblycan be seen
afteropening the doors(ifapplicable),mustbe
inspected beforeeachuseofthe grill.Ifthere
isexcessiveabrasion orwearorifthe hoseis
cut, itmustbe replaced priortothe grill being
used again.
Keep the gasregulatorhoseawayfromhot
grill surfacesand dripping grease.Avoidunnec-
essary twisting ofhose.Visuallyinspecthose
priortoeachuseforcuts,cracks,excessive
wearorotherdamage.Ifthe hoseappears
damaged do notusethe gasgrill.Call our
Grill Information Centerforareplacement,
at1-877-934-7455.
Never lightyourgasgrill withthe lidclosed or
beforechecking toensurethe burnertubesare
fullyseated overthe gasvalveorifices.
Never allowchildren tooperateyourgrill.Do
notallowchildren toplaynearyourgrill.
Never connectan unregulated LPgastankto
yourgasgrill.The gasregulatorassembly
supplied withyourgasgrill isadjusted tohave
an outletpressureof11"watercolumn(WC)
forconnection toan LPgastank.
Onlyusethe regulatorand hoseassembly
supplied withyourgasgrill.Replacement
regulatorsand hoseassembliesmustbe those
specified bymanufacturer.
HaveyourLPgastankfilled byareputable
propane gasdealerand visuallyinspected and
re-qualified ateachfilling.
Neverfill the gastankbeyond 80% full.
Haveyourpropane gasdealercheck the
releasevalveafterevery filling toensurethatit
remainsfree ofdefects.
Alwayskeep LPgastanksinuprightposition.
Donotstore(oruse)gasoline orotherflammable
vaporsand liquidsinthe vicinityofthisgasgrill.
LPgastanksnotconnected forusemustNOT be
stored on bottomshelforinthe vicinityofthisor
anyothergasgrill.
Donotsubject theLPgastanktoexcessiveheat.
NeverstoreanLPgastankindoors.If you
storeyourgasgrill inthegarage orotherindoor
location, always disconnecttheLPgastank
firstand storeitsafelyoutside.
Proper Placementand ClearanceofGrill
Never useyourgasgrill inagarage,porch,shed,
breezewayoranyotherenclosed area.Yourgasgrill
istobeused outdoorsonly,atleast24inchesfrom
the back andside ofanycombustible surface.Do
notlocatethisapplianceunderoverheadunprotected
combustiblesurfaces.Do notobstructthe flowof
ventilationairaroundthegasgrillhousing.
Thisoutdoorgasgrill isnotintended tobe installed in
oronrecreationalvehiclesand/orboats.
CorrectLPGas TankUse
LPgasgrill modelsaredesignedforusewitha
standard20lb.LiquidPropaneGas(LPgas) tank,
notincluded in grillbox. Never connectyourgas
grilltoanLPgastankthatexceedsthiscapacity.
Atankofapproximately12 inchesindiameterby
18-1/2incheshighisthemaximumsizeLPgas
tanktouse. Youmustuse an "OPD"gastank
whichoffers alistedOverfill PreventionDevice.
Thissafetyfeaturepreventstankfrombeing overfilled
whichcan causemalfunction ofLPgastank,
regulatorand/orgrill.
TheLPgastankmustbeconstructedandmarked
in accordancewiththeSpecificationsforLP-Gas
CylindersoftheU.S.DepartmentofTransportation
(D.O.T.)ortheNational StandardofCanada,CAN/
CSA-B339,Cylinders,SpheresandTubesforTrans-
portation ofDangerousGoods;andCommission,as
applicable.
The LPgastankhasashutoff valve,termi-
nating inan LPgassupplytankvalveoutlet,
thatiscompatiblewithaType 1tankcon-
nection device.The LPgastankmustalso
haveasafetyreliefdevicethathasadirect
connection withthe vaporspaceofthe tank.
The tanksupplysystemmustbe arranged
forvaporwithdrawal.
The LPgastankused musthaveacollar
toprotectthe tankvalve.
1.
2.
3.
NOTE: The normalflowofgasthrough the
regulatorand hoseassemblycan createa
humming noise.Alowvolumeofnoiseis
perfectlynormaland will notinterferewith
operation ofthe grill.Ifhumming noiseis
loud and excessiveyou mayneed topurge
airfromthe gasline orresetthe regulator
excess gasflowdevice.Thispurging proce-
dureshouldbe done every timeanewLP
gastankisconnected toyourgrill.Forhelp
call the Grill Information Centerforassis-
tance, 8:00am -4:30pmCST,Monday
through Friday 1-877-934-7455.
Shutoff gassupplytothe gasgrill.
Turnthe ControlKnobstoOFF position.
Extinguishanyopenflamesuchascandle,
cigarette,lighter,etc., thatcould causegas
toignite.
Open the Grill Lid.
Getawayfromthe LPgastank.
Do nottry tofixthe problemyourself.
Ifodorcontinuesoryou haveafireyou
cannotextinguish,call yourfiredepart-
ment. Do notcall nearthe LPgastank
becauseyourtelephone isan electrical
deviceand couldcreateaspark resulting
infireand/orexplosion.
!WARNING
Ifyousmell gas:

Figure 1(Naturalgas modelonly)
GAS SUPPLY
QUICK
DISCONNECT
INSIDE
WALL
OUTSIDE
WALL
MALE
FITTING
TOGRILL
LOCKING
SHUTOFF SHUTOFF
Yournaturalgasgrill isdesigned tooperateon
naturalgasonly,atapressureof7"watercolumn
(WC)(1/4psior1.75 kpa),regulated atthe
residentialmeter.Check withyourgasutility
companyforlocalgaspressureand withyour
localmunicipalityforbuildingcoderequirements.If
yourresidentialgasline pressurehasnotbeen
regulated to7"WC,contactyourlocalgasutility
companyforprofessionalassistance.
The gaspressureRegulatorsupplied withthis
appliancemustbe used.ThisRegulatorisset
foranoutletpressureof4"W.C.
ItisrecommendedthataShutoffValvebeinstalled
atthe gassupplysourceoutdoors.Installatapoint
afterthe gaspipe exitsthe outside wall and before
the quick-disconnecthose, orinstall itat the point
beforethegaslinepipingenterstheground.
See Figure1.
Pipesealingcompoundorpipethreadtaperesistant
totheactionofnaturalgasmustbeusedonallmale
pipe threadswhen making the connection.
Disconnectyourgasgrillfromfuelsourcewhen
the gassupplyisbeing tested athigh pressures.
Thisgasgrillanditsindividualshutoffvalvemust
be disconnected fromthe gassupplypipe system
during anypressuretesting ofthatsystemat
pressureinexcess of1/2psi(3.5kpa).
Turnoffyourgasgrillwhenthe gassupplyis
being testedatlowpressures.The grillmustbe
isolatedfromthegassupplypipe systemby
closingitsindividualmanualshutoffvalveduring
anypressuretesting ofthegassupplypipe
systematpressuresequaltoorless than1/2psi
(3.5kpa).
IMPORTANT: YourNaturalGasGrill cannotbe
converted touseLPGas.Attempting todo sois
extremelyhazardousand will alsovoidthe grill
warranty.
NaturalGasSafetyInstructions
4

5
CAUTION: Spidersand small insectsocca-
sionallyspinwebsormakenestsinthe grill
BurnerTubesduring transitand warehousing.
Thesewebscan lead toagasflowobstruc-
tion whichcouldresultinafireinand around
the BurnerTubes.Thistype offireisknown
asa"FLASHBACK" and can causeserious
damage toyourgrill and createan unsafe
operating condition forthe user.
Toreducethe chanceof"FLASHBACK",you
mustclean the burnertubesbeforeassem-
bling yourgrill,and atleastonceamonthin
latesummerorearlyfall when spidersare
mostactive.AlsoperformthisBurnerTube
cleaning procedureifyourgrill hasnotbeen
used foran extended period oftime.
CAUTION:BEWAREOFFLASHBACK
Toreducethe chanceof"FLASHBACK" (see
CAUTION atleft)clean the BurnerTubesand
Burners before fullyassembling yourgrill.
Removethe CotterPinfromthe rearunderside
ofeachBurnerusing apairoflong nosepliers.
CarefullylifteachBurnerup and awayfromthe
GasValveOrifice,then referto Figure 1 and
performone ofthesethree cleaning methods:
1.
2.
3.
Bend astiff wire,(alightweightcoathanger
workswell)intoasmall hookasshown
below.Run the hookthrough the BurnerTube
and inside the Burnerseveraltimestoremove
anydebris.
Useabottlebrushwithaflexiblehandle.
Run the brushthrough the BurnerTube and
inside the Burnerseveraltimes,removing any
debris.
Usean airhosetoforceairthrough each
BurnerTube.The forced airshouldpass
debrisorobstructionsthrough the Burnerand
outthe Ports.
Flashback Prevention
AssemblyTips
Long noseplierscan be used toremove
CotterPinwhen cleaning the Burners
Usework glovestoprotectyourhands
Weareyeprotection
Whenyou have finishedassembling your
grill westronglyurgethatall Screwsbe
tightenedwithaScrewdriver
The location ofthe BurnerTube withre-
specttothe Orificeisvitalforsafeopera-
tion.Check toensurethe Orificeisinside
the BurnerTube beforeusing yourgasgrill.
See Figure 2.Ifthe Orificeisnotinside
the BurnerTube,lighting the Burnermay
causeexplosion and/orfire.
!WARNING
Figure 1
Figure 2
ORIFICE BURNERTUBE
GASVALVE
ASSEMBLY
TOCLEAN BURNERTUBE,
INSERTHOOKHERE
BURNERTUBE
SPARKELECTRODE
ASSEMBLY
GASCOLLECTORBOX
BURNER
FOOT
BURNERPORT
COTTERPIN

6
The following tableillustratesabreakdownofthe hardwarepack.It highlightswhatcomponentsareused
inthe variousstagesofassembly.
Contents forHardwarePack/LPG(Part#P06020003A)
Install CartSide Panel,CasterSeatand Cart
BottomShelf
AttachCasterSeattoCartBottomShelf
AttachCartSide PaneltoCartRearPanel
AttachDoorHandleBrackettoDoors
AttachDoorBrackettoCartSide Panel
AttachTankPull-OutTrayAssemblyandTankPull-
OutTrayStop toCartBottomShelf
AttachSide BurnerFrameand Side ShelftoBowl
AttachHandleBracketstoSide Burnerand Side
Shelf
AttachBowltoCart
AttachToolHolder/TowelRack toSide Burner
Frame/Side Shelfand side ofControlPanel
Install CartTowelRack and SpiceBasket
Powerthe ElectricIgnitor
Powerthe FuelGauge
Tighten the Caster
S112G04401
S313G04061
S112G04081
S112G04081
S112G04081
S112G04081
S112G04081
S112G04081
S112G04081
S142G04161
S112G03081
S172G03081
P05301001A
P05301002A
P05515005A
PhillipsHead Screw1/4"x2"-1/2"
Flange Nut1/4"
PhillipsHead Screw1/4"x1/2"
PhillipsHead Screw1/4"x1/2"
PhillipsHead Screw1/4"x1/2"
PhillipsHead Screw1/4"x1/2"
PhillipsHead Screw1/4"x1/2"
PhillipsHead Screw1/4"x1/2"
PhillipsHead Screw1/4"x1/2"
CountersinkFlat Head Screw1/4"x1"
PhillipsHead Screw3/16"x1/2"
Self-Tapping Screw3/16"x1/2"
Battery/AA
Battery/AAA
Wrench
Ref. PurposeofComponents
8
8
8
4
8
4
6
8
8
6
2
6
2
2
1
Qty.Component
Battery/AA
Qty.2
Ref.#P05301001A
Countersink FlatHeadScrew1/4"x1"
Qty.6
Ref.#S142G04161
PhillipsHeadScrew1/4"x2-1/2"
Qty.8
Ref.#S112G04401
PhillipsHeadScrew3/16"x1/2"
Qty.2
Ref.#S112G03081
FlangeNut1/4"
Qty.8
Ref.#S313G04061
PhillipsHeadScrew
1/4"x1/2"
Qty.46
Ref.#S112G04081
Sizeand QuantityofeachHardware Piece:
LPGMODELONLY
Wrench(scale:1/2)
Qty.1
Ref.#P05515005A
Battery/AAA
Qty.2
Ref.#P05301002A
Self-TappingScrew
3/16"x1/2"
Qty.6
Ref.#S172G03081

7
The following tableillustratesabreakdownofthe hardwarepack.It highlightswhatcomponentsareused
inthe variousstagesofassembly.
Contents forHardwarePack/NG (Part#P06020004A)
Install CartSide Panel,CasterSeatand Cart
BottomShelf
AttachCasterSeattoCartBottomShelf
AttachCartSide PaneltoCartRearPanel
AttachDoorHandleBrackettoDoors
AttachDoorBrackettoCartSide Panel
AttachSide BurnerFrameand Side ShelftoBowl
AttachHandleBracketstoSide Burnerand Side
Shelf
AttachBowltoCart
AttachToolHolder/TowelRack toSide Burner
Frame/Side Shelfand side ofControlPanel
AttachNGRegulatorBrackettoCartSide Panel
Install the CartTowelRack and SpiceBasket
Powerthe ElectricIgnitor
Tighten the Caster
S112G04401
S313G04061
S112G04081
S112G04081
S112G04081
S112G04081
S112G04081
S112G04081
S142G04161
S112G03081
S112G03081
S313G03051
S172G03081
P05301001A
P05515005A
PhillipsHead Screw1/4"x2"-1/2"
Flange Nut1/4"
PhillipsHead Screw1/4"x1/2"
PhillipsHead Screw1/4"x1/2"
PhillipsHead Screw1/4"x1/2"
PhillipsHead Screw1/4"x1/2"
PhillipsHead Screw1/4"x1/2"
PhillipsHead Screw1/4"x1/2"
CountersinkFlat Head Screw1/4"x1"
PhillipsHead Screw3/16"x1/2"
PhillipsHead Screw3/16"x1/2"
Flange Nut3/16"
Self-Tapping Screw3/16"x1/2"
Battery/AA
Wrench
Ref. PurposeofComponents
8
8
8
4
8
4
8
8
6
2
2
2
6
2
1
Qty.Component
Battery/AA
Qty.2
Ref.#P05301001A
Countersink FlatHeadScrew1/4"x1"
Qty.6
Ref.#S142G04161
PhillipsHeadScrew1/4"x2-1/2"
Qty.8
Ref.#S112G04401
Sizeand QuantityofeachHardware Piece:
NGMODELONLY
PhillipsHeadScrew
3/16"x1/2"
Qty.4
Ref.#S112G03081
FlangeNut1/4"
Qty.8
Ref.#S313G04061
PhillipsHeadScrew
1/4"x1/2"
Qty.40
Ref.#S112G04081
Wrench(scale:1/2)
Qty.1
Ref.#P05515005A
Self-TappingScrew
3/16"x1/2"
Qty.6
Ref.#S172G03081
FlangeNut3/16"
Qty.2
Ref.#S313G03051

8
SOURCE04BLP&NG Parts Diagram

9
QTYREF# PART#
DESCRIPTION
SOURCE04BLP&NG Parts List
1
2
3
4
5
6
7
8
9
10
11
12
13
14
15
16
17
18
18a
19
20
21
22
23
24
25
26
27
28
29
30
31
32
33
34
35
36
37
38
39
Lid
LidHingeSupport,Left
LidHingeSupport,Right
TemperatureGauge
HandleBracket, Left
HandleBracket,Right
LidHandle
HandleHeat-Insulating Spacer
Protective Pad
NamePlate
CookingRack/Secondary
CookingGrid/Large
CookingGrid/Small
FlameTamer/Stainless Steel
SmokerDrawer
SmokerDrawerBracket, Front
SmokerDrawerBracket, Rear
Burner/Main
BurnerAirShutter/Main(NGonly)
SmokerBurner
BurnerBracket
Gas CollectorBox withElectrode
ElectricWireSet
BowlPanel, Left
BowlPanel,Right
BowlPanel,Front
BowlPanel, Rear
BowlWindShield
Grease TrayTrack,Left
Grease TrayTrack,Right
Grease TrayHeatShield,Upper
Grease Tray
GasValve/ManifoldAssembly(LPG)
GasValve/ManifoldAssembly(NG)
ElectricIgnitor, 4-Port
ElectricIgnitor, 2-Port
ControlPanel(LPG)
ControlPanel(NG)
ControlKnob
ControlKnobSeat
Back BurnerAssembly(LPG)
Back BurnerAssembly(NG)
Back Burner Frame
Y0110021
P03320003K
P03320004K
P00601171A
P00301026E
P00302026E
P00205045B
P06801008A
P05518002I
P00416001C
P01517002B
P01604001B
P01604003B
P01708001B
P06701006A
P06703001A
P06703002A
P02001062E
P05524006A
P02008002A
P02213024A
P02609004B
P02615017A
P00705057G
P00706057G
P00738096C
P00725146C
P0071608FC
P05330001E
P05330002E
P06904003C
P0270605CC
Y0060111
Y0060112
P02502024C
P02502012C
P02910061B
P02910061G
P03411073L
P03415024A
Y0030012
Y0030013
P02011007E
1
1
1
1
3
3
1
6
6
1
1
2
1
4
1
1
1
4
4
1
1
5
1
1
1
1
1
1
1
1
1
1
1
1
1
1
1
1
7
7
1
1
1

SOURCE04BLP&NG Parts List
QTYREF# PART#
DESCRIPTION
10
40
41
42
43
44
45
46
47
48
49
50
51
52
53
54
55
56
57
58
59
60
61
62
63
64
65
66
67
68
69
70
71
72
73
74
75
76
77
78
79
80
81
82
83
---
---
---
---
---
BackBurnerExtension Tube
Back BurnerWind Shied
Cart Side Panel,Left (LPG only)
Cart SidePanel, Left (NG only)
Cart SidePanel, Right
CartBottomShelf (LPGonly)
CartBottomShelf (NGonly)
Cart RearPanel
Door Bracket
Door,Left
Door,Right
Door TrimPlate, Left
DoorTrimPlate,Right
DoorMagnet
DoorHandleBracket, Left
DoorHandleBracket,Right
DoorHandle
DoorHandleHeat-Insulating Spacer
Caster, 3in., withBrake
CasterSeatSet
TankPull-OutTrayAssembly(LPG only)
Side BurnerFrame
SideShelf,Right
SideShelf Handle
SideBurnerLid
SideBurnerLidKnob
Side Burner LidBracket
Side BurnerPotSupport
Side BurnerElectrode
SideBurnerGas Valve Assembly(LPG)
SideBurnerGas Valve Assembly(NG)
Side BurnerwithBrass Ring
Side BurnerBracket
SideBurnerConnectionHose(LPG)
SideBurnerConnectionHose(NG)
ToolHolder/TowelRack
ToolHook
RegulatorwithHose(LPG)
Hose/LPG/ProtectivePlate
RegulatorAssembly(NG)
SideBurnerExtensionHose(NGonly)
Hose,12ft. (NG)
Cart Spice Basket
Cart TowelRack Bracket
Cart TowelRack
LightingStick
HardwarePack (LPG)
HardwarePack (NG)
Owner'sManual
GrillCover
RotisserieAssembly
P03701002A
P06906008C
P07602002A
P07602003A
P07603002A
P01009001C
P01009002C
P07701023A
P03302008C
P04302014A
P04303017A
P07506004A
P07507004A
P05523002K
P00301036E
P00302036E
P00205048B
P06801009A
P05106003D
Y0260018
Y0340017
P01108002B
P01107003B
P00205046B
P01127001A
P00215001B
P03326001A
P00814001D
P02607003C
Y0060113
Y0060114
P02002005G
P02215025A
P03705008H
P03705008I
P05514004A
P05514005A
P03601011A
P05535001L
Y0080015
P03705010A
P03703001A
P05203001A
P05212008A
P05209003A
P05313023B
P06020003A
P06020004A
P80157002A
P07002005B
Y0250052
1
1
1
1
1
1
1
1
1
1
1
1
1
2
2
2
2
4
4
1
1
1
1
2
1
1
2
1
1
1
1
1
1
1
1
2
5
1
1
1
1
1
1
1
1
1
1
1
1
1
1

SOURCE04BLP&NG Parts List
Recordyourgrill ModelNumberand SerialNumber
belowforfuturereference.
MODELNUMBER
SERIALNUMBER
CSA labellocatedhere
Forthe repairorreplacementpartsyou need:
Call 8:00am-4:30 pmCST, Mondaythrough Fridayat1-877-934-7455.
Tomakesureyou obtainthe correctreplacementpart(s)foryourGasGrill,pleaserefertothe partslist. The
following information isrequired toassureyou receivethe correctpart(s):
1.Modeland SerialNumber(see CSA labelon grill)
2.PartNumber
3.Description
4.Quantityofpart(s)needed
Pleaseallowsufficienttimetoprocess and ship.
IMPORTANT: Keep thisOwner'sManualforconvenientreferraland forpart(s)replacement.
IMPORTANT: Useonlyfactory authorized parts.The useofanypartthatisnotfactory authorized can be
dangerous.Thiswill alsovoidyourwarranty.
GrillInformationCenter:If you havequestionsaboutassemblyorgrilloperation,or
iftherearedamaged ormissing partswhen youunpack thisunitfromthe shippingbox,call us
8:00am-4:30pmCST,MondaythroughFridayat:1-877-934-7455
11

Y0250052 RotisserieAssemblyParts Diagram
HardwareforRotisserie
Y0250052 RotisserieAssemblyParts List
REF# PART#
DESCRIPTION QTY
1
2
3
4
5
6
7
8
9
10
11
12
Rot. Spit
Rot. Holding Fork
Rot. Thumbscrew1/4"x1/2"
Rot. Thumbscrew#10x1/2"
Rot. Collar
Rot. Bushing
Rot. Handle
Rot. MotorBracket
Rot. Motor/AC
Rot. PhillipsHead Screw#10-24x3/4"UNC
Rot. HexNut#10-24 UNC
Rot. PlainWasher3/16"
P05508054A
P05508077A
S196G04081
S196G10081
P05508032A
P05508033A
P05508076E
P03308002A
P07101017B
S112G10124
S362G10124
S411G03084
1
2
2
1
1
1
1
1
1
2
2
2
Rot.Plain Washer3/16"
Qty.2
Ref.#S411G03084
Rot.Hex Nut#10-24UNC
Qty.2
Ref.#S362G10124
Rot. Thumbscrew1/4"x1/2"
Qty.2
Ref. #S196G04081
Rot. Thumbscrew#10x1/2"
Qty.1
Ref. #S196G10081
Rot.PhillipsHeadScrew
#10-24x3/4"UNC
Qty.2
Ref. #S112G10124
GrillInformationCenter:If you havequestionsaboutassemblyorgrilloperation,or
iftherearedamaged ormissing partswhen youunpack thisunitfromthe shippingbox,call us
8:00am-4:30pmCST,MondaythroughFridayat:1-877-934-7455
12

13
CAUTION: Whileitispossibleforone person toassemblethisgrill,obtainassistancefromanotherperson when
handling someofthe larger,heavierpieces,especiallythegrill head.
AssemblyInstructions
During unpacking andassemblyalwayswearwork glovesand eyeprotection.
OpenLidofshippingcarton andremovetop sheetofcardboard.Laycardboardsheeton flooranduseasawork
surfacetoprotectfloorandgrill partsfromscratches.
Removepackingmaterialsandcartpartsfromshipping carton.
You mayslicethe carton frontcornerswithautilityknifetolayopen the carton frontpanel.Thiswill allowyou to
raisethe grill headLidand removethe componentspacked inside the head,making iteasiertolift.
Withanassistant, liftthe grill headoutofthe shipping carton and placeiton the cardboardwork surface.
Usethe partslisttocheck thatall partshavebeen included.
Inspectthe grill fordamage asyou assembleit.Do notassembleoroperatethe grill ifitappearsdamaged.If
therearedamaged ormissing partswhen you unpack the shipping box,oryou havequestionsduring the
assemblyprocess,call:
1-877-934-7455
1.
2.
3.
4.
5.
6.
7.
Assembling TheCartToTheGrill Head
1
PhillipsHeadScrew
1/4"x1/2"
Qty.8
Ref.#S112G04081
PhillipsHeadScrew1/4"x2-1/2"
Qty.8
Ref.#S112G04401
FlangeNut1/4"
Qty.8
Ref.#S313G04061
1.Place2CasterSeatsintothe bottomofLeftSide Panel,and 2CasterSeatsintothe bottomofRightSide Panel.
2.Insertthe CartBottomShelftothe 4CasterSeats.Tighten securelybyusing 8ofthe 1/4"x1/2"PhillipsHead
Screws.
3.Align the holeson CartSide Panel,CasterSeatand CartBottomShelf,and tighten securelybyusing eight
1/4"x2-1/2"PhillipsHeadScrewsand eight1/4"FlangeNuts.

14
4.Screwthe 4Castersintothe threadholeson the CasterSeats.Turnthe threaded stembyhand,clockwiseuntil it
stops.Tighten securelybyusing the provided Wrench.
Wrench
Qty.1
Ref.#P05515005A
PhillipsHeadScrew
1/4"x1/2"
Qty.4
Ref.#S112G04081
5.InstalltheCartRearPaneltoinsideofLeft andRightSidePanel.Tightensecurelybyusing4ofthe1/4"x1/2"Phillips
Head Screws.

15
Install TheTankPull-OutTray(For LPG modelonly)
1.AttachTankPull-OutTrayStop toCartBottomShelfbyusing two1/4"x1/2"PhillipsHeadScrews.
2.Install the TankPull-OutTraytothe CartBottomShelf.Tighten securelybyusing 4ofthe 1/4"x1/2"PhillipsHead
Screws.
1.AttacheachDoorHandletoDoorsbyusing 4ofthe 1/4"x1/2"PhillipsHeadScrews.
2.PlaceRightBottomDooraxleintoDooraxleholeon the bottomofRightSide Panel.
3.PlaceDoorBracketholeintotheDooraxle on the top ofRightDoor.
4.InstallDoorBrackettothetopofRightSidePanel.Tightenlooselybyusing2ofthe1/4"x1/2"PhillipsHeadScrews.
5.PlaceLeftBottomDooraxleintoDooraxleholeonthe bottomofLeftSidePanel.
6.LiftDoorBracketand placeholeintotheDooraxleonthe topofLeftDoor.
7.InstallDoorBrackettothe topofLeftSidePanel.Tighten looselybyusing 2ofthe 1/4"x1/2"PhillipsHeadScrews.
8.Adjustthe 2DoorsandDoorBracketthen tighten securelybyusing 4ofthe 1/4"x1/2"PhillipsHeadScrews.
Install TheDoors
2
3
PhillipsHeadScrew
1/4"x1/2"
Qty.6
Ref.#S112G04081
PhillipsHeadScrew
1/4"x1/2"
Qty.12
Ref.#S112G04081

16
1.Withanassistant, liftand position theGrill Headontothe Grill Cart.
2.Align the 3holesofRightBowlSide Paneltothe threadholeson the CartRightSide Panel.Tighten securelyby
using 3ofthe 1/4"x1"FlatHead Screws.
3.Align the3holesofLeftBowlSide Panel tothethreadholesonthe CartLeftSide Panel.Tighten securelybyusing
3ofthe 1/4"x1"FlatHead Screws.
Install TheGrill Head
4
Countersink FlatHeadScrew1/4"x1"
Qty.6
Ref.#S142G04161

17
Attachfour1/4"x1/2"PhillipsHeadScrewsintothe top threaded holeson the LeftBowlSide Panel. Do not
tighten thesescrews.Allowenoughroomtoslide the slotted holeson the Side BurnerFrameBracketontothe
screws.Placeand position the Side BurnerFramethen tighten the previousscrewssecurely.
Install TheSideBurnerFrame
5
PhillipsHeadScrew
1/4"x1/2"
Qty.4
Ref.#S112G04081

18
Attachfour1/4"x1/2"PhillipsHeadScrewsintothe topthreaded holeson the Right BowlSide Panel.Do not
tighten thesescrews.Allowenough roomtoslide the slotted holeson the Right Side Shelf ontothe screws.
Placeand position the RightSide Shelfthen tighten the previousscrewssecurely.
Install TheSideShelf
6
PhillipsHeadScrew
1/4"x1/2"
Qty.4
Ref.#S112G04081

19
Install TheSideBurnerConnection Hose
1.Install the Side BurnerConnection HoseintoSocketas shownin Figure 1.
2.Toconnect,pushbackSleeveofthe Socket. See Figure1a.InsertPlug then releaseSleeve. SeeFigure 1b.
PushPlug until sleevesnapsforwardlockingthe Plug intotheSocket. See Figure 1c.
7
(NaturalGas only)
SOCKET PLUG
SLEEVE
SLEEVE
1a
1b
1c
ForNaturalGasModels attachtheRegulator
BrackettoLeftCartSidePanel using two3/16"x
1/2"PhillipsHeadScrewsandtwo3/16"FlangeNuts
tightly.See Figure2 below.
Figure 1
Figure2
PhillipsHeadScrew3/16"x1/2"
Qty.2
Ref.#S112G03081
EXTENSION HOSE
REGULATORASSEMBLY/NG
REGULATOR BRACKET
FlangeNut3/16"
Qty.2
Ref.#S313G03051
SIDEBURNER
CONNECTION HOSE
SIDEBURNER
GASVALVE
SOCKET

20
1.Loosenthe front-lowerscrewon RightSide Shelf.
2.Securefirmlyusing the previousloosened screw toattachTowelRack and RightSide Shelf,one 3/16"x1/2"
PhillipsHeadScrewforTowelRack and side ofControlPanel.
3.Loosenthefront-lowerscrewonSideBurnerFrame.
4.Slide the 5ToolHooks ontothe ToolHolderwiththe hooks facing the Side BurnerFrame.Securefirmlyusing
the previousloosened screwtoattachToolHolderand Side BurnerFrame,one 3/16"x1/2"PhillipsHeadScrew
forToolHolderand side ofControlPanel.
Install TheTowelRack and ToolHolder
9
8
Installthe CartTowelRackandSpiceBasketontotheRightDoorTrimPlatebyusing six3/16"x1/2"Self-Tapping
Screws.
Install TheCartTowelRack and Spice Basket
PhillipsHeadScrew3/16"x1/2"
Qty.2
Ref.#S112G03081
Self-Tapping Screw3/16"x1/2"
Qty.6
Ref.#S172G03081
This manual suits for next models
1
Table of contents
Other The Source Grill manuals
