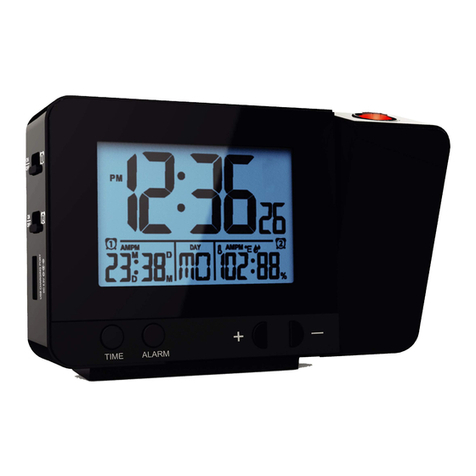
ThinkGizmos TG644 User manual

TG644 PROJECTION CLOCK
CONGRATULATIONS ON PURCHASING THE THINK GIZMOS PROJECTION CLOCK,
PLEASE FOLLOW THESE INSTRUCTIONS CAREFULLY AND KEEP THIS INSTRUCTION BOOKLET
FOR FUTURE REFERENCE.
User Manual

ENGLISH MANUAL - CONTENTS
1.
2.
3.
4.
1.1 Projection Clock Features ...................................................................................3
3.1 Automatic Time/Date Setting ............................................................................ 5
3.2 Automatic Time/Date Further Information ..................................................... 5
2.1 Battery Precautions ............................................................................................ 4
2.2 Battery Installation ............................................................................................. 4
2.3 Reset Function .................................................................................................... 4
4.1 Manual Time/Date Setting.................................................................................. 6
PROJECTION CLOCK FEATURES
TIME AND CALENDAR SETTINGS
IMPORTANT INFORMATION
TIME AND CALENDAR SETTINGS CONTINUED
2
5. 5.1 Setting the Alarm ................................................................................................ 7
5.2 Activating and Deactivating the Alarm ............................................................. 7
5.3 Snooze Function ................................................................................................. 7
5.4 Stopping the Alarm ............................................................................................. 7
ALARM SETTING
6.
7.
6.1 Projection Function ............................................................................................ 8
6.2 Backlight .............................................................................................................. 8
PROJECTION AND BACKLIGHT
8.
7.1 °C/°F Temperature Display ................................................................................8
7.2 Charging Function ............................................................................................. 8
TEMPERATURE AND CHARGING
8.1 Warranty Information ....................................................................................... 9
WARRANTY

1. PROJECTION CLOCK FEATURES
3
1.1 Projection Clock Features
●Radio controlled clock using MSF frequency.
●Date and day of week display.
●Perpetual calendar: 2001-2099.
●Snooze Alarm Clock.
●Temperature display in °C/°F.
●Thermometer: Indoor measurement ranges -9°C to +50 °C.
●LED back light display with projection (auto o after 5 seconds when using batteries).
●Battery: 2 x AAA 1.5V (Not included).
●DC power supply 5V DC 1.2A for continuous projection (Included).
●USB Charging Slot.

2. IMPORTANT INFORMATION
4
2.1 Battery Precautions
1. Alkaline batteries are recommended.
2. Incorrect use of batteries may cause damage, so please pay attention to the following:
●Do not install batteries with opposite polarity.
●When not in use and if the Projection Clock is not going to be used for a long time,
please remove the batteries to avoid corrosion.
●Do not mix old and new batteries.
●Please replace exhausted batteries as soon as possible.
●Keep batteries away from children.
●Do not place batteries near res or expose them to strong sunlight or damp
conditions.
●Please dispose of batteries carefully.
3. Careful with small parts, do not eat.
4. Do not place near re, high temperature or damp conditions.
2.2 Battery Installation
●Gently open the battery compartment located on the rear side of the unit.
●Insert 2 X 1.5V AAA batteries observing the correct polarity, as marked inside the
compartment.
●Replace the battery compartment door.
2.3 Reset Function
●If the clock is not working properly or does not respond to your input remove all
batteries and power for 30 seconds.
●This will reset the clock to factory defaults.

3. TIME AND CALENDAR SETTINGS
5
3.1 Automatic Time/Date Setting
●When you rst insert the batteries or connect the power all the symbols on the display
will briey light up and you will hear a signal tone. The LCD display will be lit for 2
seconds with beeping and the clock will start searching for the MSF Frequency for 7
minutes.
●To manually start the MSF signal search, press the WAVE button.
●The radio mast icon will ash showing it is searching for signal.
●Once the signal is found the Time and Date will be automatically set. If no signal is
found within 7 minutes the radio mast icon will dissapear and it will automatically start
searching again in 1 hour.
3.2 Automatic Time/Date Further Information
●At 1:00am the Projection Clock automatically carries out a synchronization procedure
with the MSF signal to correct any deviations to the exact time. If this synchronization
attempt is unsuccessful (The radio mast symbol disappears from the display), the system
will automatically attempt another synchronization at the next full hour. This procedure
is repeated automatically up to 5 times.
●If the clock cannot receive the MSF signal (because the distance is too great to receive a
signal from the transmitter in Anthorn), you have the option of setting the time manually
and instructions can be found on page 6. As soon as the reception of the MSF signal is
received the projection clock is re-adjusted automatically.
●We recommend a minimum distance of 2.5 meters (8.2 Feet) to all sources of
interference, such as televisions or computer monitors.
●Radio reception can be weaker in rooms with concrete walls and in oces. In such
extreme circumstances, place the system close to the window for better signal reception.

6
4. TIME AND CALENDAR SETTINGS CONT.
4.1 Manual Time/Date Setting
Note: After 20 seconds without pressing any button, the clock switches automatically from
Set Mode to Normal Time Mode.
●Press and hold down the SET button for 2 seconds, the 12/24 hour mode display starts
to ash. Now use +and -buttons to set the correct 12/24 hour mode.
●Press SET to conrm your setting, the Hour display starts to ash. Now use +and -
buttons to set the correct hour.
●Press SET to conrm your setting, the Minute displays starts to ash. Now use +and -
buttons to set the correct minute.
●Press SET to conrm your setting, the date format displays starts to ash. Now use +and
- buttons to set the correct date format.
●Press SET to conrm your setting, the Year display 2016 starts to ash. Now use +and -
buttons to set the correct year.
●Press SET to conrm your setting, the Month display starts to ash. Now use +and -
buttons to set the correct month.
●Press SET to conrm your setting, the Date display starts to ash. Now use +and -
buttons to set the correct date.
●Press SET to conrm your setting and to end the setting procedure.

5. ALARM SETTING
5.1 Setting the Alarm
This Clock possesses 2 daily alarms. To view the set alarm times toggle the switch or
switch to ON and the LCD display will show the alarm time.
Note: After 20 seconds without pressing any button, the clock switches automatically from
Set Mode to Normal Time Mode.
●Press and hold down the ALARM button for 2 seconds until Alarm Time starts ashing
on the display.
●The Hour display of the Alarm will start to ash. Use the +and -buttons to set the
required hour. Press the ALARM button to conrm your settings.
●The Minute display of the Alarm will start to ash. Use the +and -buttons to set the
required minute. Press the ALARM button to conrm your settings.
●The Hour display of the Alarm will start to ash. Use the +and -buttons to set the
required hour. Press the ALARM button to conrm your settings.
●The Minute display of the Alarm will start to ash. Use the +and -buttons to set the
required minute. Press the ALARM button to conrm your settings and to end the alarm
setting procedure.
5.2 Activating and Deactivating the Alarm
7
●To activate or deactivate the daily alarms, briey toggle switch or switch .
5.3 Snooze Function
●While the alarm is sounding, touch the button to activate snooze function.
When the snooze fuction is active the alarm icons or will ash on the display.
●The snooze function moves the alarm back by 5 minutes and after this time it will sound
again.
●To turn o the snooze function press and button on the projection clock.
●If a snooze alarm is in process and another alarm is scheduled this will automatically
stop the snooze function and the set alarm will sound.
5.4 Stopping the Alarm
●When the alarm is sounding press any button on the back, apart from the “SNZ” button,
to stop the alarm.
●The alarm will stop sounding automatically after 2 minutes and will repear 24 hours later
at the set time.
●The alarm is a rising alarm which changes volume 4 times whilst the alarm sounds.

8
6. PROJECTION AND BACKLIGHT
6.1 Projection Function
●The projection lamp on the right side of the product can project the current time of the
clock on the wall or ceiling in order to see the time at night, if the projection direction is
not correct, press the button to switch the display direction.
●When the clock uses the 5V power adapter, the projection function will be on
continuously, if batteries are being used the projection will only show when the
button is pressed.
6.2 Backlight
●On batteries at any time, touch the button and the backlight will light for 8
seconds.
●When using the 5V power adapter, the projection clocks backlight will have 4 brightness
settings, high - medium - low - out, each time the button is pressed it will
change the brightness setting.
7. TEMPERATURE AND CHARGING
7.1 °C/°F Temperature Display
●The temperature is displayed either in °C or °F. Pressing the -button allows you to switch
between the individual models.
7.2 Charging Function
●When using the 5V power adapter, the USB plug on the left side of the projection clock
can be used for charging mobile phones etc.
●The charging function will stop if the projection clock is searching for the MSF signal and
will start working again once it has been found.

8. WARRANTY
8.1 Warranty Information
Think Gizmos, Unit 19, Lawson Hunt Industrial Park,
Broadbridge Heath, West Sussex, RH12 3JR
Tel.: +44/(0)203 384 8304
What is Covered:
This warranty covers any defects in materials or workmanship, with the exceptions stated
below.
How Long Coverage Lasts:
This warranty runs for 1 Year from the date your Projection Clock is delivered.
What is not covered:
Any problem that is caused by abuse, misuse, or an act of God (such as a ood) are not
covered.
What We Will Do:
If the Product proves defective during the warranty period, we will provide you with the
instructions for the return, and we will take one of the following actions: (i) replace the
Product with a product that is the same or equivalent to the Product you purchased; (ii)
repair the Product; or (iii) refund to you the whole of or part of the purchase price of the
Product.
How To Get Service:
To obtain instructions on how to obtain service under this warranty, contact our customer
service by phone or email. You will nd the contact details of our customer service below.
Customer service may ask you questions to determine your eligibility under this warranty,
and if you are eligible you’ll be given instructions for returning the defective Product. If
we send you a replacement or repair your Product, we will pay the cost of delivering the
replacement or repaired Product to you.
Do not return the item to the original place of purchase, please contact Think
Gizmos direct.
9

“CE” marking states that the product is compliant to European Directives
2014J35/EU Low Voltage Directive (LVD)
2004/108/EC EMC Directive
It is possible to request a full copy of Declaration of compliance from the
Distributor:
This product complies with the rules of RoHS Directive(2011/651EU)
This product complies with the rules of Eup Directive(2009/125/EC)
Thinkgizmos is a registered trademark of Paramount Zone Ltd
Meaning of the ‘Dustbin’ Symbol:
To protect our environment, do not dispose of electrical equipment in with domestic waste.
Please return any electrical equipment that you will no longer use to the collection points
provided for their disposal.
This helps to avoid the potential eects of incorrect disposal on the environment and human
health.
This will contribute to the recycling and other forms of reutilisation of electrical and electronic
equipment.
Information concerning where the equipment can be disposed of can be obtained from your
local authority.
Other manuals for TG644
1
Table of contents
Other ThinkGizmos Clock manuals
