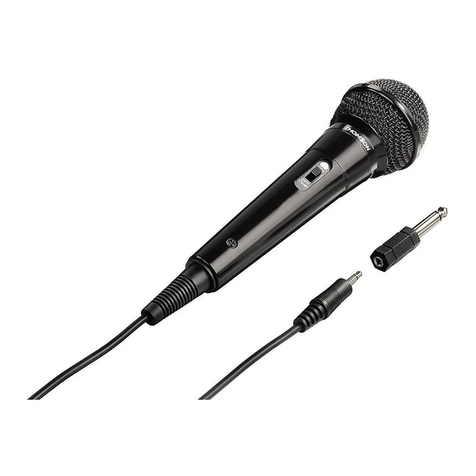
THOMSON WMP 540 User manual

Before you begin, ensure that the rated voltage of the AC/DC power
adapter is the same as the mains power.
1. Connect the AC/DC power adapter to the mains power supply outlet.
Insert the DC connector of the AC/DC power adapter into the 12 Volt
DC input located at the rear of the receiver.
2. Connect the microphone output located at the rear of the receiver to
the microphone input of your hi-fi or karaoke system using the audio
cable.
3. Open the microphone unit and install the 9 Volt battery into the battery
compartment.
4. Select the channel.When using only one microphone set, ensure that
channel A is selected on the receiver. When using two microphone sets
in the same room at the same time, switch the second microphone set
to channel B.
SET-UP
When closing the microphone unit, ensure not to damage the antenna.
MIC OUT
CHANNEL
A B
TUNING
DC IN
12 V
Congratulations! You have bought a most sophisticated wireless micro-
phone system. Easy to connect to a hi-fi or karaoke system, this micro-
phone uses a high radio frequency as the signal carrier, ensuring a very
clear, sharp reception. It also uses 360°signal technology to give you total
freedom of movement. You can operate two microphone systems simulta-
neously in the same room.
GB
wmp540 9/11/00 9:35 Page 1

1. Switch the power switch on ON. The power-on LED lights up.
If the LED does not light up, the battery is empty and should be replaced.
2. When using only one microphone set, ensure that channel A is selected
on the receiver. When using two microphone sets in the same room at the
same time, switch the second microphone set to channel B.
3. Speak into the microphone. Fine tune the signal using the tuning controls
on the receiver and the microphone.
4. Adjust the volume on your hi-fi or karaoke system.
OPERATION
SPECIFICATIONS
Wireless microphone
Receiver power supply: 12 Volt mains adapter
Microphone power supply: 9 Volt SM544 6LR61 battery, non rechargeable
High frequency radio system 433 MHz
Operating range: up to 30 m
2 channels
Frequency range: 80 - 16 000 Hz
Sensitivity: 55 dB
Signal noise ratio: > 60 dB
FM subcarrier frequencies: channel A: 434.4 to 434.7 MHz, channel B: 433,2 to 433,5 MHz
Please respect the environment and prevailing regulations.
Before you dispose of batteries or accumulators, ask your dealer whether they are subject
to special recycling and if he accepts to take them back.
CONTROLS
Microphone:Receiver:
power on switch tuning knob
tuning knob micro output
power on and battery LED power adapter input (DC IN 12 V)
channel selection switch
power on indicator
GB
wmp540 9/11/00 9:35 Page 2

Avant de commencer, vérifiez que la tension indiquée sur l’adaptateur
ca/cc correspond à l’alimentation secteur du lieu d’utilisation.
1. Connectez l’adaptateur ca/cc au récepteur, puis branchez-le sur une
prise secteur.
2. Branchez une extrémité du cordon de raccordement audio sur la sortie
micro du récepteur et l’autre sur l’entrée micro d’une chaîne hi-fi ou
d’un karaoke.
3. Dévissez la partie inférieure du micro et installez la pile dans son loge-
ment. Refermez le micro.
4. Choisissez le canal de transmission : si vous n’utilisez qu’un seul
micro, placez le commutateur sur A. Pour utiliser deux micros simulta-
nément dans la même pièce, choisissez le canal A pour l’un et le canal
B pour l’autre.
INSTALLATION
Veillez à ne pas endommager l’antenne qui se trouve à l’intérieur du micro.
MIC OUT
CHANNEL
A B
TUNING
DC IN
12 V
Facile à installer sur une chaîne hi-fi ou un karaoke, ce microphone sans
fil à signal omnidirectionnel permet une totale liberté de mouvement. Il uti-
lise une fréquence radio élevée pour offrir une réception de haute qualité.
Les deux canaux de transmission permettent l’utilisation de deux micro-
phones dans la même pièce simultanément.
F
wmp540 9/11/00 9:35 Page 3

1. Placez le bouton de mise sous tension du micro sur ON. Le voyant rouge
s’allume.
Si le voyant ne s’allume pas, la pile est déchargée. Remplacez-la.
2. Selon que vous utilisez un ou deux micros dans la même pièce, placez le
commutateur de canaux sur A ou B.
3. Commencez à parler. Le cas échéant, utilisez les molettes de réglage du
récepteur et du micro pour améliorer la qualité du signal.
4. Pour régler le volume sonore, utilisez les commandes de la chaîne hi-fi
ou du karaoke.
UTILISATION
CARACTERISTIQUES
Microphone sans fil
Alimentation du récepteur : 12 V par adaptateur secteur
Alimentation du micro : pile 9 V SM544 type 6LR61 non rechargeable
Transmission radio haute fréquence 433 MHz
Portée : jusqu’à 30 m
2 canaux de transmission commutables
Bande passante : 80 – 16 000 Hz
Sensibilité : 55 dB
Rapport signal-bruit : > 60 dB
Sous-porteuse FM : canal A : 434,4 à 434,7 MHz, canal B : 433,2 à 433,5 MHz
Respectez l’environnement et la loi !
Avant de jeter des piles (ou des accumulateurs), informez-vous auprès de votre distributeur pour
savoir si elles (ou ils) font l’objet d’un recyclage spécial, et s’il peut se charger de les récupérer.
COMMANDES
Microphone :Récepteur :
bouton de mise sous tension (ON/OFF) molette de réglage (TUNING)
molette de réglage (TUNING) sortie micro (MIC OUT)
voyant de mise sous tension entrée adaptateur secteur (DC IN 12 V)
commutateur de canaux
voyant de mise sous tension
F
wmp540 9/11/00 9:35 Page 4

INSTALLAZIONE I
Facile da installare su un impianto hi-fi o un karaoke, questo microfono
senza filo a segnale omnidirezionale permette una totale libertà di movi-
menti ed utilizza una frequenza radio elevata al fine di offrire una ricezio-
ne di alta qualità. O due canali di trasmissione permettono l'impiego
simultaneo di due microfoni nello stesso locale.
MIC OUT
CHANNEL
A B
TUNING
DC IN
12 V
Prima di cominciare, verificare che la tensione indicata sull'adattatore
CC/CA corrisponde a quella erogata dal settore del luogo di utilizzazione.
1. Collegare l'adattatore CC/CA al ricevitore e inserire quindi la spina in
una presa del settore.
2. Collegare una estremità del cordone de raccordo audio sulla uscita
microfono del ricevitore e l'altra estremità sull'entrata microfono di un
impianto hi-fi o di un karaoke.
3. Svitare la parte inferiore del microfono ed installare la pila nella sede
ad essa riservata. Richiudere il microfono.
4. Scegliere il canale di trasmissione : se si utilizza un solo microfono,
mettere il commutatore sulla posizione A. Per utilizzare simultanea-
mente due microfoni nello stesso locale, scegliere il canale A per il pri-
mo e il canale B per il secondo.
Fare attenzione a non danneggiare l’antenna che si trova all'interno del microfono.
wmp540 9/11/00 9:35 Page 5

Rispettate l'ambiente e la legge!
Prima di gettar via le pile (o gli accumulatori) informatevi presso il vostro distributore per
sapere se sono o no oggetto di un riciclaggio speciale e se può incaricarsi di recuperarli.
I
CARATTERISTICHE TECNICHE
UTILIZZAZIONE
COMANDI
Microfono :Ricevitore :
pulsante di marcia e arresto (ON/OFF) manopola di regolazione (TUNING)
manopola di regolazione (TUNING) uscita microfono (MIC OUT)
spia di presenza tensione entrata adattatore di rete (DC IN 12 V)
commutatore dei canali
spia di presenza tensione
1. Mettere l'interruttore di marcia e arresto del microfono sulla posizione ON.
Si accende allora la spia rossa.
Se la spia non si accende, vuol dire che la pila è scarica e deve essere
sostituita.
2. A seconda che si utilizzi uno o due microfoni nello stesso locale, mettere il
commutatore dei canali sulla posizione A o B.
3. Cominciare a parlare. Per migliorare la qualità del segnale, utilizzare le
manopole di regolazione del ricevitore e del microfono.
4. Per regolare il volume sonoro, utilizzare i comandi dell'impianto hi-fi o del
karaoke.
Microfono senza filo
Alimentazione del ricevitore : 12 V tramite un adattatore di rete
Alimentazione del microfono : pila a 9 V SM 544 del tipo 6LR61 non ricaricabile
Trasmissione radio ad alta frequenza : 433 MHz
Portata : fino a 30 m
2 canali di trasmissione commutabili
Banda passante : 80 - 16 000 Hz
Sensibilità : 55 dB
Rapporto segnale-rumore : > 60 dB
Sotto portante FM : canale A : da 434,4 a 434,7 MHz, canale B : da 433,2 a 433,5 MHz
wmp540 9/11/00 9:35 Page 6

E
Fácil de instalar en un equipo hi-fi o un karaoke, este micrófono inalám-
brico de señal omnidireccional permite una total liberta de movimiento.
Utiliza una radiofrecuencia alta para ofrecer una gran calidad de recep-
ción. Gracias a sus dos canales de transmisión, pueden utilizarse simul-
táneamente dos micrófonos en la misma habitación.
MIC OUT
CHANNEL
A B
TUNING
DC IN
12 V
Antes de empezar, compruebe que la tensión indicada en el adaptador
ca/cc se corresponda con la tensión de la red eléctrica.
1. Tras conectar el adaptador ca/cc al receptor, enchúfelo a una toma de
corriente.
2. Conecte un extremo del cable de conexión audio a la salida de micró-
fono del receptor y el otro extremo a la entrada de micrófono de un
equipo hi-fi o un karaoke.
3. Desenrosque la parte inferior del micrófono e instale la pila en su aloja-
miento. Vuelva a colocar la parte inferior del micrófono.
4. Seleccione el canal de transmisión: si sólo utiliza un micrófono, sitúe el
conmutador en la posición A. Para utilizar simultáneamente dos micró-
fonos en una misma habitación, seleccione el canal A para el primero y
el B para el otro.
INSTALACIÓN
Proceda con cuidado para no estropear la antena situada dentro del micrófono.
wmp540 9/11/00 9:35 Page 7

¡Respete el medio ambiente y la ley!
Antes de tirar las pilas o acumuladores, pregunte a su distribuidor si éstos son objeto
de algún reciclaje especial y si él puede encargarse de su recuperación.
E
Micrófono:Receptor:
botón de encendido (ON/OFF) control de la señal (TUNING)
control de la señal (TUNING) salida micrófono (MIC OUT)
piloto marcha entrada adaptador de corriente (DC IN 12 V)
conmutador de canales
piloto marcha
1. Sitúe el botón marcha/paro del micrófono en ON. Se enciende el piloto
rojo.
Si no se enciende el piloto, la pila estará gastada y se tendrá que susti-
tuir.
2. Según utilice uno o dos micrófonos en una misma habitación, deberá
situar el conmutador de canales en A o B.
3. Empiece a hablar. Utilice las ruedas de control del receptor y del micrófo-
no para mejorar la calidad de la señal.
4. Para ajustar el volumen, utilice los mandos del equipo hi-fi o del karaoke.
Micrófono inalámbrico
Alimentación del receptor: 12 V mediante adaptador de red eléctrica
Alimentación del micrófono: pila 9 V SM544 tipo 6LR61 no recargable
Transmisión por radiofrecuencia de 433 MHz
Alcance: hasta 30 m
2 canales de transmisión conmutables
Ancho de banda: 80 – 16 000 Hz
Sensibilidad: 55 dB
Relación señal-ruido: > 60 dB
Subportadora FM: canal A: 434,4 a 434,7 MHz, canal B: 433,2 a 433,5 MHz
CONTROLES
UTILIZACIÓN
CARACTERÍSTICAS TÉCNICAS
wmp540 9/11/00 9:35 Page 8

NL
INSTALLATIE
Deze draadloze microfoon met rondstralend signaal is eenvoudig aan te
sluiten op een hifi- of karaoke-installatie en biedt een volledige bewe-
gingsvrijheid. Hij gebruikt een hoge radiofrequentie voor een ontvangst
van uitstekende kwaliteit. Met de twee transmissiekanalen kan men in
dezelfde ruimte tegelijkertijd twee microfoons gebruiken.
MIC OUT
CHANNEL
A B
TUNING
DC IN
12 V
Controleer, alvorens te beginnen, of de op de wisselstroom-/gelijkstroo-
madapter aangegeven spanning overeenkomt met de netspanning ter
plaatse.
1. Sluit de wisselstroom-/gelijkstroomadapter aan op de ontvanger en
sluit deze vervolgens aan op het lichtnet.
2. Sluit het ene uiteinde van het audio-aansluitsnoer aan op de microfoo-
nuitgang van de ontvanger en het andere op de microfooningang van
een hifi- of karaoke-installatie.
3. Schroef het onderste gedeelte van de microfoon los en plaats de batte-
rij in het batterijvakje. Zet de microfoon weer in elkaar.
4. Kies het transmissiekanaal: als u slechts één microfoon gebruikt, zet
de schakelaar dan op A. Als u tegelijkertijd twee microfoons in dezelfde
ruimte gebruikt, kies dan kanaal A voor de ene microfoon en kanaal B
voor de andere.
Zorg ervoor dat u de antenne in de microfoon niet beschadigt.
wmp540 9/11/00 9:35 Page 9

Eerbiedig de natuur en de wetgeving!
Alvorens de batterijen (of de accumulators) weg te werpen, vraag aan uw verdeler of deze het
voorwerp uitmaken van een bijzondere recycling en of hij belast is met de ophaling ervan.
NL
Microfoon:Ontvanger:
Aan-/Uitknop (ON/OFF) afstelwieltje (TUNING)
afstelwieltje (TUNING) uitgang microfoon (MIC OUT)
spanningscontrolelampje ingang lichtnetadapter (DC IN 12 V)
kanalenschakelaar
spanningscontrolelampje
1. Zet de Aan-/Uitknop van de microfoon op ON. Het rode controlelampje
gaat branden.
Als het controlelampje niet brandt, is de batterij leeg. Vervang deze.
2. Aan de hand van het gebruik van één of twee microfoons in dezelfde
ruimte, zet u de kanalenschakelaar op A of B.
3. Begin met praten. Gebruik de afstelwieltjes van de ontvanger en de
microfoon om de kwaliteit van het signaal te verbeteren.
4. Gebruik voor het afstellen van het geluidsvolume de bedieningsknoppen
van de hifi- of karaoke-installatie.
Draadloze microfoon
Voeding van de ontvanger: 12 V via een lichtnetadapter
Voeding van de microfoon: niet oplaadbare batterij 9 V SM544 type 6LR61
Hoog frequente radiotransmissie 433 MHz
Bereik: tot 30 m
2 overschakelbare transmissiekanalen
Bandbreedte: 80 -16.000 Hz
Gevoeligheid: 55 dB
Signaal-geluidverhouding: > 60 dB
FM-hulpdraaggolf: kanaal A: 434,4 t/m 434,7 MHz, kanaal B: 433,2 t/m 433,5 MHz
GEBRUIK
TECHNISCHE EIGENSCHAPPEN
BEDIENINGSKNOPPEN
wmp540 9/11/00 9:35 Page 10

S
INSTALLATION
Lätt att installera på en karaoke- eller HiFi-apparat ger denna omnidirek-
tionella, trådlösa mikrofon total rörelsefrihet. Den använder en högfrek-
vent radio signal som säkerställer mottagning av hög kvalitet. De två
transmissionskanalerna gör det möjligt att använda två mikrofoner i sam-
ma rum samtidigt.
MIC OUT
CHANNEL
A B
TUNING
DC IN
12 V
Innan du börjar kontrollerar du att den spänning som anges på ca/cc-
adaptern motsvarar nätspänningen på den plats där mikrofonen skall
användas.
1. Anslut ca/cc-adaptern till mottagaren och anslut den till ett nätspän-
ningsuttag.
2. Koppla ena ändan av audiokabeln till mottagarens mikrofonutgång och
den andra till mikrofoningången till en karaoke- eller HiFi-enhet.
3. Skruva loss mikrofonens undre del och sätt in ett batteri i det därför
avsedda utrymmet. Stäng mikrofonen.
4. Välj transmissionskanal: om du endast använder en enda mikrofon sät-
ter du omställaren på A. För att använda två mikrofoner samtidigt i
samma rum väljer du kanal A för den ena och kanal B för den andra.
Se till att du inte skadar antennen som finns inuti mikrofonen.
wmp540 9/11/00 9:35 Page 11

Tänk på miljön!
Förbrukade batterier (eller laddningsbara batterier) läggs i de speciella uppsamlingslådor
som finns uppsatta i din kommun, eller återlämnas till en återförsäljare av batterier för
återvinning.
S
Mikrofon:Mottagare:
Knapp för påkoppling av spänning (ON/OFF) reglageknapp (TUNING)
reglageknapp (TUNING) mikrofonutgång (MIC OUT)
signallampa för spänning ingång nätspänningsadapter (DC IN 12 V)
kanalomställare
signallampa för spänning
1. Sätt mikrofonens spänningsknapp på ON. Den röda signallampan tänds.
Om den röda signallampan inte tänds är batteriet urladdat. Byt ut det.
2. Allteftersom du använder en eller två mikrofoner i samma rum placerar du
kanalomställaren på A eller B.
3. Börja tala. Använd mottagarens reglageknapp för att få bästa kvalitet på
signalen.
4. För att reglera ljudvolymen använder du volymkontrollen på karaoke- eller
HiFi-enheten.
Trådlös mikrofon
Strömförsörjning mottagare: 12 V genom nätspänningsadapter
Strömförsörjning mikrofon: batteri 9 V SM544 typ 6LR61 ej reglerbar
Högfrekvent radiotransmission 433 MHz
Räckvidd: upp till 30 m
2 kommuterbara transmissionskablar
Bandpass: 80 – 16 000 Hz
Känslighet: 55 dB
Signal/brusförhållande: > 60 dB
Sekundär FM-bärvåg: kanal A: 434,4 till 434,7 MHz, kanal B: 433,2 till 433,5 MHz
KOMMANDON
ANVÄNDNING
TEKNISKA DATA
wmp540 9/11/00 9:35 Page 12

DECLARATION OF CONFORMITY FOR THE UNITED KINGDOM
This declaration is the responsability of manufacturer / importer:
Tomei Acoustic Accessories (Huizhou) Co., Ltd.
Duten Industrial Village, Lunfun Office Complex, Huizhou,
Guangdong Province, China
This certifies that the following designated product WMP 540 complies with the essential
protection requirements of R&TTE Directive 1999/5/EC on the approximation of the law
of the Member States relating to Radio Spectrum Matters, EMC and Electrical Safety.
This declaration applies to all specimens manufactured in accordance with the attached
technical documentation described in the annex II of the Directive which form part of this
declaration.
Assessment of compliance of the product (class 2.6) with the requirements relating to
the essential requirements acc. to Article 3 R&TTE was based on Annex IV of the
Directive 1999/5/EC and the following standards:
Radio Spectrum ETS/300220
EMC ETS/300683
Electrical Safety EN60065
Huizhou, 12 / 2000
Tsang Hing Fong
DÉCLARATION DE CONFORMITÉ POUR LA FRANCE
Cette déclaration est établie sous la responsabilité du fabricant :
Tomei Acoustic Accessories (Huizhou) Co., Ltd.
Duten Industrial Village, Lunfun Office Complex, Huizhou,
Guangdong Province, China
La présente déclaration certifie que l’appareil WMP 540 satisfait aux exigences essen-
tielles de la directive européenne R&TTE 1999/5/EC, visant à rapprocher les législations
des Etats membres, concernant l’utilisation du spectre radioélectrique, la compatibilité
électromagnétique et la sécurité électrique.
Cette déclaration s’applique à tous les exemplaires fabriqués conformément à la docu-
mentation technique décrite à l’annexe II de la directive.
L’évaluation de la conformité de l’appareil (Classe 2.6) avec les exigences essentielles
de l’Article 3 R&TTE a été effectuée conformément à l’Annexe IV de la directive et aux
normes suivantes :
Spectre radioélectrique ETS/300220
Compatibilité électromagnétique (CEM) ETS/300683
Sécurité électrique EN60065
Huizhou, 12 / 2000
Tsang Hing Fong
0681
0681
wmp540 9/11/00 9:35 Page 13

DICHIARAZIONE DI CONFORMITÀ PER L’ITALIA
Questa dichiarazione viene stabilita sotto la sola responsabilità
del fabbricante/ dell'importatore:
Tomei Acoustic Accessories (Huizhou) Co., Ltd.
Duten Industrial Village, Lunfun Office Complex, Huizhou,
Guangdong Province, China
Certifica che il prodotto sotto designato WMP 540 è conforme alle esigenze di sicurezza
fondamentali della direttiva R&TTE 1999/5 CE relativa allo spettro radio-elettrico, alla
compatibilità elettromagnetica e alla sicurezza elettrica, così come queste esigenze sono
state integrate nelle leggi nazionali degli Stati membri.
Questa dichiarazione si applica a tutti gli apparecchi fabbricati secondo la documenta-
zione tecnica acclusa, come viene menzionata all'appendice II della direttiva, e questa
documentazione è parte integrante della presente dichiarazione.
La valutazione della conformità del prodotto (classe 2.6) alle esigenze fondamentali sti-
pulate dall'articolo 3 della direttiva R&TTE è stata effettuata sulla base dell'appendice IV
della direttiva 1999/5 CE e delle seguenti norme:
Spettro radioelettrico ETS/300220
Compatibilità elettromagnetica ETS/300683
Sicurezza elettrica EN60065
Huizhou, 12 / 2000
Tsang Hing Fong
DECLARACION DE CONFORMIDAD PARA ESPAÑA
Esta declaración se establece bajo la única responsabilidad
del fabricante / del importador:
Tomei Acoustic Accessories (Huizhou) Co., Ltd.
Duten Industrial Village, Lunfun Office Complex, Huizhou,
Guangdong Province, China
Certifica que el producto descrito a continuación WMP 540 está conforme con las exi-
gencias de seguridad fundamentales de la directiva R&TTE 1999/5 CE relativa al espec-
tro radioeléctrico, a la compatibilidad electromagnética y a la seguridad eléctrica,
exigencias que fueron integradas en las leyes nacionales de los Estados miembros.
Esta declaración se aplica a todos los aparatos fabricados según la documentación téc-
nica adjunta, como se menciona en el anexo II de la directiva y esta documentación hace
parte integrante de la presente declaración.
La evaluación de conformidad del producto (clase 2.6) con las exigencias fundamenta-
les estipuladas por el artículo 3 de la directiva R&TTE fue efectuada en base al anexo IV
de la directiva 1999/5 CE y de las normas siguientes:
Espectro radioeléctrico ETS/300220
Compatibilidad electromagnética ETS/300683
Seguridad eléctrica EN60065
Huizhou, 12 / 2000
Tsang Hing Fong
0681
0681
wmp540 9/11/00 9:35 Page 14

GELIJKVORMIGHEIDSVERKLARING VOOR NEDERLAND
Deze verklaring werd opgesteld onder de enige verantwoordelijkheid
van de fabrikant / invoerder:
Tomei Acoustic Accessories (Huizhou) Co., Ltd.
Duten Industrial Village, Lunfun Office Complex, Huizhou,
Guangdong Province, China
Zij garandeert dat het hieronder beschreven product WMP 540 gelijkvormig is aan de
fundamentele veiligheidsvereisten van de richtlijn R&TTE 1999/5 EG betreffende het
radio-elektrisch spectrum, de elektromagnetische compatibiliteit en de elektrische veili-
gheid zoals deze vereisten in de nationale wetten van de Lidstaten opgenomen werden.
Deze verklaring is van toepassing op alle apparaten vervaardigd volgens de hierbijge-
voegde technische documentatie zoals vermeld in bijlage II van de richtlijn, en deze
documentatie maakt integraal deel uit van deze verklaring.
De evaluatie van de gelijkvormigheid van het product (klasse 2.6) aan de fundamentele
vereisten vermeld in artikel 3 van de richtlijn R&TTE werd uitgevoerd op basis van de bij-
lage IV van de richtlijn 1999/5 EG en op basis van de volgende normen:
Radio-elektrisch spectrum ETS/300220
Elektromagnetische compatibiliteit ETS/300683
Elektrische veiligheid EN60065
Huizhou, 12 / 2000
Tsang Hing Fong
KONFORMITETSDEKLARATION FÖR SVERIGE
Denna deklaration är upprättad på tillverkarens / importörens enda ansvar:
Tomei Acoustic Accessories (Huizhou) Co., Ltd.
Duten Industrial Village, Lunfun Office Complex, Huizhou,
Guangdong Province, China
Den intygar att nedanstående nämnda produkt WMP 540 uppfyller de fundamentala
säkerhetskraven i direktivet R&TTE 1999/5 CE angående det radioelektriska spektret,
den elektromagnetiska kompatibiliteten och den elektriska säkerheten, såsom dessa
krav har upptagits i medlemsländernas nationella lagar.
Denna deklaration gäller alla apparater tillverkade enligt den bifogade tekniska doku-
mentationen, som den omnämns i bilaga II i direktivet, och denna dokumentation ingår
som en viktig del i den föreliggande deklarationen.
Granskningen av produktens konformitet (klass 2.6) enligt de fundamentala kraven sti-
pulerade i artikel 3 i direktivet R&TTE har gjorts på basis av bilagan IV i direktivet 1999/5
CE och följande normer:
Radioelektriskt spektrum ETS/300220
Elektromagnetisk kompatibilitet ETS/300683
Elektrisk säkerhet EN60065
Huizhou, 12 / 2000
Tsang Hing Fong
0681
0681
wmp540 9/11/00 9:35 Page 15
Table of contents
Languages:
Other THOMSON Microphone System manuals
Popular Microphone System manuals by other brands

GOSUNCN
GOSUNCN GW500 user manual

Avaya
Avaya XT Premium 3-way Microphone Pod Quick setup guide

Royal Enfield
Royal Enfield Z-Drive 130 Service manual and parts list

DC-Digital
DC-Digital WT-250-Wireless-System Operating and installation instructions

Audibax
Audibax SIDNEY CONFERENCE 1000 user manual

PCB Piezotronics
PCB Piezotronics HT378B02 Installation and operating manual