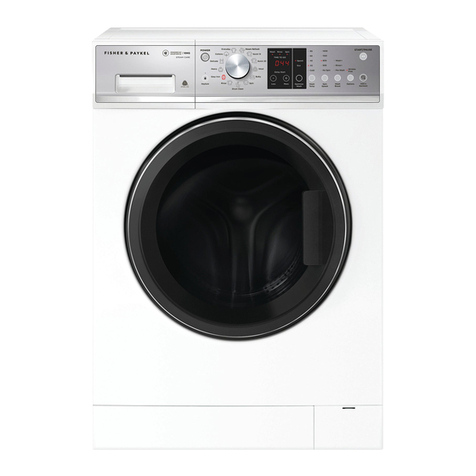
THOR T35148MLW User manual

User manual Front loading washing machine
Welcome to Your New washing machine!
Congratulations on your selection of a new Thor washing machine for your laundry needs.
We are confident you will enjoy the superior performance and reliability.
Please read this user guide and do not hesitate to contact our Customer Service department
if you have any questions or comments with your new washing machine.
Contact details can be found by scanning the QR code on the front of the machine or by
emailing service@shomar.ie or by calling our Dublin office 01-4505327
Model:
T35148MLW
T351410MLW

User manual Front loading washing machine

Contents
1
Safety instructions. 2-3-4-5
Safety instructions
Disposal
Installation. 6-7-8-9-10-11-12
Unpacking,
Carrying the appliance
What’s included
Removing the transport bolts
Choosing the Right Location
Levelling the appliance
Connecting the water supplies and electricity
Technical date
Description of the appliance. 13-14
Control panel
Display
Preparing and sorting laundry. 15-16
Preparing the laundry
Sorting the laundry according to colour and degree of soiling
Sorting laundry according to their care label specifications
Various cycles and functions. 17-18-19-20
Table of wash cycles
M-Smart wash cycle
Special wash cycles
Delay end
DIY time
Child lock
Add clothes during the program is running
Cancelling the buzzer
Load balancing system
How to use the appliance. 21-22-23
Before loading your first load of laundry
Daily use
Preparing the laundry
How to use the washing machine
Care and maintenance. 24-25-26
Cutting off water and electricity supplies
Cleaning the appliance’s exterior
Cleaning the drum
Descaling the washer
Caring for the door and drum of your appliance
Checking the water inlet hose
Cleaning the detergent dispenser
Cleaning the mesh filter in the water supply hose
Cleaning the drain pump
Troubleshooting. 27-28-29-30
Product fiche. 31-32-33

Safety instructions
2
When properly cared for, your new appliance has
been designed to be safe and reliable. Read and
understand all safety instructions before using the
appliance. Keep them nearby for future reference.
These safety instructions will reduce the risk of fire,
electric shock, serious injury or death to persons.
When using the appliance, basic safety instructions
must be followed, including those in the following
pages. The manufacturer declines any liability for
failure to observe these safety instructions, for
inappropriate use of the appliance or incorrect
setting of controls.
PERMITTED USE
1This appliance is intended to be used in household
and similar applications such as: staff kitchen areas
in shops, offices and other working environments;
farm houses; by clients in hotels, motels, bed &
breakfast and other residential environments.
1Children from 8 years old and above and persons
with reduced physical, sensory or mental
capabilities or lack of experience and knowledge
can use this appliance only if they are supervised or
have been given instructions on safe use and
understand the hazards involved.
1This appliance is not for professional use. Do not
use the appliance outdoors.
1Do not load the appliance above the maximum
capacity (kg of dry cloth) indicated in the table of
wash cycle.
1The appliance is not intended to be operated by
means of an external switching device, such as a
timer, or separate remote controlled system.
1Do not wash articles that have been previously
cleaned, washed, soaked, or spotted with gasoline,
dry cleaning solvents, and other flammable or
explosive substances as they give off vapors that
could ignite or explode.
1Do not add gasoline, dry cleaning solvents, or
other flammable or explosive substances to the
wash water. These substances give off vapors that
could ignite or explode.
1Fabric softeners, or similar products, should be
used as specified by the fabric softener instructions.
1Do not machine wash fiberglass materials (such as
curtains and windows coverings that use fiberglass
materials). Small particles may remain in the washer
and stick to fabrics in subsequent wash loads
causing skin irritation.
1Remove all objects from packets such as lighters
and matches.
1Make sure there is no water in the drum before
opening the door.
1Never wash the carpet in the appliance.
1Exercise caution when pumping out hot detergent
solution.
1Do not fill water during washing cycle manually.
1Please close the loading door correctly, if it is
difficult to close it, please check if the laundry is
caught in the door.
1Water may reach very high temperatures during
the wash cycle.
1Do not temper with the controls.
1Never open the door forcibly or use it as a step.
1Do not allow anyone to climb, lean or hang on any
part of the appliance including any protruding
components such as the appliance door or a pullout
shelf.
1Never put small appliance, such as microwave
oven; and/or jar cooker, on the machine.
1Keep the machine away from the flaming
equipment, such as candle; cooking stove; liquefied
gas container etc.
1Never put the pressure containers on the
machine.
1Always follow the fabric care instructions
recommended by clothing manufacturer.
1Check the water inlet hose connections on a
regular basis to ensure that they are tight and not
leaking.
1Do not operate the appliance if parts are missing
or broken.
1Do not operate the appliance until you are sure
that:
The appliance has been installed according to the
installation instructions.
All water, drain, power and grounding
connections are in compliance with all local
regulations and/or other applicable regulations
and requirements.

Safety instructions
3
INSTALLATION
1The appliance must be handled and installed by
two or more persons – risk of injury. Use protective
gloves to unpack and install – risk of cuts.
1Keep children away from the installation site.
1After unpacking the appliance, make sure that it
has not been damaged during transport. In the
event of problems, contact the dealer.
1During installation, make sure the appliance does
not damage the power cable – risk of fire or electric
shock.
1When moving, do not lift the appliance by the
knobs or detergent drawer, without lifting it by the
worktop or top lid; during transport, never rest the
door on the trolley.
1The appliance is fitted with transport bolts to
prevent any possible damage to the interior during
transport. Before using the machine, it is imperative
that the transport bolts are removed. After their
removal, cover the open transport bolt holes with
the four cover caps.
1The appliance must be installed and operated in a
room with the drain.
1Keep the environment dry and vented.
1Never put the machine over the opening of an
uncovered drainage.
1Do not install the appliance where it may be
exposed to extreme conditions, such as: poor
ventilation, temperatures below 5 ℃or above
35℃.
1Do not expose the appliance in the place with
causticity or explosive gas. (E.g. dust, steam and gas,
etc.)
1Do not install the appliance in a bathroom or a
room very wet.
1The appliance should not be installed in an
outdoor environment, not even where the area is
sheltered, because it may be very dangerous to
leave it exposed to damp, rain and thunderstorms.
1When installing the appliance make sure that the
four feet are stable and resting on the floor,
adjusting them as required, and check that the
appliance is perfectly to level using a spirit level.
1The appliance must not be installed behind a
lockable door, a sliding door or a door with a hinge
on the opposite side to that of the appliance, in
such way that a full opening of the appliance door is
restricted.
1The appliance must be disconnected from the
power supply before any installation operation –
risk of electric shock.
1Installation, including water supply (if any) and
electrical connections and repairs must be carried
out by a qualified technician.
1Connect the water inlet hose(s) to the water
supply in accordance with the regulations of your
local water company.
1Use only the new water inlet hose(s) supplied with
the appliance to connect the appliance to water
supply. The old water inlet hose(s) should not be
reused.
1The supply water pressure must be in the
0.03—1.0 MPa range.
1Make sure that the ventilation openings in the
base of the appliance (if available on your model)
are not obstructed by a carpet or other material.
1After installation of the appliance, wait a few
hours before starting it so that it acclimates to the
environmental conditions of the room.
1Once installed, packaging waste (plastic,
Styrofoam parts etc.) must be stored out of reach of
children – risk of suffocation.
1Only activate the appliance when the installation
has been completed.

Safety instructions
4
ELECTRICAL WARNING
1It must be possible to disconnect the appliance
from the power supply by unplugging it if plug is
accessible, or by a multi-pole switch installed
upstream of the socket in accordance with the
wiring rules and the appliance must be earthed in
conformity with national electrical safety standards.
1When the appliance is installed, the mains
socket must be within easy reach.
1When heating, the maximum current of the
appliance is 10A, so please make sure that the
power supply system (voltage, current and the cable)
is applicable to the load of the applied appliance.
1In order to ensure your safety, you must plug the
cable into a socket which connected to earth. And
please check your socket to make sure that it is
connected with reliable earth correctly.
1Do not use extension leads, multiple sockets or
adapters.
1The electrical components must not be accessible
to the user after installation.
1Do not operate the appliance when you are wet or
barefoot.
1Do not operate the appliance if it has a damaged
power cable or plug, if it is not working properly, or
if it has been damaged or dropped.
1If the supply cord is damaged, it must be replaced
with an identical one by the manufacturer, its
service agent or similarly qualified persons in order
to avoid a hazard – risk of electric shock.
1Disconnect the power cord by grasping the plug,
not the cord.
CLEANING AND MAINTENANCE
1WARNING!Ensure that the appliance is switched
off and disconnected from the power supply and
turn off the water tap before performing any
maintenance operation; never use steam cleaning
equipment – risk of electric shock.
1Use caution when draining hot water from the
drum such as during pump maintenance.
SERVICE
1Do not repair or replace any part of the appliance
or attempt any service unless specifically stated in
the user manual. Use only authorized After-sales
Service. Self or non-professional repair may lead to
dangerous incident resulting in live or health
threatening and/or significant property damage.
1In the event of fault and/or malfunction, turn off
the appliance, close the water tap and do not
tamper with the machine. Immediately contact the
Customer Service Centre and only use original spare
parts. Failure to observe these instructions may
jeopardise appliance safety.
1Certain internal parts are intentionally not
grounded and may present a risk of electric shock
during servicing. Service personnel – Do not contact
the following parts while the appliance is energized:
inlet valve(s), drain pump, heat sink of the motor
controller, PCBs.
1Always unplug the appliance from the power
supply before attempting any service. Disconnect
the power cord by grasping the plug, not the cord.
1Before the appliance is removed from service or
discarded, remove the door to prevent children
from playing or hiding inside. Also remove the
power cord/plug.

Safety instructions
5
CHILDREN
1Very young children (0-3 years) should be kept
away from the appliance. Young children (3-8 years)
should be kept away from the appliance unless
continuously supervised. Children from 8 years old
and above can use this appliance only if they are
supervised or have been given instructions on safe
use and understand the hazards involved.
1Do not allow children and pets to play on or in the
appliance.
1Close supervision of children is necessary when
the appliance is used near children.
1Make sure to utilize all child lock/safety function
of the appliance, and be sure to turn the appliance
Off when not in use.
1Cleaning and user maintenance must not be
carried out by children without supervision.
1Keep all laundry aids (including detergent, bleach,
fabric softener, etc.) out of the reach of children.
1To reduce the risk of poisoning or chemical burns,
keep all cleaning products out of the reach of
children.
1Keep pets away from the appliance.
1WARNING! The company denies all liability if and
when these norms are not respected.
DISPOSAL OF PACKAGE MATERIALS
The packaging material is 100% recyclable and is
marked with the recycle symbol
∆
.
The various parts of packaging must therefore be
disposed of responsibly and in full compliance with
local authority regulations governing waste
disposal.
DISPOSAL OF HOUSEHOLD APPLIANCES
This appliance is manufacture with recyclable or
reusable materials. Dispose of it in accordance with
local waste disposal regulations. For further
information on the treatment, recovery and
recycling of household electrical appliances, contact
your local authority, the collection service for
household waste or the store where you purchased
the appliance. This appliance is marked in
compliance with European Directive 2012/19/EU.
Waste Electrical and Electronic Equipment (WEEE).
By ensuring this product is disposed of correctly,
you will help prevent negative consequences for the
environment and human health.
The symbol on the product or on the
accompanying documentation indicates that it
should not be treated as domestic waste but must
be taken to an appropriate collection center for the
recycling of electrical and electronic equipment.

Installation
6
1This user manual should be kept in a safe place for
future reference. If the washer is sold, transferred
or moved, make sure that the user manual remains
with the machine so that the new owner is able to
familiarize himself/herself with its operation and
features.
1Read these instructions carefully, they contain
vital information relating to the safe installation and
operation of the appliance.
Follow these instructions carefully to ensure proper
installation of the appliance and to prevent
accidents when doing laundry.
Unpacking
1. Remove the appliance from its packing.
2. To remove the cushion bottom of the packing
materials, do not tip the appliance over on its
front side. When you lay the appliance down to
remove the carton base, protect the side of the
appliance and lay it down carefully. Never lay the
appliance on its back or front.
3. Make sure that the appliance has not been
damaged during shipping. Make sure you have
received all of the items shown on the next page
(“What’s included”). If the appliance was
damaged during shipping, or you do not have all
of the items. If it has been damaged, contact the
retailer and do not proceed any further with the
installation process.
1WARNING
Packing materials can be dangerous to children.
Keep all packing material (plastic bags, polystyrene.
etc.) well out of children’s reach.
Carrying the appliance
1Don’t do it by yourself alone.
Tilt the appliance backward.
One person stands behind
the appliance and holds the
protruding part of the top
plate, while the other
person holds the bottom of
the appliance in front.
1To prevent personal injury or strain, wear
protective gloves whenever lifting or carrying the
unit.
1When moving the appliance, do not allow the
front of the appliance to contact the trolley frame.

Installation
7
What’s included
Description of the parts
Accessories

Installation
8
Removing the transport bolts
1
CAUTION
DAMAGE TO THE APPLIANCE OR INJURY POSSIBLE
The appliance is secured for transport with
transport bolts. Transport bolts that are not
removed can damage the drum during operation
of the washer, the appliance will vibrate, and it
will be much noisier during spin cycles if the
transport bolts are not removed before use. Be
sure to remove all 4 transport bolts completely
before first use. Keep the transport bolts. If a
pedestal was purchased with the appliance, it
must be installed first, prior to removing the
transport bolts. Please consult the pedestal
installation instructions.
In order to prevent transport damage during later
transport, be sure to re-install the bolts before
transport.
1. Undo the four transport bolts Aby the wrench
(supplied) and remove them.
2. Remove the four spacer tubes B. During the
removal of the bolts occasionally spacer tubes
fall inside the machine, these can be remove by
tilting the machine forward and recovering them
from the floor or inside the base of the machine.
3. Cover the open transport bolt holes with the four
cover caps C which will find in the plastic bag
containing the accessories.
Keep all the parts in safe place: you will need them
again if the washer needs to be moved to another
location.
NOTE
Transport the washer for the prevention of
breakage as below:
- The transport bolts are reinstalled.
- The power cord is secured to the back of the
washer.
Choosing the right location
●Locations requirement
- The machine should be installed on the solid and
flat floor, never put the machine on the soft
carpet or on the wood floor. Do not install the
machine on the homemade plinth, if the
installation location cannot be changed, the
plinth must be improved as required, such as
enlarge the size, secure with brackets. Never put
the machine on the separate brackets. It is
possible the machine moves a little by the factors
of overloading, situation of the plinth (wet) and
so on, so it will on risk the machine falls down
from the plinth after working for a period of
time.
- Keep the environment dry and vented.
- The appliance must be installed and operated in
a room with the drain
- Never put small appliance, such as microwave
oven; and/or jar cooker, on the machine.
- Keep the machine away from the flaming
equipment, such as candle; cooking stove;
liquefied gas container etc.
- Never put the pressure containers on the
machine.
- Never put the machine over the opening of an
uncovered drainage.
●Clearance requirement
- Install the appliance with easy access to the
power plug and socket.
- Install the appliance where there is enough space
around it.
(a) 3cm or more
above
(b) 5cm or more
behind
(c) 5cm or more on
the left side
(d) 5cm or more on
the right side
(e) 70cm or more
1CAUTION: Do not let metallic portions of the
appliance come into contact with metal sinks or
other appliances.

Installation
9
Leveling the Appliance
Importance of leveling the appliance
The appliance uses high spin speeds to remove
water at the end of the wash cycle. It is important
that the appliance is level and that the appliance
feet press with equal pressure against the floor. This
will help assure the quietest, most vibration-free
use of the appliance.
Follow these steps:
1. Install the appliance on a level and solid surfaces.
Preferably in a corner of a room.
2. If the floor is uneven (or out of level), adjust the
appliance feet as required to level the appliance.
Do not place anything under the appliance feet
to help level the appliance.
3. Extend the appliance feet no more than is
necessary. The more the feet are extended, the
more vibration the appliance will experience.
Start with the appliance feet turned all the way in
and adjust each foot as necessary.
4. Use a bubble level (no supplied) to check the top
of the appliance to make sure it is level side to
side and front to rear.
5. Press down on each corner of the appliance top
to make sure the appliance doesn’t “wobble”.
There should be no “give” or movement. All the
appliance feet should press equally against the
floor. This is just as important as the appliance
being level to prevent vibration.
6. When the appliance is level and does not wobble,
lock the appliance feet in place by tightening the
locknuts against the washer bottom. Be sure to
do this without changing the height of the foot
(hold the foot while tightening the locknut)
Procedure for adjusting the appliance feet:
1. After determining which the appliance feet need
to be extended, have someone lift up on the
appliance slightly to take pressure off the foot to
be adjusted.
2. Turn the appliance foot to extend it downward as
far as necessary to raise the corner of the
appliance the correct amount to level the
appliance.
3. When the height of the foot is correct, use the
wrench (supplied) to tighten the locknut against
the appliance bottom to lock the foot in place.

Installation
10
Connection the water supplies and
electricity
Connecting the water inlet hose
1. Connect one end of the water inlet hose to a cold
water tap and tighten by hand (see figure). Before
performing the connection, allow the water to run
freely until it is perfectly clear.
2. Connect the other end of the water inlet hose to
the water inlet valve on the rear of the appliance
and tighten by hand.
3. Turn on the tap slowly and make sure there are
no leaks.
1Do not twist, squash, modify or cut the hose.
1Tighten the end of the hose firmly by hand.
1The supply water pressure must be in the
0.03—1.0MPa range. If the water pressure exceeds
this value, please fit a pressure reducing valve.
1If the hose is not long enough, contact a
specialized shop or an authorized technician.
1Never use second-hand water inlet hose.
1Use the new water inlet hose supplied with the
appliance
Connecting the drain hose
Height of drain point
Height difference between the floor and drainage
point: min. 60cm(24 in.) and max. 100cm(39 in.).
Types of drainage hookups
■Standpipe
Attach the drain hose to the elbow (no supplied,
available from our Customer Service Department).
Position the elbow on the drain hose 4" (100mm)
from end of the hose as shown. Insert this section
of the drain hose into the drain pipe, If the hose is
pushed down too far, this may cause the washer to
self-syphon ie. continuously empty as it is filling.
Secure the elbow and hose with a cable tie to keep
the hose from coming out of the drain pipe during
use.

Installation
11
■Sink siphon
Secure the drain hose to the sink siphon using a
Ǿ0.9-1.6 in.(20-44mm) hose clip (available from a
hardware store).
■
Wash Basin
1
WARNING
SCALDING
When washing at high temperatures, there is a risk
of scalding if you touch hot suds, e.g. when
pumping out hot suds into a wash basin.
Do not reach into the hot suds.
Notice: Appliance damage/ damage to textiles
If the end of the drain hose touches the discharged
water (water drained from washer), it (the
discharged water) can be sucked back into the
washer and may damage the appliance or textiles.
Make sure that:
There is no stopper in the sink drain.
The end of the drain hose does touch the
discharge water.
The sink drain is free flowing and not partially
clogged.
Attach the drain hose securely to the wash basin.
1Do not twist, pull out or bend the drain hose.
1Secure the drain hose with the cable tie to the
drain pipe, wash basin, etc., so the hose does not
pull out from the force of the water.
1We advise against the use of drain hose
extensions; in case of absolute need, the extension
must have the same diameter as the original hose
and must not exceed 250cms in length.

Installation
12
Electric connection
Before plugging the washer into the mains socket,
make sure that:
The socket is earthed and in compliance with the
applicable law.
The socket is able to sustain the appliance’s
maximum power load indicated on the Technical
Date Plate fixed on the machine.
The supply voltage is included within the values
indicated on the Technical Date Plate fixed on the
appliance.
When heating, the maximum current of the
appliance is 10A, so please make sure that the
power supply system (voltage, current and the
cable) is applicable to the load of the applied
appliance.
The socket is compatible with the washer’s plug.
If this is not the case, replace the socket or the
plug by a qualified electrician.
1
WARNING----THIS APPLIANCE MUST BE EARTHED.
THE FOLLOWING OPERATIONS SHOULD BE
CARRIED OUT BY A QUALIFIED ELECTRICIAN.
Replace the supply cable:
If the supply cord is damaged, it must be replaced
with an identical one by the manufacturer, its
service agent or similarly qualified persons in order
to avoid a hazard – risk of electric shock.
Disposing of the plug:
Ensure that before disposing of the plug itself, you
make the pins unusable so that it cannot be
accidentally inserted into a socket.
Disposing of the appliance:
When disposing of the washer please remove the
plug by cutting the mains cable as close as possible
to the plug body and dispose of the plug as
described above.
1The appliance is not intended to be operated by
means of an external switching device, Such as a
timer, or separate remote controlled system.
1When the appliance is installed, the mains socket
must be within easy reach.
1Do not use extension cables, multiple sockets or
adapters.
1To remove the plug from the socket, grasp the
plug firmly and pull it out. Do not pull at the cable.
1The electrical components must not be accessible
to the user after installation.
1Do not connect the machine to electrical outlets
while your hands are wet or damp.
1Do not operate this appliance when you are wet or
barefoot.
1Do not operate this appliance if it has a damaged
power cable or plug, if it is not working properly, or
if it has been damaged or dropped.
1WARNING! The company denies all liability if and
when these norms are not respected.
Technical date
Model T351410MLW
T35148MLW
Rated washing
capacity (kg) 10.0 8.0
Rated voltage
220~240 V
220~240 V
Rated frequency
50Hz
50Hz
Rated power (W)
2000
2000
Washing noise
level (dB) 62 62
Spinning noise
level (dB)
76 76
Spin speed (rpm) 1400 1400
Water pressure
(MPa) 0.03
~
1.0 0.03
~
1.0
Degree of
waterproof
IPX4 IPX4
Net weight (kg) 65 60
Outer dimension
(WxDxH mm) 600X577X847 600X520X847

Description of the appliance
13
Control panel
A---WASH CYCLE SELECTOR knob:Used to set the
desired wash cycle (see “Table of wash cycles”).
OFF position : Turn the Linear mark on the
wash cycle selector knob under the symbol ““ to
switch the machine off. If the machine is switched
off during a wash cycle, this wash cycle will be
cancelled.
B---TEMP.button: Press to change the water
temperature for the current cycle. There are five
temperature values on the display. When a
temperature value is selected, the corresponding
temperature value indicator light illuminated on the
display.
C---SPEED button: Press to change the spinning
speed for the current cycle. There are five spinning
speed values on display. When a spinning speed
value is selected, the corresponding spinning speed
value indicator light illuminated on the display.
CHILD LOCK function : When the cycle is
running, long press the SPEED button for 3
seconds to set or cancel the Child lock function.
For a detailed description, see→Various cycles and
functions.
Cancelling the buzzer:
Press and hold the SPEED button and ONE TOUCH
button together at the same time for at least 3
seconds, you can turn off the buzzer that sounds
during the washing cycle running.
For a detailed description, see→Various cycles and
functions.
D---STEAM button: Press to set the STEAM wash
cycle.For a detailed description, see →Various
cycles and functions.
E---RINSE button: Press to change the rinse count
for the current cycle, the changed rinse count
appears on digital display.
F---DELAY END button: Press to set the program end
(Delay end) time.
For a detailed description, see→Various cycles and
functions.
G---ONE TOUCH button: Press to set the ONE
TOUCH wash cycle.
For a detailed description, see→Various cycles and
functions.
H---START/PAUSE button: Long press the button
to start or pause a wash cycle.
Add clothes during the program is running:
Once the cycle has begun, if you want to pause the
wash cycle, please long press the button again. If
the DOOR LOCK indicator light is off, the door
may be opened, you can add or take out laundry.
To start the wash cycle from the point at which it
was interrupted, press the button again.
For a detailed description, see→Various cycles and
functions.

Preparing and sorting the laundry
14
M---Display
1---Temperature indicator
When a program is selected, the default
temperature value indicator light of this
program will be lit on the display.
You can change the temperature value
by pressing the TEMP. button. There are
five temperature values indicator lights
on the display. When a temperature
value is selected, the corresponding
temperature value indicator light will be
lit on the display. If all temperature value indicator
lights are off, it indicates the appliance using only
cold water without utilized the heater in this
program.
2---SPINNING SPEED indicator
When a program is selected, the
default spinning speed value indicator
light of this program will be lit on the
display.
You can change the spinning speed
value by pressing the SPEED button.
There are five spinning speed values
indicator lights on the display. When a
spinning speed value is selected, the corresponding
spinning speed value indicator light will be lit on the
display. If all spinning speed value indicator lights
are off, it indicates the appliance does not spin after
the final drain process in this program.
3---DOOR LOCK indicator
The lit indicator light indicates that the
door is locked. To prevent any damage,
wait until the indicator light turns off
before opening the door.
To open the door while a cycle is in progress, press
the START/PAUSE button, if the DOOR LOCK
indicator light is off, the door may be opened.
4---CHILD LOCK indicator
The lit indicator light indicates the CHILD
LOCK function is activated, the control
panel is locked.
5---DELAY END indicator
The lit indicator light indicates the DE LAY
END function is activated. The countdown
to the end of the selected wash cycle will appear on
the digital display.
6---ONE TOUCH indicator
The lit indicator light indicates the One
Touch wash program is selected. There are three
ways to set the O ne To uch wash program.
7---RINSE COUNT indicator
When the indicator light is lit, you can
select the rinse count, the selected rinse
count will appear on the digital display.
8---DIGITAL DISPLAY
1) Remaining time of
the wash cycle
2) Delay end time
3) Rinse count
4) Fault code
The display is useful when programming the machine and provides a great deal of information.

Preparing and sorting the laundry
15
Preparing the laundry
Notice: Damage to the washer/fabric
Foreign objects (e.g. coins, paper-clips, needles,
nails) may damage the laundry or components in
the appliance.
Therefore, note the following tips when preparing
your laundry:
Remove any loose
items or metal objects,
such as safety pins,
paper clips, etc. from
the laundry.
Brush sand, coins, etc. out of pocket and cuffs.
Close zips and button
up cushion covers,
duvet covers, etc.
Remove curtain runners, or secure them in a net
bag.
Particularly delicate items; such as tights or lace
curtains, or smaller
items, such as tiny
socks or handkerchiefs,
should only be
washed in a net bag or
pillow case.
Some items are best
turned inside out.
These included
knitwear, trousers,
T-shirts and
sweatshirts.
Make sure that the wire-cup bras are machine
washable.
!
Make sure that wire-cup bras in a pillow case
which can be securely closed with a zip or button.
If the wire works itself out of the cup it may fall
through the holes of the drum and cause
extensive damage.
Sorting the laundry according to
colour and degree of soiling
Sort laundry items according to color, degree of
soiling and recommended wash temperature range.
Items of clothing can become discoloured.
Never wash new muti-coloured items together
with other items.
Wash white items separately from colored items.
Otherwise, white items may tend to become
grey.
Degree of soiling
Light soiling
No visible soiling or stains, but may have
absorbed some odor. This could include light
weight summer clothes such as T-shirts, shirts, or
blouses worn only once. Also to freshen bed
linen or guest towels
Normal soiling
Visible soiling and/or a few light stains. This could
include clothing such as T-shirts, shirts, or
blouses that nave been sweated in or worn
several times. Also tea towels, hand towels or
bed linen used for up to one week or more.
Curtains without stains that have not been
washed for up to a half year.
Heavy soiling
Visible soiling and stains. This could include
kitchen towels, fabric napkins, baby bibs,
children’s outer clothing or football jerseys and
shirts stained with grass or dirt. It could also
include working clothes such as overalls and
jeans and other clothing worn for outside work
and activities.

Preparing and sorting the laundry
16
Sorting laundry according to their care label specifications
The symbols on labels of your garments will help you in choosing the suitable wash program, the right
temperature, wash cycles, and ironing methods. Don’t forget to give a glance to these useful indications!

Various cycles and functions
17
Table of wash cycle
L=gel-/liquid detergent P=Powder detergent O=Optional ---=No
If using liquid detergent, it is not recommended to activate the time delay.
Please follow the dosage recommendation on the powder or liquid detergent package.
Wash cycle
Tem p .
℃
(Max)
Max.Load (kg) Description
Kind of detergent
Detergents softe
ner
Universal Special
Mix 60 10 8
For washing lightly to normally
soiled mixed load of cotton and
synthetic fabrics, white and
colored items together
L / P --- O
Cotton 60 10 8
For daily items of cotton, linen
and cotton blends
L / P --- O
Anti-Allergy 85 3 3
For clothes that need to remove
mites and allergens.
L / P --- O
Wool 40 1 1
For machine washable wool and
wool blend clothes --- L / P O
Baby Care 85 5 5
acycle designed for dirt typical
of children’s garments in that it
effectively removes any traces of
residual detergent
L / P L O
Shirts 60 3 3 For shirts and women’s blouses L / P L O
Bedding 60 6 6 For large items such as blankets,
curtains and bedspreads L / P --- O
Eco40-60 40 10 8 Energy efficiency test program L / P --- O
20℃20 3 3 For 20℃washing L / P --- O
Quick Wash 40 1 1
For small amount or lightly
soiled garments that you want
to finish washing quickly
L / P --- O
Underwear
60
5
5
For underwear.
L / P
L
O
Down Jacket 40 2 2
For down jacket which can be
washed by machine
--- L / P O
Rinse +Spin --- 10 8
Combines a rinse and spin for
loads requiring an additional
rinse cycle. Also use for loads
that require rinsing only
--- --- O
Spin --- 10 8
This cycle uses a spin to shorten
drying times for heavy fabrics or
special-
care items washed by
hand
--- --- ---
Drum clean 85 --- ---
Clean the drum by removing dirt
and bacteria from the drum.
Make sure the drum is empty
--- --- ---
M-Smart 40 5 5
Special cycle which can be
started simply by pressing the
ONE-TOUCH button.
L / P --- O

Various cycles and functions
17
We recommend by using:
Laundry powder 20℃to 80℃
Wool detergent 20℃to 40℃
This manual suits for next models
1
Table of contents
Other THOR Washer manuals

