Tibo TI430 User manual
User Guide
TI430 CD-Player
Turn it back on
Please read this user manual carefully before using your TI430 CD-Player system and retain for future reference.


3
Turn it back on
3
Turn
it
back
on
CONTENTS
SAFETY
Safety precautions . . . . . . . . . . . . . . . . . . . . . . . . . . . . . . . . . . . . . . . . . .4
Important safety instruction . . . . . . . . . . . . . . . . . . . . . . . . . . . . . . . . . . .5
INCLUDED IN THE BOX . . . . . . . . . . . . . . . . . . . . . . . . . . . . . . . . . . . . . . . . . . . . . .6
SETTING UP THE SYSTEM . . . . . . . . . . . . . . . . . . . . . . . . . . . . . . . . . . . . . . . . . . . .6
REMOTE CONTROL
Installing batteries . . . . . . . . . . . . . . . . . . . . . . . . . . . . . . . . . . . . . . . . . .7
Using the remote control . . . . . . . . . . . . . . . . . . . . . . . . . . . . . . . . . . . . .7
Remote control functions . . . . . . . . . . . . . . . . . . . . . . . . . . . . . . . . . . . . .8
CD PLAYER
Front panel. . . . . . . . . . . . . . . . . . . . . . . . . . . . . . . . . . . . . . . . . . . . . . . .9
VFD display . . . . . . . . . . . . . . . . . . . . . . . . . . . . . . . . . . . . . . . . . . . . . . .9
On/Off and standby . . . . . . . . . . . . . . . . . . . . . . . . . . . . . . . . . . . . . . . . .9
Load a disc . . . . . . . . . . . . . . . . . . . . . . . . . . . . . . . . . . . . . . . . . . . . . . .10
Play a disc . . . . . . . . . . . . . . . . . . . . . . . . . . . . . . . . . . . . . . . . . . . . . . .10
Pause a disc . . . . . . . . . . . . . . . . . . . . . . . . . . . . . . . . . . . . . . . . . . . . . .10
Stop/Clear . . . . . . . . . . . . . . . . . . . . . . . . . . . . . . . . . . . . . . . . . . . . . . . .10
Previous/Next. . . . . . . . . . . . . . . . . . . . . . . . . . . . . . . . . . . . . . . . . . . . . .11
Forward/Rewind. . . . . . . . . . . . . . . . . . . . . . . . . . . . . . . . . . . . . . . . . . . .11
Random playback . . . . . . . . . . . . . . . . . . . . . . . . . . . . . . . . . . . . . . . . . .11
TECHNICAL DATA . . . . . . . . . . . . . . . . . . . . . . . . . . . . . . . . . . . . . . . . . . . . . . . . . . .12
TROUBLE SHOOTING. . . . . . . . . . . . . . . . . . . . . . . . . . . . . . . . . . . . . . . . . . . . . . . .13
INDEX . . . . . . . . . . . . . . . . . . . . . . . . . . . . . . . . . . . . . . . . . . . . . . . . . . . . . . . . .14
CONTACTS . . . . . . . . . . . . . . . . . . . . . . . . . . . . . . . . . . . . . . . . . . . . . . . . . . . . . . . .15

4
Turn it back on
A triangle with a
lighting symbol draws
the user’s attention to
“dangerous voltage”
without insulation in the cabinet,
which may be high enough to
entail a risk of an electric shock.
A triangle with an ex-
clamation mark draws
the user’s attention to
important instructions
for use and maintenance in the ac-
companying manual, which should
be studied and adhered to.
The symbol for a
CLASS II (double
insulation) product.
Safety precautions
Warning:
To minimise the risk of re or electric shock, do not expose the unit to liquid or moisture. Do not open the cabinet
as it contains dangerous voltages. Only qualied technicians are allowed to carry out repair and service of this
system.
If the plug of the power cord needs to be replaced. It is important that the replacement is identical to the plug that
needs to be replaced, or that the new plug has been recommended by the manufacturer.
Caution:
To avoid electric shock, it is important to insert the plug correctly into the wall outlet.
Warning:
It is important that you read and observe both the instructions in this manual and the instruction on the unit.
Keep this manual for safe future reference. This unit was designed and manufactured with a view to providing
maximum safety for the user. Incorrect use of the unit may cause an electric shock or re. The protection devices
built into this unit will protect the user if the procedures below are observed in connection with installation, use
and repair. This unit is fully electronic and contains no parts that can be repaired by the user.
Do not remove the covers. Risk of dangerous voltage. Only qualied technicians are allowed to repair the unit.
Important safety instructions
Read the manual
After unpacking the unit, please read the manual care-
fully and observe all the instructions given.
Power supply
Only the power supply indicated on the rating plate
must be used for this unit. If you are not sure which
power supply you have, please contact your local
dealer.
Earthing or polarisation
If the plug cannot be inserted properly into the
socket, or if the plug does not t, the unit must not be
used in your country.
Ventilation
The cabinet is provided with slots and openings to
ensure ventilation and reliable operation to protect the
unit against overheating. Do not block or cover these
openings. The openings must never be blocked, for
instance by placing the unit on a bed, a sofa, a carpet
or similar surface.
Heat
Do not place the unit near sources of heat such as
radiators, ovens or other units that produce heat.
Water and moisture
The unit must not be placed close to water, such
as bathtub, wash basin, kitchen sink or washing
machine, in a damp cellar or close to a swimming
pool, etc.
Cleaning
Unplug the unit before cleaning. Do not use liquid de-
tergents and aerosol cleaning agents. Use a dry cloth.
Power cords
Wiring must be organised to prevent people from step-
ping on the cables and to avoid pinching by objects
placed on or beside them. Take special care around
sockets and plug boxes and where the power cords
leave the unit.
Lightning
Unplug the unit for additional protection during storms
or when the unit is not used for prolonged periods.
This will prevent damage to the unit from lightning and
power surges.
SAFETY

5
Turn it back on
Important safety instructions
SAFETY
Penetration of objects and liquid
Never push any foreign objects through the openings into the unit, as they may touch dangerous voltage points
or short-circuit parts and cause re or an electric shock. Do not spill liquid onto the unit.
Accessories
Do not place the unit on unstable surfaces such as a trolley, stand, tripod, shelf or table. The
unit may fall and cause serious injury to persons or damage to the unit. Use only trolley, stand,
tripod, shelf or table that is very stable or provided with the unit. The unit must be installed in
accordance with the manufacturer’s instructions and by means of installation equipment recom-
mended by the manufacturer. If the unit is placed on a trolley, the trolley must be moved very
carefully. Sudden stops, unnecessary force and uneven surfaces may cause the trolley to turn
over.
Loads
Do not place heavy loads on the unit and do not step on it. The load may fall and cause serious injury to persons
or damage to the unit.
Damage
Unplug the unit and contact qualied technicians in the following cases:
A. If the power cord or the plug is damaged.
B. If liquid has been spilled on the unit or objects have
fallen into the unit.
C. If the unit has been exposed to liquid or moisture.
D. If the unit does not work properly after adhering to the instructions in the operation manual. Only the settings
described in the operation manual must be made as incorrect setting may result in damage and often will
make it difficult for a qualied technician to make the unit work properly again.
E. If the unit has been dropped or damaged in any other way.
F. When the operation of the unit changes drastically, the unit requires service.
Service
Do not attempt to carry out any service work by yourself. By opening or removing the cover, you will be exposed
to dangerous voltage or other hazards. Any service work should be carried out by qualied technicians.
Recycling
If at any time in the future you need to dispose of this product please note that waste electrical
products should not be disposed of with household waste. Please recycle where facilities exist.
Check with your Local Authority or retailer for recycling advice.
Approval
This product complies with European Low Voltage and Electromagnetic Compatibility Directives
when used and installed according to this instruction manual.

6
Turn it back on
Please save your packaging as you will need this in the event of warranty/service repair or support. We are
unable to carry out warranty/service if you are unable to package it correctly. The safest way to package your
item in the event of warranty/service repair is in it’s original box/packaging.
INCLUDED IN THE BOX
SETTING UP THE SYSTEM
Accessories
Included with this TI430 CD-Player system are the following accessories:
Box 1
1 x User Manual1 x TI430 CD-Player
1 x Main Plugs 1 x RCA Audio Cables
1 x Remote Control
(2 x AAA batteries included)
User Guide
TI430 CD-Player
Turn it back on
Pleaseread this user manual carefully before using your TI430 CD-Player system and retain for future reference.
1. Stereo output: Analogue stereo output. For connection to the TI430 BT/AMPLIFIER or other amplier.
2. AC input: For connection of the mains input. Make sure that the plug has been correctly inserted into the wall
outlet.
CD Player
TI 430 CD-PLAYER
1 2
7
Turn it back on
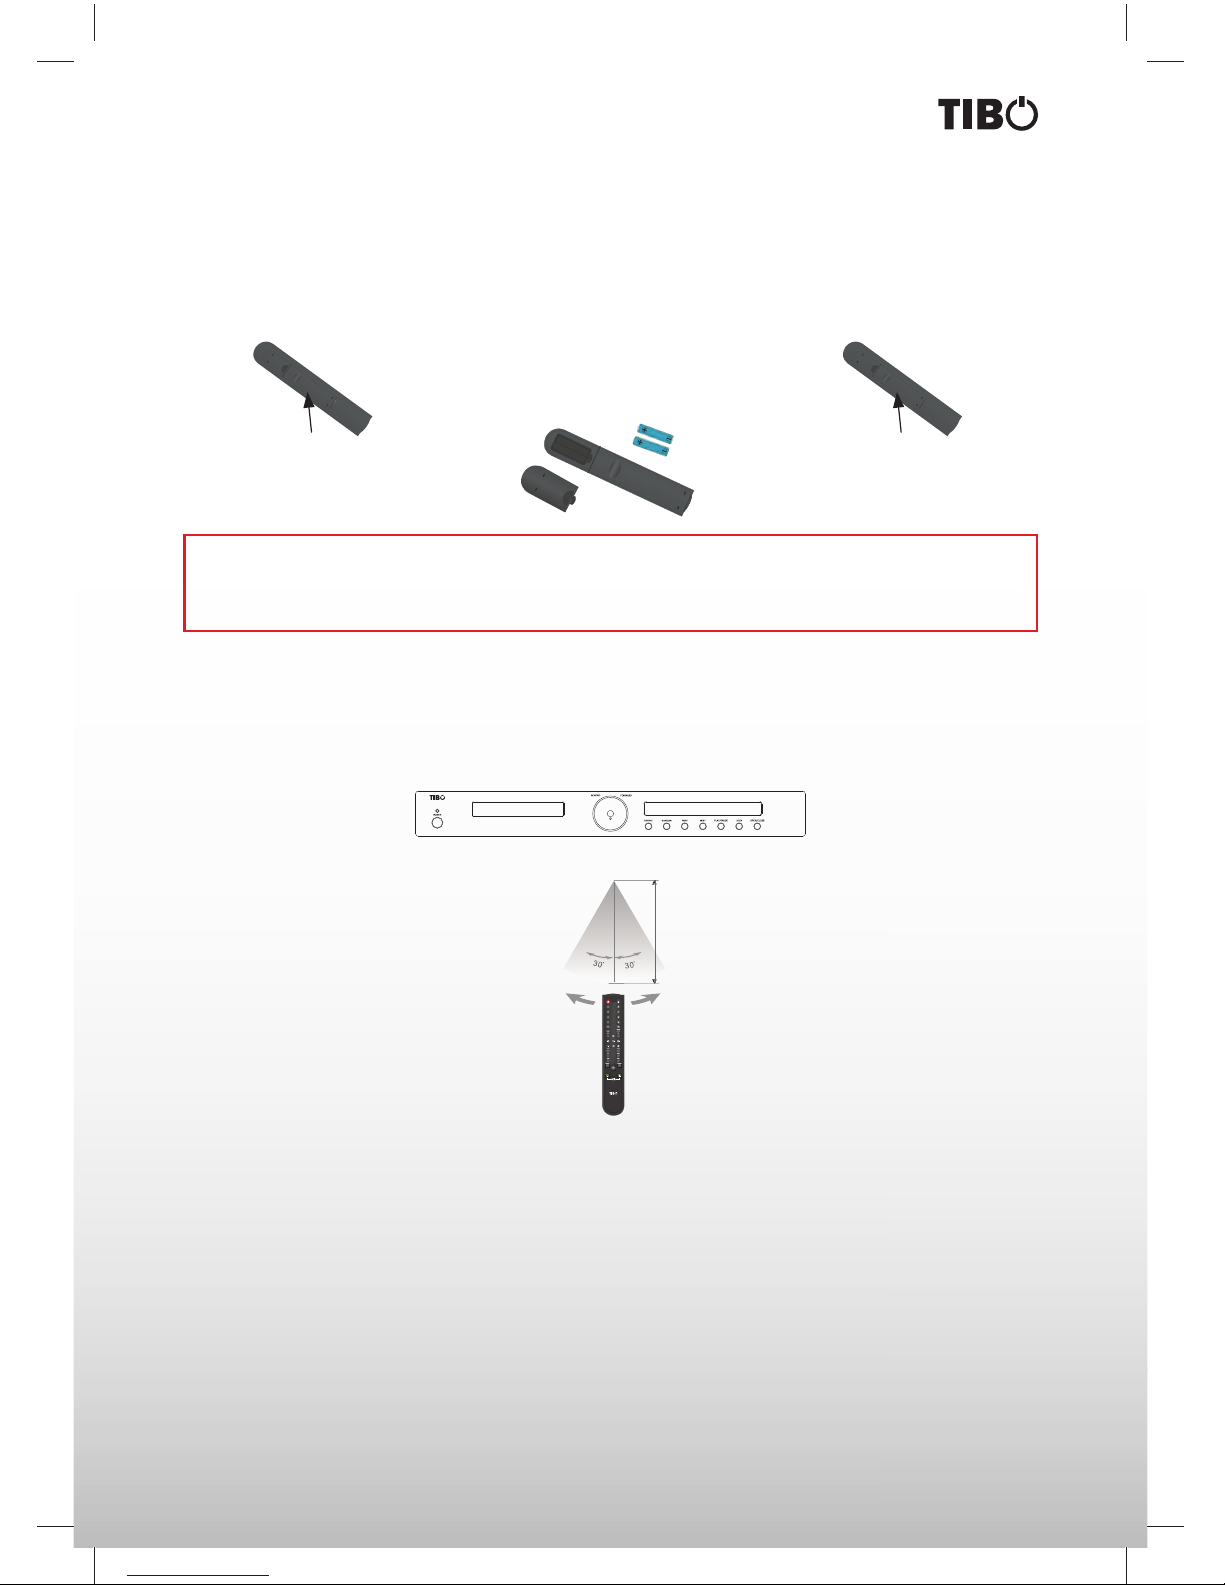
1. Remove the cover as illustrated. 2. Position two batteries of
the type AAA in the battery
compartment. Make sure that
the polarity of the batteries is
correct (see drawing at bottom
of the remote control).
3. Replace the cover.
Installation of batteries
Using the remote control
Direct the remote control at the sensor on the front panel of the unit. When the remote control signal is received,
the unit reacts accordingly. The remote control works within a range of 6 meters.
Sometimes the remote control does not work well in strong light.You may have to move the unit if it is a problem.
Malfunction may occur if other remote controls are used near the unit.
Do not place any objects on the remote control, as the batteries may become at if a key is depressed constantly.
Make sure that there are no obstacles between remote control and the unit.
Do not position the unit behind tinted glass as it may reduce the maximum range of the remote control.
TI 430 CD-PLAYER
Maximum 6m
REMOTE CONTROL
Note:
A) Do not mix new and old batteries and do not use different types of batteries.
B) If the remote control is not used for prolonged periods, remove the batteries from the remote control to
avoid corrosion.

8
Turn it back on
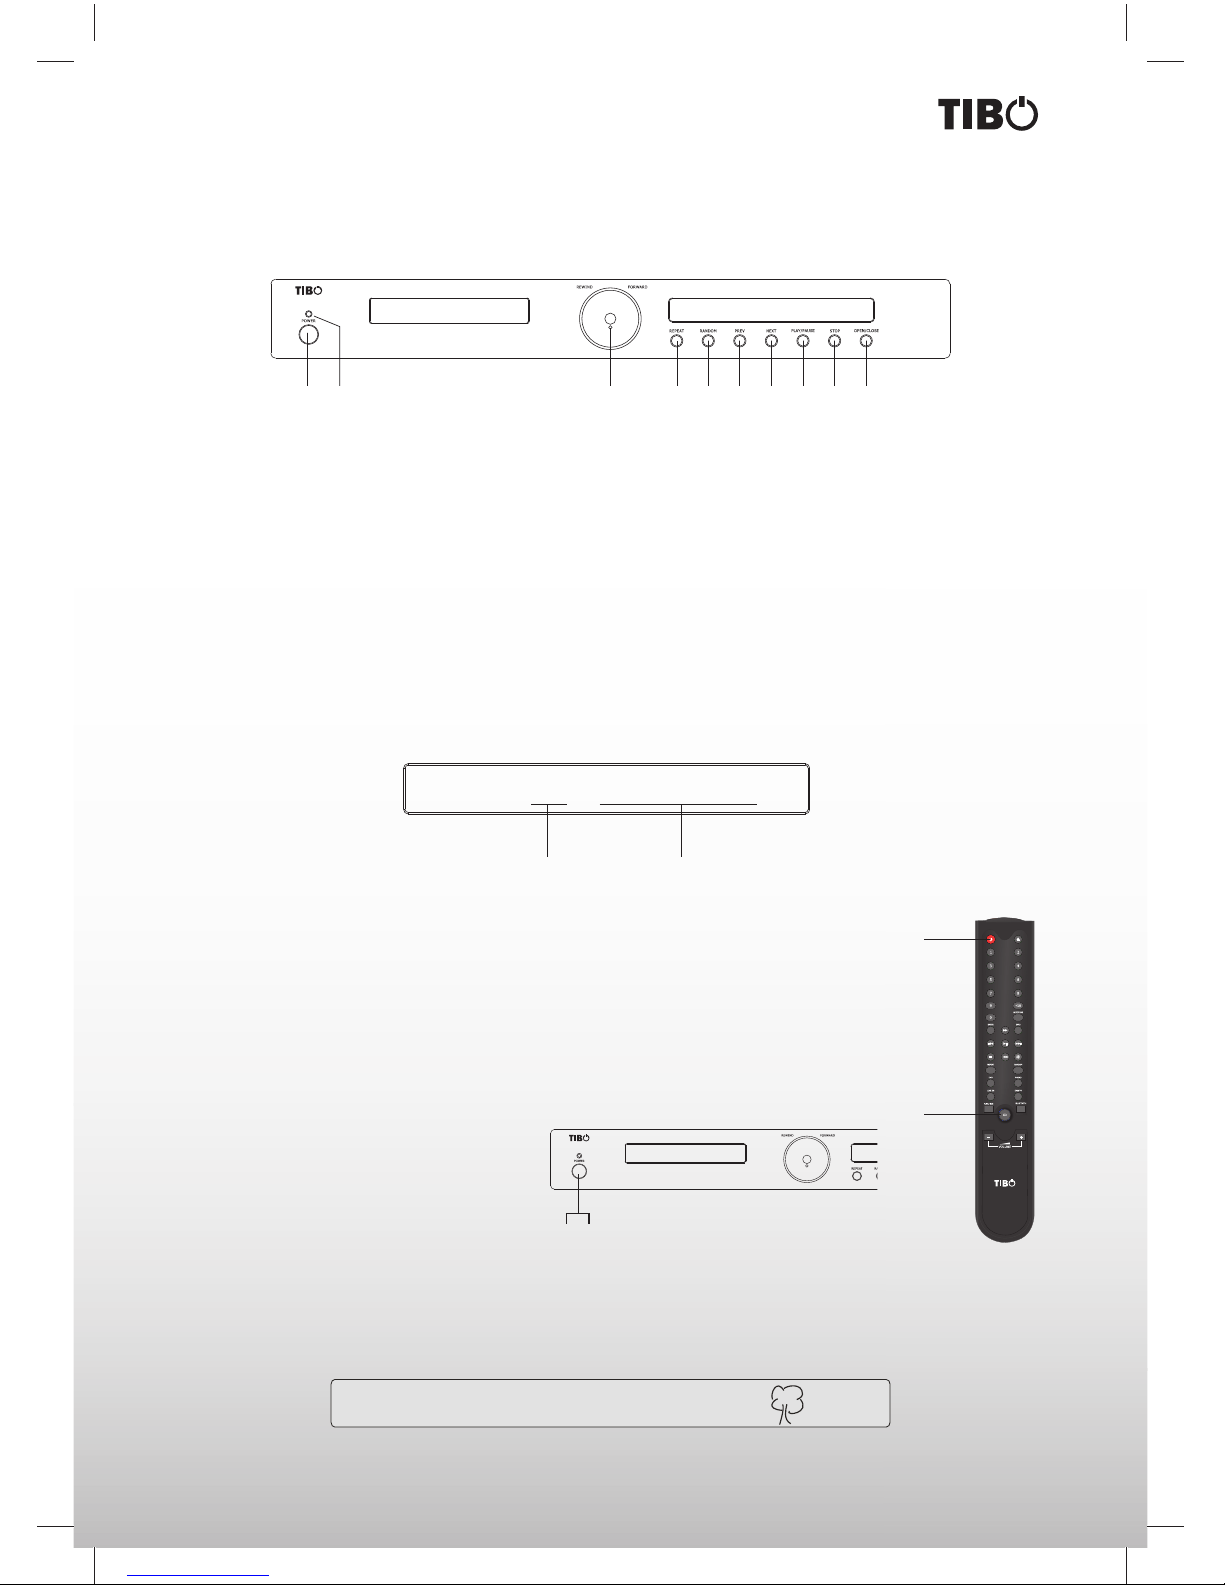
Remote control functions
113
2
14
315
16
4
175
6
10
18
7
11
19
8
22
25
20
23
9
12
21
24
1. Power: Sets TI430 BT/AMP, TI430 CDP, TI430 DAB/FM into
standby.
2. 0-9 digits: Selects tracks on the TI430 CDP and pre-set
stations on TI430 DAB.
3. Fast forward: Fast forward playback.
4. Enter: For TI430 DAB only. Conrms selection.
5. Previous: Select the previous track.
6. Stop: Stop playback.
7. Fast rewind: Rewinds playback.
8. Repeat: Repeat a single or all tracks on CD disc.
9. DVD: To activate the DVD source.
10. Line-in: To activate the Line-in source.
11. Function: Enters the menu on the TI430 BT/AMP.
12. Volume decrease: turns down the volume.
13. Eject: Opens and closes the disc tray on the TI430 CDP.
14. +10: Use this button along with the 0-9 digits to select tracks
on the TI430 CDP and pre-set stations on TI430 DAB above
10. For example press the +10 button and the 5 digit to select
track 15 on a disc.
15. Autotune: Press once to automatically tune for a station at a
higher frequency TI430 DAB.
16. Info: Displays the RDS and DAB information for the tuner.
17. Next: Selects the next track on.
18. Play/Pause: Starts and pauses playback.
19. Mute: Mutes the sound.
20. Random: All tracks are played in a random order for TI430
CDP only.
21. Phono: To activate the phono function.
22. DAB/FM: To activate the TI430 DAB and FM function.
23. Bluetooth: To activate the Bluetooth audio function.
24. CD: To activate the TI430 CD Player and the TI430 AMP on
and selects the CD input on the TI430 BT/AMP.
25. Volume increase: Turns up the volume.
REMOTE CONTROL
Some of the functions of the unit can only be performed by means of the remote control. Some functions are
connected with the selected signal input source. Some buttons on the remote control may therefore not be
available if the corresponding signal input source has not been selected.
9
Turn it back on
Explanation of VFD (Vacuum Fluorescent Display)
This unit does not feature any OSD (On Screen Display). Instead it features a more descriptive VFD display that
displays all information required. Below you can see a picture of the display and an explanation of the various
symbols.
Front panel
TI 430 CD-PLAYER
13759248610
1. Mains switch: Used to turn On/Off the mains power.
2. LED indicator: No lights when the CD-Player is turned On. Blue light in standby mode.
3. Rewind/Forward: Fast forward and reverse.
4. Program: Play the tracks of a CD in a programmed order.
5. Random: Play tracks on a CD in a random order.
6. Previous: Selects the previous track.
7. Next: Selects the next track.
8. Play/Pause: Starts playback when pressed once and pauses playback when pressed again.
9. Stop: Stops playback completely.
10. Open/Close: Opens and closes the CD tray.
CD 12-12-59:47
Track number Track time
On/Off and standby
1. Turn On the unit by pressing the mains switch.
2. Press the standby button on the remote control to switch the unit into standby mode. The
display will turn Off and all functions will be reduced to a minimum to make sure that the
unit uses minimal power. When in standby mode the unit only reacts to the CD button on
the remote control (3).
3. If you want to turn Off the unit to avoid any power consumption, you must press the mains
switch.
Protect the enviroment and turn Off the unit after use.
CD-PLAYER
2
3
TI 430 CD-PLAYER
CD 12-12-59:49
3
1

10
Turn it back on
Load a disc
If you want to play a disc, you must load a CD. You do this by pressing the eject button the remote control or on
the front panel of the CD player. When the disc has been read, the display will show the number of tracks on the
disc and the total playback time.
If there is no disc in the tray, the message No Disc will be displayed. If the unit has trouble reading a disc, you
must check if the disc is clean and free from dirt and scratches. If the disc is still not playing, you must contact
your dealer.
Play
Press the Play/Pause button on the remote control or on the front panel once to start playback. The counter on
the left side of the display will start to count upwards.
CD 12-12-59:47
CD 12-12-59:47
NO DISC
CD-PLAYER
Pause a disc
Press the Play/Pause button once more to stop playback. The counter on the left side of the display will start to
blink. To continue playback, press the Play/Pause button again.
Stop/Clear
To stop playback completely press Stop button once. The display will again display the number of tracks on
the disc and the total playback time. When the stop button is pressed all previous programming settings will be
deleted.
11
Turn it back on
CD-PLAYER
Previous/Next
When a CD track is being played it is possible to switch to the previous track or to the next track. If you want
to continue to the next track, you must press the >>| (next) button on the remote control or on the front panel
once. If you want to move on several tracks, you must press >>| until you reach the desired track. If you want to
go back to one of the previous tracks, you must use the same procedure but not the same button. Use the |<<
(previous) button instead.
Forward/Rewind
It is possible to perform a search in the track played. If you want to search forward, press the >> (forward) button
on the remote control until you get to the part of the track that you wish to hear, then press play. You will see that
the time counter in the display counts up very quickly.
To increase the search speed press 2 or 3 times on the >> button.You will see that the information on the display
changes between >, >> and >>>, which indicates the speed.
If you wish to search backward use the same procedure as forward, but use the << (rewind) button instead.
It is possible to activate the search function by turning the Rewind/Forward button on the front panel.
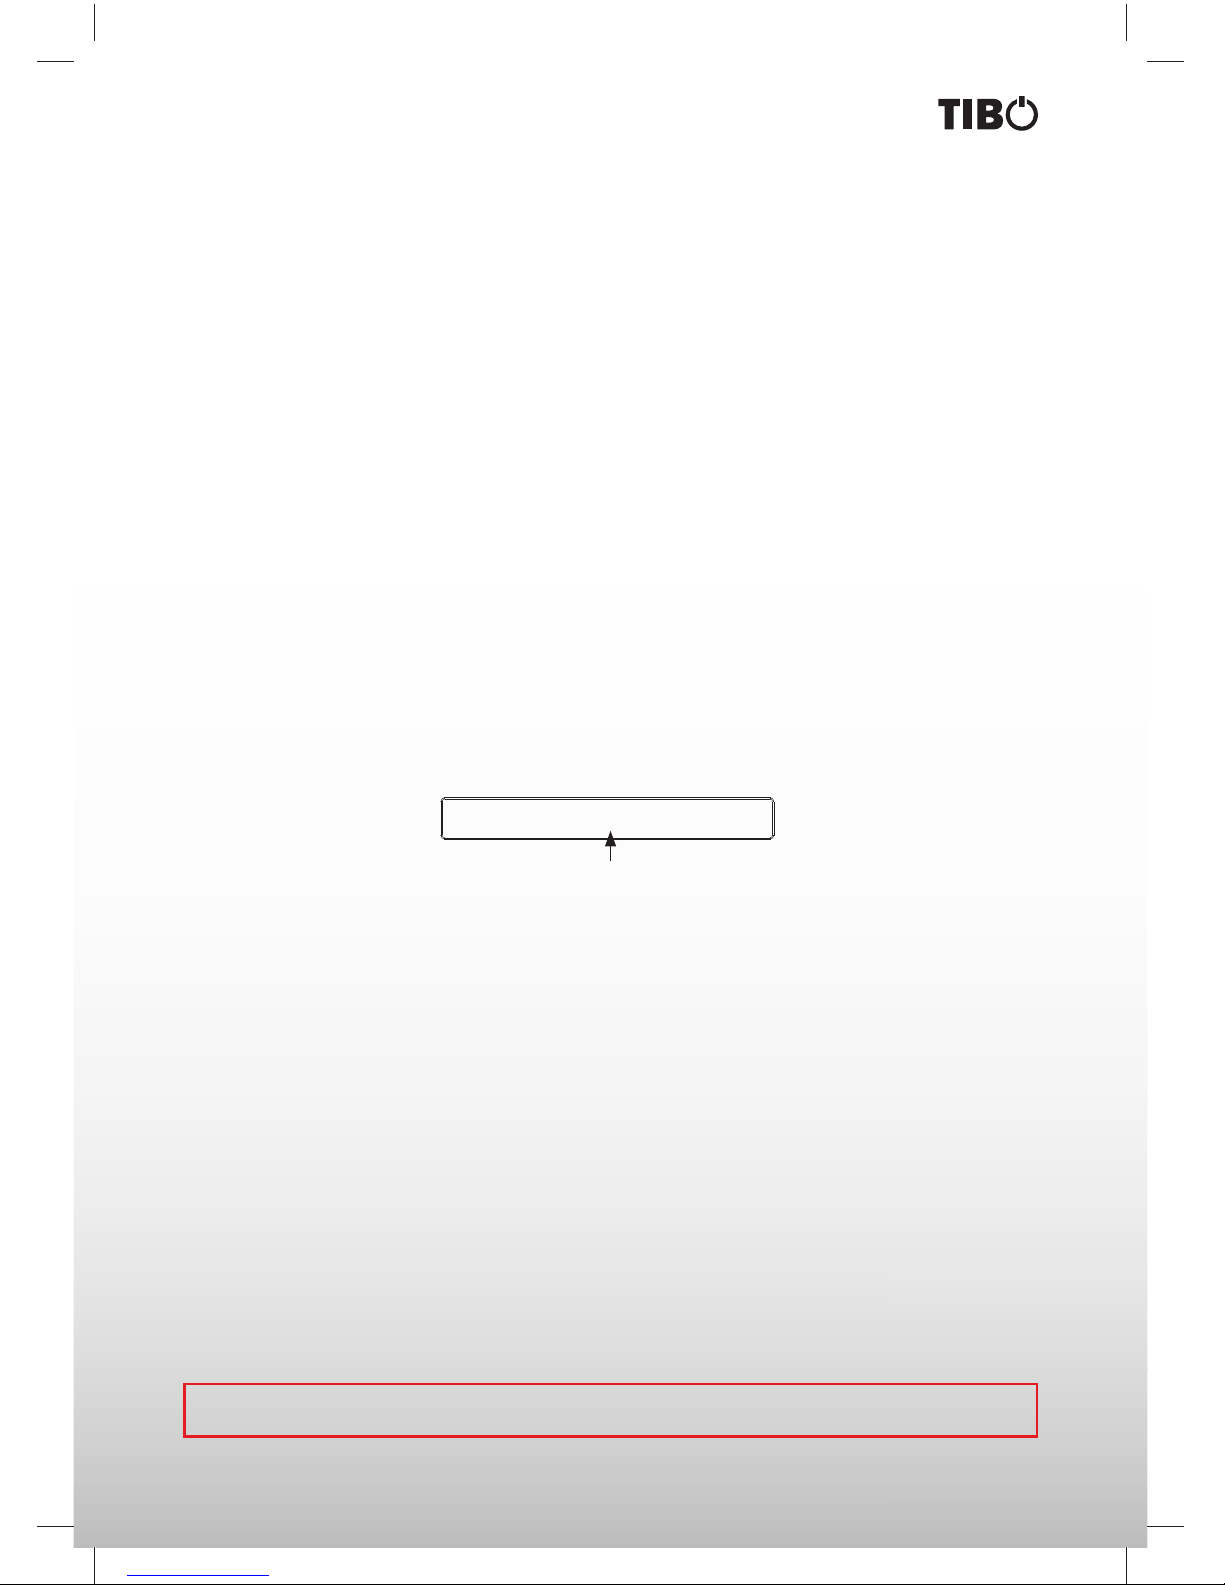
Random playback
It is possible to select random playback by pressing the Random button on the remote control or on the front
panel.
The CD tracks will be played in random order. The dash between the rst and second number from the left starts
to ash, when this function has been activated. It is possible to activate random play both in stop mode and dur-
ing playback. Press the Random button again if you wish to deactivate random play.
CD 12-12-59:47
Flashing when random is activated
Note: When you press |<< or >>| during random play, it will not be possible to select the next track or any other
track.

12
Turn it back on
TECHNICAL DATA
We reserve the rights to change the technical data and the design of the product without notice as a result of further development.
CD-Player
Max. power consumption:
Signal to noise ratio:
Frequency response:
Disc format (playback):
Distortion:
Analog audio outputs:
Dimensions (HxWxD):
Weight:
30 Watts
> 90 dB
20 - 20,000 Hz
Audio CD/CD-R
< 0.1 % THD
Stereo RCA
50 x 430 x 285 mm
3.5 kg

13
Turn it back on
TROUBLE SHOOTING
Problem Solution
No power when the CD-Player is turned On. Turn on the power at the wall outlet.
Check that the plug has been correctly inserted into the wall
outlet.
The internal fuse has blown and must be replaced by a qualied
service technician.
The power cord has been damaged and must be replaced.
The VFD display on the CD-Player does not display any
information.
The CD player is defective and should be serviced by a qualied
technician.
Error 1 message is displayed on the CD-Player. The CD player is defective and should be serviced by a qualied
technician.
The CD-Player will not read the disc. Check if the disc has been turned upside down.
Check if the disc is clean, inserted and undamaged.
Make sure that your disk is either CD or CD-R.
The CD-Player skips during playback. Check if the disc is clean and undamaged.
The unit is positioned on an unstable surface.

14
Turn it back on
INDEX
CONTACTS. . . . . . . . . . . . . . . . . . . . . . . . . . . . . . . . . . . . . . . . . . . . . . . . . . . . . . . . . . . . . 15
CD PLAYER | Front panel . . . . . . . . . . . . . . . . . . . . . . . . . . . . . . . . . . . . . . . . . . . . . . . . . . 9
CD PLAYER | VFD display . . . . . . . . . . . . . . . . . . . . . . . . . . . . . . . . . . . . . . . . . . . . . . . . . 9
CD PLAYER | On/Off and standby . . . . . . . . . . . . . . . . . . . . . . . . . . . . . . . . . . . . . . . . . . . 9
CD PLAYER | Load a disc . . . . . . . . . . . . . . . . . . . . . . . . . . . . . . . . . . . . . . . . . . . . . . . . . 10
CD PLAYER | Play a disc . . . . . . . . . . . . . . . . . . . . . . . . . . . . . . . . . . . . . . . . . . . . . . . . . . 10
CD PLAYER | Pause a disc . . . . . . . . . . . . . . . . . . . . . . . . . . . . . . . . . . . . . . . . . . . . . . . . 10
CD PLAYER | Stop/Clear . . . . . . . . . . . . . . . . . . . . . . . . . . . . . . . . . . . . . . . . . . . . . . . . . . 10
CD PLAYER | Previous/Next . . . . . . . . . . . . . . . . . . . . . . . . . . . . . . . . . . . . . . . . . . . . . . . . 11
CD PLAYER | Forward/Rewind . . . . . . . . . . . . . . . . . . . . . . . . . . . . . . . . . . . . . . . . . . . . . . 11
CD PLAYER | Random playback . . . . . . . . . . . . . . . . . . . . . . . . . . . . . . . . . . . . . . . . . . . . 11
INCLUDED IN THE BOX. . . . . . . . . . . . . . . . . . . . . . . . . . . . . . . . . . . . . . . . . . . . . . . . . . . 6
INDEX . . . . . . . . . . . . . . . . . . . . . . . . . . . . . . . . . . . . . . . . . . . . . . . . . . . . . . . . . . . . .14
REMOTE CONTROL | Installing batteries. . . . . . . . . . . . . . . . . . . . . . . . . . . . . . . . . . . . . . 7
REMOTE CONTROL | Using the remote control. . . . . . . . . . . . . . . . . . . . . . . . . . . . . . . . . 7
REMOTE CONTROL | Remote control functions . . . . . . . . . . . . . . . . . . . . . . . . . . . . . . . . 8
SAFETY | Safety precautions . . . . . . . . . . . . . . . . . . . . . . . . . . . . . . . . . . . . . . . . . . . . . . . 4
SAFETY | Important safety instruction . . . . . . . . . . . . . . . . . . . . . . . . . . . . . . . . . . . . . . . . 5
SETTING UP THE SYSTEM . . . . . . . . . . . . . . . . . . . . . . . . . . . . . . . . . . . . . . . . . . . . . . . . 6
TECHNICAL DATA . . . . . . . . . . . . . . . . . . . . . . . . . . . . . . . . . . . . . . . . . . . . . . . . . . . . . . . 12
TROUBLE SHOOTING . . . . . . . . . . . . . . . . . . . . . . . . . . . . . . . . . . . . . . . . . . . . . . . . . . . . 13

15
Turn it back on
CONTACTS
Tibo Ltd.
DSV House
Maidstone Road
Milton Keynes
MK10 0AJ
United Kingdom
tel.: +44 (0) 845 2711 906
e-mail: info@tibo-electronics.com
Proof of purchase (attach your receipt here).

Turn it back on
www.tibo-electronics.com
Other manuals for TI430
2
Table of contents
Other Tibo CD Player manuals


