manuals.online logo
Brands
  1. Home
  2. •
  3. Brands
  4. •
  5. Timco Tools
  6. •
  7. Burner
  8. •
  9. Timco Tools PRO User manual

Timco Tools PRO User manual

KAASUPOLTIN
GAS BURNER
GASBRÄNNARE
KÄYTTÖOHJE
INSTRUCTION MANUAL
BRUKSANVISNING
a) Varmista että kaasun säätöruuvi on kierrettynä “-“ asentoon, eli mahdollisimman pitkälle
myötäpäivään, ennen kuin asennat kaasusäiliön polttimeen.
b) Tarkista aina ennen kaasusäiliön asennusta, että kaasupolttimen venttiilin o-rengastiiviste on ehjä
ja paikoillaan.
c) Pidä kaasusäiliö pystysuorassa asennossa, kun asennat sen polttimeen.
d) Aseta polttimen venttiili suoraan kaasusäiliön venttiilin yläpuolelle, ja kierrä poltin kaasusäiliön
venttiiliin kiinni. Kiristä napakasti, mutta varoen ylikiristystä ja liiallista voiman käyttöä, joka
saattaa vahingoittaa kaasusäiliön venttiiliä.
TIMCO KAASUPOLTIN PRO
1. KAASUSÄILIÖN KIINNITYS
TURVALLISUUSOHJEET
2. SYTYTYS JA KÄYTTÖ
3. SAMMUTUS JA VARASTOINTI
MUUTA HUOMIOITAVAA
SUUTINPUTKEN VAIHTO
b) Käännä kaasun säätöruuvia n. ½-1 kierrosta vastapäivään avataksesi kaasunsyötön polttimelle.
c) Paina sytytyspainiketta, ja pidä pohjassa, jotta kaasuntulo suuttimelle ei katkea. Pitkäaikaiseen
työskentelyyn voit lukita kaasuntulon päälle painamalla sytytyspainikkeen yläpuolella olevan
metallinvärisen liekin lukituspainikkeen painikkeen ala-asentoon. Nyt voit irrottaa otteen
sytytyspainikkeesta, ja kaasuntulo suuttimelle on lukittuna päälle.
d) Säädä tarvittaessa liekkiä käyttäen kaasunsäätöruuvia. Soveltuva liekin pituus on n. 10-12 cm.
Älä säädä kaasua tarpeettoman suurelle välttääksesi tarpeettoman suuren kaasunkulutuksen
sekä epävakaan liekin.
a) Mikäli polttimen kaasuntulo on lukittuna auki paina sytytyspainiketta kerran vapauttaaksesi
lukituksen. Kun irrotat painikkeesta, kaasuntulo suuttimelle loppuu. Mikäli kaasuntulo ei ole
lukittuna, lopeta vain sytytyspainikkeen painaminen katkaistaksesi kaasuntulon. Jos poltinta on
käytetty ylösalaisin, voi liekin sammuminen kestää joitain sekunteja.
b) Käännä kaasun säätöruuvia loppuun asti myötäpäivään sulkeaksesi venttiilin.
c) Aseta sytytyspainikkeen alla oleva lukitusvipu asentoon ”lock” varastoinnin ajaksi.
d) Anna polttimen jäähtyä rauhassa ennen varastointia.
e) Kierrä kaasupullo varoen irti polttimen venttiilistä. Säilytä poltin ja kaasupullo toisistaan
irrotettuina.
f) Säilytä kaasupoltin aina kuivassa paikassa.
- Kylmissä olosuhteissa kaasusäiliöstä tulevan kaasun paine saattaa olla
normaalia pienempi, mikä johtaa tavallista pienempään liekkiin. Vältä
kaasusäiliön säilyttämistä liian kylmissä olosuhteissa.
- Anti-Flare toiminnon ansiosta kaasupoltinta voi käyttää missä tahansa
kulmassa / asennossa.
- Anti-Flare toiminnosta huolimatta kylmissä olosuhteissa liekki saattaa
sammua, kun poltinta käytetään ylösalaisin.
- Kaasun paineen ollessa matala, liekki saattaa muuttua epävakaaksi kun
poltinta käytetään ylösalaisin.
Kierrä vanha suutinputki irti kääntämällä putken juuressa olevaa mustaa
muovista kiristysrengasta hieman vastapäivään. Vedä vanha suutinputki
suoraan irti polttimesta. Huomaa asennettavan suutinputken muovikannassa
olevat pykälät (kuva 1), ja kohdista ne polttimen kannassa oleviin hahloihin
(kuva 2). Varmista että suutin osoittaa polttimen etuosaan (kuva 3) ja
työnnä suutinputki suoraan alaspäin paikoilleen (kuva 4). Paina muovinen
kiristysrengas alaspäin kohti poltinta, ja kierrä myötäpäivään niin pitkälle kuin
rengas kiertyy (kuva 5). Poltin on käyttövalmis uuden suutinputken kanssa
(kuva 6).
VAROITUS
ÄLÄ KOSKAAN YRITÄ KIERTÄÄ SUUTINPUTKEA TAI KOHDISTA SIIHEN
VOIMAKKAITA ISKUJA. SUUTINPUTKEN KIINNITYSOSAT SAATTAVAT MURTUA,
MIKÄLI PUTKEEN KOHDISTETAAN LIIAN SUURIA VOIMIA TAI SITÄ YRITETÄÄN
KIERTÄÄ.
TEKNISET TIEDOT
Teho: 3,1 kW
Kaasun tyyppi: propaanikaasu, butaani-propaani –seoskaasu, propeeni, MAPP-kaasut
Kaasun kulutus: 203,2 g/h supersyklonisuuttimella
135,2 g/h syklonisuuttimella
47,2 g/h fokussuuttimella
Liekin maksimilämpötila: 1212 °C supersyklonisuuttimella
1260 °C syklonisuuttimella
1050 °C fokussuuttimella
Sytytys: piezosytytys
Venttiili: 7/16” EU-kierreventtiili
Lue käyttö- ja turvallisuusohjeet ennen tuotteen käyttöönottoa ja säilytä ne tallessa myöhempää tarvetta varten.
- Älä käytä tuotetta, ellet ole tutustunut käyttöohjeisiin
huolella ja ymmärtänyt niiden sisältöä. Tutustu
tuotteen toimintoihin ja ominaisuuksiin huolella ennen
käyttöä.
- Pidä poltin poissa lasten ulottuvilta.
- Käytä vain teknisissä tiedoissa mainittuja
sallittuja kaasutyyppejä. Muiden kaasutyyppien
käyttö on kielletty, ja saattaa johtaa tulipalo- tai
räjähdysvaaraan.
- Käytä tuotetta ainoastaan EN 417 standardin
mukaisen EU (7/16”) -kierreventtiilillä varustetun
kaasusäiliön kanssa.
- Älä koske suuttimeen tai yritä vaihtaa, kiristää tai
irrottaa suutinta sen ollessa vielä kuuma.
- Älä jäähdytä suutinta vedellä, vaan anna sen jäähtyä
itsekseen.
- Älä osoita polttimen suutinta kohti itseäsi, muita
henkilöitä tai syttyviä esineitä.
- Irrota kaasusäiliö polttimesta, kun tuote ei ole
käytössä.
- Älä irrota tai kiinnitä kaasusäiliötä polttimeen
paikoissa, joissa säiliöstä vapautuva kaasu saattaisi
syttyä avotulen tai kipinöiden vaikutuksesta.
- Älä muokkaa polttimen rakennetta, lisää siihen
ylimääräisiä osia, tai irrota siitä kiinteitä osia. Käytä
vain alkuperäisiä Timco-suutinputkia lisävarusteina.
- Käytä poltinta varoen, äläkä kohdista siihen iskuja tai
muuta liiallista voimaa. Älä yritä vääntää suutinta eri
asentoon.
- Älä käytä poltinta, mikäli sen toiminta vaikuttaa
epänormaalilta, mikäli kaasusäiliön ja polttimen liitos
vuotaa tai mikäli polttimessa on ulkoisia vaurion jälkiä.
- Käytä vain hyvin ilmastoiduissa tiloissa.
- Älä altista pitkäaikaiselle suoralle auringonvalolle, kun
kaasusäiliö on kiinnitetty polttimeen.
- Polttimen sininen liekki saattaa olla lähes näkymätön
kirkkaassa valossa. Noudata varovaisuutta.
- Aseta kuumennettava kohde aina palamattomalle ja
kuumennusta kestävälle alustalle.
- Käytä suojalaseja ja suojahanskoja.
- Pidä työskennellessäsi sammutuspeite, sammutin tai
vesiastia lähettyvillä tulipaloriskin vuoksi.
- Käytön jälkeen huolehdi, että poltin on täysin jäähtynyt
ennen sen siirtämistä säilytykseen.
Ilmoitetut kulutus- ja liekin lämpötila-arvot mitattuna butaani-propaani seoskaasulla. Käytetty kaasutyyppi vaikuttaa
merkittävästi liekin maksimilämpötilaan, ja muuttaa myös kaasun kulutusarvoja.
Kaasupolttimen mukana toimitetaan 1kpl supersyklonisuutin. Kaikkia suuttimia on saatavissa polttimeen lisävarusteena.
COLD WEATHER OPERATION:
In cold weather, the size of the flame can be smaller due to lower gas pressure. To produce a larger flame, pre-warm
the gas cylinder to room temperature prior to use. Shaking the gas cylinder a few times to warm the fuel up will
help. There is a possibility that the flame will extinguish when the torch is turned upside down in cold weather.
CONNECT AND DISCONNECT TO THE GAS CONTAINER:
Connect to the gas container:
A. Ensure that the gas control knob is turned to the" -"position (turned fully clockwise), before assembling.
B. Keep the cartridge or cylinder upright when fitting it to the valve.
C. Place the valve adequately on top of the cylinder valve, gently screw the burner into the valve until it meets the
seals of the valve. Be careful not to fit the cartridge cross threaded. Screw hand tight only. Do not overtighten or
you will damage the cartridge valve.
Disconnect to the gas container:
A. Check that burners are extinguished before disconnecting the gas container.
B. When burner is cool, turn the fuel cylinder anti-clockwise from valve body to disconnect.
C. Keep and store the burner and cylinder in safety places-away from fire.
D. Check the seals before connecting a new gas container to the appliance.
E. Change the gas container outside and away from people.
READ ALL INSTRUCTIONS:
1. Before using, check all parts for proper function and damage to component parts.
2. Do not use this torch to heat, mold or bend plastic sheets, moulding or tubing.
3. “Hidden areas such as behind walls, ceilings, floors, soffit boards and other panels may contain flammable
materials that could be ignited by the heat gun when working in these locations. The ignition of these
materials may not be readily apparent and could result in property damage and injury to persons.
4. When working in these locations, keep the torch moving in a back-and-forth motion. Lingering or pausing in
one spot could ignite the panel or the material behind it.”
5. Do not use this torch to remove paint
DANGER
EXTREMELY FLAMMABLE. CONTENTS UNDER PRESSURE. Keep out of the reach of children. Keep
away from heat or flame. It is illegal and dangerous to refill the cylinder. Obtain new gas cylinder from
your dealer. Avoid prolonged exposure to sunlight. Do not store near heat or in a room used for habita-
tion, Always close torch valve and wait until cool before removing torch from gas cylinder. Always
detach gas cylinder from torch when not in use. Do not breath gas, fumes, vapor or spray. If inhaled,
remove affected person to fresh air. Avoid contact with skin and eyes. For skin contact, flush with large
amount of water. In case of contact with eyes, rinse immediately with plenty of water and seek medical
advice. When gas cylinder is empty, discard in a safe place. Do not throw in fire. Do not puncture or
incinerate container. Do not modify the appliance.
SHUTDOWN AND STORAGE:
1. Press the ignition button again to release the ignition. Note: The flame may continue to burn for a short period of
time if the torch has been operated in an invented (upside down) position.
2. When torch is cool, turn the gas cylinder counter-clockwise to disconnect it. Slightly pull the ignition button to
vent the remaining gas inside the torch.
3. Store the torch and gas cylinder separately. Read other cautions on gas cylinder label.
GENERAL SAFETY RULES:
1. Do not use this torch until you have understood all of the operation instructions and cautions and familiarize
yourself with the torch before you use it. Review instruction and cautions. Deviating from these procedures may result
in fire, explosion, property damage and/or operator injury. Do not try to operate before reading instructions.
2. Use any fuel other than Propane with this torch may cause a fire or explosion.
3. Wait for the torch to cool down before tightening or removing torch head and before installing or removing
accessories.
4. Do not point torch towards face, other persons or flammable objects. Never attempt to use torch as a cigarette
lighter.
5. Disconnect gas cylinder when not in use. Never store with torch attached to the gas cylinder.
6. Do not attach or detach the torch from the cylinder at where accidentally released gas might be ignited by open
flames.
7. Never attempt to modify the torch construction and never use unapproved fuel.
8. Treat the torch as you would any fine tool or instrument. DO NOT use the torch until you have corrected the
problem. Torches improperly operated, maintained or repaired can be dangerous Improper use, service
repair or modification of the torch could result in damage to the product, property damage or personal
injury to the operator.
9. Do not use a leaking, damaged or malfunctioning torch.
10. Work only in well-ventilated areas.
11. Always place your work on firebrick. Ordinary brick and concrete can explode when subject to a high
temperature. Do not work on wood or metal surfaces. Always shield your work.
12. Always wear protective glasses and gloves. Use proper tools to handle hot work. Always have a fire
extinguisher and a bucket of water near the torch and work area.
OPERATION AND LIGHTING:
1. Check that seals are in place and in good condition before connecting to the gas container.
2. Do not use the appliance if it has damaged or worn seals.
3. Do not use an appliance which is leaking, damaged or which does not operate properly.
4. If there is a leak on your appliance (smell of gas), take it outside immediately into a well ventilated flame free
location where the leak may be detected and stopped. If you wish to check for leaks on your appliance, do it
outside. Do not try to detect leaks using a flame, use soapy water.
5. Torch are to be use with Propane Mix Gas only. Use only with Hand Held Propane Cylinders specifically designed
for use with torches. ( valve type EN417. )
6. Before installing the torch to the gas cylinder, make sure the valve is OFF by turning the gas control knob in
clockwise direction until hand tight only. DO NOT FORCE.
7. Hold torch and gas cylinder upright. Turn the gas cylinder clockwise into the torch valve body until hand tight and
attached securely to the torch connector. Check connection for leaks.
4. Turn the gas control knob counter-clockwise about 1/2 to 1 turn then push the safety lock lever to center.
5. To engage the ignition button lock for a continuous work, press the ignition button and push the flame locking
lever aside (leftward). Then release the ignition button.
6. Any other servicing shall be performed by an authorized service representative.
7. Do not clean the flame tube after off the flame, put in the high area and wait 10-15 minutes then use wet tower to
clean the tube.
8. Do not put Torch in the water or the Piazor will lose function.
9. Put the torch in the dry area to avoid piazor lose function and O-Ring break.
HOW TO CHANGE BURNER TUBE
NORMAL FLAME LENGTH: 12cm
Models: BTS-8096
READ ALL INSTRUCTIONS
SAVE THESE INSTRUCTIONS
64
● Seal to Bottom
3
2
1 5
1
2
Don't change the burner tube, when gas cylinder is connected appliance!
Don't violently turn the burner tube, after locking the burner tube!
Every time installing the torch with gas cylinder, make sure the valve is OFF!
Blow Torch
Important: Read these instructions for use carefully so as to familiarize yourself with the appliance before connecting
it to its gas container. Keep these instructions for future reference
FLAME ADJUSTMENT:
1. Turn the adjustment knob to control the gas output according to different applications.
2. Adjust the flame size by turning the control knob to either left ( ) or right ( ). Recommended flame length
should be adjust to 4"~4 3/4" in length to avoid any waste of gas or unstable flame.
3. The maximum heat zone is very concentrated. It's located between 1/2" to 1" from the end of the tip. Holding the
torch too close or too far away from the target can reduce the heating effect.
NORMAL FLAME LENGTH: 12cm
Nominal rate:226g/hr(3.1kW)
Seals
Interchangeable
burner tube Gas control knob
Ignition button
Safety lock
Flame locking lever
BTS-8096 Blow torch
Tech Union Co., Ltd.
5th FL-2, No.26 Wu-Chuan 2RD.,
Hsin Chuang Dist, New
Taipei, Taiwan
• Type of gas:propane mix gas
• Appliance category:vapour pressure-propane
•
This appliance shall only be used with the gas
container which is comply with EN417.
It may be hazardous to attempt to fit other types
of gas containers
• Only use in well ventilated areas
• Consumption rate : 226g/hr(3.1kW)
• Read the instructions before using the appliance
• Flame guard may become very hot
• Keep away from children
Vaihdettavissa oleva suutinputki
Kaasunsäätöruuvi
Sytytyspainike
Liekin lukituspainike
Lukitusvipu
MUUTA HUOMIOITAVAA
SUUTINPUTKEN VAIHTO
a) Make sure that the gas control knob is turned to ”-” position, which is maximum clockwise
rotation, before attaching a gas container.
b) Always check before attaching a gas container that the O-ring seal inside the valve is on its place
and intact.
c) Keep the gas container and the burner vertically upright when attaching them together.
d) Place the burner valve directly on top of the gas container valve, and turn the gas container into
the valve. Hand tighten firmly, but be careful of over tightening and using too much force which
might damage the valve on the gas container.
TIMCO GAS BURNER PRO
1. ATTACHING THE GAS CONTAINER
SAFETY INSTRUCTIONS
2. IGNITION AND USE
3. SHUTDOWN AND STORAGE
OTHER NOTES
CHANGING THE BURNER TUBE
a) Make sure that the safety lock switch under the ignition button is set to ”unlock”.
b) Turn the gas control knob counter-clockwise approximately ½-1 rounds to open the gas flow to burner.
c) Press the ignition button and keep pressed down to keep the flame lit. For long time use, you can
lock the gas flow on by pushing down the metal colored flame-locking button, which is located above
the ignition button. While this locking button is in down position the gas flow will not stop even if you
release the ignition button.
d) Adjust the flame if needed by using the gas control knob. The recommended flame length is
approximately 10-12 cm. Do not adjust the gas flow unnecessarily high to prevent excessive gas
consumption and unstable flame.
a) If the flame-locking button is pressed down, push the ignition button and release it to cut the
flame. If the flame-locking button is not in down position simply release the ignition button to cut
the flame. If the burner is used upside down, it might take several seconds before the flame dies.
b) Turn the gas control knob all the way clockwise to close the gas valve.
c) Adjust the safety lock switch below the ignition button to ”lock” position for storage.
d) Let the nozzle cool down completely before storage.
e) Rotate the gas container carefully to detach it from the burner. During storage, keep the burner
and gas container detached.
f) Always store the burner in dry place.
- In cold temperatures, the gas pressure coming from the gas container
might be lower than normally, which leads to smaller than desired flame.
Avoid storing the gas container in too cold ambient temperature.
- The burner is equipped with Anti-Flare function, which allows usage of the
burner in any angle / position.
- Despite the Anti-Flare function, when the burner is used in an inverted
position in cold conditions, the flame might extinguish by itself.
- When gas pressure is low the flame might become unstable or start flaring
if the burner is used in an inverted position.
Remove the old burner tube by twisting the black plastic tightening ring slightly
counter-clockwise. Pull the old burner tube directly off the burner. Note the
plastic ridges on the plastic stub of the tube (picture 1), and align them with
the grooves on the burner socket (picture 2). Make sure that the nozzle points
to the front side of the burner (picture 3) and push the burner tube directly
downwards in its place (picture 4). Push down the plastic tightening ring and
twist clockwise as long as it goes (picture 5). Burner is now ready for use with
the new burner nozzle in place (picture 6).
WARNING
NEVER TRY TO TWIST THE BURNER TUBE OR APPLY EXCESSIVE FORCE OF
ANY KIND ON IT. THE LOCKING RIDGES OF THE TUBE CAN GET BROKEN IF
HARD HITS OR TWISTING FORCES ARE APPLIED ON THE TUBE.
TECHNICAL SPECIFICATION
Power: 3,1 kW
Gas type:
propane gas, butane-propane gas mixture, propylene, MAPP-type gas
Gas consumption: 203,2 g/h with super cyclone nozzle
135,2 g/h with cyclone nozzle
47,2 g/h with focus nozzle
Flame max. temperature: 1212 °C with super cyclone nozzle
1260 °C with cyclone nozzle
1050 °C with focus nozzle
Ignition: piezo ignition
Valve: 7/16” EU threaded valve
Read the instruction manual and safety instructions before using the product, and store the manual for later use.
- Do not use this appliance unless you have read the
instruction manual thoroughly and understood the
contents. Familiarize yourself with the product and its
functions carefully before taking it into use.
- Keep the burner out of reach of children.
- Only use the gas types allowed in the “technical
specification” section. Using other gas types is
forbidden and may cause a fire or an explosion.
- Only use the burner in combination with EN 417
standard compliant gas container which is equipped
with EU (7/16”) threaded valve.
- Do not touch the nozzle or try to replace, tighten or
remove it when it is still hot.
- Do not cool down the nozzle by water, but instead let
it cool down by itself.
- Do not point the burner nozzle towards yourself, other
people or flammable objects.
- Detach the gas container from the burner when not
using the product.
- Do not attach or detach the gas container to the
burner at places where accidentally released gas
might be ignited by sparks or open flame.
- Do not modify the construction of the burner, add
parts on it or remove fixed parts from it. Only use
original Timco nozzle tubes as spare accessories.
- Handle the burner with care; do not subject it to hits or
other excessive force. Do not try to twist or rotate the
nozzle tube in a different position.
- Do not use the burner if the function seems abnormal,
if there is a sign of any kind of leakage or if the burner
has external signs of damage.
- Only use in well-ventilated spaces.
- Avoid prolonged exposure to sunlight when burner is
attached to a gas container.
- The blue flame from the burner can be nearly invisible
in bright light. Operate with caution.
- Place the item being worked on on a non-flammable
surface that can resist high temperatures.
- Always wear protective glasses and gloves.
- Due to fire risk always keep a fire blanket, fire
extinguisher or a water bucket close by when
operating the gas burner.
- Make sure the burner is completely cooled down
before storage.
Announced values for gas consumption and flame maximum temperature are from butane-propane gas mixture testing.
Changing the gas type will significantly change the maximum temperature of the flame and it will also have an effect on
gas consumption values.
Gas burner includes 1pc super cyclone nozzle. All nozzles are available for the burner as extra accessories.
COLD WEATHER OPERATION:
In cold weather, the size of the flame can be smaller due to lower gas pressure. To produce a larger flame, pre-warm
the gas cylinder to room temperature prior to use. Shaking the gas cylinder a few times to warm the fuel up will
help. There is a possibility that the flame will extinguish when the torch is turned upside down in cold weather.
CONNECT AND DISCONNECT TO THE GAS CONTAINER:
Connect to the gas container:
A. Ensure that the gas control knob is turned to the" -"position (turned fully clockwise), before assembling.
B. Keep the cartridge or cylinder upright when fitting it to the valve.
C. Place the valve adequately on top of the cylinder valve, gently screw the burner into the valve until it meets the
seals of the valve. Be careful not to fit the cartridge cross threaded. Screw hand tight only. Do not overtighten or
you will damage the cartridge valve.
Disconnect to the gas container:
A. Check that burners are extinguished before disconnecting the gas container.
B. When burner is cool, turn the fuel cylinder anti-clockwise from valve body to disconnect.
C. Keep and store the burner and cylinder in safety places-away from fire.
D. Check the seals before connecting a new gas container to the appliance.
E. Change the gas container outside and away from people.
READ ALL INSTRUCTIONS:
1. Before using, check all parts for proper function and damage to component parts.
2. Do not use this torch to heat, mold or bend plastic sheets, moulding or tubing.
3. “Hidden areas such as behind walls, ceilings, floors, soffit boards and other panels may contain flammable
materials that could be ignited by the heat gun when working in these locations. The ignition of these
materials may not be readily apparent and could result in property damage and injury to persons.
4. When working in these locations, keep the torch moving in a back-and-forth motion. Lingering or pausing in
one spot could ignite the panel or the material behind it.”
5. Do not use this torch to remove paint
DANGER
EXTREMELY FLAMMABLE. CONTENTS UNDER PRESSURE. Keep out of the reach of children. Keep
away from heat or flame. It is illegal and dangerous to refill the cylinder. Obtain new gas cylinder from
your dealer. Avoid prolonged exposure to sunlight. Do not store near heat or in a room used for habita-
tion, Always close torch valve and wait until cool before removing torch from gas cylinder. Always
detach gas cylinder from torch when not in use. Do not breath gas, fumes, vapor or spray. If inhaled,
remove affected person to fresh air. Avoid contact with skin and eyes. For skin contact, flush with large
amount of water. In case of contact with eyes, rinse immediately with plenty of water and seek medical
advice. When gas cylinder is empty, discard in a safe place. Do not throw in fire. Do not puncture or
incinerate container. Do not modify the appliance.
SHUTDOWN AND STORAGE:
1. Press the ignition button again to release the ignition. Note: The flame may continue to burn for a short period of
time if the torch has been operated in an invented (upside down) position.
2. When torch is cool, turn the gas cylinder counter-clockwise to disconnect it. Slightly pull the ignition button to
vent the remaining gas inside the torch.
3. Store the torch and gas cylinder separately. Read other cautions on gas cylinder label.
GENERAL SAFETY RULES:
1. Do not use this torch until you have understood all of the operation instructions and cautions and familiarize
yourself with the torch before you use it. Review instruction and cautions. Deviating from these procedures may result
in fire, explosion, property damage and/or operator injury. Do not try to operate before reading instructions.
2. Use any fuel other than Propane with this torch may cause a fire or explosion.
3. Wait for the torch to cool down before tightening or removing torch head and before installing or removing
accessories.
4. Do not point torch towards face, other persons or flammable objects. Never attempt to use torch as a cigarette
lighter.
5. Disconnect gas cylinder when not in use. Never store with torch attached to the gas cylinder.
6. Do not attach or detach the torch from the cylinder at where accidentally released gas might be ignited by open
flames.
7. Never attempt to modify the torch construction and never use unapproved fuel.
8. Treat the torch as you would any fine tool or instrument. DO NOT use the torch until you have corrected the
problem. Torches improperly operated, maintained or repaired can be dangerous Improper use, service
repair or modification of the torch could result in damage to the product, property damage or personal
injury to the operator.
9. Do not use a leaking, damaged or malfunctioning torch.
10. Work only in well-ventilated areas.
11. Always place your work on firebrick. Ordinary brick and concrete can explode when subject to a high
temperature. Do not work on wood or metal surfaces. Always shield your work.
12. Always wear protective glasses and gloves. Use proper tools to handle hot work. Always have a fire
extinguisher and a bucket of water near the torch and work area.
OPERATION AND LIGHTING:
1. Check that seals are in place and in good condition before connecting to the gas container.
2. Do not use the appliance if it has damaged or worn seals.
3. Do not use an appliance which is leaking, damaged or which does not operate properly.
4. If there is a leak on your appliance (smell of gas), take it outside immediately into a well ventilated flame free
location where the leak may be detected and stopped. If you wish to check for leaks on your appliance, do it
outside. Do not try to detect leaks using a flame, use soapy water.
5. Torch are to be use with Propane Mix Gas only. Use only with Hand Held Propane Cylinders specifically designed
for use with torches. ( valve type EN417. )
6. Before installing the torch to the gas cylinder, make sure the valve is OFF by turning the gas control knob in
clockwise direction until hand tight only. DO NOT FORCE.
7. Hold torch and gas cylinder upright. Turn the gas cylinder clockwise into the torch valve body until hand tight and
attached securely to the torch connector. Check connection for leaks.
4. Turn the gas control knob counter-clockwise about 1/2 to 1 turn then push the safety lock lever to center.
5. To engage the ignition button lock for a continuous work, press the ignition button and push the flame locking
lever aside (leftward). Then release the ignition button.
6. Any other servicing shall be performed by an authorized service representative.
7. Do not clean the flame tube after off the flame, put in the high area and wait 10-15 minutes then use wet tower to
clean the tube.
8. Do not put Torch in the water or the Piazor will lose function.
9. Put the torch in the dry area to avoid piazor lose function and O-Ring break.
HOW TO CHANGE BURNER TUBE
NORMAL FLAME LENGTH: 12cm
Models: BTS-8096
READ ALL INSTRUCTIONS
SAVE THESE INSTRUCTIONS
64
● Seal to Bottom
3
2
1 5
1
2
Don't change the burner tube, when gas cylinder is connected appliance!
Don't violently turn the burner tube, after locking the burner tube!
Every time installing the torch with gas cylinder, make sure the valve is OFF!
Blow Torch
Important: Read these instructions for use carefully so as to familiarize yourself with the appliance before connecting
it to its gas container. Keep these instructions for future reference
FLAME ADJUSTMENT:
1. Turn the adjustment knob to control the gas output according to different applications.
2. Adjust the flame size by turning the control knob to either left ( ) or right ( ). Recommended flame length
should be adjust to 4"~4 3/4" in length to avoid any waste of gas or unstable flame.
3. The maximum heat zone is very concentrated. It's located between 1/2" to 1" from the end of the tip. Holding the
torch too close or too far away from the target can reduce the heating effect.
NORMAL FLAME LENGTH: 12cm
Nominal rate:226g/hr(3.1kW)
Seals
Interchangeable
burner tube Gas control knob
Ignition button
Safety lock
Flame locking lever
BTS-8096 Blow torch
Tech Union Co., Ltd.
5th FL-2, No.26 Wu-Chuan 2RD.,
Hsin Chuang Dist, New
Taipei, Taiwan
• Type of gas:propane mix gas
• Appliance category:vapour pressure-propane
•
This appliance shall only be used with the gas
container which is comply with EN417.
It may be hazardous to attempt to fit other types
of gas containers
• Only use in well ventilated areas
• Consumption rate : 226g/hr(3.1kW)
• Read the instructions before using the appliance
• Flame guard may become very hot
• Keep away from children
Vaihdettavissa oleva suutinputki
Kaasunsäätöruuvi
Sytytyspainike
Liekin lukituspainike
Lukitusvipu
a) Se till att gasregulatorn är vriden till läget “-”, dvs. så långt medurs som möjligt, innan
gasbehållaren monteras i brännaren.
b) Kontrollera alltid att o-ringtätningen på gasbrännarventilen är intakt och på plats innan du
monterar gasbehållaren.
c) Håll gasbehållaren i vertikalt läge när du monterar den på brännaren.
d) Placera brännarventilen direkt ovanför gasbehållarventilen och skruva fast brännaren på
gasbehållarventilen. Dra åt ordentligt, men var försiktig så att du inte drar åt för hårt eller
använder för mycket kraft, vilket skulle skada ventilen på gasbehållaren.
TIMCO GASBRÄNNARE PRO
1. FÄSTNING AV GASBEHÅLLAREN
SÄKERHETSANVISNINGAR
2. TÄNDNING OCH ANVÄNDNING
3. AVSTÄNGNING OCH LAGRINGE
ANNAT ATT NOTERA
BYTE AV MUNSTYCKESRÖR
a) Kontrollera att låsspaken under tändningsknappen är i läget “unlock”.
b) Vrid gasjusteringsskruven moturs ca ½-1 varv för att öppna gastillförseln till brännaren.
c) Håll tändningsknappen intryckt för att förhindra att gastillförseln till munstycket stängs av. För
längre arbetstider kan du låsa gasintaget genom att trycka in metallknappen för flamlås ovanför
tändningsknappen. Nu kan du släppa tändningsknappen och gastillförseln till munstycket är låst på.
d) Justera vid behov flamman med hjälp av gasjusteringsskruven. En lämplig flamlängd är ca 10-12 cm
För att undvika onödig gasförbrukning och en instabil låga får du inte ställa in gasen på en onödig hög
nivå.
a) Om brännarens gasintag är låst öppet, tryck på tändningsknappen en gång för att frigöra låset.
När du släpper knappen stoppas gastillförseln till munstycket. Om gastillförseln inte är låst är
det bara att sluta trycka på tändningsknappen för att stänga av gastillförseln. Om brännaren har
använts upp och ner kan det ta några sekunder innan lågan slocknar.
b) Vrid gasjusteringsskruven helt medurs för att stänga ventilen.
c) Placera låsspaken under tändningsknappen i läget “lock” för förvaring.
d) Låt brännaren svalna innan den förvaras.
e) Skruva försiktigt loss behållaren från brännarventilen. Förvara brännaren och behållaren separat
från varandra.
f) Förvara alltid gasbrännaren på ett torrt ställe.
- I kalla förhållanden kan gastrycket från behållaren vara lägre än
normalt, vilket leder till en mindre flamma än normalt. Undvik att förvara
gasbehållaren i alltför kalla förhållanden.
- Tack vare Anti-Flare-funktionen kan gasbrännaren användas i vilken vinkel/
ställning som helst.
- Trots Anti-Flare-funktionen kan lågan slockna i kalla förhållanden när
brännaren används upp och ner.
- Vid lågt gastryck kan lågan bli instabil när brännaren används upp och ner.
Skruva loss det gamla munstyckesröret genom att vrida den svarta plastringen
vid rörets bas en aning moturs. Dra ut det gamla munstyckesröret rakt ut
ur brännaren. Notera skårorna på plastdelen på det munstyckesrör som
ska installeras (figur 1) och anpassa dem till skårorna på brännaren (figur
2). Se till att munstycket pekar mot brännarens framsida (figur 3) och tryck
munstyckesröret rakt ner på plats (figur 4). Tryck ner klämringen i plast mot
brännaren och vrid medurs så långt som ringen kan vridas (figur 5). Brännaren
är klar för användning med det nya munstyckesröret (figur 6).
VARNING
FÖRSÖK ALDRIG VRIDA MUNSTYCKESRÖRET OCH UTSÄTT DET INTE FÖR
KRAFTIGA STÖTAR. MUNSTYCKESRÖRETS FOGAR KAN GÅ SÖNDER OM MAN
ANVÄNDER ÖVERDRIVEN KRAFT PÅ RÖRET ELLER FÖRSÖKER VRIDA DET.
TEKNISK INFORMATION
Effekt: 3,1 kW
Gastyp: propangas, mixad butan/propangas, propylen, Mappgaser
Gasförbrukning: 203,2 g/h med supercyklonmunstycket
135,2 g/h med cyklonmunstycket
47,2 g/h med fokusmunstycket
Flammans högsta temperatur: 1212 °C med supercyklonmunstycket
1260 °C med cyklonmunstycket
1050 °C med fokusmunstycket
Tändning: piezotändning
Ventil: 7/16” EU gängad ventil
Läs bruks- och säkerhetsanvisningarna innan du använder produkten och förvara dem på ett säkert ställe för framtida behov.
- Använd inte produkten om du inte noggrant har läst
och förstått bruksanvisningen. Bekanta dig noggrant
med produktens funktioner och egenskaper innan du
använder den.
- Håll gasbrännaren utom räckhåll för barn.
- Använd endast de tillåtna gastyper som anges i de
tekniska uppgifterna. Användning av andra typer
av gas är förbjuden och kan leda till brand- eller
explosionsrisker.
- Använd produkten endast med en gasbehållare med en
EU (7/16”) gängad ventil enligt EN 417.
- Rör inte munstycket och försök inte byta, dra åt eller ta
bort munstycket när det fortfarande är varmt.
- Kyl inte munstycket med vatten, utan låt det svalna av
sig självt.
- Rikta inte brännarmunstycket mot dig själv, andra
personer eller brännbara föremål.
- Ta loss gasbehållaren från brännaren när produkten inte
används.
- Ta inte loss eller fäst gasbehållaren till brännaren på
platser där gasen som frigörs från behållaren kan
antändas av öppen eld eller gnistor.
- Ändra inte gasbrännarens konstruktion, lägg inte till extra
delar och ta inte bort fasta delar. Använd endast Timco-
munstycken i original som tillbehör.
- Använd gasbrännaren med försiktighet och skydda den
mot stötar och andra överdrivna krafter. Försök inte vrida
munstycket till ett annat läge.
- Använd inte gasbrännaren om den verkar fungera
onormalt, om anslutningen mellan gasbehållaren och
brännaren läcker eller om det finns yttre tecken på
skador.
- Använd endast i väl ventilerade utrymmen.
- Utsätt inte gasbehållaren för långvarigt direkt solljus när
den är monterad på brännaren.
- Brännarens blå låga kan vara nästan osynlig i starkt ljus.
Var försiktig.
- Placera alltid föremålet som ska värmas på en
obrännbar och värmebeständig yta.
- Använd skyddsglasögon och skyddshandskar.
- När du arbetar ska du ha en brandfilt, brandsläckare eller
vattenbehållare i närheten för att minska risken för brand.
- Efter användning ska du se till att brännaren har svalnat
helt innan du förvarar den.
Rapporterade värden för förbrukning och flamtemperatur uppmätta med mixad butan/propangas. Den typ av gas som
används har en betydande inverkan på den maximala flamtemperaturen och ändrar också på gasförbrukningsvärdena.
Gasbrännaren levereras med 1 supercyklonmunstycke. Alla munstycken finns som tillval.
COLD WEATHER OPERATION:
In cold weather, the size of the flame can be smaller due to lower gas pressure. To produce a larger flame, pre-warm
the gas cylinder to room temperature prior to use. Shaking the gas cylinder a few times to warm the fuel up will
help. There is a possibility that the flame will extinguish when the torch is turned upside down in cold weather.
CONNECT AND DISCONNECT TO THE GAS CONTAINER:
Connect to the gas container:
A. Ensure that the gas control knob is turned to the" -"position (turned fully clockwise), before assembling.
B. Keep the cartridge or cylinder upright when fitting it to the valve.
C. Place the valve adequately on top of the cylinder valve, gently screw the burner into the valve until it meets the
seals of the valve. Be careful not to fit the cartridge cross threaded. Screw hand tight only. Do not overtighten or
you will damage the cartridge valve.
Disconnect to the gas container:
A. Check that burners are extinguished before disconnecting the gas container.
B. When burner is cool, turn the fuel cylinder anti-clockwise from valve body to disconnect.
C. Keep and store the burner and cylinder in safety places-away from fire.
D. Check the seals before connecting a new gas container to the appliance.
E. Change the gas container outside and away from people.
READ ALL INSTRUCTIONS:
1. Before using, check all parts for proper function and damage to component parts.
2. Do not use this torch to heat, mold or bend plastic sheets, moulding or tubing.
3. “Hidden areas such as behind walls, ceilings, floors, soffit boards and other panels may contain flammable
materials that could be ignited by the heat gun when working in these locations. The ignition of these
materials may not be readily apparent and could result in property damage and injury to persons.
4. When working in these locations, keep the torch moving in a back-and-forth motion. Lingering or pausing in
one spot could ignite the panel or the material behind it.”
5. Do not use this torch to remove paint
DANGER
EXTREMELY FLAMMABLE. CONTENTS UNDER PRESSURE. Keep out of the reach of children. Keep
away from heat or flame. It is illegal and dangerous to refill the cylinder. Obtain new gas cylinder from
your dealer. Avoid prolonged exposure to sunlight. Do not store near heat or in a room used for habita-
tion, Always close torch valve and wait until cool before removing torch from gas cylinder. Always
detach gas cylinder from torch when not in use. Do not breath gas, fumes, vapor or spray. If inhaled,
remove affected person to fresh air. Avoid contact with skin and eyes. For skin contact, flush with large
amount of water. In case of contact with eyes, rinse immediately with plenty of water and seek medical
advice. When gas cylinder is empty, discard in a safe place. Do not throw in fire. Do not puncture or
incinerate container. Do not modify the appliance.
SHUTDOWN AND STORAGE:
1. Press the ignition button again to release the ignition. Note: The flame may continue to burn for a short period of
time if the torch has been operated in an invented (upside down) position.
2. When torch is cool, turn the gas cylinder counter-clockwise to disconnect it. Slightly pull the ignition button to
vent the remaining gas inside the torch.
3. Store the torch and gas cylinder separately. Read other cautions on gas cylinder label.
GENERAL SAFETY RULES:
1. Do not use this torch until you have understood all of the operation instructions and cautions and familiarize
yourself with the torch before you use it. Review instruction and cautions. Deviating from these procedures may result
in fire, explosion, property damage and/or operator injury. Do not try to operate before reading instructions.
2. Use any fuel other than Propane with this torch may cause a fire or explosion.
3. Wait for the torch to cool down before tightening or removing torch head and before installing or removing
accessories.
4. Do not point torch towards face, other persons or flammable objects. Never attempt to use torch as a cigarette
lighter.
5. Disconnect gas cylinder when not in use. Never store with torch attached to the gas cylinder.
6. Do not attach or detach the torch from the cylinder at where accidentally released gas might be ignited by open
flames.
7. Never attempt to modify the torch construction and never use unapproved fuel.
8. Treat the torch as you would any fine tool or instrument. DO NOT use the torch until you have corrected the
problem. Torches improperly operated, maintained or repaired can be dangerous Improper use, service
repair or modification of the torch could result in damage to the product, property damage or personal
injury to the operator.
9. Do not use a leaking, damaged or malfunctioning torch.
10. Work only in well-ventilated areas.
11. Always place your work on firebrick. Ordinary brick and concrete can explode when subject to a high
temperature. Do not work on wood or metal surfaces. Always shield your work.
12. Always wear protective glasses and gloves. Use proper tools to handle hot work. Always have a fire
extinguisher and a bucket of water near the torch and work area.
OPERATION AND LIGHTING:
1. Check that seals are in place and in good condition before connecting to the gas container.
2. Do not use the appliance if it has damaged or worn seals.
3. Do not use an appliance which is leaking, damaged or which does not operate properly.
4. If there is a leak on your appliance (smell of gas), take it outside immediately into a well ventilated flame free
location where the leak may be detected and stopped. If you wish to check for leaks on your appliance, do it
outside. Do not try to detect leaks using a flame, use soapy water.
5. Torch are to be use with Propane Mix Gas only. Use only with Hand Held Propane Cylinders specifically designed
for use with torches. ( valve type EN417. )
6. Before installing the torch to the gas cylinder, make sure the valve is OFF by turning the gas control knob in
clockwise direction until hand tight only. DO NOT FORCE.
7. Hold torch and gas cylinder upright. Turn the gas cylinder clockwise into the torch valve body until hand tight and
attached securely to the torch connector. Check connection for leaks.
4. Turn the gas control knob counter-clockwise about 1/2 to 1 turn then push the safety lock lever to center.
5. To engage the ignition button lock for a continuous work, press the ignition button and push the flame locking
lever aside (leftward). Then release the ignition button.
6. Any other servicing shall be performed by an authorized service representative.
7. Do not clean the flame tube after off the flame, put in the high area and wait 10-15 minutes then use wet tower to
clean the tube.
8. Do not put Torch in the water or the Piazor will lose function.
9. Put the torch in the dry area to avoid piazor lose function and O-Ring break.
HOW TO CHANGE BURNER TUBE
NORMAL FLAME LENGTH: 12cm
Models: BTS-8096
READ ALL INSTRUCTIONS
SAVE THESE INSTRUCTIONS
64
● Seal to Bottom
3
2
1 5
1
2
Don't change the burner tube, when gas cylinder is connected appliance!
Don't violently turn the burner tube, after locking the burner tube!
Every time installing the torch with gas cylinder, make sure the valve is OFF!
Blow Torch
Important: Read these instructions for use carefully so as to familiarize yourself with the appliance before connecting
it to its gas container. Keep these instructions for future reference
FLAME ADJUSTMENT:
1. Turn the adjustment knob to control the gas output according to different applications.
2. Adjust the flame size by turning the control knob to either left ( ) or right ( ). Recommended flame length
should be adjust to 4"~4 3/4" in length to avoid any waste of gas or unstable flame.
3. The maximum heat zone is very concentrated. It's located between 1/2" to 1" from the end of the tip. Holding the
torch too close or too far away from the target can reduce the heating effect.
NORMAL FLAME LENGTH: 12cm
Nominal rate:226g/hr(3.1kW)
Seals
Interchangeable
burner tube Gas control knob
Ignition button
Safety lock
Flame locking lever
BTS-8096 Blow torch
Tech Union Co., Ltd.
5th FL-2, No.26 Wu-Chuan 2RD.,
Hsin Chuang Dist, New
Taipei, Taiwan
• Type of gas:propane mix gas
• Appliance category:vapour pressure-propane
•
This appliance shall only be used with the gas
container which is comply with EN417.
It may be hazardous to attempt to fit other types
of gas containers
• Only use in well ventilated areas
• Consumption rate : 226g/hr(3.1kW)
• Read the instructions before using the appliance
• Flame guard may become very hot
• Keep away from children
Vaihdettavissa oleva suutinputki
Kaasunsäätöruuvi
Sytytyspainike
Liekin lukituspainike
Lukitusvipu

Popular Burner manuals by other brands

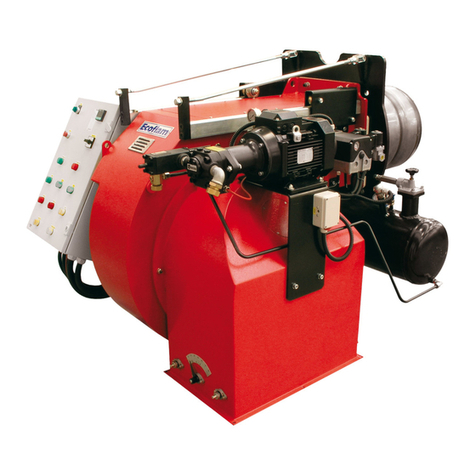
Ecoflam OILFLAM 700.1 PR operating instructions

Ecoflam

Ecoflam OILFLAM 700.1 PR operating instructions

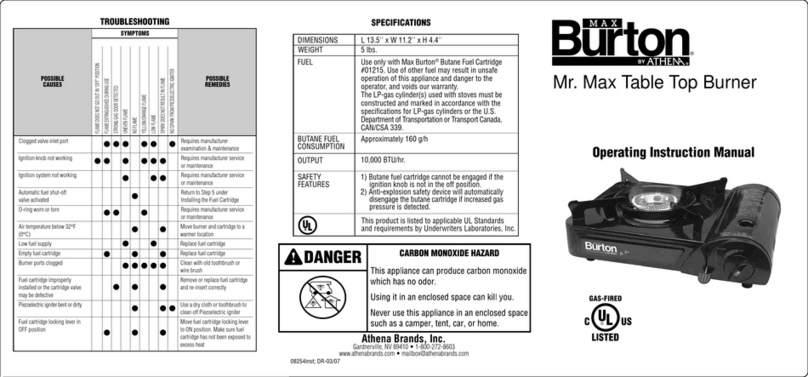
Max Burton Mr. Max Table Top Burner Operating instructions manual

Max Burton

Max Burton Mr. Max Table Top Burner Operating instructions manual

Town & Country Fireplaces TC30.NG03D instructions

Town & Country Fireplaces

Town & Country Fireplaces TC30.NG03D instructions

Weishaupt WG10 0-D ZMI Series Installation and operating instruction manual

Weishaupt

Weishaupt WG10 0-D ZMI Series Installation and operating instruction manual

Riello 1106 T81 Installation, use and maintenance instructions

Riello

Riello 1106 T81 Installation, use and maintenance instructions

Riello RDB4.2 FIREBIRD C58/200K Installation, use and maintenance instructions

Riello

Riello RDB4.2 FIREBIRD C58/200K Installation, use and maintenance instructions

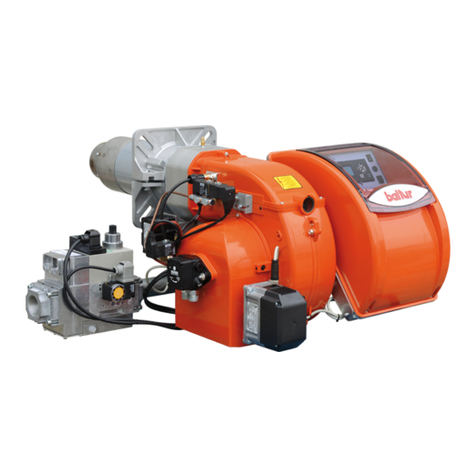
baltur TBML 50 ME INSTALLATION, USE AND MAINTENANCE INSTRUCTION MANUAL

baltur

baltur TBML 50 ME INSTALLATION, USE AND MAINTENANCE INSTRUCTION MANUAL

SUNSTONE 1SSB Use & care guide

SUNSTONE

SUNSTONE 1SSB Use & care guide

Enertech Bentone B55 Series Installation and maintenance  instruction

Enertech

Enertech Bentone B55 Series Installation and maintenance instruction

Sig Marine 10400 Assembly guide

Sig Marine

Sig Marine 10400 Assembly guide

Spark LBS-OD 24 OWNER'S OPERATION AND INSTALLATION MANUAL

Spark

Spark LBS-OD 24 OWNER'S OPERATION AND INSTALLATION MANUAL

Dantherm RG0.R Instruction

Dantherm

Dantherm RG0.R Instruction

Riello RS 34/E MZ Installation, use and maintenance instructions

Riello

Riello RS 34/E MZ Installation, use and maintenance instructions

Beckett AF Series manual

Beckett

Beckett AF Series manual

Riello P 140 P/G Installation, use and maintenance instructions

Riello

Riello P 140 P/G Installation, use and maintenance instructions

Nu-Way MDFL 1880 Installation & maintenance manual

Nu-Way

Nu-Way MDFL 1880 Installation & maintenance manual

Riello 20066726 Installation, use and maintenance instructions

Riello

Riello 20066726 Installation, use and maintenance instructions

Unigas H455A manual

Unigas

Unigas H455A manual

manuals.online logo
manuals.online logoBrands
  • About & Mission
  • Contact us
  • Privacy Policy
  • Terms and Conditions

Copyright 2025 Manuals.Online. All Rights Reserved.