Tokistar Advantage AVLED-KC User manual

TOKISTAR LIGHTING
1015 E. Discovery Lane
Anaheim, CA 92801
TEL: 714 772 7005 FAX: 714 772 7014
email: info@tokistar.com Website: tokistar.com
Advantage Series
PRECAUTIONS
1. Read all instructions completely before beginning installation.
2. Turn off electricity before beginning installation.
3. All wiring is to be performed by a qualied electrician.
4. Installation must comply with the National Electrical Code, and all applicable codes.
5. Turn main supply to transformer on only after all connections are made and tested.
6. Use only transformers provided by Tokistar with the system.
General Description
Tokistar’s Advantage Series is a 24 VAC lighting system using LED modules or rigid-loop xenon lamps. LEDs are
0.72 watts. Xenon lamps are available at 3 watt and 5 watt. Xenon lamps have the voltage and rating stamped on the
glass at one end. Each Advantage xture is labeled with wattage and operating voltage.
This chart gives recommended
maximum lengths which take into
account these two limitations.
Conforming to these lengths will
ensure no xture exceeds 480
Watts, and will not be subjected to
excessive voltage drop.
Secondary Circuit Limitation
The maximum load of each xture must not exceed 480
Watts (20 amps @ 24 Volts). In addition to this limitation,
consideration must be given to the effects of voltage drop.
Fixtures with lower wattage lamps (such as LEDs) and
more distant socket spacing have recommended maximum
lengths less than 480 Watts.
Secondary Circuit Limitation
Each secondary circuit MUST NOT exceed
20 amps (480 watts @ 24VAC)
T
TOKISTAR LIGHTING
INSTRUCTION MANUAL
END VIEW
Socket
Wire Wire
Side View
24/5
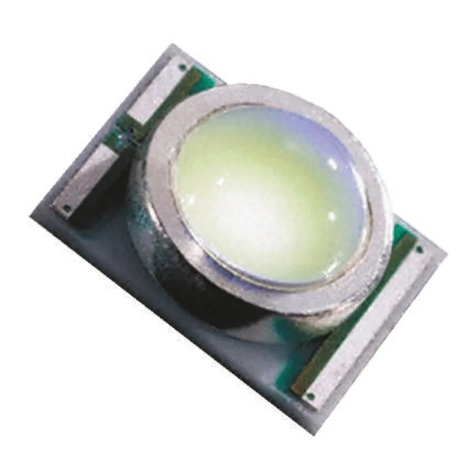
LED Module
The voltage and lamp rating are stamped
on one end of the xenon lamps.
END VIEW
Wire
Socket
Side View
Wire
END VIEW
Xenon Lamp
Light Source
Description Part No.
0.72 Watt LED
0.72 Watt LED
0.72 Watt LED
0.72 Watt LED
3 Watt Xenon
5 Watt Xenon
AVLED-KC
AVLED-LW
AVLED-WW
AVLED-IW
XB-3F
XB-5F
3 Watt/X3 5 Watt/X5 0.72 Watt LED Modules
Maximum Lamps/Circuit 160 Lamps 96 Lamps 400 LEDs
Lamp Spacing Maximum Run Lengths
2.4" O.C. (60 mm)
3" O.C. (75 mm)
4" O.C. (100 mm)
6" O.C. (150 mm)
32' (9.6 M)
40' (12 M)
48' (14.4 M)
60' (18 M)
19' (5.76 M)
24' (7.2 M)
32' (9.6 M)
48' (14.4 M)
80' (24 M)
100' (30 M)
133' (40 M)
200' (60 M)
Version 1.1

PRECAUTIONS / Heat Consideration
Xenon lamps produce heat and will cause damage if they come in direct contact with persons or combustible
materials. In accordance with NEC/NFPA 70 Article 410.11, combustible materials next to xtures must not be
subjected to temperatures in excess of 90º C (194º F). In order to conform to this standard, xtures need to be
installed according to the minimum space requirements shown below.
Step 1: Mounting Fixtures
Option 1 - Direct Screw Mounting (Part# AV-MS)
Each LED or lamp socket, has four mounting holes designed to accept
screws. For secure mounting, use two screws in opposing holes. Sockets
must be rmly attached to support the weight of the xture.
Option 2A - Channel Clamps (Part# AV-CL)
These clamps are for use with our AV-MC Mounting Channel. Screw the
clamps securely in place, then snap in the channel. Attach clamps every 8".
Option 2 - Mounting Channel (Part# AV-MC)
An optional mounting channel may have been provided with your
materials. Screw the channel securely in place, then snap each socket
into the channel. Attach screws every 8".
End Caps - Part# ECD-WH (White) / Part# ECD-BK (Black)
Ends caps are attached to the end of each Advantage lighting xture. If the
xture needs to be trimmed, a new end cap needs to be attached to the end
of the xture after trimming.
3", 4" and 6" socket spacing
Seamless Light
Advantage xtures are exible enough to turn
corners without the use of special hardware,
eliminating dark spots at corner locations.
2.4" socket spacing
Channel Clamp
Mounting Channel
conforms to a 24" inside
or outside radius.
With Reector 2.4" O.C.
Watts d1 d2 D
3
5
.75"
.75"
.75"
1.25"
1.5"
2"
Basic System 2.4" O.C.
Watts d1 d2 D
3
5
1"
1.5"
.75"
1"
1.75"
2.5"
Basic System 2.4" O.C.
Watts d D
3
5
1"
1.5"
2"
3"
Basic System 2.4" O.C.
Watts d D
3
5
.75"
1"
1.5"
2"
D
D
DD
d1
d2
d1
d
d
d2
d
d
Attach screws
every 8"
End Cap
Advantage Instructions Page 2

Installing Clear Lens - Part# AV-LNS
Your xture may have been provided with clear lens
covers. Push the lens directly over the top of the socket.
When properly seated between the two catches on the side
of the socket, the lens will be securely fastened and not
move from side to side.
WIRE
END VIEW SIDE VIEW
WIRE
FOR SHIELD
Clear Lens
Catches secure
Clear Lens in place.
End View
Step 2: Installing Reectors/LEDs/Lamps
Your xture may have been provided with optional reectors.
Symmetrical reectors (#AVWH/BK-REF-S) must be
attached before lamps are installed. Push the plastic reector
base directly over the socket until it is rmly seated in place.
Asymmetrical reectors (#AVWH/BK-REF-A) may be
attached after lamps or LEDs have been installed.
Silver Reector
Plastic Reector Base
Advantage Socket
Installing Reflectors - Part # AVWH-REF-S (White) / Part #: AVBK-REF-S (Black)
Part# AVWH-REF-A (White) / Part# AVBK-REF-A (Black)
Installing LEDs or Lamps
1. Push LED or Lamp into one
side of socket at an angle.
2. Push other side of LED or Lamp
straight down. Do Not Twist.
SOCKET
WIRE
WIRE
24/5
LAMP
SOCKET
WIRE
WIRE
24/5
LAMP
WIRE
WIRE
Lamp Replacement
1. Remove lamps from socket by pulling directly out (Do Not Twist).
2. Replace lamps only with the same or lower wattage lamp.
Advantage Instructions Page 3

Live conductor must be within connector housing
PRECAUTIONS
When attaching wire to terminals, make certain the insulation is stripped and the connection is made so
no live conductors are exposed.
Step 3: Secondary Wiring
Mini Junction Box Connectors - Part# AV-JBOX
If installation involves running wire through a building structure, conduit may be required to feed the xture. A
miniature junction box is available with a 1/2"Ø knockout for use with conduit ttings. The terminal block inside the
junction box accepts 14-8 AWG wire.
All secondary circuit wiring must conform to the National Electrical Code and all applicable codes.
Terminal Block Connectors - Part# AV-CONN
Advantage Series xtures may have been provided with terminal block connectors. One end of this connector screws
directly to the Advantage xture, and the other end accepts 14-8 AWG wire. A screw hole is provided in the center of
the connector for secure mounting.
AV-CONN Terminal Block
T-Connector
T-Connection System - Part# AV-TCON
Our T-Connection system can feed multiple xtures from a
single wiring harness. Female connectors are attached to the
main harness at any interval and the mating male connectors
attach to each end of the xture.
Screw AV-JBOX
rmly in place
Remove AV-JBOX Cover
AV-CONN inside AV-JBOX
Install
Strain-Relief
Maximum 480 Watts (20 Amps) per connection
Advantage Instructions Page 4

PRECAUTIONS
Transformers should be installed in an accessible location. Magnetic transformers generate heat and must be
installed in locations where there is free-air circulation. Electronic transformers require less space to dissipate
heat, but they too should be installed in accessible locations with free-air circulation.
For additional information, please refer to the instruction manual provided with your transformer.
Secondary Circuit Protection
Transformers are provided with circuit breakers to protect secondary circuits. The maximum size circuit breaker on a
transformer is 25 amps, but the circuit wired to the breaker MUST NOT EXCEED 20 AMPS.
There are several transformer sizes available, and different size breakers installed in them. Below is a selection of trans-
formers with their respective circuit limitations.
Larger capacity transformers with multiple out-
puts can be centrally located and feed xtures
in either direction.
Input Voltage
Transformer
Do not exceed maximum xture length
Do not exceed transformer output rating
Transformer Location
The maximum recommended distance between the xture and the transformer varies, based upon the load of each x-
ture and the size of secondary wire feeding the xture. It is impossible to give a denitive distance without considering
all the variables. Electrical engineers and contractors can calculate these distances. Should you need guidance, consult
the factory.
Step 4: Transformer Instructions
25 A
500 Watt
Transformer
Max. Load 20 Amps
480 Watts Max.
15 A
300 Watt
Transformer
Max. Load 12.5 Amps
300 Watts @ 24 VAC
250 Watt
Transformer 15 A Max. Load 10.4 Amps
250 Watts @ 24 VAC
7 A
100 Watt
Transformer
Max. Load 4.1 Amps
100 Watts @ 24 VAC
25 A
25 A
1000 Watt
Transformer Max. Load 20 Amps
480 Watts @ 24 VAC
Max. Load 20 Amps
480 Watts @ 24 VAC 960 Watts Max.
25 A
25 A
750 Watt
Transformer Max. Load 20 Amps
480 Watts @ 24 VAC
Max. Load 20 Amps
480 Watts @ 24 VAC 750 Watts Max.
Advantage Instructions Page 5
Version 1.1
This manual suits for next models
6
Table of contents
