Toner TAVQ User manual

1
User’s Manual
TAVQ
8VSB-QAM Transcoder
Toner Cable Equipment Inc. 969 Horsham Rd Horsham Pennsylvania 19044 USA
T (1) 215 675 2053 800 523 5947
Web ; www.tonercable.com e-mail; info@tonercable.com

2
Contents
1. Safety Instructions & Precautions………………………………..………………
3
2. Operation Guide……………..…………………….…………………………….……… 4-6
2-1. Front Panel……..……………………………….………………………. 4
2-2. Top Edge……..……….……………………………………………….
2-3. Rear Panel……………..……………………………………………….
5
6
3. System Configurations………………….………………………………………..….. 7-18
3-1. Configure through web GUI……………..………………………..…... 7
3-1-1. Ethernet…………………………………………………………..… 7
3-1-2. RF IN / RF OUT………………………………………….………… 8-9
3-1-3. TUNER CONFIG...…………………………………..…………..… 9-15
3-1-4. SAVE………..…..…………………………………….………....…
16-18
3-1-5. SPECIFICATIONS…………………………………….………....… 19

3
1.
Safety Instructions & Precautions
Do not operate the unit in high-humidity areas, or expose it to water or
moisture. No objects filled with liquid should be placed on the device.
Disconnect the product from the wall outlet prior to cleaning. Use a light,
damp cloth (no solvents) to dust or clean the product.
Do not block or cover slots and openings in the unit. These are provided for
ventilation and protection from overheating. Never place the unit near or
over a radiator or heat register. Do not place the unit in an enclosure such as
a cabinet without proper ventilation.
We strongly recommend using the enclosed ground wire connecting to the
ground cable of your house/building to avoid voltage spikes or ground fault.
Never insert objects of any kind into the unit through openings, as the objects
may touch dangerous voltage points or short out parts. This also could cause
fire or electrical shock.
When replacement parts are required, ensure that the service technician uses
replacement parts specified by the seller. Unauthorized substitutions may
damage the unit or cause electrical shock or fire, and will void the warranty.
Upon completion of any service or repair to the unit, ask the service
technician to perform safety checks to ensure that the unit is in proper
operating condition.
CAUTION
RISK OF ELECTRIC SHOCK
DO NOT OPEN
CAUTION: TO REDUCE THE RISK OF ELECTRICAL SHOCK,
DO NOT REMOVE COVER FROM THIS UNIT.
NO USER-SERVICEABLE PARTS INSIDE.
REFER SERVICING TO QUALIFIED SERVICE PERSONNEL.
WARNING: TO PREVENT SHOCK HAZARD,
DO NOT EXPOSE THIS UNIT TO RAIN OR MOISTURE.

4
2.
Operation Guide
2-1. Front Panel
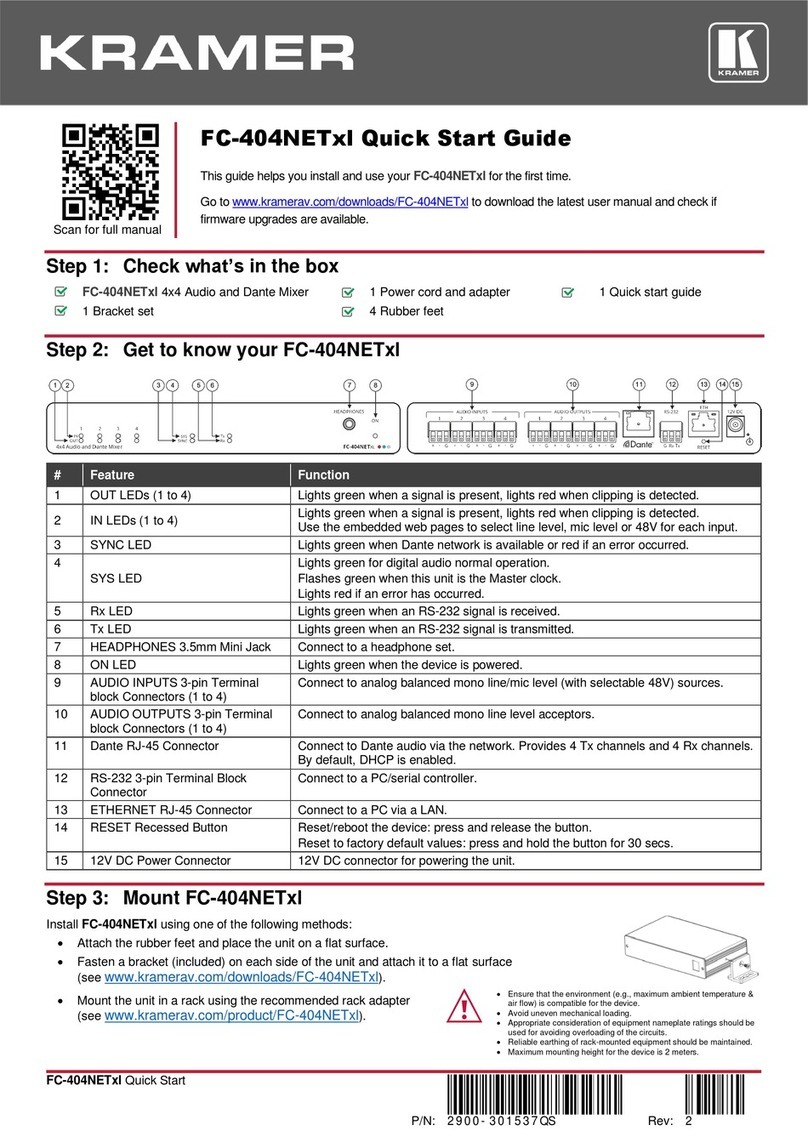
1. POWER INDICATOR : Should be solid RED, (if blinking then there is no input signal)
2. RJ 45 CONNECTOR : For web/remote configuration and system management

5
2-2. Top Edge
To do a Software Update follow this procedure
Step 1 Hold down this button for 5 seconds (button 1)
Step 2 Power up TAVQ transcoder by plugging the power connector in on
the rear of the unit
Step 3 Now follow up software update procedures provided with the Software update
To reset the IP address to Factory default (192.168.1.149)
Step 1 Power on the TAVQ on
Step 2 Hold down button (#1 above) for 5 seconds and release
The TAVQ is re set to factory standard
Connection 2 is only for Factory use

6
2-3. Rear panel
1. RF IN:Signal Input 8VSB
2. RF LOOP:RF Loop output
3. POWER CONNECTOR : Power Supply Input (5VDC/ 12VDC/ GND)
4. RF OUT : QAM Signal Output

7
3.
System Configurations
3-1. Configure through IP interface
Connect the unit to a computer with a ethernet RJ45 cable.
Enter the IP address of the unit (Default address: 192.168.1.149) on web browser
3-1-1. ETHERNET –
Image 1
Select the check box to allow editing then un-select it and save your settings.
PREV
PREV
PREV
PREV
NEXT
NEXT
NEXT

8
3-1-3. Tuner Config (Input)
Image 2
RF Input mode can be set to Channel number or to frequency (center frequency)
Input signal is default to 8VSB and there are no other options (Greyed out)
Once you scan the input the Lock status will change to lock if the TAVQ finds the correct input channel.
Mux Type allows you to select either Pass through or Remux
Pass Through will pass the entire multiplex of the tuned channel (Major and minor channels)
Remux allows you to select which service(s) to process from the tuned channel

9
Pass Through
If you have selected Pass Through and the RF input signal is locked, then the TAVQ will send the entire
mux to the RF Output Image 3. (If the signal is not locked you cannot proceed)
Image 3
RF output can be set by Channel or by Frequency
Output signal can be set to QAM 256 or QAM 64 (QAM 256 is default)
Output RF attenuation allows you to reduce the RF Output level from, 31 dBmV down to 0 dBmV
in 1 dB steps
Remux
If Remux is selected and RF input signal is locked, you then go to the Services List (Image 4)
menu
Select NEXT
NOTE: anytime you select PREV (Previous) to go to a prior screen the Transcoder will stop processing
signals until you re scan

10
Image 4
This screen shows all the services (programs) in the 8VSB Multiplex that are available for
processing
Select the box next to each service you want to process through in the Remux
Once you select the services you want, click NEXT To Image 5

11
Image 5
On this screen you are able to see the services selected as well as the Video and Audio PID’s
If there are more than one Audio PIDs available I/E for a second language here is where you can select if you want it
Select NEXT to go to the Remux configuration screen (image 6)

12
Image 6
If you select “Major Only” then you can only edit and display the Major channel number and
minor is greyed out. If you do not select “Major only” then you can edit both the major and
the minor number which will be displayed.
pmt pid -- Number range is Hex [0x20 ~ 0x1ffe], Dec [32 ~ 8190] We strongly suggest that you
do not edit these pid numbers unless you are an expert in Hexadecimal numbering
major/minor -- This is Major/Minor channel. Number range is (1 to 1023) short
name -- This is Service Name. Character length is max 7 characters serid -- This
is Service ID. Number range is Hex [0x1 ~0xffff], Dec [1 to 65535]
Select Next to go to the RF Output configuration setting screen (image 7)

13
Image 7
You can select RF output either by Channel number or by RF Center
Frequency Enter the channel number or channel center frequency
You can select the RF Output signal QAM mode, either QAM 256 or QAM 64 (QAM-256 is default)
You can now select the RF Output attenuation 0 to 31 dB
NOTE: Reducing the RF Output level with this output attenuation setting will negatively impact C/N.
For more than 2 or 3 dB of attenuation a FAM Attenuator pad on the output is a better choice
Our FAM Kit provides many attenuator options to choose from
You can now select NEXT to go to the device status page (Image 8)

14
Image 8
This screen confirms the previous settings you have made
If the screen content is RED then the input is no longer locked to an 8VSB Channel, you may
have lost the input signal, you need to go back and re scan
(3-1-3. Tuner Config (Input) on Page 8)

15
3-1-4. Saving Settings
Go to the SAVE tab on the main menu screen to save all your settings (Image 9)
Image 9
Click on the box to save your settings. (If you fail to do this you will have to start over)
Backup / Restore / Copy
From this screen you can also perform a backup of your settings, restore settings from a
previous backup or copy the current settings.
To start, click on the Backup / Restore button, this will take you to the Backup / Restore / Copy
filer screen (Image 10)

16
Image 10
BACKUP:
Click Download backup Database to copy the file of all settings and data in file name IP.config
(For example, if IP is 192.168.1.159, it will be filed as 192.168.1.159.config)
RESTORE:
Click Choose File to select configuration file, and click Restore Database to re configure the
TAVQ to a previously saved configuration
Remember once you upload a config file to save it on your TAVQ
COPY:
Step 1; Select Choose File and select the file you want to copy, an icon comes up on your computer
(Image 11)
Step 2; Select saved file (.config)
Step 3; Select a new file name and location and save it to your PC

17
Image 11

18
Specifications
Terrestrial RF Input
Frequency Range: 54 to 608 MHz
Input Level: -35 to 40 dBmV
Input Impedance: 75 ohms
Loop-Through Gain: ±3 dB
Connector: F-Type Female
RF Modulation
ITU-T J.83 Annes: Annex B
Modulation Format: Cable QAM
Mode: 64 QAM or 256 QAM
Phase Noise: @1K≥70dBC; @10K≥80dBC; @100K≥60dBC
MER: 36-40 dB
RF Output
Frequency Range: 54-1000 MHz
Bandwidth: 6 MHz (NTSC)
QAM Symbol Rate: (1) 64 QAM : 5057 Mbps
(2) 256 QAM : 5360 Mbps
Output Level: +35 dBmV with 30 dB adjustment
(+30 dBmV for 860-999 MHz)
Spurious Level: -55 dB typical
Out-of-Band Noise: -55 dB typical
Frequency Stability: ±20 KHz max
Output Impedance: 75 Ohms
Web Control Interface
Connector: F-Type Female
Communication Interface: Ethernet/LAN
Electrical Interface: IEEE 802.3, 10 Base-T
Connector Type: RJ45
General
DC Power Input: 5V/410mA and 12V/200mA
Operating Temperature: 0 to 50°C
Size: 1”W x 3.5”H x 7.5”D
Weight: 1.2 lbs
Support
Contact your sales person or our technical support department for assistance with the TAVQ
Toner Cable Equipment Inc. 969 Horsham Rd Horsham PA 19044 USA
Tel: (1) 215 675 2053 e-mail: info@tonercable.com Website www.tonercable.com
Table of contents


