ToolPRO CMS18G User manual

TOOLPRO
18V compound Mitre saw
Instruction Manual
Important - Please read these instructions fully before operating or maintaining your Mitre saw
These instructions contain important information that will help you get the best from your
Mitre saw, ensuring it remains safe to operate.
If you need help or have damaged or missing parts, call the Customer Helpline on 1300 889 028
After Sales Support
CMS18G
FREE CALL 1300 889 028
EMAIL:salesau@positecgroup.com

Customer Helpline 1300 889 028
2
Contents
Safety Information.....................................................................................................3
InTheBox..................................................................................................................10
Operating Instructions............................................................................................. 12
Maintenance...........................................................................................................21
Technical data..........................................................................................................21

Customer Helpline 1300 889 028
3
Safety Information
Important - Please read these instructions fully before starting assembly
Warning Symbols
To reduce the risk of injury, user must read instruction manual
Warning
Wear ear protection Wear eye protection
Wear dust mask RCM marking
Do not dispose of batteries, Return exhausted batteries to your local collection or recycling
point.
Do not burn Do not expose to rain or water
DO NOT STARE INTO BEAM LASER RADIATION
For indoor use only
Fuse
Positive terminal Negative terminal
ABN: Australian Business Number. By this number, business information such as entity
type, status, business location etc. can be found at website http://abr.business.gov.au.
ABN of Positec Australia Pty Limited is 14 101 682 357

Customer Helpline 1300 889 028
4
WARNING! Read all safety warnings and all instructions. Failure to follow the
warnings and instructions may result in electric shock, fire and/or serious injury.
Save all warnings and instructions for future reference.
The term “power tool” in the warnings refers to your mains-operated (corded) power tool
or battery-operated (cordless) power tool.
1) Work area safety
a) Keep work area clean and well lit. Cluttered or dark areas invite accidents.
b) Do not operate power tools in explosive atmospheres, such as in the presence of
flammable liquids, gases or dust. Power tools create sparks which may ignite the
dust or fumes.
c) Keep children and bystanders away while operating a power tool. Distractions can
cause you to lose control.
2) Electrical safety
a) Power tool plugs must match the outlet. Never modify the plug in any way. Do not
use any adapter plugs with earthed (grounded) power tools. Unmodified plugs and
matching outlets will reduce risk of electric shock.
b) Avoid body contact with earthed or grounded surfaces, such as pipes, radiators,
ranges and refrigerators. There is an increased risk of electric shock if your body is
earthed or grounded.
c) Do not expose power tools to rain or wet conditions. Water entering a power tool will
increase the risk of electric shock.
d) Do not abuse the cord. Never use the cord for carrying, pulling or unplugging the
power tool. Keep cord away from heat, oil, sharp edges or moving parts. Damaged or
entangled cords increase the risk of electric shock.
e) When operating a power tool outdoors, use an extension cord suitable for outdoor
use. Use of a cord suitable for outdoor use reduces the risk of electric shock.
f) If operating a power tool in a damp location is unavoidable, use a residual
current device (RCD) protected supply. Use of an RCD reduces the risk of electric
shock.
3) Personal safety
a) Stay alert, watch what you are doing and use common sense when operating a
power tool. Do not use a power tool while you are tired or under the influence of
drugs, alcohol or medication. A moment of inattention while operating power tools
may result in serious personal injury.
b) Use personal protective equipment. Always wear eye protection. Protective
equipment such as dust mask, non-skid safety shoes, hard hat, or hearing protection
used for appropriate conditions will reduce personal injuries.
c) Prevent unintentional starting. Ensure the switch is in the off-position before
connecting to power source and/or battery pack, picking up or carrying the tool.
Carrying power tools with your finger on the switch or energising power tools that
have the switch on invites accidents.
Safety Information
Important - Please read these instructions fully before starting assembly
General Power Tool Safety Warnings

Customer Helpline 1300 889 028
5
d) Remove any adjusting key or wrench before turning the power tool on. A wrench or
a key left attached to a rotating part of the power tool may result in personal injury.
e) Do not overreach. Keep proper footing and balance at all times. This enables better
control of the power tool in unexpected situations.
f) Dress properly. Do not wear loose clothing or jewellery. Keep your hair, clothing
and gloves away from moving parts. Loose clothes, jewellery or long hair can be
caught in moving parts.
g) If devices are provided for the connection of dust extraction and collection facilities,
ensure these are connected and properly used. Use of dust collection can reduce
dust-related hazards.
h) Do not let familiarity gained from frequent use of tools allow you to become
complacent and ignore tool safety principles. A careless action can cause severe
injury within a fraction of a second.
4) Power tool use and care
a) Do not force the power tool. Use the correct power tool for your application.
The correct power tool will do the job better and safer at the rate for which it was
designed.
b) Do not use the power tool if the switch does not turn it on and off. Any power tool
that cannot be controlled with the switch is dangerous and must be repaired.
c) Disconnect the plug from the power source and/or the battery pack from the power
tool before making any adjustments, changing accessories, or storing power
tools. Such preventive safety measures reduce the risk of starting the power tool
accidentally.
d) Store idle power tools out of the reach of children and do not allow persons
unfamiliar with the power tool or these instructions to operate the power tool.
Power tools are dangerous in the hands of untrained users.
e) Maintain power tools. Check for misalignment or binding of moving parts, breakage
of parts and any other condition that may affect the power tool’s operation. If
damaged, have the power tool repaired before use. Many accidents are caused by
poorly maintained power tools.
f) Keep cutting tools sharp and clean. Properly maintained cutting tools with sharp
cutting edges are less likely to bind and are easier to control.
g) Use the power tool, accessories and tool bits etc. in accordance with these
instructions, taking into account the working conditions and the work to be
performed. Use of the power tool for operations different from those intended could
result in a hazardous situation.
h) Keep handles and grasping surfaces dry, clean and free from oil and grease.
Slippery handles and grasping surfaces do not allow for safe handling and control
of the tool in unexpected situations.
5) Battery tool use and care
a) Recharge only with the charger specified by the manufacturer. A charger that is
suitable for one type of battery pack may create a risk of fire when used with another
battery pack.
Safety Information
Important - Please read these instructions fully before starting assembly
General Power Tool Safety Warnings

Customer Helpline 1300 889 028
6
b) Use power tools only with specifically designated battery packs. Use of any other
battery packs may create a risk of injury and fire.
c) When battery pack is not in use, keep it away from other metal objects, like paper
clips, coins, keys, nails, screws or other small metal objects, that can make a
connection from one terminal to another. Shorting the battery terminals together may
cause burns or a fire.
d) Under abusive conditions, liquid may be ejected from the battery; avoid contact. If
contact accidentally occurs, flush with water. If liquid contacts eyes, additionally seek
medical help. Liquid ejected from the battery may cause irritation or burns.
e) Do not use a battery pack or tool that is damaged or modified. Damaged or modified
batteries may exhibit unpredictable behaviour resulting in fire, explosion or risk of injury.
f) Do not expose a battery pack or tool to fire or excessive temperature. Exposure to fire
or temperature above 130 °C may cause explosion.
g) Follow all charging instructions and do not charge the battery pack or tool outside
the temperature range specified in the instructions. Charging improperly or at
temperatures outside the specified range may damage the battery and increase the risk
of fire.
6) Service
Have your power tool serviced by a qualified repair person using only identical
replacement parts. This will ensure that the safety of the power tool is maintained.
Safety Information
Important - Please read these instructions fully before starting assembly
General Power Tool Safety Warnings
a) Mitre saws are intended to cut wood or wood-like products, they cannot be used with
abrasive cut-off wheels for cutting ferrous material such as bars, rods, studs,etc.
Abrasive dust causes moving parts such as the lower guard to jam. Sparks from abrasive
cutting will burn the lower guard, the kerf insert and other plastic parts.
b) Use clamps to support the workpiece whenever possible. If supporting the workpiece
by hand, you must always keep your hand at least 100 mm from either side of the saw
blade. Do not use this saw to cut pieces that are too small to be securely clamped or
held by hand. If your hand is placed too close to the saw blade,there is an increased risk
of injury from blade contact.
c) The workpiece must be stationary and clamped or held against both the fence and
the table. Do not feed the workpiece into the blade or cut “freehand” in any way.
Unrestrained or moving workpieces could be thrown at high speeds, causing injury.
d) Push the saw through the workpiece. Do not pull the saw through the workpiece. To
make a cut, raise the saw head and pull it out over the workpiece without cutting, start
the motor, press the saw head down and push the saw through the workpiece. Cutting
on the pull stroke is likely to cause the saw blade to climb on top of the workpiece and
violently throw the blade assembly towards the operator.
e) Never cross your hand over the intended line of cutting either in front or behind the
saw blade. Supporting the workpiece “cross handed” i.e. holding the workpiece to the
right of the saw blade with your left hand or vice versa is very dangerous.
f) Do not reach behind the fence with either hand closer than 100 mm from either side
of the saw blade, to remove wood scraps, or for any other reason while the blade is
spinning. The proximity of the spinning saw blade to your hand may not be obvious and
Safety instructions for mitre saws

Customer Helpline 1300 889 028
7
Safety Information
Important - Please read these instructions fully before starting assembly
Safety instructions for mitre saws
you may be seriously injured.
g) Inspect your workpiece before cutting. If the workpiece is bowed or warped, clamp
it with the outside bowed face toward the fence. Always make certain that there is no
gap between the workpiece, fence and table along the line of the cut. Bent or warped
workpieces can twist or shift and may cause binding on the spinning saw blade while
cutting. There should be no nails or foreign objects in the workpiece.
h) Do not use the saw until the table is clear of all tools, wood scraps, etc., except for
the workpiece. Small debris or loose pieces of wood or other objects that contact the
revolving blade can be thrown with high speed.
i) Cut only one workpiece at a time. Stacked multiple workpieces cannot be adequately
clamped or braced and may bind on the blade or shift during cutting.
j) Ensure the mitre saw is mounted or placed on a level, firm work surface before use. A
level and firm work surface reduces the risk of the mitre saw becoming unstable.
k) Plan your work. Every time you change the bevel or mitre angle setting, make sure
the adjustable fence is set correctly to support the workpiece and will not interfere
with the blade or the guarding system. Without turning the tool “ON” and with no
workpiece on the table, move the saw blade through a complete simulated cut to assure
there will be no interference or danger of cutting the fence.
l) Provide adequate support such as table extensions, saw horses, etc. for a workpiece
that is wider or longer than the table top. Workpieces longer or wider than the mitre
saw table can tip if not securely supported. If the cut-off piece or workpiece tips, it can
lift the lower guard or be thrown by the spinning blade.
m) Do not use another person as a substitute for a table extension or as additional
support. Unstable support for the workpiece can cause the blade to bind or the
workpiece to shift during the cutting operation pulling you and the helper into the
spinning blade.
n) The cut-off piece must not be jammed or pressed by any means against the spinning
saw blade. If confined, i.e. using length stops, the cut-off piece could get wedged against
the blade and thrown violently.
o) Always use a clamp or a fixture designed to properly support round material such as
rods or tubing. Rods have a tendency to roll while being cut, causing the blade to “bite”
and pull the work with your hand into the blade.
p) Let the blade reach full speed before contacting the workpiece. This will reduce the
risk of the workpiece being thrown.
q) If the workpiece or blade becomes jammed, turn the mitre saw off. Wait for all moving
parts to stop and disconnect the plug from the power source and/or remove the battery
pack. Then work to free the jammed material. Continued sawing with a jammed
workpiece could cause loss of control or damage to the mitre saw.
r) After finishing the cut, release the switch, hold the saw head down and wait for the
blade to stop before removing the cut-off piece. Reaching with your hand near the
coasting blade is dangerous.
t) Use only saw blades recommended by the manufacturer, which conform to EN 847-1, if
intended for wood and analogous materials.

Customer Helpline 1300 889 028
8
WARNING! Read all safety warnings and all instructions. Failure to follow the
warnings and instructions may result in electric shock, fire and/or serious injury.
Save all warnings and instructions for future reference.
- This appliance is not intended for use by persons (including children) with reduced
physical, sensory or mental capabilities, or lack of experience and knowledge, unless they
have been given supervision or instruction concerning use of the appliance by a person
responsible for their safety.
- Children should be supervised to ensure that they do not play with the appliance.
If the supply cord is damaged, it must be replaced by the manufacturer, its service agent
or similarly qualified persons in order to avoid a hazard.
Additional safety instructions for your Battery Charger
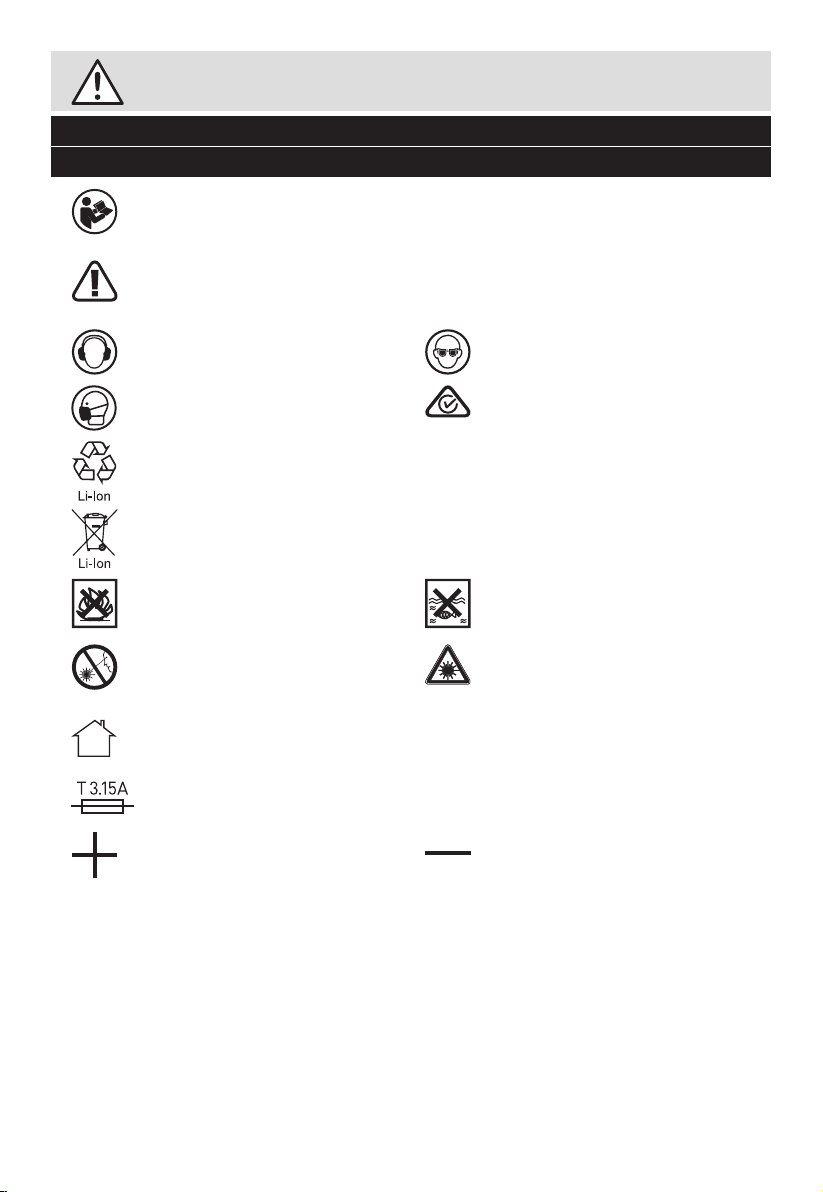
1. Before charging, read the instructions.
2. For charge Li-ion battery pack only.
3. Do not charge a leaking battery.
4. Do not use chargers for works other than those for which they are designed.
5. Before charging, ensure your charger is matching the local AC supply.
6. The charging device must be protected from moisture.
7. Do not use the charging device in the open.
8. Do not short out the contacts of battery or charger.
9. Respect the polarity “+/-“ when charging.
10.Do not open the unit and keep out of the reach of children.
11.Do not charge the batteries of other manufactures or ill-suited models.
12.Ensure that the connection between the battery charger and battery is correctly
positioned and is not obstructed by foreign bodies.
13.Keep battery charger’s slots are free of foreign objects and protect against dirt and
humidity. Store in a dry and frost-free place.
14.When charging batteries, ensure that the battery charger is in a well-ventilated
area and away from inflammable materials. Batteries can get hot during charging.
Do not overcharge any batteries. Ensure that batteries and chargers are not left
unsupervised during charging.
15.Do not recharge non-rechargeable batteries, as they can overheat and break.
16.Longer life and better performance can be obtained if the battery pack is charged
when the air temperature is between 18oC and 24oC. Do not charge the battery pack
in air temperatures below 4.5oC, or above 40.5oC. This is important as it can prevent
serious damage to the battery pack.
17.Charge only battery pack of the same model provided by manufacturer and of
models recommended by manufacturer.
a) Do not dismantle, open or shred cells or battery pack.
b) Do not short-circuit a battery pack. Do not store battery packs haphazardly in a
box or drawer where they may short-circuit each other or be short-circuited by
conductive materials. When battery pack is not in use, keep it away from other metal
objects, like paper clips, coins, keys, nails, screws or other small metal objects, that
can make a connection from one terminal to another. Shorting the battery terminals
together may cause burns or a fire.
c) Do not expose battery pack to heat or fire. Avoid storage in direct sunlight.
Safety Information
Important - Please read these instructions fully before starting assembly
General Safety Warnings for your Battery Charger
Safety Warnings for battery pack

Customer Helpline 1300 889 028
9
Safety Information
Important - Please read these instructions fully before starting assembly
d) Do not subject battery pack to mechanical shock.
e) In the event of battery leaking, do not allow the liquid to come into contact with the
skin or eyes. If contact has been made, wash the affected area with copious amounts
of water and seek medical advice.
f) Seek medical advice immediately if a cell or battery pack has been swallowed.
g) Keep battery pack clean and dry.
h) Wipe the battery pack terminals with a clean dry cloth if they become dirty.
i) Battery pack needs to be charged before use. Always refer to this instruction and use
the correct charging procedure.
j) Do not maintain battery pack on charge when not in use.
k) After extended periods of storage, it may be necessary to charge and discharge the
battery pack several times to obtain maximum performance.
l) Battery pack gives its best performance when it is operated at normal room
temperature (20 °C ± 5 °C).
m) When disposing of battery packs, keep battery packs of different electrochemical
systems separate from each other.
n) Recharge only with the charger specified by POSITEC . Do not use any charger other
than that specifically provided for use with the equipment. A charger that is suitable for
one type of battery pack may create a risk of fire when used with another battery pack.
o) Do not use any battery pack which is not designed for use with the equipment.
p) Keep battery pack out of the reach of children.
q) Retain the original product literature for future reference.
r) Remove the battery from the equipment when not in use.
s) Dispose of properly.
General Safety Warnings for your Laser
WARNING! Read all safety warnings and all instructions. Failure to follow the
warnings and instructions may result in serious injury.
Save all warnings and instructions for future reference.
These lasers do not normally present an optical hazard although staring at the beam may
cause flash blindness.
Do not stare directly at the laser beam. A hazard may exist if you deliberately stare into the
beam, please observe all safety rules as follows:
1. The laser shall be used and maintained in accordance with the manufacturer’s instructions.
2. Never aim the beam at any person or an object other than the work piece.
3. The laser beam shall not be deliberately aimed at another person and shall be prevented
from being directed towards the eye of a person for longer than 0.25 seconds area.
4. Always ensure the laser beam is aimed at a sturdy work piece without reflective
surfaces, e.g. wood or rough-coated surfaces are acceptable. Bright shiny reflective
sheet steel or similar is not suitable for laser applications as the reflective surface may
direct the laser beam back at the operator.
5. Do not change the laser device with a different type. The manufacturer or an authorized
agent must carry out repairs.
6. CAUTION: Use of controls or adjustments other than those specified herein may result in
hazardous radiation exposure.
Additional safety warning for class 2 laser
The laser device fitted to this tool is CLASS 2 with a maximum radiation of 1mW and 650nm
wavelength. CLASS 2 LASER RADIATION, DO NOT STARE INTO BEAM
Safety Warnings for battery pack

Customer Helpline 1300 889 028
10
In The Box
Parts
1
7
6
5
2
8
3
9
4
10
14
12
16
11
15
13
17
18
20
22
24
26
28
30
32
35
19
21
23
25
27
29
31
34
33
36
Operating handle
Release latch
Upper fixed blade safety guard
Blade bolt cover screw
Lower rotating blade safety guard
Laser light
Fence
Table insert
Mitre table lock knob
Mitre latch
Mitre scale
Mitre table
6mm Hex key
Bevel scale adjustment screw
Bevel scale
Slide bars
Guard retraction arm
Blade bolt cover
Switch trigger
Switch locker
Laser light switch
Battery pack
Battery pack release button
Slide lock
Bevel lock knob
0° Bevel adjustment screw
Fence securing screw
Work clamp
Release knob
Motor housing
Spindle lock button
Trenching depth adjustment screw
Trenching stop
Trenching depth lock nut
Mounting hole
Dust bag

Customer Helpline 1300 889 028
11
In The Box
1
2
3
5
4
6
7
8
9
10
21
20
36
35
19
22
23
24
25
27
33
32
34
28
31
29
30
26
111213
14
16
17
18
15
Accessories
Battery pack (ABP118L4) 1
Charger (ACG18LD3) 1
Work clamp 1
Blade wrench 1
Dust bag 1

Customer Helpline 1300 889 028
12
NOTE: Before using the tool, read the instruction book carefully.
Intended Use
The electro-tool is intended as a stationary machine for making straight lengthways and
crossways cuts in wood. Horizontal mitre angles of 0~45oL&R as well as vertical bevel angles
of 0° to +45° are possible.
ASSEMBLY
1. MITRE TABLE LOCK KNOB (See Fig. A)
1) Place the threaded stud on the end of the mitre table lock knob (9) into the threaded hole
in the control arm.
2) Turn clockwise to tighten.
2. TO INSTALL DUST BAG (See Fig B)
This mitre saw comes with a dust bag (36) to help you keep the work area clean. The dust
bag is ideal for small jobs. Attaching the Dust Bag: Hold the dust bag on both sides of the
metal ring, place it on the dust collection port, and then loosen the metal ring. The dust bag
is well installed by not falling off when being pulled back gently.
Operating Instructions
Assembly
A B

Customer Helpline 1300 889 028
13
Operating Instructions
3. WORK CLAMP (See Fig. C)
1) The work clamp (28) can be fitted on either side of the saw and is fully adjustable to suit
the size of the workpiece.
2) Do not operate the saw without clamping the workpiece.
3) Make sure that the work clamp securing screws are tightened.
4. MOUNTING HOLES
Your compound mitre saw should be permanently mounted to a firm, stable-supporting
surface, such as a workbench. Four bolt holes (35) have been provided in the saw base
for this purpose. Each of these four mounting holes should be securely bolted using M8
machine bolts, lock washers and hex nuts (not included). Bolts should be long enough to fit
through the saw base, lock washers, hex nuts and the thickness of the workbench.
Tighten all four bolts securely. Carefully check the workbench after mounting the saw to
make sure that no movement can occur during use. If any tipping, sliding or walking is
noted, secure the workbench to the floor before operating.
WARNING! Always make sure your compound mitre saw is securely mounted to a
workbench or an approved work-stand. Failure to do so could result in an accident,
resulting in possible serious personal injury.
When the saw is boxed, in storage, or being transported, make sure that the saw head is
locked in the down position. To release the head to make it ready for operation, applying
downward pressure and pull out the release knob(29), the head will be raised gently to
upper position.
Assembly
C
D

Customer Helpline 1300 889 028
14
Operating Instructions
Assembly
CHARGING
We strongly recommend to use ToolPRO battery & charger kit. Please contact you local
Supercheap Auto store for more details or log onto www.supercheapauto.com.au for
Australia or www.supercheapauto.co.nz for New Zealand customers to find out more details.
1. BEFORE PUTTING INTO OPERATION
CHARGING THE BATTERY PACK (SEE FIG.D1, D2)
NOTE:
a) The battery in your new tool is not charged when it leaves the plant. Therefore it must
be full charged before using the first time.
b) Do not use any charger other than that specifically provided for use with the equipment.
c) If the battery pack is very hot you must remove your battery pack from the charger and
allow time for the battery to cool down before recharging.
d) Please charge the battery to reach full or no less than half charge before storage. If the tool
will not be used for long periods of time, charge the battery every 3-6 months.
2. CHARGING PROCEDURE
a) Plug the charger into an appropriate outlet.
b) Place the battery pack into the charger
c) When charging is completed,unplug the charger and remove the battery pack.
NOTE: If the battery pack is locked in the charger, press the battery pack release button
and remove it.
WARNING: When battery charge runs out after continuous use or exposure to direct
sunlight or heat, allow time for the battery to cool down before re-charging to
achieve the full charge.

Customer Helpline 1300 889 028
15
Operating Instructions
Assembly
3. CHARGING INDICATOR
a) Fast charger(See fig. D1)
Light ON/OFF flash Status
Red on Charging
Red flash - - - - - Defective Battery
Green on Fully Charged
Green flash - - - - - - Hot/Cold Delay
b) Slow charger(See fig. D2)
Light ON/OFF flash Status
Green flash - - - - - Charging
Green on Fully Charged
D1 D2

Customer Helpline 1300 889 028
16
Operating Instructions
1. SWITCH TRIGGER (See Fig. E)
Operating the switch trigger (19) with your forefinger and then squeeze on it to turn on the
machine, when the blade has reached maximum speed, unlock the lower rotating blade
safety guard (5) by operating the release latch (2) using your thumb. It will then be feasible
to push the saw head down by the handle.
To do continuously work, press the switch trigger (19) continuously. Release switch to turn off.
2. TO CROSSCUT WITH YOUR MITRE SAW (See Fig F)
1) Remove the battery pack.
WARNING! To prevent personal injury, always remove the battery pack from the
tool before assembling parts, making adjustments or changing blades.
2) Pull out the release knob (29) and lift the saw arm to its full height.
3) Loosen (unscrew) the mitre table lock knob (9) approximately one-half turn.
4) Lift mitre latch (10) with your forefinger and hold.
5) Rotate the control arm until the pointer aligns with the desired angle on the mitre scale.
6) Release the mitre latch (10).
NOTE: You can quickly locate 0°, 15°, 22.5°, 31.62°, and 45oleft or right by releasing
the lock plate as you rotate the control arm. The lock plate will seat itself in one of the
positive stop notches, located in the mitre table frame.
7) Tighten the mitre table lock knob (9) securely.
WARNING! To avoid serious personal injury, ALWAYS tighten the mitre table lock
knob securely BEFORE making a cut. Failure to do so could result in movement of
the control arm or mitre table while making a cut.
8) Place work-piece flat on the mitre table with one edge securely against the fence. If the
board is warped, place the convex side against the fence (7). If the concave edge of the
board is against the fence, the board could collapse on the blade at the end of the cut
and jam the blade.
9) When cutting long pieces of lumber or molding, support the opposite end of the stock with a
roller stand (not provided) or with another work surface that is level with the mitre table (12).
10) Align cutting line on the work-piece with the edge on the saw blade.
11) Hold the stock firmly with one hand and secure it against the fence. Use the work
clamp(28) to secure the work-piece when possible.
WARNING! To avoid serious personal injury, ALWAYS keep your hands outside
the “no hands zone”at least 80mm from blade. Also, NEVER perform any cutting
operation “freehand” (i.e. without holding work-piece against the fence); the blade
Operation
E
F

Customer Helpline 1300 889 028
17
Operating Instructions
could grab the work-piece, causing it to slip and twist.
12) BEFORE turning on the saw, perform a dry run of the cutting operation just to
make sure that no problems will occur when the cut is made.
13) Check position of the Trenching depth adjustment screw(32) and the Trenching
stop(33), making sure that they are adjusted properly to a desired height, so after
operating the blade cuts to a desired depth and would not harm to the base or table.
14) Hold the operating handle (1) firmly, when squeezing the switch trigger (19). Allow
several seconds for the blade to reach maximum speed.
15) Operating the release latch (2) and then, slowly lower the blade into and through
the work-piece.
16) Release the switch trigger (19) and allow the saw blade to stop rotating BEFORE
raising the blade out of the work-piece. Wait until the electric brake stops the
blade from turning BEFORE removing the work-piece from the mitre table.
3. BEVEL CUTTING (See Fig. G)
A bevel cut is a cut made across the grain of the work-piece with the blade at an angle
to the work-piece.
A straight bevel cut is made with the mitre table set in the 0oposition and the blade set at
an angle between 0oand 45o. Hold the operating handle and then loosen the bevel lock
knob (25), rotate the head to adjust the blade to a desired angle, Tighten the bevel lock.
Operation
E
F
G
H

Customer Helpline 1300 889 028
18
4. COMPOUND MITRE CUTTING (See Fig. H)
A compound mitre cut is a cut made using a mitre angle and a bevel angle at the same time.
This type of cut is used for moldings, picture frames, and boxes with sloping sides.
To make this type of cut, the control arm on the mitre table must be rotated to the correct
angle and the blade must be tilted to the correct bevel angle. ALWAYS take special care when
making compound mitre setups due to the interaction of the two angle settings.
Adjustments of mitre and bevel settings are dependent on one another. Each time you adjust
the mitre setting, you change the effect of the bevel setting. Also, each time you adjust the
bevel setting, you change the effect of the mitre setting. It may take several settings to obtain
the desired cut. The first angle setting should be checked after setting the second angle, since
adjusting the second angle affects the first. Once the two correct settings for a particular cut
have been obtained, ALWAYS make a test cut in scrap material BEFORE making a finish cut in
good material.
To Make a Compound Mitre Cut With Your Mitre Saw
Refer to section 2&3.
5. SUPPORT LONG WORK-PIECE
Long work-pieces require extra supports. The supports should be placed along the work-
piece so it does not sag. The support should allow the work-piece to lay flat on the base of the
work table during the cutting operation. Use the work clamp to secure the work-piece.
WARNING! To avoid serious personal injury, ALWAYS keep your hands outside the “no
hands zone” at least 80mm from blade. Also, NEVER perform any cutting operation
“freehand” (i.e. without holding work-piece against the fence); the blade could grab the work-
piece, causing it to slip and twist.
6. SETTING THE TABLE SQUARE WITH THE BLADE
1) Make sure that the battery pack is removed from the machine.
2) Push the saw arm down to its lowest position and engage the release knob (29) to hold
the saw arm in the transport position.
3) Loosen the mitre table lock knob (9) and lifting up the mitre latch (10).
4) Rotate the table until the pointer is positioned at 0°.
5) Release mitre latch (10) and tighten the mitre table lock knob (9).
6) Loosen the bevel lock (25) and set the saw arm at 0°bevel (the blade at 90°to the mitre
table). Tighten the bevel lock.
G
H
Operating Instructions
Operation

Customer Helpline 1300 889 028
19
7) Place a set square (not provided) against the table and the flat part of the blade.
8) Rotate the blade by hand and check the blade-to-table alignment at several points.
9) The edge of the set square and the saw blade should be parallel.
10) If the saw blade angles away from the set square, adjust as follows.
11) Use an 10 mm wrench or adjustable wrench (not provided) to loosen the lock nut securing
the 0° bevel adjustment screw (26). Also, loosen the bevel lock (25).
12) Adjust the 0° bevel adjustment screw (26) using a 3 mm hex key (not provided) to bring
the saw blade into alignment with the square.
13) Loosen the Phillips head screw holding the pointer of the bevel scale (15) and adjust
the position of the pointer so that it accurately indicates zero on the scale. Retighten the
screw.
14) Retighten the bevel lock and the lock nut securing the 0° bevel adjustment screw (26).
7. SETTING THE FENCE SQUARE WITH THE TABLE
1) Make sure that the battery pack is removed from the machine.
2) Push the saw arm down to its lowest position and engage the release knob (29) to hold
the saw arm in the transport position.
3) Loosen the mitre table lock knob (9) and lifting up the mitre latch (10).
4) Rotate the table until the pointer is positioned at 0°.
5) Release mitre latch (10) and tighten the mitre table lock knob (9).
6) Using the 6 mm hex key (13) provided, loosen the two screws securing the fence to the
base.
7) Place a square (not provided) against the fence and alongside the blade.
8) Adjust the fence until it is square with the blade.
9) Tighten the screws securing the fence.
10) Loosen the Phillips head screw holding the pointer of the mitre scale (11) and adjust it so
that it accurately indicates the zero position on the mitre scale (11).
11) Retighten the screw securing the mitre scale pointer.
8. CHANGING BLADE
1) Make sure that the battery pack is removed from the machine.
2) Push down on the operating handle and pull the release knob (29) to release the saw arm.
3) Use the screwdriver to loosen the blade bolt cover screw (4).
4) Pull the lower rotating blade safety guard (5) up. Assure the lowest point of the lower
rotating blade safety guard is positioned over the upper fixed blade safety guard (3), the
blade bolt cover (18) should have been moved and now it is possible to access the blade
bolt.
5) Use your right hand to press the spindle lock button(31). Use you left hand to rotate the
blade until the spindle locks.
6) Use the 6 mm hex key (13) provided to loosen and remove the blade bolt. (Loosen in a
clockwise direction as the blade screw has a left hand thread).
7) Remove the outer flange and the blade.
8) Fit the new blade onto the spindle, taking care that the inner flange sits behind the blade.
9) Replace the outer flange.
10) Depress the spindle lock button (31) and replace the blade bolt.
11) Use the 6 mm hex key provided to tighten the blade bolt securely (tighten in an anti-
clockwise direction).
Operating Instructions
Operation

Customer Helpline 1300 889 028
20
Operating Instructions
Operation
12) Lower the lower rotating blade safety guard (5), hold the lower rotating blade safety guard
(5) and blade bolt cover (18) in position and tighten the fixing screw (4) to secure the blade
bolt cover in position.
WARNING! The blade bolt cover must be positioned correctly and the bolt cover
screw must be screwed securely before you conduct the next move.
13) Check that the lower rotating blade safety guard operates correctly and covers the blade
as the saw arm is lowered.
14) Connect the saw to the battery pack and run the blade to make certain that it is operating
correctly.
Table of contents
Other ToolPRO Saw manuals
Popular Saw manuals by other brands

Laguna Tools
Laguna Tools Platinum Series manual

TYROLIT Hydrostress
TYROLIT Hydrostress TME1000P Operating manual / spare parts list

Grizzly
Grizzly G9744 Machine data sheet

Baukraft
Baukraft BK-CRS33 Original instruction manual

Bosch
Bosch Professional GKS 140 Original instructions

Worx
Worx WX500 Original instructions

Record Power
Record Power BS250 Original instruction manual

Festool
Festool SSU 200 EB Original instructions

Kompernass
Kompernass PKGS1450 Operating and safety instructions

Festool
Festool ISC 240 Li Original instructions

Würth
Würth AFS 18 COMPACT Translation of the original operating instructions

Diamond Products
Diamond Products CC500M Operator's manual