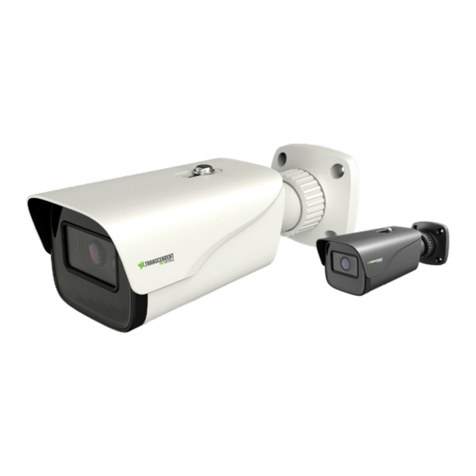
Top View A100WIRF Series User manual

3MP Ultra Discreet In-Ceiling Industrial
Indoor Network Dome Camera
User Manual
V. 02.11

Mini Dome Series | User Manual
1
Table of Content
1Product Overview 4
1.1 Physical Characteristics 4
2Installation and Connection 6
2.1 Package Content 6
2.2 Installation 6
2.2.1 Checking Appearance 6
2.2.2 Connecting the power wire 6
2.2.3 Disassembling the Camera 7
2.2.4 Installing the Camera 9
2.2.5 Network Topology 11
2.2.6 System Requirements 11
2.3 Connection 12
2.3.1 Default IP address 12
2.3.2 Connecting from a computer & Viewing Preparation 12
2.4 IP Finder 16
3Administration and Configuration 17
3.1 Live View 17
3.2 Configuration 19
3.2.1 Information 19
3.2.2 Image Parameter 19
3.2.3 Network Settings 28
3.2.4 Account Management 32
3.2.5 Event Settings 33
3.2.6Record Settings 36
3.2.7 System Settings 37
3.2.8 Event Log 40
Appendix A: Specification of A301MIF Series 41

Mini Dome Series | User Manual
2
WARNING
This unit operates with PoE (IEEE 802.3af Class 0) as power supply only.
Installation and service should be performed only by qualified and experienced technicians and comply
with all local codes and rules to maintain your warranty.
To reduce the risk of fire or electric shock, do not expose the product to rain or moisture.
Wipe the camera with a dry soft cloth. For tough stains, slightly apply with diluted neutral detergent and
wipe with a dry soft cloth.
Donotapplybenzene orthinnertothecamera,whichmaycausethesurfaceof unitto bemeltedorlensfogged.
Avoid aligning the lens to very bright objects (example, light fixtures) for long periods of time.
Avoid operating or storing the unit in the following locations:
Extremely humid, dusty, or hot/cold environments (recommended operating temperature: -10°C to +50°C)
Close to sources of powerful radio or TV transmitters
Close to fluorescent lamps or objects with reflections
Under unstable or flickering light sources
Get Started
This user manual is designed as a reference for the installation and manipulations of the unit including the
camera’s features, functions, and detailed explanation of the menu tree. Please read this manual thoroughly
and save it for future use before attempting to connect or operate the unit. The reader is supposed to be able
to get the following information in this manual.
Product Overview: the main functions and system requirements of the unit.
Installation and Connection: instructions on unit installation and wire connections.
Administration and Configuration: the main menu navigation and controls explanations.
WEEE (Waste Electrical and Electronic Equipment). Correct disposal of this product
(applicable in the European Union and other European countries with separate collection
systems). This product should be disposed of, at the end of its useful life, as per applicable
local laws, regulations, and procedures.

Mini Dome Series | User Manual
3
FCC Compliance Statement
Information to the user: This unit has been tested and found to comply with the limits for a Class
B digital device pursuant to Part 15 of the FCC Rules. Operation is subject to the following two
conditions: (1) this device may not cause harmful interference, and (2) this device must accept
any interference received, including interference that may cause undesired operation. These
limits are designed to provide reasonable protection against harmful interference in a residential installation.
This unit generates, uses, and can radiate radio frequency energy and, if not installed and used in accordance
with the manual, may cause harmful interference to radio communications. However, there is no guarantee
that interference will not occur in a particular installation.
If this unit does cause harmful interference to radio or television reception, which can be determined by
turning the unit off and on, the user is encouraged to try to correct the interference by one or more of the
following measures:
Reorient or relocate the receiving antenna.
Increase the separation between the unit and receiver.
Connect the unit to an outlet on a circuit different from that to which the receiver is connected.
Consult the dealer or an experienced radio/TV technician for help.
Caution
Changes or modifications not expressly approved by the party responsible for compliance
could void the user’s authority to operate the unit.
CE Statement
Operation is subject to the following two conditions: (1) this device may not cause harmful
interference, and (2) this device must accept any interference received, including interference
that may cause undesired operation. The manufacturer declares that the unit supplied with this
guide is compliant with the essential protection requirements of EMC directive and General Product Safety
Directive GPSD conforming to requirements of standards EN55022 for emission, EN 55024 for immunity, EN
300 and EN 328 for WIFI.

Mini Dome Series | User Manual
4
1Product Overview
1.1 Physical Characteristics
Figure 1 - 1: Dimension & Pictorial Index
Unit: ㎜

Mini Dome Series | User Manual
5
Table 1 - 1: Pictorial Index Definition
Index #
Name
1
Bracket
2
Unit Body
3
Dome Case
Figure 1 - 2: Rear Panel
Table 1 - 2: Network LED and Button Definition
RJ-45 Ethernet
Connector/PoE
To insert the RJ-45 cable for network
connection along with PoE (Power over
Ethernet) capability
Ethernet
Link LED
Solid green light stands
for a live connection is
established
Ethernet
Activity
LED
Amber flashing indicates
data is being transmitted
/ received by the unit
DEFAULT
Using a paperclip or thin object to reset
all settings of unit to the factory default
by pressing for 5 seconds.
RESET
Using a paperclip or thin object to
reboot the unit.

Mini Dome Series | User Manual
6
2Installation and Connection
2.1 Package Content
Check everything in the packing box matches to the order form and the packing slip. In addition to this manual,
items below are included in the packing box.
One set of mini indoor dome camera
One CD containing the IP Finder, user manual, and quick installation guide
One printed quick installation guide
One mounting template
Please contact your dealer if any item missing.
2.2 Installation
Following tools might help you complete the installation:
a drill
screwdrivers
wire cutters
2.2.1 Checking Appearance
When first unboxing, please check whether if there is any visible damage to appearance of the unit and its
accessories. The protective materials used for the packaging should be able to protect the unit from most of
accidents during transportation. Please remove the protective materials of the unit when every item is
checked in accordance with the list in “2.1 Package Content”
2.2.2 Connecting the power wire
PoE (IEEE 802.3af Class 0): Connect the RJ-45 jack to a PoE compatible network device that supplied
power through the Ethernet cable.

Mini Dome Series | User Manual
7
2.2.3 Disassembling the Camera
Step 1: Loosen the screws on the dome case
1. Use a screwdriver to counterclockwise loosen the screw on the dome case.
Figure 2 - 1: Disassembling the Camera 1/4
Step 2: Remove the dome case
1. After the screw was loosened, gently remove the dome case from the unit.
Figure 2 - 2: Disassembling the Camera 2/4

Mini Dome Series | User Manual
8
Step 3: Remove the unit body while retaining bracket on ceiling
1. Pull the 3 fasteners on the bracket apart to take out the unit body. (Two of three fasteners are thinner,
which are the 1st priority to pulling apart before the rest thicker one.)
2. Take off the unit body while the bracket is still attached to the ceiling.
Figure 2 - 3: Disassembling the Camera 3/4
Step 4:Detach network cable and finish disassembling.
1. Simply take the network cable out from the unit body to complete the disassembling process.
Figure 2 - 4: Disassembling the Camera 4/4

Mini Dome Series | User Manual
9
2.2.4 Installing the Camera
Step 1:
1. Use the mounting template to mark out and prepare a mounting area on ceiling.
2. Drill a round hole with Ø 84mm in diameter based on the mounting template on ceiling.
3. Put network cable through the drilled hole on ceiling, and attach the cable to the unit body with bracket.
4. Put unit body with bracket into the round hole on ceiling. (Please hold it securely since it’s not fixed yet.)
Figure 2 - 5: Installing the Camera 1/5
Step 2:
1. Use a screwdriver to turn the three screws of the bracket clockwise so that you can expand locking arms.
2. Tighten the screws sufficiently to compress the locking arms and thus stably fix the unit to the mounting
surface.
Figure 2 - 6: Installing the Camera 2/5

Mini Dome Series | User Manual
10
Step 3:
1. Before fully compressing the locking arms, users are able to pan the unit horizontally to adjust coverage.
2. Also, the lens can be tilted vertically for users to adjust till a desired view angle.
Figure 2 - 7: Installing the Camera 3/5
Step 4:
1. Mount the dome case onto the steadily fixed unit. It’s required to pay heed to the right direction.
Figure 2 - 8: Installing the Camera 4/5
Step 5:
1. Clockwise lock the screw on dome case with a screwdriver to fix it for complete installation.
Figure 2 - 9: Installing the Camera 5/5

Mini Dome Series | User Manual
11
2.2.5 Network Topology
The unit, which is equipped with Ethernet RJ-45 network interface, can deliver video images and audio in real
time via either Internet or Intranet. Please refer to the skeleton drawings shown below for understanding.
Figure 2 - 10: Network Topology
2.2.6 System Requirements
Below table lists the minimum requirement to implement and operate the unit. No hardware/software
component inferior to the requirements is recommended.
Table 2 - 1: System Requirements
System Hardware
CPU
Intel Pentium 4 2.4GHz or equivalent
RAM
1 GB or above
Display
NVIDIA GeForce 6 Series or ATI Mobility Radeon 9500
System Software
Operating System
Microsoft Windows XP, Windows Vista, Windows 7 or above
Browser
Microsoft Internet Explorer 8 ~ 10, Chrome, Firefox
Unit
Power Supply
PoE (IEEE 802.3af Class 0)
Networking
Wired*
10/100BASE-T Ethernet (RJ-45 connector)
*a switch is required for surveillance on multiple units.
Note
All the installation and operations should comply with your local electricity safety rules.

Mini Dome Series | User Manual
12
2.3 Connection
2.3.1 Default IP address
Since this is a network-based unit, an IP address must be assigned at the very first. The unit’s default IP
address is 192.168.0.30 and sub mask is 255.255.255.0. However, if you have a DHCP server in your
network, the unit would obtain an IP address automatically from the DHCP server so that you don’t need to
change the camera’s IP address. But be sure to enable DHCP in "Network Settings".
2.3.2 Connecting from a computer & Viewing Preparation
Connecting from a computer
1. Make sure the unit and your computer are in the same subnet.
2. Check whether if the networking available between the unit and the computer by executing ping the
default IP address. To do this, simply start a command prompt (Windows: from the Start Menu, select
Program. Then select Accessories and choose Command Prompt.), and type “Ping 192.168.0.30”. If the
message “Reply from…” appears, it means the connection is available.
3. Start a browser e.g. Internet Explorer and enter IP address: 192.168.0.30. A login window should pop up.
In the window, enter the default user name: admin and password: 1234 to log in.
Further administration on the unit can be found in “3. Administration and Configuration".
Figure 2 - 11: Login Window

Mini Dome Series | User Manual
13
Viewing Preparation
Images of the unit can be viewed through various browsers. Before viewing, follow these steps to enable the
display.
1. Enable Cookies as instructions below
In Internet Explorer, click Internet Options on the Tools menu.
On the Privacy tab, move the settings slider to Low or Accept All Cookies.
Click OK.
2. When a proxy server is used, click Internet Options on the Tools menus of Internet Explorer, select
Connect tab, click LAN button, and set proxy server.
3. Change Security in Internet options as instructions below
On tool menu, click Internet Options.
Press the Security tab.
If the camera operates inside of the intranet, click the Intranet icon.
If the camera operates outside of the intranet, click the Internet icon.
Click Custom Level. This will open the Security Settings –Internet Zone screen.
Figure 2 - 12: Security Settings 1/4

Mini Dome Series | User Manual
14
Scroll down to the ActiveX controls and plug-ins radio buttons and set as follows:
【Download signed ActiveX controls】Prompt (recommended)
【Download unsigned ActiveX controls】Prompt
【Initialize and script ActiveX not marked as safe for scripting】Prompt
Figure 2 - 13: Security Settings 2/4
【Automatic prompting for ActiveX controls】Enable
Figure 2 - 14: Security Settings 3/4

Mini Dome Series | User Manual
15
【Run ActiveX controls and plug-ins】Enable
【Script ActiveX controls marked safe for scripting*】Enable
Figure 2 - 15: Security Settings 4/4
Press OK to save the settings.
Close all your browser windows and restart a new window. This will allow the new settings taking
effect.
Type your setting IP address into the browser.
Then you should be able to see the camera image screen.

Mini Dome Series | User Manual
16
2.4 IP Finder
IP Finder is a utility program that helps users to locate the unit in local area network that computer is
connected to. Please note that IP Finder works only in Microsoft Windows XP, Microsoft Windows Vista, and
Microsoft Windows 7 or above. Steps to get the utility program running are listed below.
1. Insert the CD-ROM in the optical drive.
2. Copy the IP Finder’s folder on the CD-ROM to computer.
3. Double click on IPFinder.exe in computer’s IP Finder folder, and the IP Finder window should pop out.
4. The window would list information of units in operation at present. Press FIND CAMERA to find more units.
5. Locate and double-click one of the cameras in the list you want to configure the network settings. If you
have multiple cameras connected to your local network, locate the MAC address on the camera to
distinguish the target camera from others.
6. Configure the following settings as needed.
NAME: Enter a descriptive name for the camera.
NETWORK SETTINGS: If you have a DHCP server on your network to assign IP addresses to
network devices, enable the DHCP option. Otherwise, manually enter the IP ADDRESS, NET MASK
and GATEWAY values.
USERNAME & PASSWORD: Manually setup preferred username and password.
SET: Whenever you make revision of camera settings, click “SET”to take effect.
SW DEFAULT: To perform the factory defaults excluding network settings of the selected camera.
HW DEFAULT: To perform the factory defaults of the selected camera.
RESET: To reboot the selected camera.
Click Save to enable the settings and click Exit to exit the utility.
Figure 2 - 16: IP Camera Finder

Mini Dome Series | User Manual
17
3Administration and Configuration
3.1 Live View
Figure 3 - 1: First Login Page
After accessing and login to the IP address of the unit, the screen will be shown as the above screenshot. There
are 2 main options on the upper left side: “Live View”and “Configuration”. While the upper right side indicates
your current login user level with “Logout”option which enables you to log out after pressing. Wemainly focus
on Live View functionalities in this chapter and will detail Configuration in the “3.2 Configuration”later.
Figure 3 - 2: Live View
After clicking “Live View”, you will be led to real-time live view screen, the left dropdown menu is for user
interface language changing and the Stream lets users toggle among each stream settings for better
adaptation in different network condition, for which you may refer to “Edit Profiles & Streams”for more details.
The following icons within the table, which are on the top of live view screen, are for some functions activating
and event warning status. Please refer to the detailed definitions below for more understanding.

Mini Dome Series | User Manual
18
Icon
Definition
The “Snapshot”button is for taking a snapshot saved in a user-preferred file path.
The “Fixed”button is for users to display a fixed size live view screen.
The “Real”button is for users to display a real size live view screen.
The “Full Screen”button is for users to display a full screen live view display. (Press Esc to back)
The “Audio Input”button is for users to toggle on/off the audio input function.
The vibration-like icon indicates motion(s) being detected in camera coverage.
Table 3 - 1: Live View Icon Definition
Figure 3 - 3: Live View Right-Clicking Controls
Right clicking on the live view screen can obtain more info.
Version
Click to view the browser plug-in version details.
Note
Keep the zoom level of IE as 100% to display normal live view.

Mini Dome Series | User Manual
19
3.2 Configuration
After clicking the “Configuration”option, the screen will be shown as below with several menu options for
users to configure on the left side. We will thoroughly introduce them one by one in the following chapters.
Figure 3 - 4: Configure Menu
3.2.1 Information
Users can view, after clicking “Information”, the detailed information related to the unit including Firmware
Version, MAC Address and Model Name in the middle of the screen.
Figure 3 - 5: Information
3.2.2 Image Parameter
The Image Parameter contains several basic display settings like resolution, codec, FPS, GOP and so on. In
addition, it has some extending settings including exposure, color, and white balance for the unit. Also, users
can set preferred privacy zone under this menu tree as well.
This manual suits for next models
3
Table of contents
Other Top View Security Camera manuals

