Tornado BB3G User manual

BB3G User Guide
v.2 for v.54 Instan
t
Tal
k
I
nst
a
n
t
Al
e
r
t
Instan
t
Locat
e

Contents
BB3G Key and Handset Layout 3
Push To Talk Icons 4
Getting Started 4
- Charging the Battery 4
- Setting up Push To Talk (PTT) for the First Time 4
- Using Push To Talk (PTT) 5
- PTT Home Screen 5
My Status 6
Managing Your Contacts 8
Push To Talk Calls 9
- Group Types 9
- Call Behaviour 9
- Making a Call 9
- Calling Your Default Radio Channel 9
Calling Another Group 10
- Broadcast to an Ad-hoc Group 10
Request Call-back 11
Creating a Personal Group 12
Instant Messaging 13
- Sending a New Instant Message 13
- Replying to a Instant Message 13
- Opening Existing Instant Messaging Conversations 13
- Ending an Active Instant Messaging Session 13
Sending an SOS 14
Push To Talk Management Features 14
- Switching Between Loud Speaker and Phone Speaker 14
- Changing the Volume 14
- Viewing the Call Logs 14
Bluetooth Status 15
2
Push To Experience
Push To Talk (PTT) on the BB3G
will allow you to hold one-to-one
and one-to-many conversations
at the push of a button. You will
be able to set your availability,
view your colleagues’ current
status, manage your PTT contacts
and initiate calls to pre-defined
or ad-hoc groups.
The BB3G has inbuilt GPS to
enable users to be located and
it has a dedicated Alert button.
The following guide will enable
you to set up and start using
PTT on your BB3G.
EarpieceFront Camera
LCD
Left Select Key Right Select Key
Back Key
Call Key
Microphone
*Key
Clear Key
# Key
End/Exit and
ON/OFF
Arrow Keys
(Left/Right/Up/Down/OK)
Charger / USB Port
& Headset Jack
Alert Button
Rear
Camera
Volume
Up/Down
PTT
Button
Battery
Compartment
3

Charging the Battery
Insert the charger lead carefully with the arrow on the top. The lead only fits one
way. Do NOT use excessive force to insert the lead. The phone can also be charged
by connecting it to the PC using the USB data lead supplied. If the battery has no
charge at all, it may take a few minutes before the charging indicator appears on
the display. Charging takes 4-5 hours whilst the phone is powered off.
Setting up Push To Talk (PTT) for the First Time
PTT will be provisioned remotely by the service administrator or service provider;
the phone will need to be switched on with an active SIM card inserted that has
been enabled with the PTT service. Contact the service administrator or service
provider when the phone is ready to be provisioned.
Push To Talk Icons
Getting Started
Vibrate Mode Radio Channel (within menu)
Data Connection Broadcast Channel (within menu)
Battery Indicator Current Call
Online Status Groups
Offline Status Contacts
Marked Contact Instant Messaging
4
Press Once
Using Push To Talk (PTT)
When PTT is provisioned go to the Main Phone Menu to open the PTT application.
Alternatively, press the PTT button on the side of the handset.
PTT Home Screen
There are 4 menu screens in the PTT application, scroll left and right to view them.
Current CallGroupsContacts Instant
Messaging
5

My Status informs other users of availability, and can be manually changed.
Other user statuses can also be viewed from the Contacts/Current Call Menu.
The status modes are:
Changing the Status
This can be set from any PTT screen.
1. Select Menu
2. Select My Status, then My Presence and then choose desired status
My Status
Online – Shows a Green Icon, all calls received without prompt
Busy – Shows a Busy Icon, no call received, user removed from active group
Page Me – Shows a Page Me Icon, Radio Channel received without
prompt, all other calls display prompt
Offline – User needs to manually sign out, no PTT audio will be received
6
To appear as Offline sign out of Push To Talk.
1. Select Menu
2. Select Sign Out
The phone will now appear as offline on other users’ contact lists.
7

Adding a New Contact
Contacts can be added by selecting them from existing groups or searching for
them by name. New contacts appear in the Contacts Menu.
Selecting From an Existing Group
1. Scroll to the Groups Menu and highlight the group containing the contact
2. Select Actions
3. Select View Group Members
4. Highlight the contact
5. Select Actions
6. Select Add to Contacts
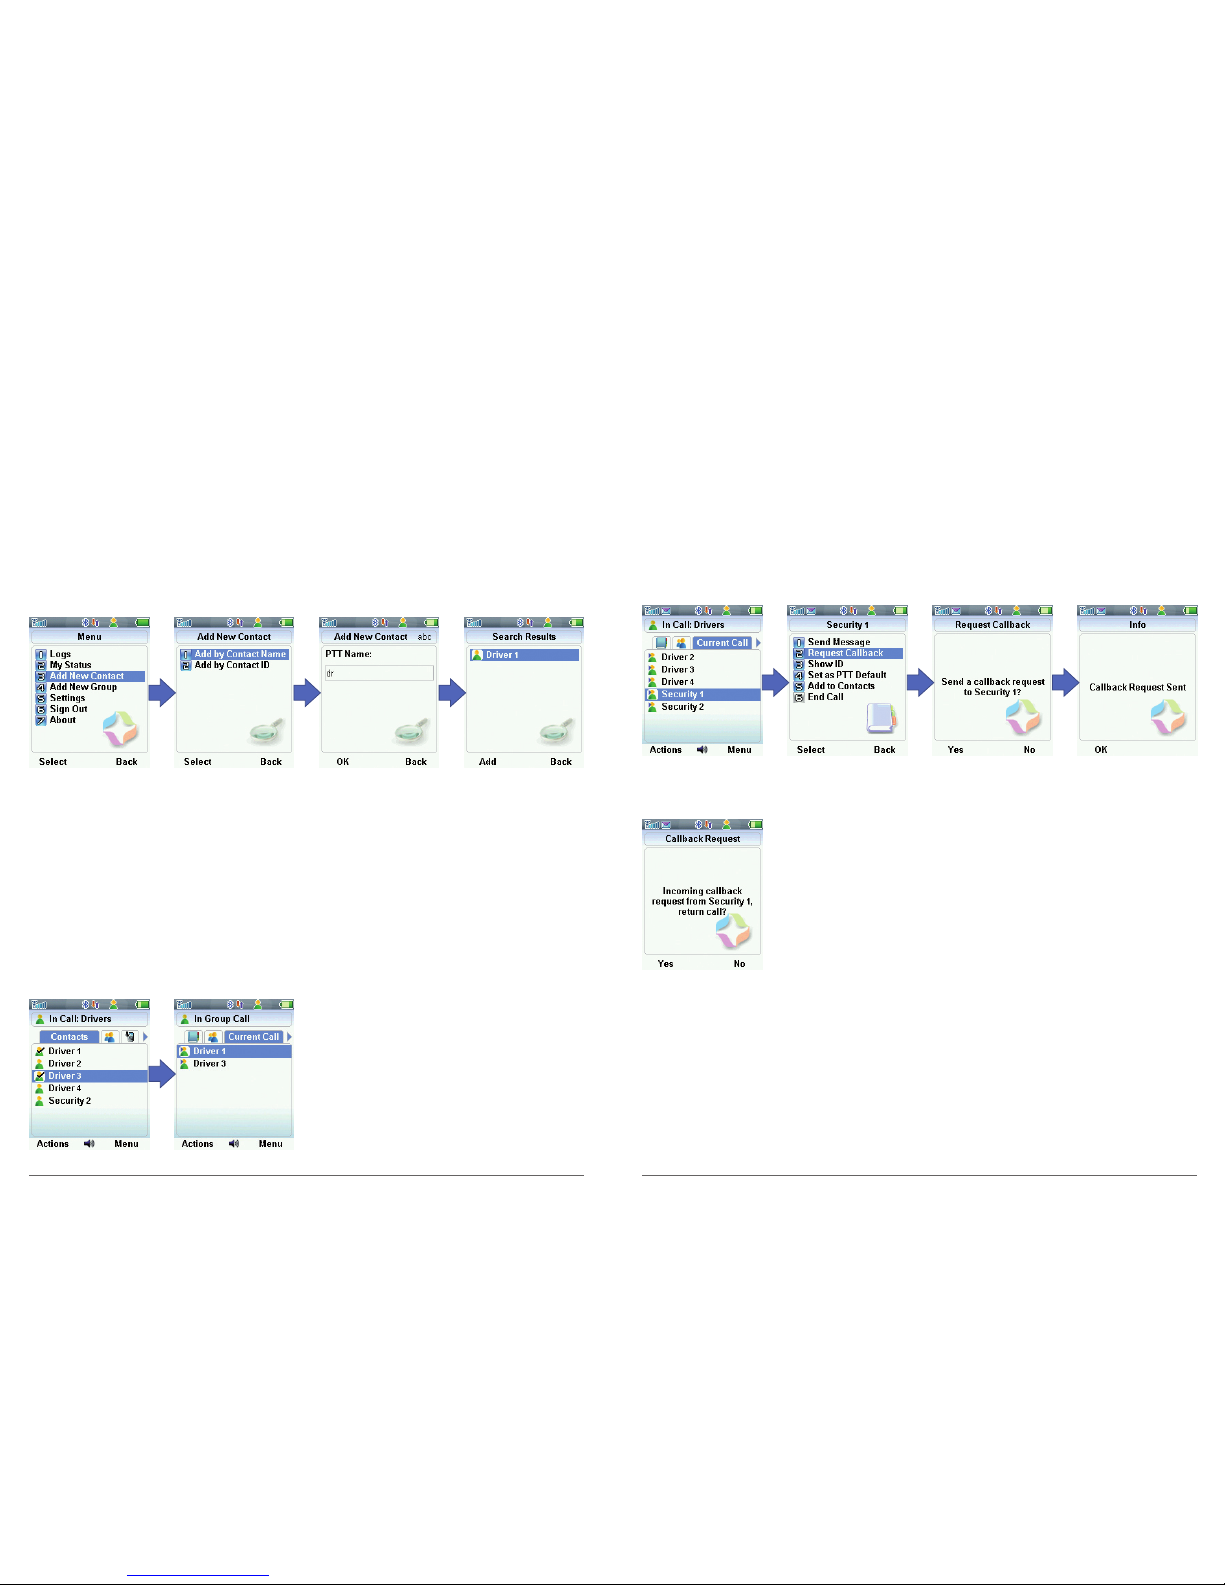
Selecting by Searching for a Contact
1. Select Menu
2. Select Add New Contact
3. Select Add by Contact Name
4. Enter part of or the full name
5. Highlight contact and select Add
Managing Your Contacts
8
Push To Talk calls can be made to a single contact or group.
Group Types
There are two group types, Radio Channels or Broadcast Groups.
Radio Channel – this is a default group that the user will always be logged into.
Users will broadcast to the whole group by pressing their PTT button, and hear
all calls in this group when chosen. Default Radio Channels are set by the service
administrator.
Broadcast Group – this is not a default group; to call a Broadcast Group it must
manually selected. Broadcast Groups will take priority over a Radio Channel.
Call Behaviour
When a Broadcast, one-to-one or one-to-many call is made it will time out after 45
seconds of inactivity; at this point the user will return to their default radio channel.
The current call is the group or person(s) that are in the active call.
Tip: For optimum audio quality hold the BB3G approximately 30cm away from the
user’s mouth when making a call.
Making a Call
Users are able to call their default group, select another group or make an ad-hoc call
to multiple contacts.
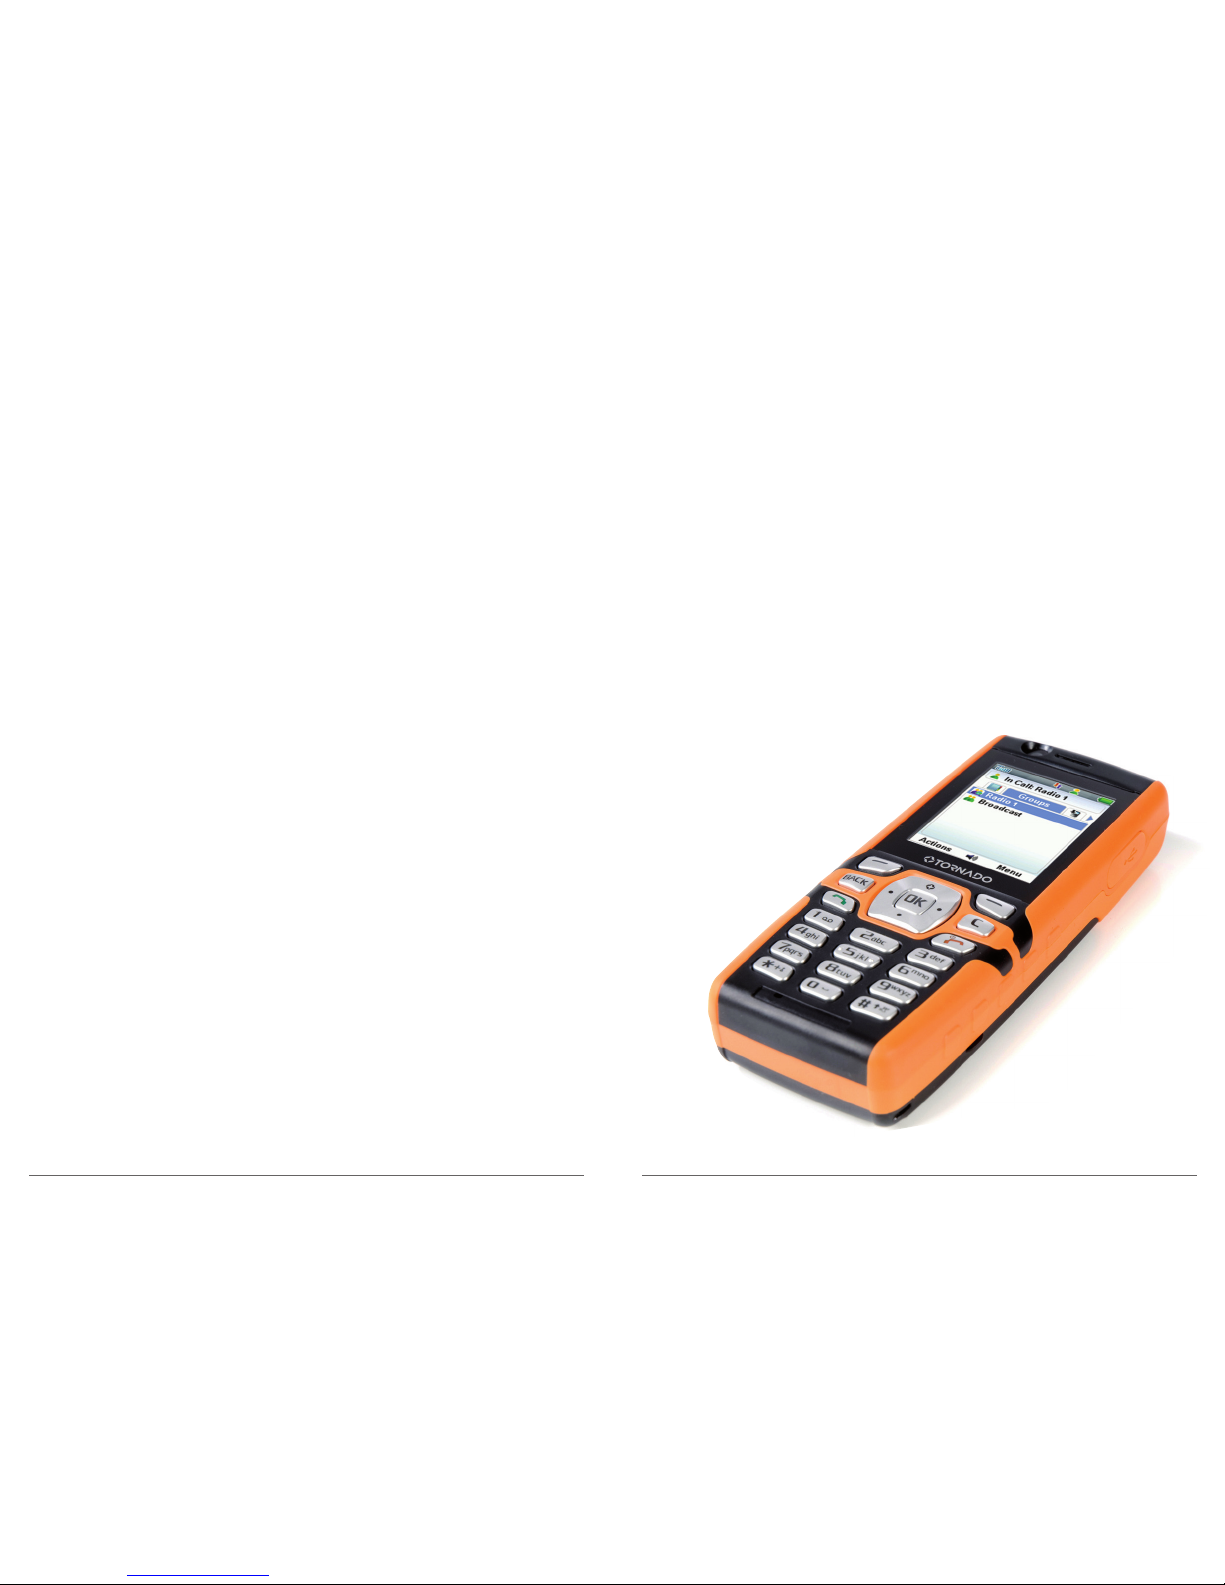
Calling the Default Radio Channel
Users have a default group called a radio channel; by default users will sign into and
broadcast to this group. To make a call to the default radio channel:
1. Press and hold down the PTT button
2. Broadcast the message
3. Release the PTT button to end the call,
the recipients can then respond
Push To Talk Calls
9

Users can be set up with multiple groups, to call another group:
1. Go to PTT Menu and scroll to the Groups Menu:
2. Highlight the Group and press OK – (a tick will be placed on this group icon)
3. Press and hold down the PTT button
4. Broadcast the message
5. Release the PTT button to end the call, the recipients can then respond
Broadcast to an Ad-Hoc Group
Users can broadcast to an Ad-Hoc Group or individuals by selecting contacts from the
Contacts Menu or by viewing users in a Group.
1. Go to PTT Menu and scroll to the Groups or the Contacts Menu.
2. Highlight each Contact(s) and press OK – (a tick will be placed over the
contacts icon)
3. Press and hold down the PTT button
4. Broadcast the message
5. Release the PTT button to end the call, the recipients can then respond
Calling Another Group
10
A Request To Talk appears on the receiving device as a prompt asking users to return
the sender’s call.
1. Highlight the Contact
2. Select Actions
3. Select Request Call-back – a prompt will appear on the receiving handset
To return a request to talk select Yes.
Request Call-back
11

Personal Groups are used to make an ad-hoc call to the same people repeatedly.
They are local to the individual subscriber and do not show on the other members’
group lists.
Subscribers need adding to the contacts list before they can be added to the
personal group.
1. Select Menu
2. Select Add New Group
3. Type Group Name, Select OK
4. Highlight each contact and, click the OK button on the keyboard; this will put
a tick next to each contacts’ name
5. Select OK
Creating a Personal Group
12 13
Instant Messaging is used to send text conversations between individual users.
Sending a New Instant Message
To send a message to a user highlight the user in either the contacts list or the
current call list.
1. Select Actions
2. Select Send Message
3. Type the desired message and select Send
Replying to an Instant Message
When a new message is received it will automatically be brought to the phone’s
foreground. To reply type the desired response and select Send.
Opening Existing Instant Messaging Conversations
When there is already active instant messaging sessions these can be opened by
scrolling to the Messaging Menu.
1. Highlight the active Instant Messaging session
2. Select OK
Ending an Active
Instant Messaging Session
To end an active Instant Messaging session
while it is open select Actions
and Close Text Chat.
Instant Messaging

The Alert Button when pressed will send an SOS alert to the ICMC Control Centre.
An alarm can be raised by pressing the alert button on the top of the phone.
When a user raises an SOS the phone will display a red flag over the Status Icon to
let the user know the SOS has been sent.
When the flag over the Status Symbol turns yellow the SOS has been acknowledged
by the Alarm Receiving Centre (ARC).
Please be aware when a user raises an SOS the ARC is able to open the microphone
on the device to assess the severity of the situation.
Switching Between Loud Speaker and Phone Speaker
Switch between the loud speaker and phone speaker by pressing the # key while
PTT is open.
Changing the Volume
To change the volume level use the volume up/down buttons on the side of
the phone.
Viewing the Call Logs
Users are able to check which calls have been missed, received, made and any
call-back requests on the Call Logs Menu.
1. Select Menu
2. Select Logs
3. This will present options to view all calls and call-backs made or received
Users can clear all logs by selecting ‘Clear All Call Logs’ from this menu.
Send an SOS
Push To Talk Management Features
14
To pair a Bluetooth device for use with the BB3G,the phone’s Bluetooth Manager
can be accessed from the PTT Application:
1. Go to the main PTT Menu and select; 2. My Status
2. From the My Status Menu select; 4. Bluetooth Status
This will open the Bluetooth Manager which will allow users to connect compatible
Bluetooth accessories to the BB3G.
Please consult the Bluetooth device manufacturer’s handbook for further instructions
on how to pair devices.
Bluetooth Status
15
Other manuals for BB3G
1
Table of contents
Other Tornado Cell Phone manuals