manuals.online logo
Brands
  1. Home
  2. •
  3. Brands
  4. •
  5. Toro
  6. •
  7. Lawn Mower
  8. •
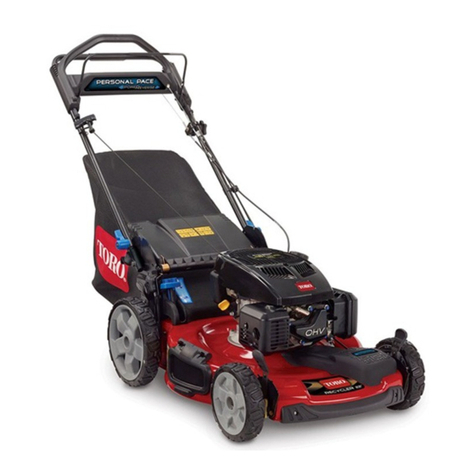
  9. Toro 133-2680 User manual

Toro 133-2680 User manual

This manual suits for next models

1

Other Toro Lawn Mower manuals

Toro 30809 Groundsmaster 3500-G User manual

Toro

Toro 30809 Groundsmaster 3500-G User manual

Toro 78218 User manual

Toro

Toro 78218 User manual

Toro Super Recycler 20053 Installation and operating instructions

Toro

Toro Super Recycler 20053 Installation and operating instructions

Toro 74274 User manual

Toro

Toro 74274 User manual

Toro 30609 User manual

Toro

Toro 30609 User manual

Toro TimeCutter User manual

Toro

Toro TimeCutter User manual

Toro 74450TE Z400 Z Master User manual

Toro

Toro 74450TE Z400 Z Master User manual

Toro 74162 User manual

Toro

Toro 74162 User manual

Toro 20833 User manual

Toro

Toro 20833 User manual

Toro 02821 User manual

Toro

Toro 02821 User manual

Toro e-cycler 20360 User manual

Toro

Toro e-cycler 20360 User manual

Toro 78292 User manual

Toro

Toro 78292 User manual

Toro 71242 User manual

Toro

Toro 71242 User manual

Toro Super Recycler 21382 User manual

Toro

Toro Super Recycler 21382 User manual

Toro Z253 Z Master User manual

Toro

Toro Z253 Z Master User manual

Toro 75304 User manual

Toro

Toro 75304 User manual

Toro ProLine 30526 User manual

Toro

Toro ProLine 30526 User manual

Toro 03200 Reelmaster 3100-D User manual

Toro

Toro 03200 Reelmaster 3100-D User manual

Toro TimeCutter MX5060 User manual

Toro

Toro TimeCutter MX5060 User manual

Toro 31201 User manual

Toro

Toro 31201 User manual

Toro Groundsmaster 72 User manual

Toro

Toro Groundsmaster 72 User manual

Toro ProLine H800 Manual

Toro

Toro ProLine H800 Manual

Toro 73542 User manual

Toro

Toro 73542 User manual

Toro Recycler 20795 User manual

Toro

Toro Recycler 20795 User manual

Popular Lawn Mower manuals by other brands

Global garden products 72 Workshop manual

Global garden products

Global garden products 72 Workshop manual

EINHELL 01045 operating instructions

EINHELL

EINHELL 01045 operating instructions

Baroness LM315GC Owner's operating manual

Baroness

Baroness LM315GC Owner's operating manual

GreenWorks Tools 25157 user manual

GreenWorks Tools

GreenWorks Tools 25157 user manual

Etesia MVEHH user manual

Etesia

Etesia MVEHH user manual

Husqvarna LTH125 owner's manual

Husqvarna

Husqvarna LTH125 owner's manual

Gravely 915034 - ZT1640 Owner's/operator's manual

Gravely

Gravely 915034 - ZT1640 Owner's/operator's manual

Jacobsen 63281 Technical manual

Jacobsen

Jacobsen 63281 Technical manual

GreenWorks Pro MO802524 Operator's manual

GreenWorks Pro

GreenWorks Pro MO802524 Operator's manual

Deutz-Allis 3000 Series parts manual

Deutz-Allis

Deutz-Allis 3000 Series parts manual

Craftsman 917.9998C owner's manual

Craftsman

Craftsman 917.9998C owner's manual

jobmate YT9108 user manual

jobmate

jobmate YT9108 user manual

Yard force GM R40A instructions

Yard force

Yard force GM R40A instructions

Husqvarna R 419TsX AWD Operator's manual

Husqvarna

Husqvarna R 419TsX AWD Operator's manual

STERWINS ELM2-36P-3W.4 Assemby - Use - Maintenance Manual

STERWINS

STERWINS ELM2-36P-3W.4 Assemby - Use - Maintenance Manual

Craftsman 917.378770 owner's manual

Craftsman

Craftsman 917.378770 owner's manual

Partner M6556SMD Repair parts manual

Partner

Partner M6556SMD Repair parts manual

Craftsman 25913 instruction manual

Craftsman

Craftsman 25913 instruction manual

manuals.online logo
manuals.online logoBrands
  • About & Mission
  • Contact us
  • Privacy Policy
  • Terms and Conditions

Copyright 2025 Manuals.Online. All Rights Reserved.

FormNo.3408-237RevA
BrakeCableKit
21inHeavy-DutyRecycler®/RearBaggerLawnMower
ModelNo.133-2680
ModelNo.136-7000
InstallationInstructions
Usetheappropriatekitforyourlawnmowermodelasfollows:
•Lawnmowermodelno.22295—kitno.133-2680
•Lawnmowermodelno.22297—kitno.136-7000
WARNING
CALIFORNIA
Proposition65Warning
Thisproductcontainsachemicalorchemicals
knowntotheStateofCaliforniatocausecancer,
birthdefects,orreproductiveharm.
Installation
LooseParts
Usethechartbelowtoverifythatallpartshavebeenshipped.
ProcedureDescriptionQty.Use
Brakecable1
Cableanchor1
2Screw1
Installthebrakecable.
1
RemovingtheBrakeCable
NoPartsRequired
Procedure
1.Shutofftheengineandwaitforallmovingpartsto
stop.
2.Disconnectthespark-plugwirefromthesparkplug.
3.Disconnectthebrakecablefromtheblade-controlbar
(Figure1orFigure2asappropriateforyourkit);keep
theboltandthenut.
g187498
Figure1
Kit133-2680
1.Bolt(keep)3.Cableanchor
2.Screw(discard)4.Nut(keep)
©2016—TheToro®Company
8111LyndaleAvenueSouth
Bloomington,MN55420
Registeratwww.T oro.com.OriginalInstructions(EN)
PrintedintheUSA
AllRightsReserved*3408-237*A
g187414
Figure2
Kit136-7000
1.Bolt(keep)3.Cableanchor
2.Screw(discard)4.Nut(keep)
4.Disconnectthebrakecablefromthecableanchor
(Figure1orFigure2asappropriateforyourkit);
discardthescrew,butkeepthenut.
5.Disconnectthebrakecablefromtheengine(Figure3
orFigure4asappropriateforyourkit),thendiscardit.
g187780
Figure3
Kit133-2680
1.Brakecable2.Engineconnection
location
g187634
Figure4
Kit136-7000
1.Nut3.Brakecable
2.Spacer4.Bolt
2
2
InstallingandAdjustingthe
BrakeCable
Partsneededforthisprocedure:
1Brakecable
1Cableanchor
1Screw
InstallingtheBrakeCable
Important:Ifyouareinstallingthiskitonamachine
withserialnumbers400000000–999999999,skipsteps1
and2.
1.Locatethecableanchor’spostandcutitattheindicated
locationonFigure5.
g185992
Figure5
1.Cableanchor3.Post
2.Cutlocation
2.Removetheremainingpieceofthepostfromthecable
anchor.
3.Attachthecableanchortothebrakecable.
4.Attachthebrakecabletotheblade-controlbar(Figure
1orFigure2asappropriateforyourkit)usingthebolt
andthenutthatyoupreviouslyremoved.
5.Securethecableanchortothehandle(Figure1or
Figure2asappropriateforyourkit)usingascrew
(includedinthekit)andthenutthatyoupreviously
removed.
6.Routethebrakecablebetweenthehandleandthedeck.
7.Attachthebrakecabletotheengine(Figure3orFigure
4asappropriateforyourkit).
AdjustingtheBrakeCable
1.Holdtheblade-controlbarat19cm(7-5/8inches)
fromthetopofthehandleasshowninFigure6.
g034988
Figure6
1.Handle3.Blade-controlbar
2.Cable-anchornut
2.Pulldownonthecableconduittoremovetheslack
fromthebrakecable.
3.Tightenthecable-anchornut.
4.Releasetheblade-controlbarandverifythatthereis
slackinthebrakecable.
3