Toro 22291 User manual

FormNo.3390-404RevA
53cmHeavy-DutyRecycler®/Rear
BaggerLawnMower
ModelNo.22291—SerialNo.315000001andUp
Registeratwww.Toro.com.
OriginalInstructions(EN)*3390-404*A

ThisproductcomplieswithallrelevantEuropeandirectives.
Fordetails,seetheseparateproduct-specicDeclarationof
Conformity(DOC)sheet.
Introduction
Thisrotary-blade,walk-behindlawnmowerisintended
tobeusedbyresidentialhomeownersorprofessional,
hiredoperators.Itisdesignedprimarilyforcuttinggrass
onwell-maintainedlawnsonresidentialorcommercial
properties.Itisnotdesignedforcuttingbrushorfor
agriculturaluses.
Readthisinformationcarefullytolearnhowtooperateand
maintainyourmachineproperlyandtoavoidinjuryand
equipmentdamage.Youareresponsibleforoperatingthe
machineproperlyandsafely.
YoumaycontactTorodirectlyatwww.Toro.comforproduct
andaccessoryinformation,helpndingadealer,ortoregister
yourproduct.
Wheneveryouneedservice,genuineToroparts,oradditional
information,contactanAuthorizedServiceDealerorToro
CustomerServiceandhavethemodelandserialnumbersof
yourmachineready.Figure1identiesthelocationofthe
modelandserialnumbersontheproduct.Writethenumbers
inthespaceprovided.
Figure1
1.Modelandserialnumberplate
ModelNo.
SerialNo.
Thismanualidentiespotentialhazardsandhassafety
messagesidentiedbythesafetyalertsymbol(Figure2),
whichsignalsahazardthatmaycauseseriousinjuryordeath
ifyoudonotfollowtherecommendedprecautions.
Figure2
1.Safetyalertsymbol
Thismanualuses2wordstohighlightinformation.
Importantcallsattentiontospecialmechanicalinformation
andNoteemphasizesgeneralinformationworthyofspecial
attention.
NetTorque
Thegrossornettorqueofthisenginewaslaboratoryrated
bytheenginemanufacturerinaccordancewiththeSocietyof
AutomotiveEngineers(SAE)J1940.Asconguredtomeet
safety,emission,andoperatingrequirements,theactualengine
torqueonthisclassofmowerwillbesignicantlylower.
©2014—TheToro®Company
8111LyndaleAvenueSouth
Bloomington,MN554202
Contactusatwww.Toro.com.
PrintedintheUSA
AllRightsReserved

Contents
Safety...........................................................................3
GeneralLawnMowerSafety.....................................3
SoundPressure......................................................5
SoundPower..........................................................5
Hand/ArmVibration..............................................5
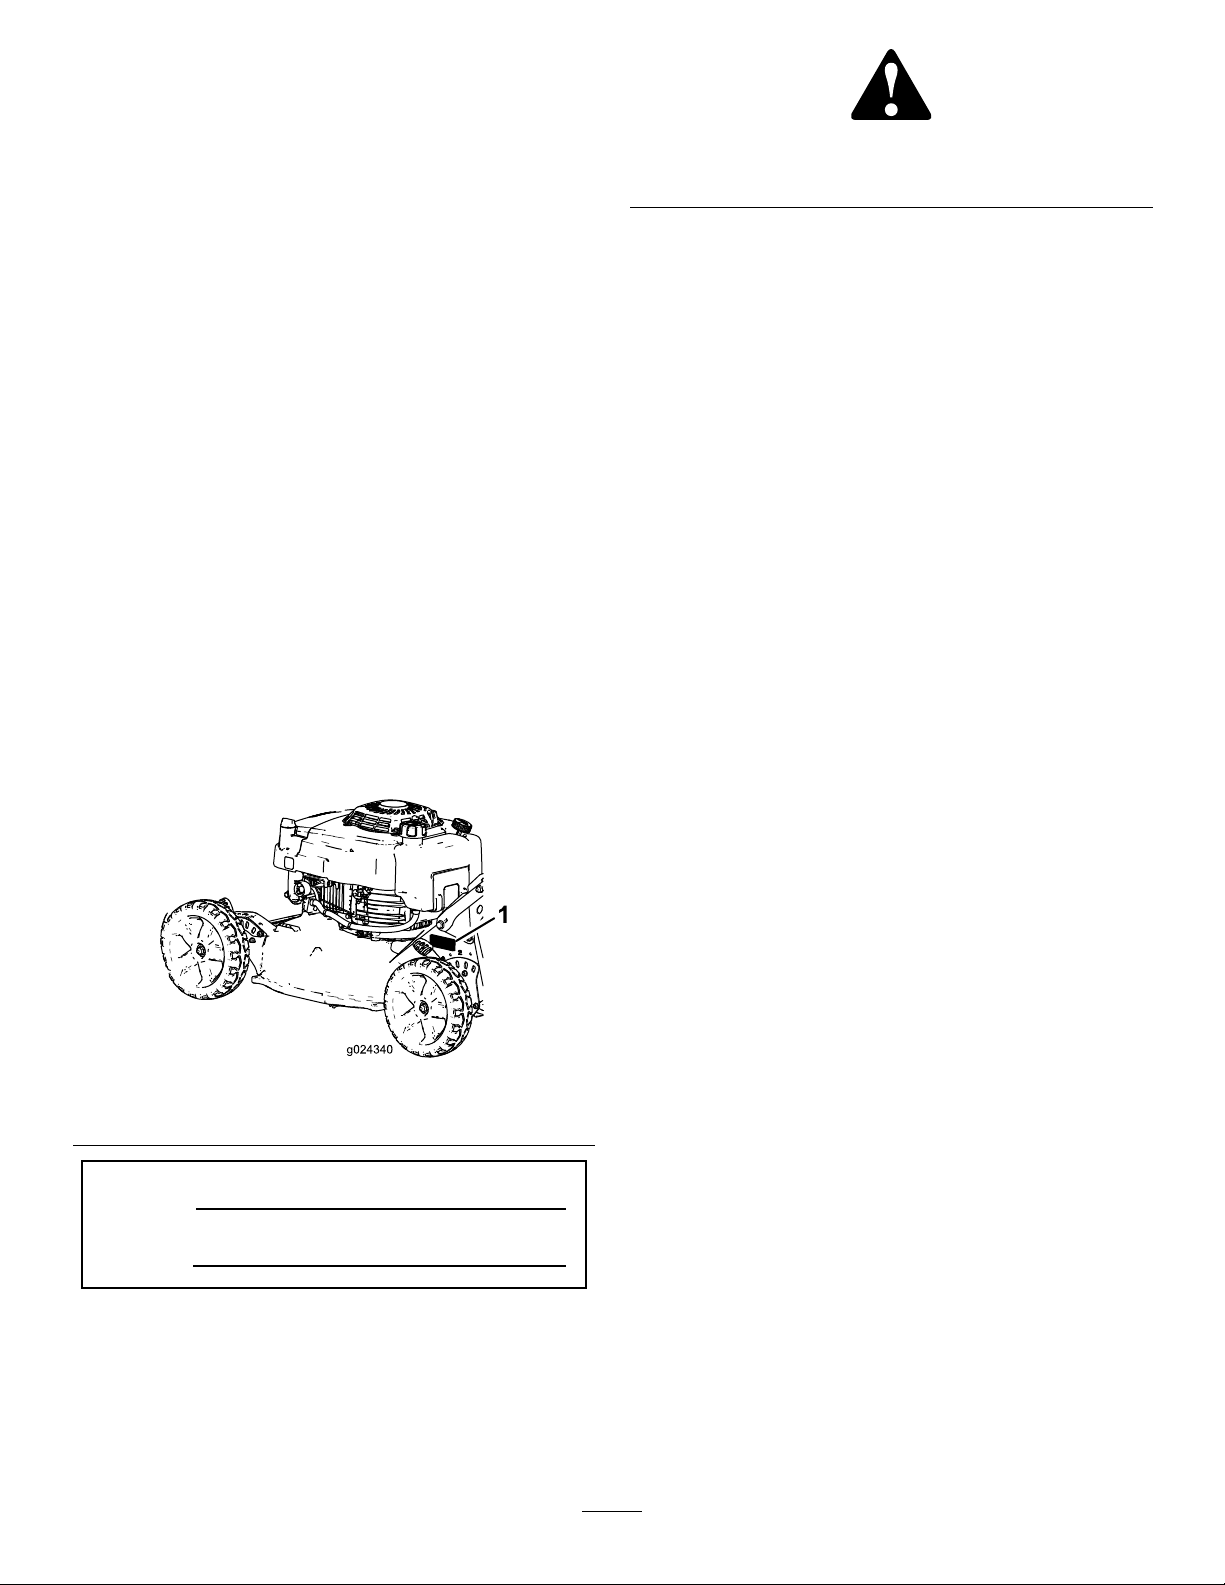
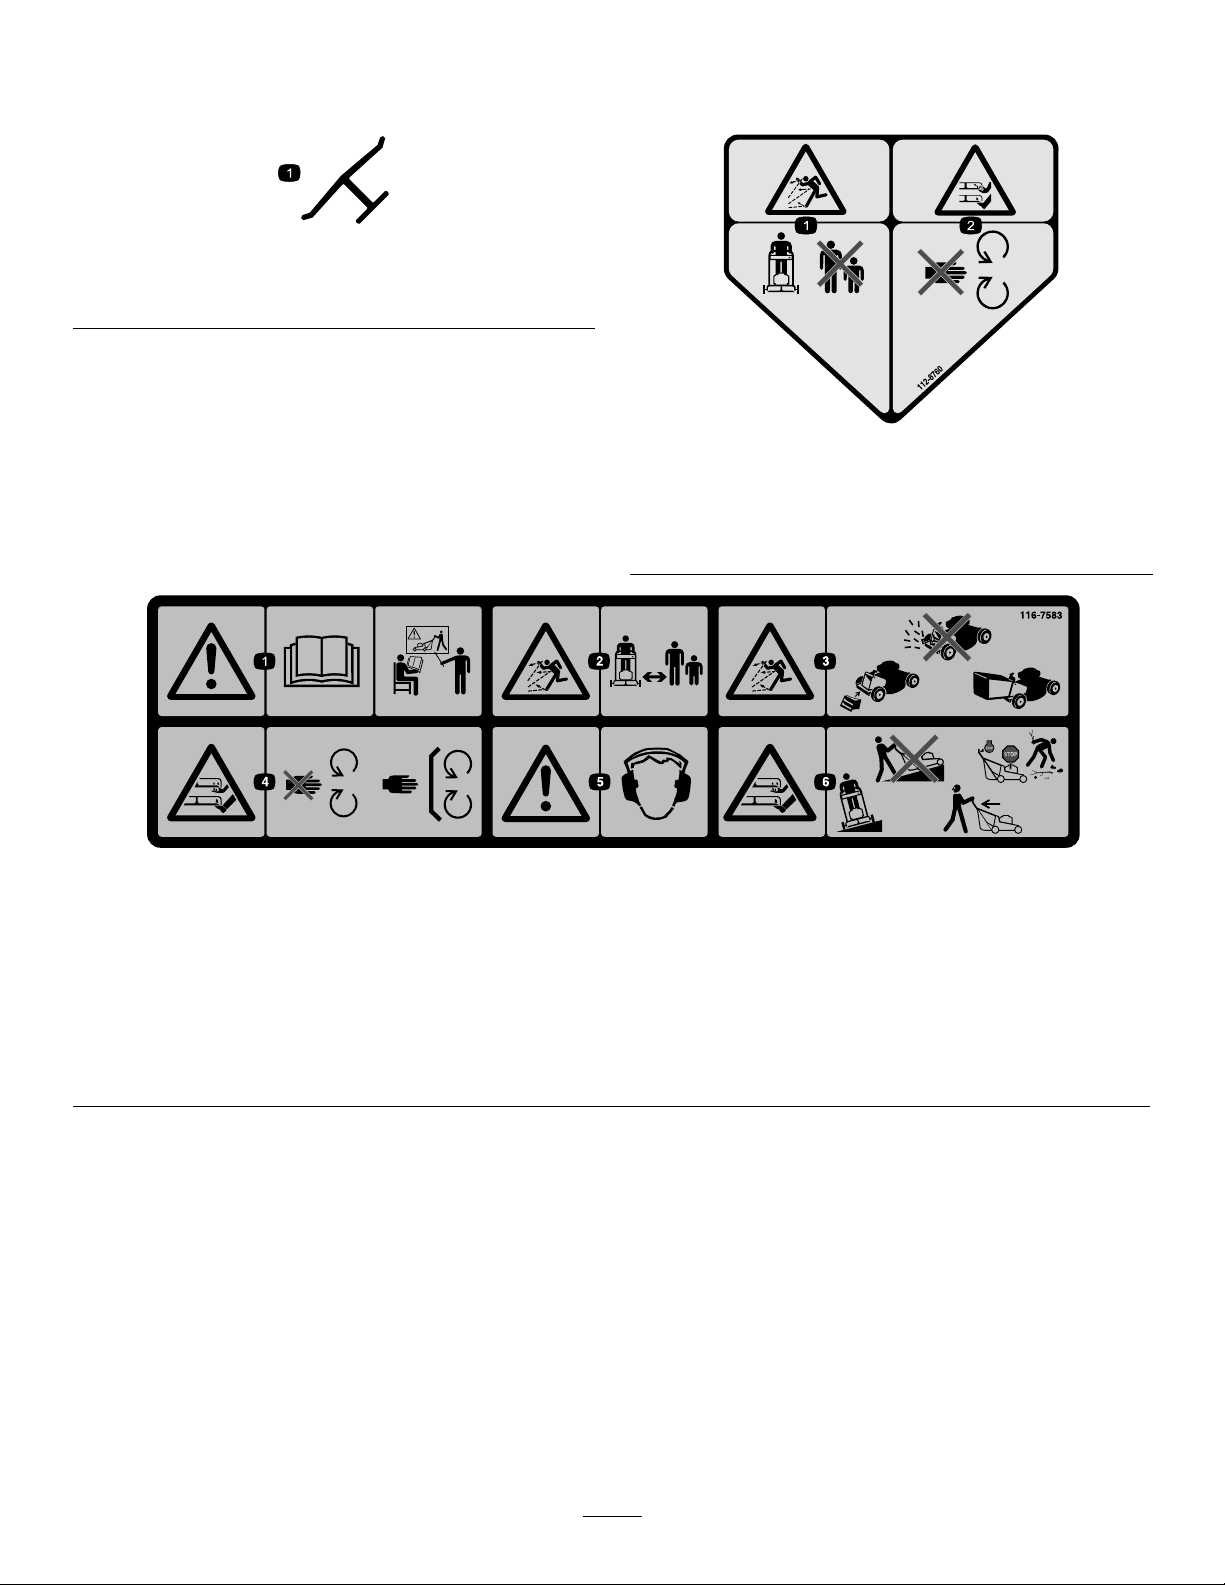
SafetyandInstructionalDecals.................................6
Setup............................................................................8
1InstallingtheHandle.............................................8
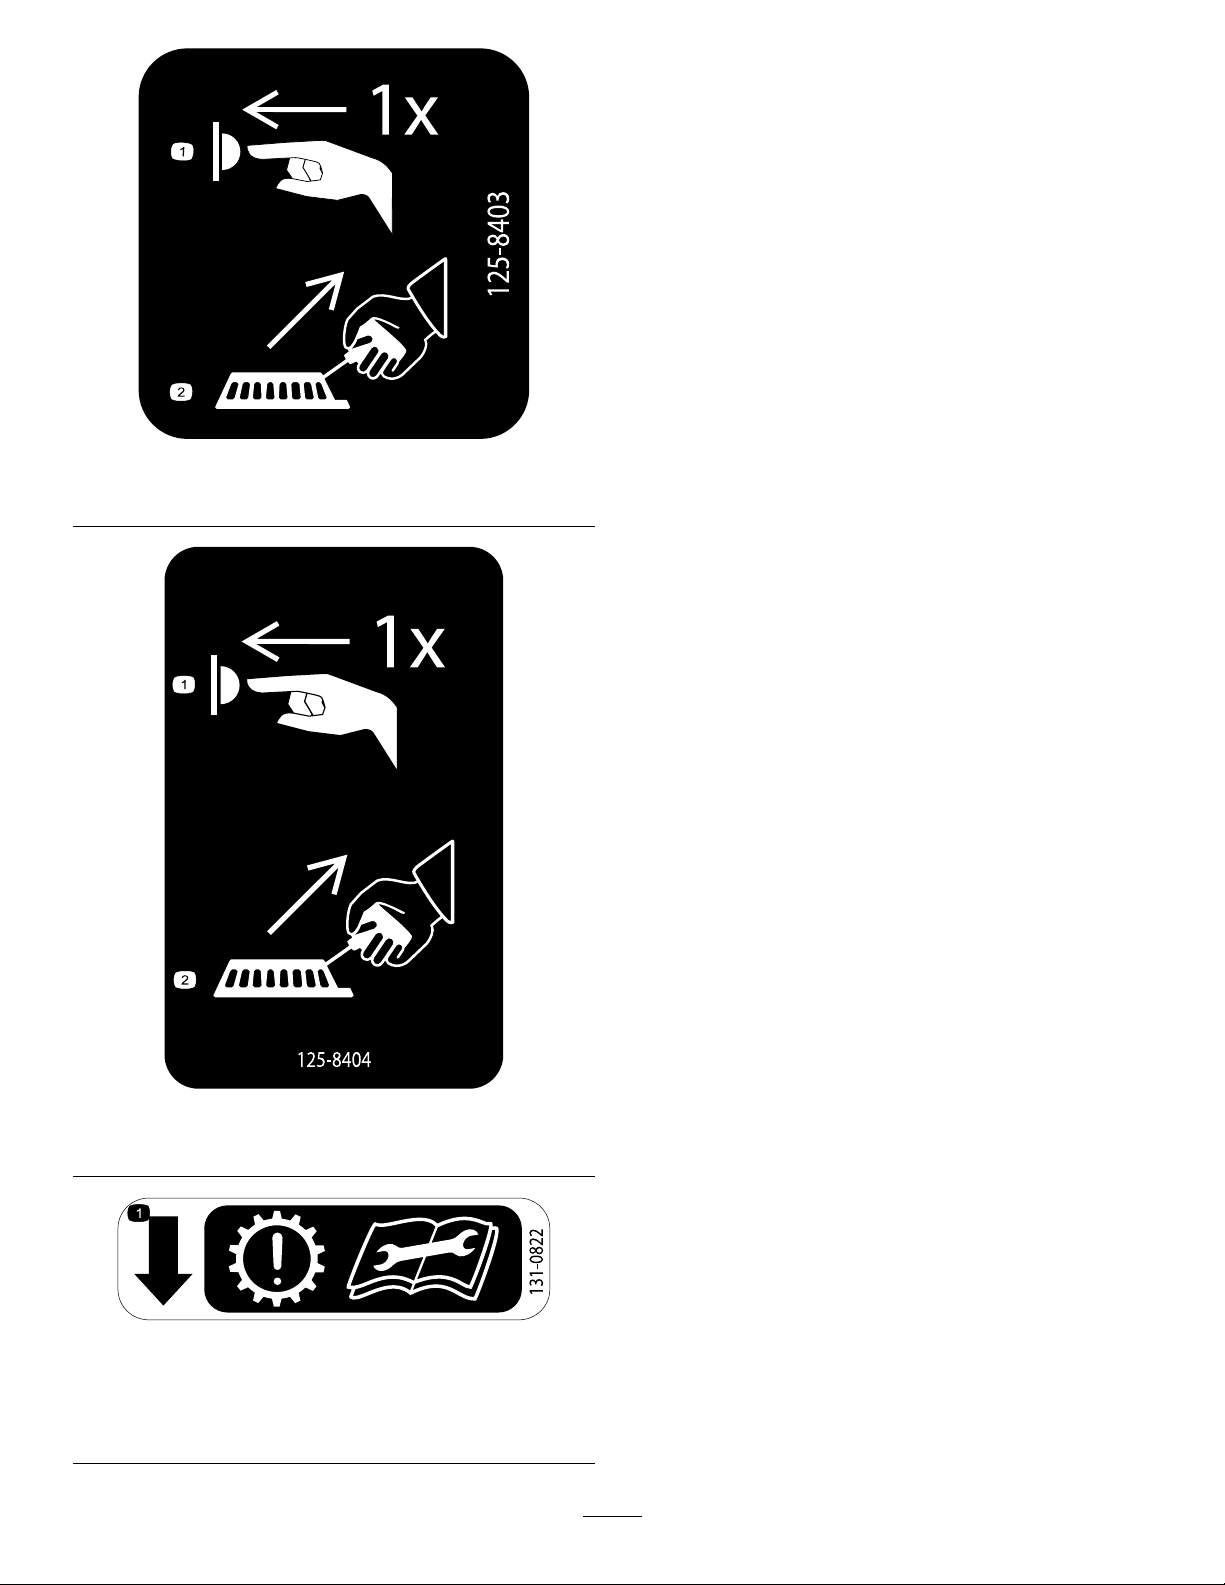
2InstallingtheRecoil-StartRope..............................10
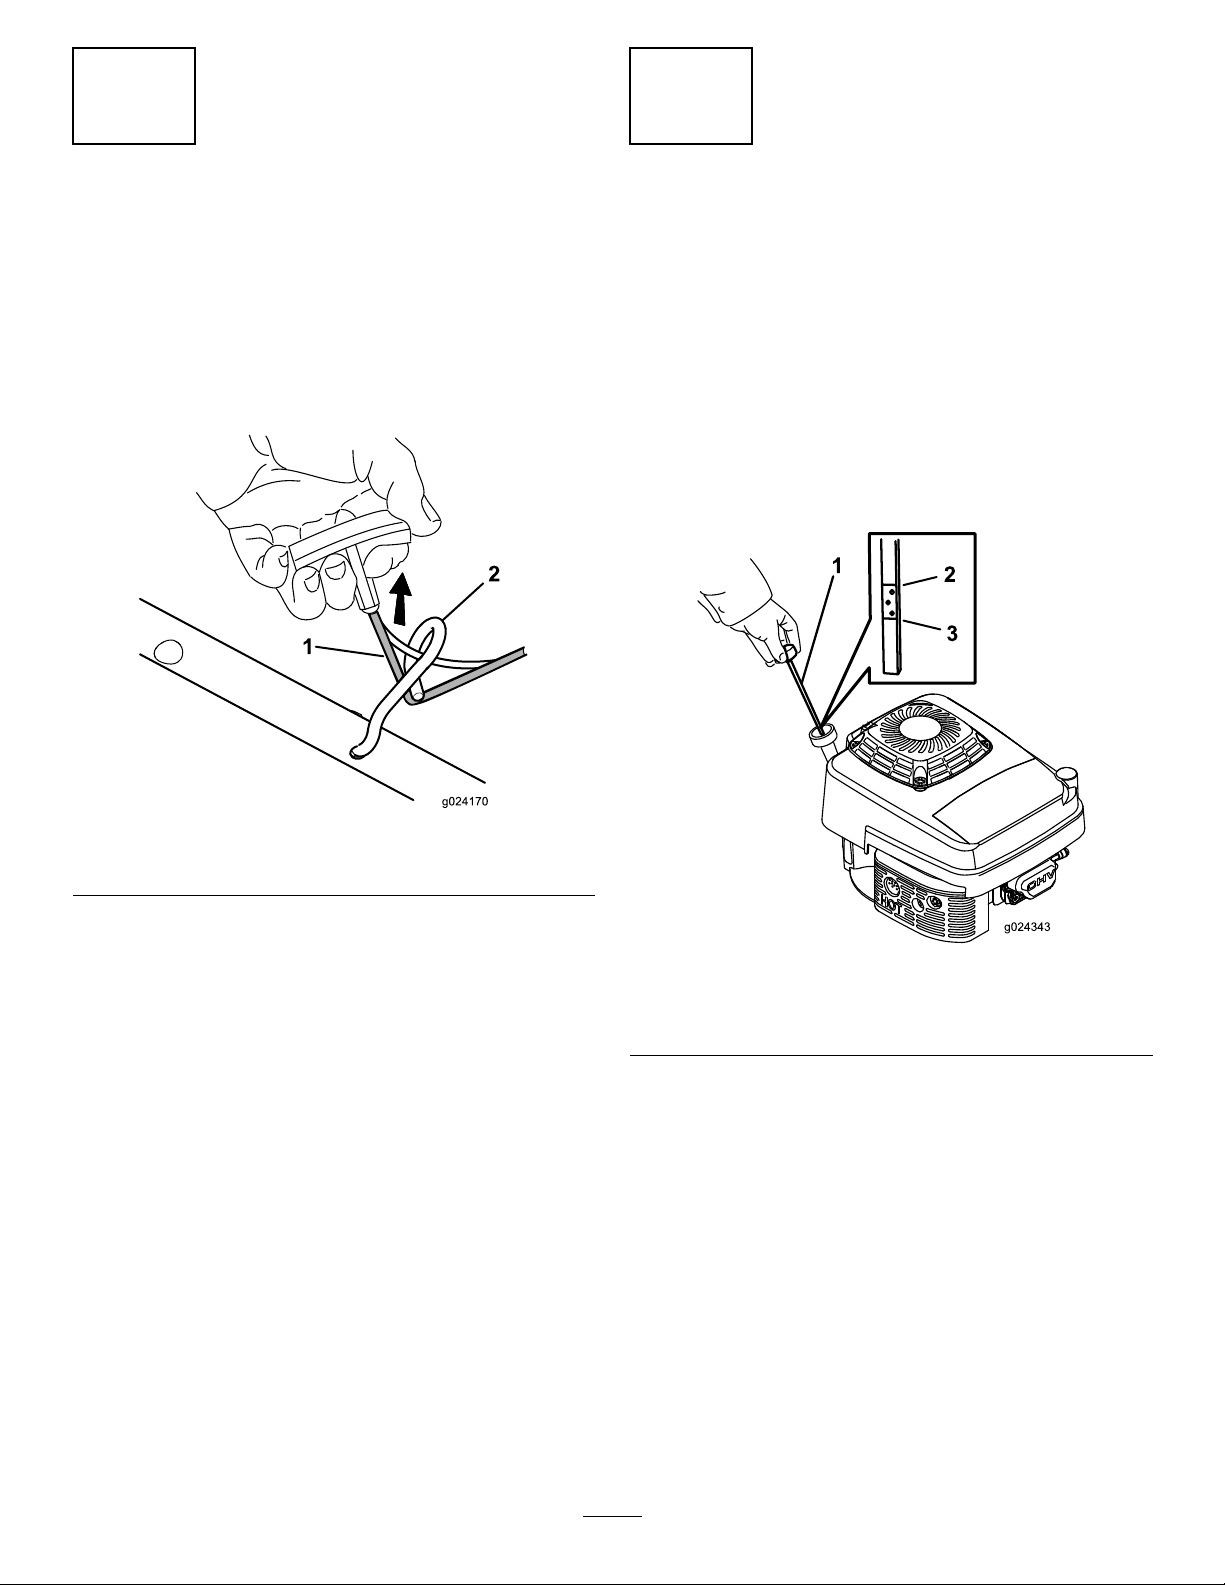
3FillingtheCrankcasewithOil................................10
4AdjustingtheSelf-PropelDrive..............................11
5AssemblingtheGrassBag.....................................11
ProductOverview.........................................................12
Specications........................................................12
Operation....................................................................12
CheckingtheEngine-OilLevel.................................12
FillingtheFuelTankwithGasoline...........................13
AdjustingtheCuttingHeight....................................13
StartingtheEngine.................................................14
StoppingtheEngine...............................................14
OperatingtheSelf-PropelDrive...............................14
RecyclingtheClippings...........................................14
BaggingtheClippings.............................................15
OperatingTips......................................................16
Maintenance.................................................................17
RecommendedMaintenanceSchedule(s)......................17
EngineMaintenance..................................................18
ServicingtheAirCleaner.........................................18
ChangingtheEngineOil.........................................18
ServicingtheSparkPlug..........................................19
DriveSystemMaintenance.........................................19
AdjustingtheSelf-PropelDrive................................19
BladeMaintenance.....................................................20
MaintainingtheBlade.............................................20
Cleaning...................................................................22
CleaningundertheMachine.....................................22
Storage........................................................................23
PreparingtheFuelSystem.......................................23
PreparingtheEngine..............................................23
GeneralInformation...............................................23
RemovingtheMachinefromStorage.........................23
Troubleshooting...........................................................24
Safety
ThismachinehasbeendesignedinaccordancewithENISO
5395:2013.
Improperlyusingormaintainingthismachinecanresult
ininjury.Toreducethepotentialforinjury,complywith
thesesafetyinstructions.
Toensuremaximumsafety,bestperformance,and
togainknowledgeoftheproduct,itisessentialthat
youandanyotheroperatorofthemowerreadand
understandthecontentsofthismanualbeforetheengine
iseverstarted.Payparticularattentiontothesafetyalert
symbol(Figure2),whichmeansCaution,Warning,or
Danger.Readandunderstandtheinstructionbecause
ithastodowithsafety.Failuretocomplywiththe
instructionmayresultinpersonalinjury.
GeneralLawnMowerSafety
Thiscuttingmachineiscapableofamputatinghandsandfeet
andofthrowingobjects.Failuretoobservethefollowing
safetyinstructionscouldresultinseriousinjuryordeath.
Training
•Readtheinstructionscarefully.Befamiliarwiththe
controlsandtheproperuseoftheequipment.
•Neverallowchildrenorpeopleunfamiliarwiththese
instructionstousethemachine.Localregulationscan
restricttheageoftheoperator.
•Keepinmindthattheoperatororuserisresponsiblefor
accidentsorhazardsoccurringtootherpeopleortheir
property.
•Understandexplanationsforallpictogramsusedonthe
machineorintheinstructions.
Gasoline
WARNING-Gasolineishighlyammable.Takethe
followingprecautions.
•Storefuelincontainersspecicallydesignedforthis
purpose.
•Refueloutdoorsonlyanddonotsmokewhilerefueling.
•Addfuelbeforestartingtheengine.Neverremovethe
capofthefueltankoraddgasolinewhiletheengineis
runningorwhentheengineishot.
•Ifgasolineisspilled,donotattempttostarttheengine
butmovethemachineawayfromtheareaofspillageand
avoidcreatinganysourceofignitionuntilgasolinevapors
havedissipated.
•Replaceallfueltankandcontainercapssecurely.
3

Preparation
•Whilemowing,alwayswearsubstantial,slip-resistant
footwearandlongtrousers.Donotoperatethe
equipmentwhenbarefootorwearingopensandals.
•Thoroughlyinspecttheareawheretheequipmentisto
beusedandremoveallstones,sticks,wires,bonesand
otherforeignobjects.
•Beforeusing,alwaysvisuallyinspecttoseethatguardsand
safetydevices,suchasdeectorsand/orgrasscatchers,
areinplaceandworkingcorrectly.
•Beforeusing,alwaysvisuallyinspecttoseethattheblades,
bladeboltsandcutterassemblyarenotwornordamaged.
Replacewornordamagedbladesandboltsinsetsto
preservebalance.
Starting
•Donottiltthemachinewhenstartingtheengineunless
themachinemustbetiltedforstarting.Inthiscase,do
nottiltitmorethanabsolutelynecessaryandliftonlythe
partwhichisawayfromtheoperator.
•Starttheenginecarefullyaccordingtoinstructionsand
withfeetwellawayfromtheblade(s)andnotinfrontof
thedischargechute.
Operation
•Nevermowwhilepeople,especiallychildren,orpetsare
nearby.
•Mowonlyindaylightoringoodarticiallight.
•Stayalertforholesintheterrainandotherhiddenhazards.
•Donotputhandsorfeetnearorunderrotatingparts.
Keepclearofthedischargeopeningatalltimes.
•Neverpickuporcarryalawnmowerwhiletheengineis
running.
•Useextremecautionwhenreversingorpullinga
pedestrian-controlledmowertowardyou.
•Walk,neverrun.
•Slopes:
–Donotmowexcessivelysteepslopes.
–Exerciseextremecautionwhenonslopes.
–Mowacrossthefaceofslopes,neverupanddown,
andexerciseextremecautionwhenchangingdirection
onslopes.
–Alwaysbesureofyourfootingonslopes.
•Reducespeedonslopesandinsharpturnstoprevent
overturningorlossofcontrol.
•Stopthebladeifthemachinemustbetiltedfor
transportationwhencrossingsurfacesotherthangrass
andwhentransportingthemachinetoandfromthearea
tobemowed.
•Donotoperatetheengineinaconnedspacewhere
dangerouscarbonmonoxideandotherexhaustgasses
cancollect.
•Stoptheengine
–wheneveryouleavethemachine.
–beforerefueling.
–beforeremovingthegrasscatcher.
–beforemakingheightadjustmentunlessadjustment
canbemadefromtheoperatingposition.
•Stoptheengineanddisconnectthespark-plugwire.
–beforeclearingblockagesoruncloggingchute.
–beforechecking,cleaningorworkingonthemachine.
–afterstrikingaforeignobject,inspectthemachine
fordamageandmakerepairsbeforerestartingand
operatingthemachine.
–ifthemachinestartstovibrateabnormally(check
immediately).
•Lightningcancausesevereinjuryordeath.Ifyousee
lightningorhearthunderinthearea,donotoperatethe
machine;seekshelter.
•Watchoutfortrafcwhencrossingornearroadways.
MaintenanceandStorage
•Keepallnuts,bolts,andscrewstighttobesurethatthe
equipmentisinsafeworkingcondition.
•Donotusepressure-cleaningequipmentonthemachine.
•Neverstoretheequipmentwithgasolineinthetankand
insideabuildingwherefumescanreachanopename
orspark.
•Allowtheenginetocoolbeforestoringinanyenclosure.
•Toreducetherehazard,keeptheengine,silencer,
batterycompartmentandgasolinestorageareafreeof
grass,leaves,orexcessivegrease.
•Checkgrasscatchercomponentsandthedischargeguard
frequentlyandreplacewithmanufacturer'srecommended
parts,whennecessary.
•Replacewornordamagedpartsforsafety.
•Replacefaultysilencers.
•Ifthefueltankhastobedrained,dothisoutdoors.
•Donotchangetheenginegovernorsettingsoroverspeed
theengine.Operatinganengineatexcessivespeedcan
increasethehazardofpersonalinjury.
•Becarefulwhileadjustingthemachinetoprevent
entrapmentofthengersbetweenmovingbladesand
xedpartsofthemachine.
•Toensurethebestperformanceandsafety,
purchaseonlygenuineTororeplacementpartsand
accessories.Donotuse
will t
partsandaccessories;
theymaycauseasafetyhazard.
Hauling
•Usecarewhenloadingorunloadingthemachineintoa
traileroratruck.
4

•Usefull-widthrampsforloadingthemachineintoa
traileroratruck.
•Tiethemachinedownsecurelyusingstraps,chains,cable,
orropes.Boththefrontandtherearstrapsshouldbe
directeddownandoutwardfromthemachine.
SoundPressure
Thisunithasasoundpressurelevelattheoperator’searof88
dBA,whichincludesanUncertaintyValue(K)of1dBA.
Thesoundpressurelevelwasdeterminedaccordingtothe
proceduresoutlinedinENISO5395:2013.
SoundPower
Thisunithasaguaranteedsoundpowerlevelof98dBA,
whichincludesanUncertaintyValue(K)of1dBA.
Thesoundpowerlevelwasdeterminedaccordingtothe
proceduresoutlinedinISO11094.
CAUTION
Long-termexposuretonoisewhileoperatingthe
machinemaycausesomehearingloss.
Wearadequatehearingprotectionwheneveryou
operatethemachineforanextendedperiodoftime.
Hand/ArmVibration
Measuredvibrationlevelforlefthand=2.3m/s2
Measuredvibrationlevelforrighthand=2.7m/s2
UncertaintyValue(K)=1.4m/s2
Measuredvaluesweredeterminedaccordingtotheprocedures
outlinedinENISO5395:2013.
CAUTION
Long-termexposuretovibrationwhileoperating
themachinemaycausesomenumbnessinthe
handsandwrists.
Wearglovesthatdampenthevibrationwhenever
youoperatethemachineforanextendedperiodof
time.
5

SafetyandInstructionalDecals
Important:Safetyandinstructiondecalsarelocatednearareasofpotentialdanger.Replacedamageddecals.
Manufacturer'sMark
1.Indicatesthebladeisidentiedasapartfromtheoriginal
machinemanufacturer.
112-8760
1.Thrownobjecthazard—keepbystandersasafedistance
fromthemachine.
2.Cutting/dismembermentofhandorfoot—stayawayfrom
movingparts.
116-7583
1.Warning–ReadtheOperator’sManual.Donotoperatethis
machineunlessyouaretrained.
4.Cutting/dismembermenthazardofhandorfoot,mower
blade—stayawayfrommovingparts;keepallguardsinplace.
2.Thrownobjecthazard—keepbystandersasafedistancefrom
themachine.
5.Warning—wearhearingprotection.
3.Thrownobjecthazard—Donotoperatethemowerwithoutthe
reardischargeplugorbaginplace.
6.Cutting/dismembermenthazardofhandorfoot,mower
blade—Donotoperateupanddownslopes;operatesideto
sideonslopes;stoptheenginebeforeleavingtheoperating
position—pickupobjectsthatcouldbethrownbytheblades;
andlookbehindyouwhenbackingup.
6

125-8403
1.Pushtheprimeronce.2.Pulltherecoil-starthandle.
125-8404
1.Pushtheprimeronce.2.Pulltherecoil-starthandle.
131-0822
1.Self-propeldrive—Attention;prematurewearofthe
transmissionmayoccurifthebeltisover-tightened;before
servicingorperformingmaintenance,readtheOperator's
Manual.
7

Setup
LooseParts
Usethechartbelowtoverifythatallpartshavebeenshipped.
ProcedureDescriptionQty.Use
Handle1
Hex-head-angebolt(5/16x1-1/2
inches)2
Carriagebolt(5/16x1-1/2inches)2
1
Flangenut(5/16inch)4
Installthehandle.
2Nopartsrequired–Installtherecoil-startrope.
3Nopartsrequired–Fillthecrankcasewithoil.
4Nopartsrequired–Adjusttheself-propeldrive.
5Nopartsrequired–Assemblethegrassbag.
Note:Determinetheleftandrightsidesofthemachine
fromthenormaloperatingposition.
1
InstallingtheHandle
Partsneededforthisprocedure:
1Handle
2Hex-head-angebolt(5/16x1-1/2inches)
2Carriagebolt(5/16x1-1/2inches)
4Flangenut(5/16inch)
Procedure
1.Removethecableguardfromthehandle(Figure3)by
removingthe2carriageboltsand2locknutsthathold
thecableguardtothehandle.
Figure3
1.Cableguard4.Flangenut—5/16inch(2)
2.Locknut(2)5.Hex-head-ange
bolt—5/16x1-1/2inches
(2)
3.Carriagebolt—1/4x1-1/2
inches(2)
Note:Savetheguard,thecarriagebolts,andthe
locknutssothatyoucaninstallitontothehandlelater
inthisprocedure.
8

2.Installthehandleendsontothemachinehousingwith
2hex-head-angebolts(5/16x1-1/2inches)and2
angenuts(5/16inch)asshowninFigure3.
3.Setthemachinetothedesiredcuttingheight;referto
AdjustingtheCuttingHeight(page13).
4.Standbehindthemachineintheoperatingpositionto
determinethehandleheightthatismostcomfortable
foryou(Figure4).
Figure4
1.Handle4.Mediumhandleheight
2.Handlebracket(2)5.Lowesthandleheight
3.Highesthandleheight
5.Securethehandleontothehandlebracketsatyour
desiredhandleheightwith2carriagebolts(5/16x
1-1/2inches)and2angenuts(5/16inch)asshown
inFigure5.
Important:Ensurethattheboltheadsareon
theinsideofthehandleandthenutsareonthe
outsideofthehandle.
Figure5
1.Carriagebolt—5/16x
1-1/2inches(2)
3.Flangenut—5/16inch(2)
2.Handlebracket(2)
6.Positionthecableguardontothehandlewiththe
cable(s)insidetheguard,andsecuretheguardtothe
handlewiththe2carriageboltsandthe2locknutsthat
youpreviouslyremoved(Figure3).
Important:Ensurethatyoudonotpinchthe
cable(s)tothehandlewithwhenyouinstallthe
cableguardsontothehandle.
9

2
InstallingtheRecoil-Start
Rope
NoPartsRequired
Procedure
Pulltherecoil-startropethroughtheropeguideonthe
handle(Figure6).
Figure6
1.Recoil-startrope2.Ropeguide
Note:Tomaketheropeeasiertoinstall,squeezethe
blade-controlbaronthehandle.
3
FillingtheCrankcasewithOil
NoPartsRequired
Procedure
Theenginecrankcaseisshippedwithoutoil.Before
startingtheengine,llthecrankcasewithoil.Theengine
crankcase(withoillter)canhold0.65L(22oz)ofoil.Use
onlyhigh-qualitySAE10W-30weightdetergentoilthathas
theAmericanPetroleumInstitute(API)serviceclassication
SH,SJ,orequivalent.
Beforeeachuse,ensurethattheoillevelisbetweentheAdd
andtheFullmarksonthedipstick(Figure7).
Figure7
1.Dipstick3.Addmark
2.Fullmark
Note:Whenthecrankcaseisempty,pourabout3/4ofthe
crankcasecapacityofoilinthecrankcase,thenfollowthe
procedureinthissection.
1.Movethemachineontoalevelsurface.
2.Cleanaroundthedipstick(Figure7).
3.Removethedipstickbyrotatingthecap
counterclockwiseandpullingitout.
4.Wipethedipstickcleanwithacleancloth.
5.Insertthedipstickintothellerneck,thenremovethe
dipstick.
6.Readtheoillevelonthedipstick.
•IftheoillevelisbelowtheAddmarkonthe
dipstick,slowlypourasmallamountofoilinto
theoil-lltube,wait3minutes,andrepeatsteps4
10

through6untiltheoillevelisattheFullmarkon
thedipstick.
•IftheoillevelisabovetheFullmarkonthe
dipstick,draintheexcessoiluntiltheoillevelon
thedipstickisattheFullmark.RefertoChanging
theEngineOil(page18).
Important:Iftheoillevelinthecrankcaseis
toolowortoohighandyouruntheengine,
youmaydamagetheengine.
7.Insertthedipstickintothellerneckandrotatethecap
clockwiseuntilitistight.
4
AdjustingtheSelf-PropelDrive
NoPartsRequired
Procedure
Important:Youmustadjusttheself-propel-drivecable
beforeyouoperatethemachineforthersttime.Refer
toAdjustingtheSelf-PropelDrive(page19).
5
AssemblingtheGrassBag
NoPartsRequired
Procedure
1.SlipthegrassbagovertheframeasshowninFigure8.
1
23
g027289
Figure8
1.Handle3.Grassbag
2.Frame
Note:Donotslipthebagoverthehandle(Figure8).
2.Hookthebottomchannelofthebagontothebottom
oftheframe(Figure9).
g027290
Figure9
3.Hookthetopandsidechannelsofthebagontothetop
andsidesoftheframe,respectively(Figure9).
11

ProductOverview
Figure10
1.Handle7.Sparkplug
2.Self-propel-drivebar8.Cutting-heightlever(4)
3.Blade-controlbar9.Oilll/dipstick
4.Reardoor10.Grassbag
5.Fuel-tankcap11.Recoil-starthandle
6.Aircleaner
Specications
Weight56kg(124lb)
Length161cm(64inches)
Width55cm(22inches)
Height88cm(35inches)
Operation
Note:Determinetheleftandrightsidesofthemachine
fromthenormaloperatingposition.
Eachtimebeforeyoumow,ensurethattheself-propeldrive
andtheblade-controlbaroperateproperly.Whenyourelease
theblade-controlbar,thebladeandtheself-propeldrive
shouldstop.Iftheydonot,contactanAuthorizedService
Dealer.
CAUTION
Thismachineproducessoundlevelsinexcessof
85dBAattheoperator'searandcancausehearing
lossthroughextendedperiodsofexposure.
Wearhearingprotectionwhenoperatingthis
machine.
Figure11
1.Warning—wearhearingprotection.
CheckingtheEngine-OilLevel
ServiceInterval:Beforeeachuseordaily—Checkthe
engine-oillevel.
Beforeyouusethemachine,ensurethattheoillevelis
betweentheAddandtheFullmarksasshownonthedipstick
(Figure12).
Figure12
1.Dipstick3.Addmark
2.Fullmark
12

IftheoillevelisbelowtheAddmark,addoil.Referto3
FillingtheCrankcasewithOil(page10).
FillingtheFuelTankwith
Gasoline
DANGER
Gasolineisextremelyammableandexplosive.A
reorexplosionfromgasolinecanburnyouand
others.
•Topreventastaticchargefromignitingthe
gasoline,placethecontainerand/ormachine
directlyonthegroundbeforelling,notina
vehicleoronanobject.
•Fillthetankoutdoorswhentheengineiscold.
Wipeupspills.
•Donothandlegasolinewhensmokingoraround
anopenameorsparks.
•Storegasolineinanapprovedfuelcontainer,out
ofthereachofchildren.
•Forbestresults,useonlyclean,fresh(lessthan30days
old),unleadedgasolinewithanoctaneratingof87or
higher((R+M)/2ratingmethod).
•Oxygenatedfuelwithupto10%ethanolor15%MTBE
byvolumeisacceptable.
•Ethanol:Gasolinewithupto10%ethanol(gasohol)
or15%MTBE(methyltertiarybutylether)byvolume
isacceptable.EthanolandMTBEarenotthesame.
Gasolinewith15%ethanol(E15)byvolumeisnot
approvedforuse.Neverusegasolinethatcontains
morethan10%ethanolbyvolume,suchasE15
(contains15%ethanol),E20(contains20%ethanol),or
E85(containsupto85%ethanol).Usingunapproved
gasolinemaycauseperformanceproblemsand/orengine
damagewhichmaynotbecoveredunderwarranty.
•Donotusegasolinecontainingmethanol.
•Donotstorefueleitherinthefueltankorinfuel
containersoverthewinterunlessafuelstabilizerisused.
•Donotaddoiltogasoline.
Important:Toreducestartingproblems,addfuel
stabilizertothefuelallseason,mixingitwithgasoline
lessthan30daysold.
Note:Thecapacityofthefueltankis1.8L(0.47USgallon).
AdjustingtheCuttingHeight
Youcanchangethecuttingheightateachwheelbyadjusting
acutting-heightlever.Cuttingheightsare25mm(1inch),38
mm(1-1/2inches),51mm(2inches),64mm(2-1/2inches),
76mm(3inches),89mm(3-1/2inches),102mm(4inches),
114mm(4-1/2inches).
DANGER
Adjustingthecutting-heightleverscouldbringyour
handsintocontactwithamovingbladeandresult
inseriousinjury.
•Stoptheengineandwaitforallmovementto
stopbeforeadjustingthecuttingheight.
•Donotputyourngersunderthehousingwhen
adjustingthecuttingheight.
1.Pullthecutting-heightlevertowardthewheel(Figure
13)andmovethelevertothedesiredsetting.
Figure13
1.Rearcutting-heightlever(2)
2.Frontcutting-heightlever(2)
2.Releasethecutting-heightleverandseatitsecurelyin
thenotch.
3.Adjustallthewheelstothesamecutting-heightsetting.
13

StartingtheEngine
1.Connectthespark-plugwiretothesparkplug.
2.Firmlypushintheprimer(Figure14),holdingthe
primerbulbinfor1second.
Figure14
1.Primer
3.Holdtheblade-controlbaragainsttheupperhandle
(Figure15).
Figure15
1.Upperhandle2.Blade-controlbar
4.Pullthestarterhandlelightlyuntilyoufeelresistance,
pullitsharply,thenallowittoreturnslowlytotherope
guideonthehandle.
Note:Iftheenginedoesnotstart,repeatsteps2
through4.
StoppingtheEngine
Releasetheblade-controlbar.Boththeengineandtheblade
shouldstopwithin3seconds.Iftheydonot,contactan
AuthorizedServiceDealer.
OperatingtheSelf-Propel
Drive
•Toengagetheself-propel-drive:Squeezethe
self-propel-drivebaragainstthehandleandholdit
(Figure16).
Figure16
1.Blade-controlbar(shown
engaged)
3.Upperhandle
2.Self-propel-drivebar
Note:Themaximumself-propel-drivespeedisxed.
Toreducethespeed,increasethespacebetweenthe
self-propel-drivebarandthehandle.
•Todisengagetheself-propeldrive:Releasethe
self-propel-drivebar.
Note:Themachinecomeswithfreewheelingclutches
thatmakeiteasiertopullthemachinerearward.To
disengagetheclutches,youmayneedtopushthemachine
forwardabout2.5cm(1inch)ormoreafteryourelease
theself-propel-drivebar.
RecyclingtheClippings
Thismachinecomesfromthefactoryreadytorecyclegrass
andleafclippingsbackintothelawn.Topreparethemachine
torecycle:
•Ifthegrassbagisonthemachine,removeit;referto
RemovingtheGrassBag(page15).
•Iftherear-dischargeplugisnotinstalled,gripitby
thehandle,raisethereardoor,andinsertitintothe
rear-dischargechuteuntilthelatchlocksintoplace
(Figure17).
14

Figure17
1.Rear-dischargeplug2.Reardoor
WARNING
Operatingthemachinetorecyclelawnclippings
withoutthepluginplaceallowsobjectstobe
throwninyourdirectionorinthedirectionof
bystanders.Also,contactwiththebladescould
occur.Thrownobjectsorbladecontactcancause
seriousinjuryordeath.
Ensurethattherear-dischargeplugisinplace
beforeyourecycletheclippings.Neverengagethe
bladeswithouteithertherear-dischargeplugorthe
grassbaginstalledonthemachine.
BaggingtheClippings
Usethegrassbagwhenyouwanttocollectgrassandleaf
clippingsfromthelawn.
WARNING
Aworngrassbagcouldallowsmallstonesand
othersimilardebristobethrowntowardyouor
bystanders,resultinginseriouspersonalinjuryor
death.
Checkthegrassbagfrequently.Ifitisdamaged,
installanewTororeplacementbag.
WARNING
Thebladesaresharp;contactingthebladescan
resultinseriouspersonalinjury.
Stoptheengineandwaitforallmovingpartstostop
beforeleavingtheoperatingposition.
InstallingtheGrassBag
1.Stoptheengineandwaitforallmovingpartstostop.
2.Raiseandholdupthereardoor(Figure18).
Figure18
1.Reardoor3.Notch(2)
2.Bag-rodend(2)4.Grassbag
3.Removetherear-dischargeplugbypushinginthelatch
withyourthumbandpullingtheplugoutfromthe
machine(Figure17).
4.Installthebag-rodendsintothenotchesatthebaseof
thehandle,androckthebagbackandforthtoensure
thatthebag-rodendsareseatedatthebottomofboth
notches(Figure18).
5.Lowerthereardooruntilitrestsonthegrassbag.
RemovingtheGrassBag
DANGER
Themachinecanthrowgrassclippingsand
otherobjectsthroughanopeninginthemachine
housing.Objectsthrownwithenoughforcecould
causeseriouspersonalinjuryordeathtoyouorto
bystanders.
•Neverremovethegrassbagandthenstartthe
enginewithoutthedischargepluginstalledon
themachine.
•Neveropenthereardooronthemachinewhen
theengineisrunning.
1.Stoptheengineandwaitforallmovingpartstostop.
2.Raisethereardoor.
3.Removethebagrodonthegrassbagfromthenotches
atthebaseofthehandle(Figure18).
4.Installthedischargeplug;refertoRecyclingthe
Clippings(page14).
5.Lowerthereardoor.
15

OperatingTips
GeneralTips
•Reviewthesafetyinstructionsandreadthismanual
carefullybeforeoperatingthemachine.
•Cleartheareaofsticks,stones,wire,branches,andother
debristhatthebladecouldhitandthrow.
•Keepeveryone,especiallychildrenandpets,awayfrom
theareaofoperation.
•Avoidstrikingtrees,walls,curbs,orothersolidobjects.
Neverdeliberatelymowoveranyobject.
•Ifthemachinestrikesanobjectorstartstovibrate,
immediatelystoptheengine,disconnectthewirefrom
thesparkplug,andexaminethemachinefordamage.
•Maintainasharpbladethroughoutthecuttingseason.
Periodicallyledownnicksontheblade.
•ReplacethebladewhennecessarywithanoriginalToro
replacementblade.
•Mowonlydrygrassorleaves.Wetgrassandleavestend
toclumpontheyardandcancausethemachinetoplug
ortheenginetostall.
WARNING
Wetgrassorleavescancauseseriousinjuryif
youslipandcontacttheblade.
Mowonlyindryconditions.
•Cleanunderthemachineaftereachmowing;referto
CleaningundertheMachine(page22).
•Keeptheengineingoodrunningcondition.
•Cleantheairlterfrequently.Mulchingstirsupmore
clippingsanddustwhichclogstheairlterandreduces
engineperformance.
•Settheenginespeedtothefastestpositionforthebest
cuttingresults.
WARNING
Operatingamachinewithitsenginerunning
ataspeedgreaterthanthefactorysettingcan
causethemachinetothrowapartofthebladeor
engineatyouorbystanders,resultinginserious
personalinjuryordeath.
–Donotchangetheenginespeedsetting.
–Ifyoususpecttheenginespeedisfaster
thannormal,contactanAuthorizedService
Dealer.
CuttingGrass
•Grassgrowsatdifferentratesatdifferenttimesofthe
year.Inthesummerheat,itisbesttocutgrassatthe64
mm(2-1/2inch),76mm(3inch),or89mm(3-1/2inch)
cutting-heightsettings.Cutonlyaboutathirdofthegrass
bladeatatime.Donotcutbelowthe64mm(2-1/2inch)
settingunlessthegrassissparseoritislatefallwhen
grassgrowthbeginstoslowdown.
•Whencuttinggrassover15cm(6inches)tall,rstmow
atthehighestcuttingheightsettingandwalkslower;then
mowagainatalowersettingforthebestlawnappearance.
Ifthegrassistoolongandtheleavesclumpontopofthe
lawn,themachinemayplugandcausetheenginetostall.
•Alternatethemowingdirection.Thishelpsdispersethe
clippingsoverthelawnforevenfertilization.
Ifthenishedlawnappearanceisunsatisfactory,try1or
moreofthefollowing:
•Sharpentheblade.
•Walkataslowerpacewhilemowing.
•Raisethecuttingheightonyourmachine.
•Cutthegrassmorefrequently.
•Overlapcuttingswathsinsteadofcuttingafullswath
witheachpass.
•Setthecuttingheightonthefrontwheelsanotchlower
thantherearwheels.Forexample,setthefrontwheels
at64mm(2-1/2inches)andtherearwheelsat76mm
(3inches).
CuttingLeaves
•Aftercuttingthelawn,ensurethathalfofthelawnshows
throughthecutleafcover.Youmayneedtomakemore
thanasinglepassovertheleaves.
•Forlightleafcoverage,setallthewheelsatthesame
cuttingheightsetting.
•Iftherearemorethan13cm(5inches)ofleavesonthe
lawn,setthefrontcuttingheight1or2notcheshigher
thantherearcuttingheight.Thismakesiteasiertofeed
theleavesunderthemachine.
•Slowdownyourmowingspeedifthemachinedoesnot
cuttheleavesnelyenough.
16

Maintenance
Note:Determinetheleftandrightsidesofthemachinefromthenormaloperatingposition.
RecommendedMaintenanceSchedule(s)
MaintenanceService
IntervalMaintenanceProcedure
Aftertherst8hours•Changetheengineoil.
Aftertherst25hours•Tightenanyloosefasteners.
Beforeeachuseordaily
•Checktheengine-oillevel.
•Inspectthemowerbladesforwearordamage.
•Inspecttheacceleratorforwearordamage.
•Removegrassclippingsanddirtfromunderthemachine.
•Checkthestoppingtimeofthebladebrake.Theblademuststopwithin3seconds
ofreleasingtheblade-controlbar;ifitdoesnot,contactanAuthorizedService
Dealerforrepair.
•Checkforlooseormissingfastenersontheengine.
•Checkforfueloroilleaks.
•Checkorcleantherecoilstarterandtheair-intakescreen.
Every25hours•Cleanthefoampre-cleaner(morefrequentlyindustyconditions).
Every50hours
•Changetheengineoil(morefrequentlyindustyconditions).
•Sharpenorreplacetheblade.Maintainitmorefrequentlyiftheedgedullsquicklyin
roughorinsandyconditions.
Every100hours
•Inspect,clean,andadjustthesparkpluggap;replacethesparkplugifnecessary.
•Tightenanyloosefasteners.
•Checkorcleantherecoilstarterandtheair-intakescreen.
Every200hours•Haveanauthorizedengineservicingdealercheckforleaksinthefuelsystemand/or
adeterioratingfuelhose.Replacepartsifnecessary.
Every300hours
•Replacethepaperairlter(morefrequentlyindustyconditions).
•Cleanthecylinderandthecylinder-headns.
•Haveanauthorizedengineservicingdealercheckandadjusttheengineidlespeed.
•Haveanauthorizedengineservicingdealercleanthecombustionchamber.
•Haveanauthorizedengineservicingdealercheckandadjustthevalveclearance.
•Haveanauthorizedengineservicingdealercleanandlapthevalveseatingsurface.
Important:Refertoyourengineowner'smanualforadditionalmaintenanceprocedures.
CAUTION
Ifyouleavethewireonthesparkplug,someonecouldaccidentlystarttheengineandseriouslyinjure
youorbystanders.
Disconnectthewirefromthesparkplugbeforeyoudoanymaintenance.Setthewireasidesothatitdoes
notaccidentlycontactthesparkplug.
17

EngineMaintenance
ServicingtheAirCleaner
ServiceInterval:Every25hours—Cleanthefoam
pre-cleaner(morefrequentlyindusty
conditions).
Every300hours—Replacethepaperairlter(more
frequentlyindustyconditions).
Important:Donotoperatetheenginewithoutthe
airlterassemblyinplace;otherwise,extremeengine
damagewilloccur.
1.Stoptheengineandwaitforallmovingpartstostop.
2.Disconnectthewirefromthesparkplug.
3.Loosenthescrewontheair-cleanercover(Figure19).
Figure19
1.Air-cleanercover3.Foampre-cleaner
2.Paperairlter
4.Removethecoverandcleanitthoroughly.
5.Removeandinspectthepaperairlter(Figure19),and
replaceitifitisexcessivelydirty.
Important:Donottrytocleanapaperlter.
6.Removethefoampre-cleaner(Figure19)andwashit
withamilddetergentandwater,thenblotitdry.
7.Installthefoampre-cleaner.
8.Installthepaperairlter.
9.Installthecoverandsecureitwiththescrew.
ChangingtheEngineOil
ServiceInterval:Aftertherst8hours
Every50hours
1.Runtheenginetowarmtheengineoil.
Note:Warmoilowsbetterandcarriesmore
contaminants.
WARNING
Oilmaybehotafterenginehasbeenrun,and
contactwithhotoilcancauseseverepersonal
injury.
Avoidcontactingthehotengineoilwhenyou
drainit.
2.Stoptheengineandwaitforallmovingpartstostop.
3.Disconnectthewirefromthesparkplug.
4.Drainthegasolinefromthefueltank.
5.Placeasuitabledrainpanunderthedipstick/oildrain.
6.Cleanaroundthedipstick.
7.Removethedipstickbyrotatingthecap
counterclockwiseandpullingitout.
8.Tipthemachineontoitsrightside(airlterup)to
draintheoilintothedrainpan.
9.Afterdrainingtheoil,returnthemachinetothe
operatingposition.
10.FillthecrankcasetotheFullmarkonthedipstickwith
freshoil;referto3FillingtheCrankcasewithOil(page
10).
11.Insertthedipstickintothellerneckandrotatethecap
clockwiseuntilitistight.
12.Wipeupanyspilledoil.
13.Recycletheusedoilaccordingtolocalcodes.
18

ServicingtheSparkPlug
ServiceInterval:Every100hours—Inspect,clean,and
adjustthesparkpluggap;replacethe
sparkplugifnecessary.
UseanNGKBPR5ESsparkplugorequivalent.
1.Stoptheengineandwaitforallmovingpartstostop.
2.Disconnectthewirefromthesparkplug.
3.Cleanaroundthesparkplug.
4.Removethesparkplugfromthecylinderhead.
Important:Replaceacracked,fouled,ordirty
sparkplug.Donotcleantheelectrodesbecause
gritenteringthecylindercandamagetheengine.
5.Setthegapontheplugto0.76mm(0.030inch)(Figure
20).
Figure20
1.Center-electrodeinsulator
2.Sideelectrode
3.Airgap(nottoscale)
6.Carefullyinstallthesparkplugbyhand(toavoidcross
threading)untilitishandtight.
7.Tightenthesparkplugto23N-m(2.3kgf-m,17ft-lb).
Important:Aloosesparkplugcanbecomevery
hotandcandamagetheengine;overtighteninga
sparkplugmaydamagethethreadsinthecylinder
head.
8.Connectthewiretothesparkplug.
DriveSystem
Maintenance
AdjustingtheSelf-PropelDrive
Note:Ifthemachineisnew,doesnotself-propel,ortends
tocreepforward,adjustthedrivecable.
1.Movethemachineoutsideandontoapavedsurface
nearasolidwalltosafelypreventthemachinefrom
movingforwardwhiletheengineisrunning.
2.Positionthemachinewiththefronttiresagainstthe
wall.
Note:Ensurethattheareaiswellventilatedandclear
ofdebristhatcouldbethrownbythemachine.
3.Starttheengine;refertoStartingtheEngine(page14).
4.Pulltheself-propel-drivebartothehandle.
Note:Thewheelsshouldstarttoturnasthe
self-propel-drivebarjusttouchesthehandle.
5.Shutofftheengine.
6.Ifyoumustadjustthemachine,dooneofthefollowing:
•Ifthewheelsdonotspinwhenyouengagethe
self-propel-drivebar,thetractionbeltistooloose.
Rotatethewheel-drive-controlknob(Figure21)
clockwise1turnandrepeatsteps3through5.
Figure21
1.Wheel-drive-controlknob
•Ifthewheelsspinbeforeyoufullyengagethe
self-propel-drivebar,thetractionbeltistootight.
Rotatethewheel-drive-controlknob(Figure21)
counterclockwise1turnandrepeatsteps3through
5.
7.Foranewtractionbelt,rotatethewheel-drive-control
knobclockwise1additionalturntoallowforstretching
ofthebeltduringthebreak-inperiod.
Note:Youcanskipthisstepifyouareadjustinga
usedbelt.
19

BladeMaintenance
MaintainingtheBlade
Alwaysmowwithasharpblade.Asharpbladecutscleanly
andwithouttearingorshreddingthegrassblades.
1.Stoptheengineandwaitforallmovingpartstostop.
2.Disconnectthewirefromthesparkplug.
3.Drainthegasolinefromthefueltank.
4.Tipthemachineontoitsrightside(aircleanerup)as
showninFigure22.
Figure22
1.Blade3.Bladeboltandlockwasher
2.Accelerator
InspectingtheBlade
ServiceInterval:Beforeeachuseordaily—Inspectthe
mowerbladesforwearordamage.
Carefullyexaminethebladeforsharpnessandwear,especially
wheretheatandthecurvedpartsmeet(Figure23A).
Becausesandandabrasivematerialcanwearawaythemetal
thatconnectstheatandcurvedpartsoftheblade,check
thebladebeforeusingthemachine.Ifyounoticeaslotor
wear(Figure23BandFigure23C),replacetheblade;referto
RemovingtheBlade(page21).
Figure23
1.Sail3.Wear
2.Flatpartoftheblade4.Slotformed
Note:Forthebestperformance,installanewbladebefore
themowingseasonbegins.Duringtheyear,ledownany
smallnickstomaintainthecuttingedge.
DANGER
Awornordamagedbladecanbreak,andapiece
ofthebladecouldbethrowninyourdirectionor
inthedirectionofbystanders,resultinginserious
personalinjuryordeath.
•Inspectthebladeperiodicallyforwearor
damage.
•Replaceawornordamagedblade.
InspectingtheAccelerator
ServiceInterval:Beforeeachuseordaily—Inspectthe
acceleratorforwearordamage.
Carefullyexaminetheacceleratorforexcessivewear(Figure
24).Becausesandandabrasivematerialcanwearawaythe
metal(especiallyintheareashownasitem2inFigure24),
checktheacceleratorbeforeusingthemachine.Ifyounotice
thatatabontheacceleratorhasbeenworndowntoasharp
edgeorthereisacrack,replacetheaccelerator;referto
RemovingtheBlade(page21).
1 2 3
4
g027496
Figure24
1.Accelerator3.Tab
2.Weararea4.Crackformed
20
Other manuals for 22291
3
Table of contents
Other Toro Lawn Mower manuals

Toro
Toro 78395 User manual

Toro
Toro Groundsmaster 3000 User manual

Toro
Toro 13-32XLE Wheel Horse User manual

Toro
Toro 03623 User manual

Toro
Toro Groundsmaster 300 Series Manual

Toro
Toro Z593-D Z Master 74264TE User manual

Toro
Toro 71300 Wheel Horse 12-32 XLE User manual

Toro
Toro 30531 User manual

Toro
Toro Recyler 20333 User manual

Toro
Toro TIMECUTTER HD 75201 User manual

Toro
Toro 74280TE User manual

Toro
Toro TimeCutter 74780 User manual

Toro
Toro 74453TE User manual

Toro
Toro Field Pro 6040 User manual

Toro
Toro 74939 User manual

Toro
Toro Z Master 74141 User manual

Toro
Toro Greensmaster Flex21 04021 User manual

Toro
Toro 70082 User manual

Toro
Toro LT3340 User manual

Toro
Toro 74176 User manual